
Here I show you how to build a log store with reclaimed timber, an existing fence and old metal roofing sheets. This DIY firewood shed turned our growing log pile into something rather more organised! Follow the photos from the raised base right up to the roof, with plenty of room for the logs to breathe.
You can follow my Youtube videos here: part 1 (base), part 2 (rafters & purlins), part 3 (metal roof).
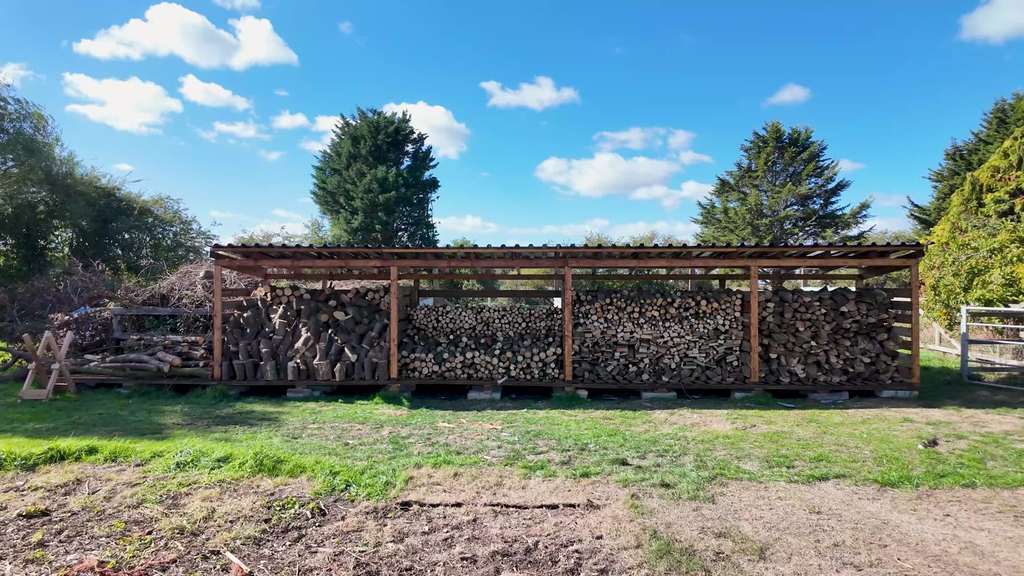
What do you do when the log stores are full and the firewood has started taking over the barns? In our case, build a much bigger one! After cutting back the trees, we needed somewhere to get everything stacked and under cover.
Our store runs for roughly 10 metres along the fence behind the compost bays. Yes, ten metres! With that much firewood to house, I was determined to put our scrap timber and old roofing sheets to work. Buying less new material was lovely. Persuading some of those wonky lengths to behave? Less lovely!
Think of this as a tour of our build, with ideas you can borrow for your own garden. You do not need a ten-metre firewood storage shed to make it worthwhile! A smaller lean-to or freestanding log store can do the same job. My shed base tutorial is handy if you want a closer look at building a raised timber base.
Jump to:
- ✔️ Why You'll Love This Project
- 📐 Plan Your Log Store
- ⚒️ DIY Log Store Tools and Materials
- 🌬️ Why Airflow Matters for Drying Logs
- 🪵 Why Do We Season Firewood?
- 📋 How to Build a Log Store Step by Step
- ⚖️ Fence-Attached, Lean-to and Freestanding Log Stores
- 🦺 A Few Practical Tips Before You Start
- 🧽 Care and Maintenance
- 💡 Pro Tips
- ❓ FAQ
- ➕ More Related Projects
- 🪵 Quick Build Checklist
- 💬 Comments
✔️ Why You'll Love This Project
- Puts an awkward strip of garden to use and keeps the firewood together.
- A raised, open-fronted store lets you keep logs off damp ground.
- Reclaimed materials can keep costs down when they are sound and suitable.
- A roof protects the stack from much of the rain while the openings let air through.
- The layout can be adapted to your own space, with separate bays for different batches of logs.
📐 Plan Your Log Store
Make life easy for yourself. Choose a breezy spot with easy access for loading and collecting logs. Leave room to get around the store, and send roof water away from the woodpile. Nobody wants to fetch an armful of logs through an obstacle course in the rain!
Give it a solid start. We used the existing fence structure at the back of the shed. The important bit is the supporting posts, not the fence boards: lightweight panels cannot carry the roof. A freestanding frame beside the fence is another option. The raised floor carries the logs, so keep their weight off the back wall.
Measure your space and your firewood. Note the width, depth and heights, then allow for the roof slope and overhang. Plan the supports, bracing and timber sizes around those spans. If you are drawing up firewood shed plans, this is the time to settle the frame dimensions and make your cutting list.
Choose the roof before cutting the frame. Different roofing sheets need different slopes and support spacing. We used trapezoid metal roofing which can afford to have a shallow slope. Once those details are sorted at the planning stage, along with the fixings, the rest of the build is much easier to organise.
⚒️ DIY Log Store Tools and Materials
Here is what went into our DIY firewood shed. Have a look through the step photos, then make a shopping list around your own dimensions and whatever useful timber you already have. There is a quick build checklist at the bottom too.
- Timber for the frame: posts, base rails, upper rails, roof beams, rafters and purlins. We used reclaimed timber; new pressure-treated timber is another option. Save the straightest, soundest lengths for the load-bearing parts.
- Floor boards and side slats: exterior timber with gaps between the boards. Matching lengths are lovely, but our reclaimed pile had other ideas!
- Concrete blocks and packing: to support the floor frame and lift it clear of the ground. The supports need a firm base and packing that will carry the load without squashing or shifting.
- Weed-control membrane: optional, but useful beneath the store. Keep drainage clear so the wood is not sitting over a puddle.
- Metal roofing: we reused old profiled sheets, with roof fixings and sealing washers. Add any flashings your layout needs.
- Timber treatment, roof paint and repair tape: for freshening up and repairing the reclaimed materials.
- Exterior fixings: structural screws, bolts or brackets to suit the joints. Make a list from your own frame rather than buying a box of one screw size and hoping for the best!
Tools for Building a Log Store
Time to raid the tool cupboard! Here is a handy list for measuring, cutting and putting everything together. Use what you already have; there is no need to buy a whole new kit for one project.
Affiliate links: I may earn a commission if you buy through these links, at no extra cost to you. As an Amazon Associate I earn from qualifying purchases.
- Measure and mark: a tape measure, pencil and spirit level for setting out the base and checking the uprights. A rafter square is handy for marking timber cuts.
- Hold it steady: Irwin clamps and ToughBuilt sawhorses help support and secure the timber. An extra pair of hands that does not ask for a tea break!
- Cut the timber: a Worx mitre saw for repeat cuts on the frame and slats, or a suitable timber saw you already own.
- Drill and fix: a Stanley combi drill and drill bit set for pilot holes. A Stanley impact driver is useful for driving screws; use screwdriver bits that fit your chosen fixings.
- Paint and protect: a paint brush for timber treatment and awkward corners, plus a mini roller set for larger areas.
- Finish the roof: cutting tools suited to your metal sheets, gloves for sharp edges and stable access equipment. Prepare as much as possible on the ground before lifting the sheets into place.
- Keep the essentials handy: safety glasses, hearing protection and suitable dust protection, plus a scrap strip of wood to keep the gaps between the slats even.
- Check the logs later: a wood moisture meter. The outside can look dry while the middle tells a different story!
🌬️ Why Airflow Matters for Drying Logs
A log store needs to keep the worst of the weather out while letting damp air escape. That is why an open front, raised floor and gaps between the side slats are so useful. All those gaps are doing a job - this is one woodworking project where we actually want a draught!
Leave some breathing space at the back of the shed too, and resist packing every last gap with firewood. A roof shelters the stack; moving air helps dry it. Wrapping the whole thing tightly in plastic rather defeats the point.
🪵 Why Do We Season Firewood?
"Seasoning" sounds as though the logs need a pinch of salt, but thankfully there is no recipe involved! It simply means giving freshly cut wood time to lose moisture before burning it.
There is a bit of old-fashioned practicality behind this project. Forest Research describes logs as the most traditional form of woodfuel: cut them to size, dry them and keep them ready for use. Our slatted store follows that familiar idea of stacking wood under shelter with air around it. Modern kiln drying speeds up the drying stage; an outdoor log store lets the weather and time do the work.
What happens if you burn wet logs?
A wet log spends some of the fire's energy losing water, so you get less useful heat. It can be harder to light, smoke more and leave blackened stove glass. Not quite the cosy evening we had in mind! More seriously, tar and soot can build up in the chimney and increase the risk of a chimney fire. Defra's guide to storing and seasoning wood explains why drying makes such a difference. Dry wood burns more efficiently, but the stove and chimney still need their usual cleaning and maintenance.
How long does it take to dry logs?
Think ahead by roughly one to two years, rather than a few weeks. HETAS puts hardwood seasoning at around 18 months to two years, and some batches take longer. Species, the size of the split pieces, weather and airflow all change the pace. A date label is useful, but the logs have not read the calendar!
Aim for 20% moisture or less before burning. Use a wood moisture meter on several logs from different parts of the stack. Split them again and test the newly exposed inner faces, including the middle, rather than just the dry-looking outside. Forest Research shows how to test split logs. If they are still too damp, leave them drying and check again later.
Give your firewood a head start
Cut and split the wood before stacking, keep it off the soil and leave room for air to move through. Keep the rain off the top without sealing the sides. Separate new batches from logs that are ready to use, so you can work through the dry wood first. This is where a few bays in a firewood storage shed really earn their keep - much less rummaging about!
📋 How to Build a Log Store Step by Step
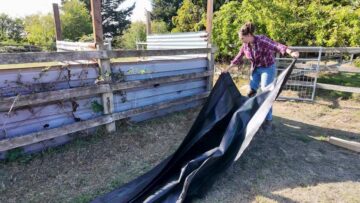
1. Clear the site and control weeds
Clear the strip, tidy the existing fence and mark out the footprint. We laid membrane to keep the weeds from making themselves at home underneath. Leave the ground draining freely before putting the base supports in place.
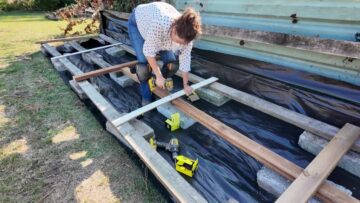
2. Set out the supports and base
Lay out the concrete blocks and build the floor frame over them, with joints supported. Use a spirit level in both directions and compare the diagonals to check it is square. Our ground had more slope than expected, so we packed where needed and kept the rear blocks for clearance. The finished base still had a slight fall towards the front.

3. Treat the timber
Sort out old nails and screws, then brush on the exterior timber treatment, including the cut ends where needed. It is much easier to reach everything now than after it has become a log store! Let the treatment dry before assembling. Here, you can see me using skirting boards for the base.
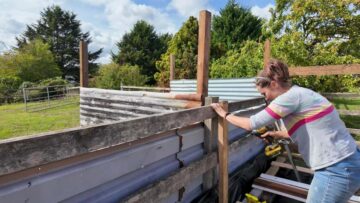
4. Assemble and secure the uprights
Build the upright assemblies and fix them to the supported base. Check each post is plumb and brace it as you go. We connected the rear to our existing supporting structure; use independent posts if your fence is only lightweight panels.

5. Fit the floor and side boards
Fix the floor boards over their supports, then add the side slats. Leave gaps for air and drainage. Those bottom slats have a whole pile of logs to carry, so give them plenty of support beneath. I used a strip of wood as a template to rest the new slat above.
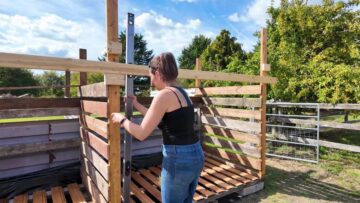
6. Tie the upper frame together
Join the uprights with the upper rails and keep checking the frame stays straight and square. Put timber joints over supports. This is where the separate sections start looking like one enormous log store! Here I'm using a temporary brace to keep the uprights plumb.
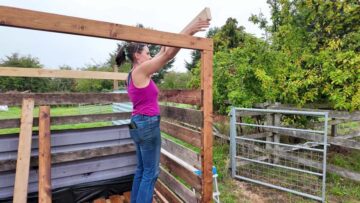
7. Fit the roof beams
Lift the roof beams into place with a helping pair of hands and secure them to the frame. The front and rear supports set the roof slope. Check the alignment now, before the rafters make everything harder to adjust.

8. Measure, cut and fix the rafters
Measure from the actual frame, mark and cut the roof rafters, then fix them across the supports with the planned overhang. Work to the timber sizes and spacing from your frame layout. A little time spent lining them up makes the next stage much nicer. I placed ours at 400 mm centres.
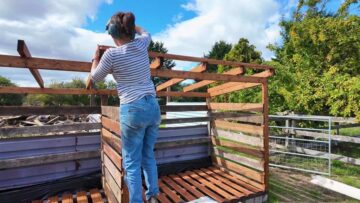
9. Add the purlins
Fix the purlins across the rafters: these give the metal roofing its supporting and fixing points. Space them for your chosen sheets and keep joints over supports. Now we have somewhere for that roof to sit!
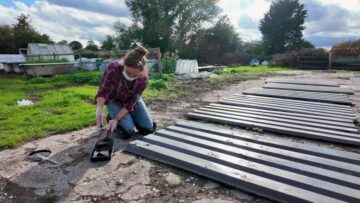
10. Prepare and paint the roofing sheets
Measure and trim the sheets, then clean and prepare them for painting. We used bitumen paint we already had for our reclaimed metal roofing. Choose a finish compatible with your sheets and let it cure. Painting on the ground is far more pleasant than trying to do it overhead!

11. Repair the old holes
Look for old screw holes before the sheets go up. We patched ours with flashing tape and pressed it down firmly onto the prepared surface. Use tape that suits the sheet and finish; badly deteriorated or dented sheets are better replaced. Much easier to spot a hole now than trace a drip later!

12. Fit the roof and fill the store
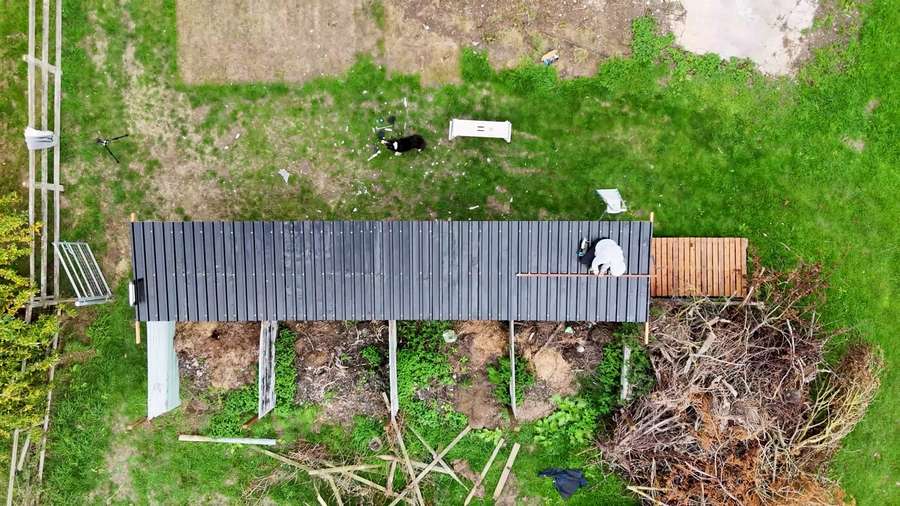
Line up the roofing sheets, overlap them to shed water and fix them to the supports with roof fixings and sealing washers. Use the overlap and fixing pattern for your sheet profile. Then comes the satisfying bit: stack the logs, leave the air gaps clear and admire how much tidier everything looks!
Roofing tip: Sort out the sheet overlaps and fixing positions before lifting everything up. This roofing installation guide explains the details for different profiles. A dry run on the ground is much less of a faff!
⚖️ Fence-Attached, Lean-to and Freestanding Log Stores
- Along a fence, like ours: a good way to use a long strip of garden. Use suitable supporting posts and leave space for air behind the stack.
- A lean-to log store: handy beside a sound wall, with a sloping roof to shed the rain. Keep the roof-to-wall joint watertight and leave ventilation behind the logs. My lean-to shed project shows a related layout.
- A freestanding firewood shed: give it its own front and rear posts, foundations, bracing and anchors. Lovely if the breeziest spot in your garden happens to be nowhere near a wall!
- Separate bays: keep newly cut wood away from the dry logs you are using now. A little label with the stacking date saves a lot of head-scratching next winter.
🦺 A Few Practical Tips Before You Start
- Pull hidden nails and screws from reclaimed timber before sawing. Rotten or badly split pieces do not belong in the structural frame.
- Clamp the timber, pop on safety glasses and hearing protection, and control the sawdust. Gloves help when handling sharp metal sheets.
- Identify old roofing before cutting it, and use stable access equipment rather than standing on unsupported sheets. Get an extra pair of hands for the long beams and roof panels.
- Brace the frame as you build and stack the logs securely. A neat woodpile should stay a neat woodpile!
- Brace and secure the frame before loading it. Stack logs securely without leaning their weight against unsupported cladding.
🧽 Care and Maintenance
The first rainy day is a useful test: look for drips and make sure water is running away from the logs. Give the frame and fixings a look over after strong winds too.
Clear leaves and weeds from the base, keep the air gaps open and touch up worn finishes when needed. Deal with a leaking patch or deteriorating sheet early, before your beautifully stacked wood gets a soaking.
💡 Pro Tips
- Sort the reclaimed pile first. Save the straightest, soundest lengths for the frame and work out where supported joints will go before cutting.
- Keep checking as you go. A long store magnifies small errors. Check levels, diagonals and upright posts before fixing the next section.
- Keep the air gap. We considered removing the rear blocks to deal with the slope, but kept them so the timber stayed clear of the ground.
- Prepare the roof on the ground. Cleaning, painting and patching the sheets was much easier before fitting them overhead.
❓ FAQ
Yes, where the fence posts and foundations can take the extra load. That is how we built ours. Ordinary lightweight fence panels are not roof supports, though; give the store its own posts if that is what you have.
No. A roof, an open front and ventilated sides make a useful combination. Leave air space behind the stack, especially beside a solid wall or fence. We want sheltered logs with a breeze passing through.
Absolutely - that was a big part of this project! Choose sound timber, remove hidden fixings and repair usable roofing before fitting it. Keep painted or treated timber for the building, not the fire.
Plan well ahead: around one to two years is a useful starting point for air drying, and hardwood often needs 18-24 months or longer. Species, size, weather and airflow all matter. Test several freshly split logs; the target is 20% moisture or less before burning.
This is our step-by-step build guide using reclaimed materials, rather than a fixed-size plan or cut list. Measure your space and log lengths, then draw up the frame and roof layout for your own version. You can borrow the build sequence without borrowing our ten-metre footprint!
➕ More Related Projects
🪵 Quick Build Checklist
A handy recap of the sequence. Use the full instructions above alongside the dimensions and structural details for your own store.
- Clear the site and control weeds
- Set out the supports and base
- Treat the timber
- Assemble and secure the uprights
- Fit the floor and side boards
- Tie the upper frame together
- Fit the roof beams
- Measure, cut and fix the rafters
- Add the purlins
- Prepare and paint the roofing sheets
- Repair the old holes
- Fit the roof and fill the store
Want more practical DIY projects? Subscribe to my newsletter, or follow along on Instagram, Facebook and TikTok.
If you build your own log store, I'd love to hear how it turned out. Leave a comment and tell me whether you went for a fence-attached, lean-to or freestanding version!
How to Build a Log Store with Reclaimed Timber and Tin Sheets
Build a roomy DIY log store with reclaimed timber and old metal roofing sheets. I’ll show you how we made our raised base, airy slatted sides and sturdy roof along an existing fence. Less timber in the scrap pile, more room for the firewood - lovely!
Materials
- Sound reclaimed timber for posts, base rails, upper rails, roof beams, rafters and purlins
- Exterior timber boards for the raised floor and ventilated sides
- Concrete support blocks and solid, load-bearing packing
- Weed-control membrane (optional)
- Reclaimed profiled metal roofing sheets
- Exterior structural screws, bolts or brackets to suit the frame
- Roof fixings with sealing washers and any required flashings
- Exterior timber treatment
- Compatible metal roof paint (we used bitumen paint)
- Compatible flashing tape for patching old screw holes
Tools
- Tape measure and pencil
- Spirit level and square
- Clamps and a supported cutting surface
- Drill/driver with suitable drill and screwdriver bits
- Mitre saw or suitable timber saw
- Suitable cutting tools for the metal roofing
- Brush or roller for timber treatment and roof paint
- A scrap strip of wood for spacing the slats
- Stable access equipment for fitting the roof
- Safety glasses, hearing protection and suitable dust protection
- Gloves for handling sharp metal sheets
- Wood moisture meter for checking firewood
Instructions
- Clear the site. Choose a breezy spot with easy access, mark out the footprint and clear the weeds. Lay optional weed-control membrane, keeping drainage clear.
- Build the raised base. Set concrete blocks on firm ground, support the frame joints and check the diagonals for square. Use a spirit level and solid packing to deal with uneven ground while keeping timber clear of the soil.
- Prepare the timber. Remove hidden nails and screws, discard rotten pieces and apply exterior timber treatment where needed, including cut ends. Let it dry before assembly.
- Fit the uprights. Secure the posts to the supported base, check they are plumb and brace them as you work. Connect to suitable existing support posts, as we did, or give a freestanding store its own rear posts.
- Add the floor and side slats. Support the floor boards well and leave gaps for drainage and airflow. Use a scrap strip of wood as a spacer between side slats - much less fiddling about!
- Join the upper frame. Fix the upper rails between the posts with joints over supports. Keep checking the frame is square and use temporary bracing to hold the uprights plumb.
- Fit the roof beams. Secure the front and rear beams at the heights needed for the roof slope. Get a helping pair of hands for the long lengths and check their alignment.
- Cut and fix the rafters. Measure from the actual frame, allow for the overhang and fix the rafters across the supports. We used 400 mm centres on our build; size and space yours for your own spans and roof.
- Add the purlins. Fix these across the rafters to support the metal sheets, keeping joints over supports and spacing them to suit the roofing.
- Prepare and paint the sheets. Measure and trim the metal roofing, then clean and prepare it for a compatible finish. We used bitumen paint we already had. Let it cure before fitting.
- Patch the old holes. Apply compatible flashing tape firmly over old screw holes on the prepared sheets. Replace badly deteriorated sheets rather than trying to rescue everything in the scrap pile!
- Fit the roof and stack the logs. Overlap and secure the sheets to suit their profile, using roof fixings with sealing washers. Check the frame is secure, then stack the logs with breathing room behind and between the batches. Stand back and enjoy a much tidier woodpile!
Notes
Make it fit your garden: ours runs for roughly 10 metres, but you can use the same build sequence for a smaller fence-attached, lean-to or freestanding log store. Choose timber sizes, fixings and quantities for your own dimensions; this is a build guide, not a measured cutting plan.
Support matters: attach to suitable structural posts, never lightweight fence panels. A freestanding version needs its own posts, foundations, bracing and anchors. Keep the weight of the logs on the supported floor.
Let the logs breathe: leave the front open, keep the floor raised and leave gaps between the side slats and behind the stack. We want sheltered wood with a lovely draught, not a sealed box!
Season before burning: allow roughly one to two years, often 18-24 months or longer for hardwood. Check several freshly split logs with a moisture meter and aim for 20% moisture or less. Keep painted or treated timber out of the fire.
Read alongside the step photos above, and check the roof for drips after rain. Costs and build time will vary with the size of your store, reclaimed materials and drying time for the finishes.

Comments
No Comments