
Starting your first backyard flock? Expanding your free-range chickens? Or just want a secure environment for your existing coop?
Well, this step-by-step guide on building a predator proof chicken run will help you create peace of mind for both you and your poultry.

If you keep backyard chickens, protecting your flock from predators is always a top priority. I recently built a lean-to chicken pen on our coop using structural timber, and galvanised mesh on a breeze block base.
It was challenging with uneven walls and three sides to square, but with careful planning and durable materials, it gave us a secure setup.
Predator-proof coops aren't just for rural areas - birds of prey, feral cats, and neighbourhood dogs can threaten suburban flocks too. And a solid build keeps chickens safe while letting them have open space.
✔️ Why You'll Love This Project
Here's why building a predator-proof chicken coop is a great idea:
- Keeps your flock safe from predators and pests.
- Provides a secure space for free range chickens to roam.
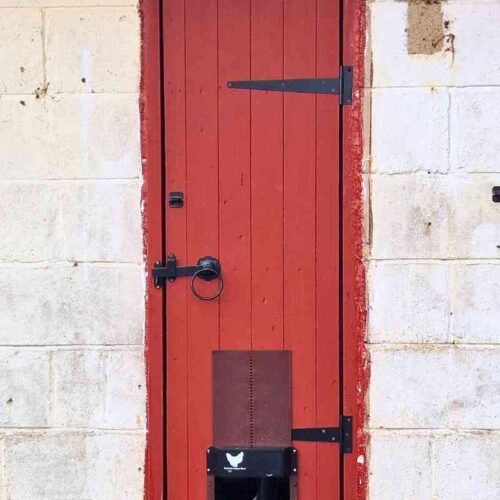
- Allows an automatic coop door with convenience.
- Built with durable, long-lasting materials.
- Traditional wooden design that's functional and attractive.
- Customisable to fit your backyard and existing coop.
❓ Why a Predator-Proof Chicken Pen Matters
⚒️Tools and Material Notes
You can refer to my shorter printable guide in the how-to card at the bottom of this post. However, I recommend reading the entire post as I have more detailed tips, tricks, and step-by-step images.

Please note that as an Amazon Associate, I earn from qualifying purchases made through affiliate links.
Tools
- Mitre saw or hand saw
- Worx compact saw
- Combi drill and impact driver
- SDS hammer drill (if mounting to masonry)
- Tape measure
- Spirit level
- Hammer
- Angle grinder (for cutting excess mesh)
- Roofer's square
- Safety goggles
- Paint brush
Materials
- Concrete screws
- Wood screws (exterior grade)
- CLS Structural timber for frames (38mm x 63mm)
- 16-gauge galvanized chicken wire or wire mesh
- Galvanised presser point staples for mesh
- Damp-proof course (DPC)
- Packers for squaring panels
- Hinges, bolt, and stop latch for door
- Barrettine Wood Preservative and/or paint
📋 Step by Step Instructions

1. Plan and Measure:
Start by mapping out your chicken run and marking where panels, doors, and corners will go. Consider the width of access points for wheelbarrows, feeders, and maintenance.
Tip: Use a level line to mark the panel height to account for any slope in the roof or ground.

2. Prepare and Treat Timber:
Treat and paint all timber with preservative before painting, paying special attention to end grains. This increases durability and ensures your coop withstands weather over time.
Tip: Stack timber to dry fully before painting with your final coat. We used Cuprinol Garden Shades in Urban Slate.

3. Build the Frame Panels:
Cut top, bottom, and centre spar pieces for each panel. Pre-drill holes and screw together for extra strength. Adjust for any unevenness in walls or ground using packers and use angled 45 degree offcuts in the corner to keep the panels square.
Tip: If using a bigger gauge steel mesh (which is thinner than 16 gauge) it's a good idea to use more spars for strength. You may also need a middle horizontal noggins.

4. Mount Wire Mesh:
Lay out the 16-gauge galvanised wire mesh on panels. Cut into manageable pieces if necessary, then attach securely from the centre outwards using U shaped galvanised staples/staples. Tension carefully to avoid ripples, and trim excess with an angle grinder.
Tip: A viewer recommended nailing the mesh on the outside incase a fox, etc, pushed from the outside.
If you don't have bricks or concrete, add a predator apron along the bottom to prevent animals digging.

5. Secure Panels to Base and Walls:
Attach panels to concrete blocks or other solid bases using masonry screws and packers as needed.
Check that everything is level and plumb and seal any gaps and cover packed up areas with trim to prevent small predators from exploiting weak points.

6. Install the Door:
For your door, cut structural timber to form a square frame, including braces to prevent sagging. Allow a combined clearance of 12mm (7.5mm either side of the door) and 10mm gap top and bottom.
Attach hinges, bolt, and stop latch, ensuring it swings freely and remains secure.
Tip: Ensure you hinge the side of the door where the bottom of the brace leans towards the hinge side (see below) to prevent sagging.
Tip: Watch this space, as we'll be adding a roof very soon and updating the post to prevent aerial predators, and any wild birds to prevent a backyard chicken catching avian flu.

⚖️ Project Variations
Here are some different ways you can enhance and truly personalise your chicken coop security:
- Electric fencing or perimeter of the run fencing: Electric fence adds an extra layer of protection for larger predators.
- Use hardware cloth: Stronger, stiffer and more durable than standard chicken wire, which stretches.
- Solid roof panels: Prevent aerial attacks while keeping your coop dry.
- Guardian animals like Great Pyrenees, etc can patrol and add peace of mind.
If this is a daunting task, you might prefer to build a smaller outdoor run and move around like a mobile coop.
🦺 Safety Tips
Here's how you and your own poultry can stay safe while building this predator proof chicken coop:
- Always wear gloves and eye protection when handling wire mesh.
- Check for sharp edges before allowing chickens near the run.
- When heavy lifting, use proper technique when moving timber or wire rolls.
- Secure footing: level panels carefully to avoid accidental tilting.
🧽 Care and Maintenance
As a chicken keeper, I recommend the following maintenance routine:
- Inspect the coop perimeter regularly for weak points.
- Replace damaged mesh promptly for maximum security.
- Keep vegetation trimmed to prevent predators from hiding near the fence.
- Ensure hinges and latches stay functional.
💡Pro Tips
- Ensure the ground is level before building
- Use the strongest gauge (which is 16 or smaller gauge) mesh you can buy to prevent large predators
- Pre-painting timber saves time in the long run and prevents drips on the mesh
- If you don't have solid flooring, I recommend adding more buried hardware cloth on the ground under the bottom of the coop
- Use angled brackets (gussets) and packers for tricky, uneven corners.
- Ensure your chicken wire or wire mesh squares are small enough to stop smaller predators like rats or weasels.
- Remove chicken feed nightly as a preventive measure
🗨️ Subscriber's Tips
My YouTube subscribers shared some brilliant tips and real-life advice in the comments, so I've gathered a few of their best suggestions below to help anyone wanting to prevent nocturnal predators.
- "Use a spring closer for the door. It will stop the bolt from rattling open and give you certainty that the door is always closed if it's not locked." - @corynsboy5814
- "If you actually spray the mesh black, it gives the optical illusion that it's see-through rather than the galvanised steel which draws the eye." - @quiggles
- "The only thing I might have done differently is to put the mesh on the outside for the reason of foxes pushing the mesh, trying to get in." - @anaestheticuk9867
❓ FAQ
Yes, you can add a predator-proof run or wire mesh to almost any existing coop structure.
Not necessarily, but it helps secure the coop at specific times and makes the daily routine easier - but don't rely on it!
16-gauge chicken wire or welded wire is strong and affordable, with small openings to prevent predators from entering.
Large panels are heavy when mesh is added. I recommend working in a pairs as it's much easier to prop panels while the other fixes them to a wall or joins panels together- and they have time to get things plumb and level!
➕ More Related Projects
Looking for more projects like this? Try these:


Why not subscribe to my newsletter to hear about the latest projects and exclusive news from The Carpenter's Daughter? You can also connect with me on social media at Facebook, TikTok, Twitter, and Instagram!
How to Build a Predator Proof Chicken Pen for Coop/Run

Starting your first backyard flock? Expanding your free-range chickens? Or just want a secure environment for your existing coop?
Well, this step-by-step guide on building a predator proof chicken run will help you create peace of mind for both you and your poultry.
Materials
- Concrete screws
- Wood screws (exterior grade)
- CLS Structural timber for frames (38mm x 63mm)
- 16-gauge galvanized chicken wire or wire mesh
- Galvanised presser point staples for mesh
- Damp-proof course (DPC)
- Packers for squaring panels
- Hinges, bolt, and stop latch for door
- Barrettine Wood Preservative and/or paint
Tools
- Mitre saw or hand saw
- Worx compact saw
- Combi drill and impact driver
- SDS hammer drill (if mounting to masonry)
- Tape measure
- Spirit level
- Hammer
- Angle grinder (for cutting excess mesh)
- Roofer's square
- Safety goggles
- Paint brush
Instructions
- Start by mapping out your chicken run and marking where panels, doors, and corners will go. Consider the width of access points for wheelbarrows, feeders, and maintenance. Tip: Use a level line to mark the panel height to account for any slope in the roof or ground.
- Treat and paint all timber with preservative before painting, paying special attention to end grains. This increases durability and ensures your coop withstands weather over time. Tip: Stack timber to dry fully before painting with your final coat. We used Cuprinol Garden Shades in Urban Slate.
- Cut top, bottom, and centre spar pieces for each panel. Pre-drill holes and screw together for extra strength. Adjust for any unevenness in walls or ground using packers and use angled 45-degree offcuts in the corner to keep the panels square. Tip: If using a bigger gauge steel mesh (which is thinner than 16 gauge) it's a good idea to use more spars for strength. You may also need a middle horizontal noggins.
- Lay out the 16-gauge galvanised wire mesh on panels. Cut into manageable pieces if necessary, then attach securely from the centre outwards using U-shaped galvanised staples/staples. Tension carefully to avoid ripples, and trim excess with an angle grinder. Tip: A viewer recommended nailing the mesh on the outside in case a fox, etc, pushed from the outside. If you don't have bricks or concrete, add a predator apron along the bottom to prevent animals digging.
- Attach panels to concrete blocks or other solid bases using masonry screws and packers as needed. Check that everything is level and plumb, and seal any gaps and cover packed-up areas with trim to prevent small predators from exploiting weak points.
- For your door, cut structural timber to form a square frame, including braces to prevent sagging. Allow a combined clearance of 12mm(7.5mm either side of the door) and 10mm gap top and bottom. Attach hinges, bolt, and stop latch, ensuring it swings freely and remains secure. Tip: Ensure you hinge the side of the door where the bottom of the brace leans towards the hinge side (see below) to prevent sagging.

Comments
No Comments