
Here I show you my tips and tricks on how to fit coving on your own with a cheap mitre tool. The coving used is lightweight polystyrene and after painting, instantly transforms a room. In total, this job cost £35.

Jobs like coving don't need a professional. I'm not one and in fact, this was my first time. Some people find coving a dated concept. However, I totally disagree if it's in the right house.
Coving is also a great option to tidy up paint lines if you ceiling isn't perfectly straight along the corners. Particularly if your walls are a darker colour than the ceiling, in which it can become more noticeable.
Also, if you're doors and frames are white, such as mine below, it allows the colours to pop more in a room. In fact, I painted the walls first before fitting the coving.

WHAT COVING SHOULD I USE?
There are various types of coving on the market with different profiles. However, the most common ones are plaster and polystyrene. In my bedroom, I fitted the latter.
The reason I prefer polystyrene is it's extremely lightweight, making it easy to lift on your own. Also, once it's painted in emulsion, you can't tell it's polystyrene.
But when it comes to pattern is a matter of preference. I think the more detail, the more expensive it looks. However, a symmetrical pattern is easier to work to avoid mistakes (as above), or one completely plain.

KITS OF COVING CAN BE CHEAPER
We found buying a pack of coving which includes mitred cuts are actually cheaper than buying straight ones.
We found this out because we already had a leftover B&Q Nayak pack (above) from a previous job. So after using it up on this new job, I went to buy some more, but non-kit ones.
The reason I like these kits is because the come with spare mitre cuts below, saving you the hassle. However, we knew we needed more these mitre coving pieces, so I used them as a template only to copy them.

THINGS YOU'LL NEED TO INSTALL COVING
Equipment
- Mitre cutting tool *mine is from Wickes, depending on your size
- Scalpel (preferred) or a very sharp stanley knife
- Finishing sandpaper
- Tape measure
- Pencil
- Hammer
- Paint brush
- Pot for PVA solution
- Long straight edge (I used a spirit level).
- Caulk/glue gun
- Speed square
- Gloves
Materials
- Polystyrene coving
- Coving Adhesive by Everbuild
- Tack nails (small nails)
- PVA glue watered down to make PVA solution
- Caulk
- Scrap piece of card

PREPARATION FOR COVING
First, I wanted to draw lines on my wall where the coving should lie on the wall as a guide to work with.
You should find the depth of your coving on the packet, to which I marked on a piece of card.
MARKING WALLS FOR COVING
I then held up the marked card along the top of the ceiling, then marked the walls where it lied.
I repeated this in regular intervals.
Once done, I repeated on the ceiling.

DRAWING STRAIGHT LINES ON THE WALL
Now, holding up a straight edge, such as a spirit level. Note, I'm not looking at the spirit level bubble.
Don't worry if not all your marks meet. Just go with the majority of them.

MAKING A TEMPORARY COVING SHELF
Making a shelf for coving is particularly handy if you're fitting it on your own. Or, if you're using a heavier one such as plaster.
Here, I'm hammering in tack pins along my bottom pencil mark all the way around the room.
Don't worry too much about making little holes when you remove them later. They're easy to hide with a touch of paint and if you're lucky, when you come to caulk it. Plus, it's so high up to even notice.


ENSURING YOUR COVING STAYS UP
Depending on your surface, you may need to do a little wall prep before gluing to the wall. Ensure there's no loose bits of paint or plaster, or it could come off.
Also, for painted surfaces, to double ensure better adhesion, I brushed all over my coving area with PVA solution and left to dry. This is just watered down PVA glue and water.
If you're unsure how to make it, there's usually instructions on the back of the bottle. But I aim for a milky consistency. Once brushed, leave to dry. Sometimes I cheat with a hair dryer if I'm really in a rush.

MITRE COVING CUTTING TOOL
Cutting mitre corners for coving may look very easy. Well, it is, once you know how. In fact, the first time we fitted coving in our living room, we used a mitre box. And once we put them up, the sides of our cuts bowed and required a lot of filler.
It certainly can be done this way, but there's a risk of not getting them not looking tidy.
So, this time I did a lot of research on the right tools for internal and external cuts. And the easiest and cheapest thing for the job was this coving cutting tool from Wickes.

WHAT SIZE MITRE TOOL DO I NEED?
This particular cutting tool comes in two sizes. Your coving should say what size it was which matched up with this 127mm mitre tool. But if in doubt, I always buy both, keep the receipts and return what I didn't use.
There's nothing worse than being ready for the job, but not having the tools I need. You can see it has 3 cutting sides.
A left, a right and the bottom for a straight edge. I'll show you how to use it shortly.

WHAT COVING ADHESIVE SHOULD I USE?
To install my coving, I initially tried using what I already had, such as grab adhesive. But it was so thick, it was too thick for the job.
With polystyrene coving, you don't need something super strong. However, I wasn't keen on B&Q's Diall adhesive as it felt like thin filler and didn't set quickly. *The tack pins would have been essential with this.
Instead, I found Everbuild's Coving Adhesive picked up from Toolstation the best. It was quick to apply and sped up the whole process.

It's also worth noting that my coving kit also came with pre cut mitred ends to help me along my way. However, it's unlikely that it will be long enough for your room.
So, below, I grabbed another pre cut mitred end in the opposite corner and marked where it lied to trim down. If you're more comfortable with mitred cuts, it is better to make these meet with a mitre too.
This will make it less visible when filling with caulk later. It just depends how fussy you think you'll be. I personally don't mind, but I can see a faint mark of where they meet, even today.

STRAIGHT COVING CUTS
First, I'd line up a set square with my pencil mark to draw a straight line, top and bottom.
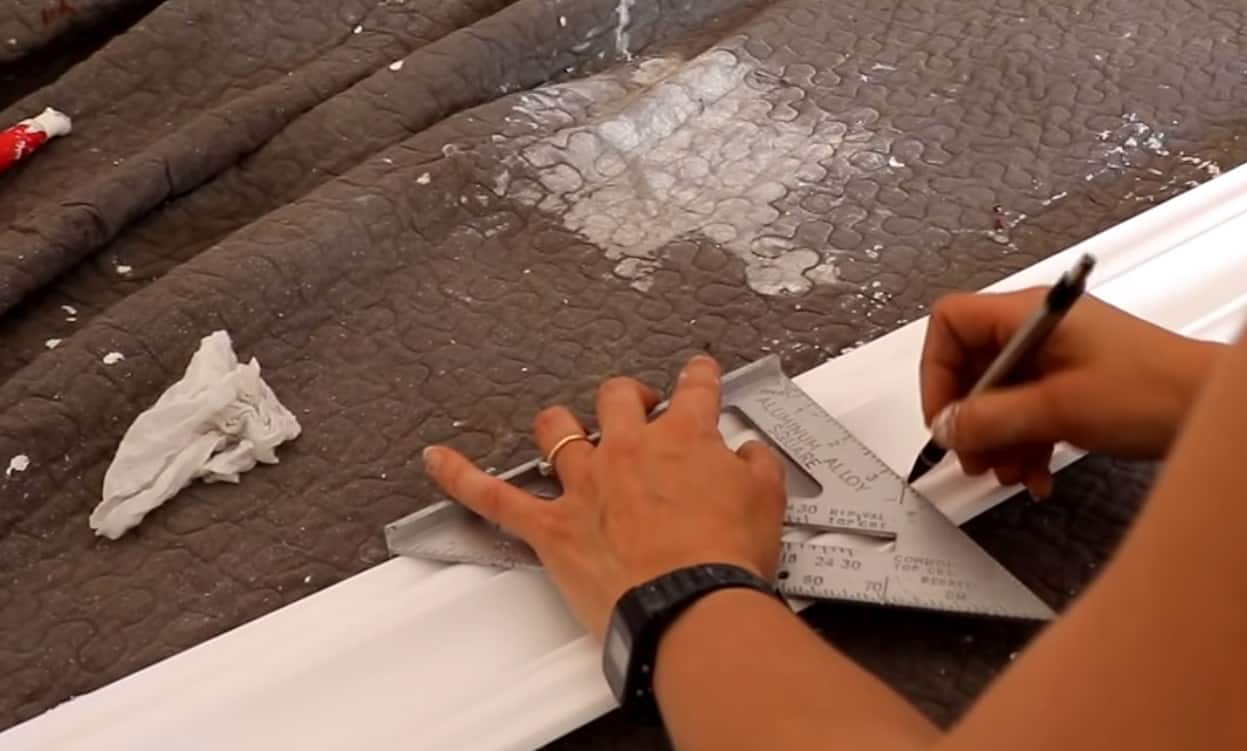
Then I laid it on a scrap piece of wood, wear gloves and hold the straight edge of the mitre tool against it.
Then cut with a fine tooth saw. (Note, you'll find I made a holder for it later to prevent wobbling).
And finally, I'd gently remove any burrs with fine grit sandpaper.
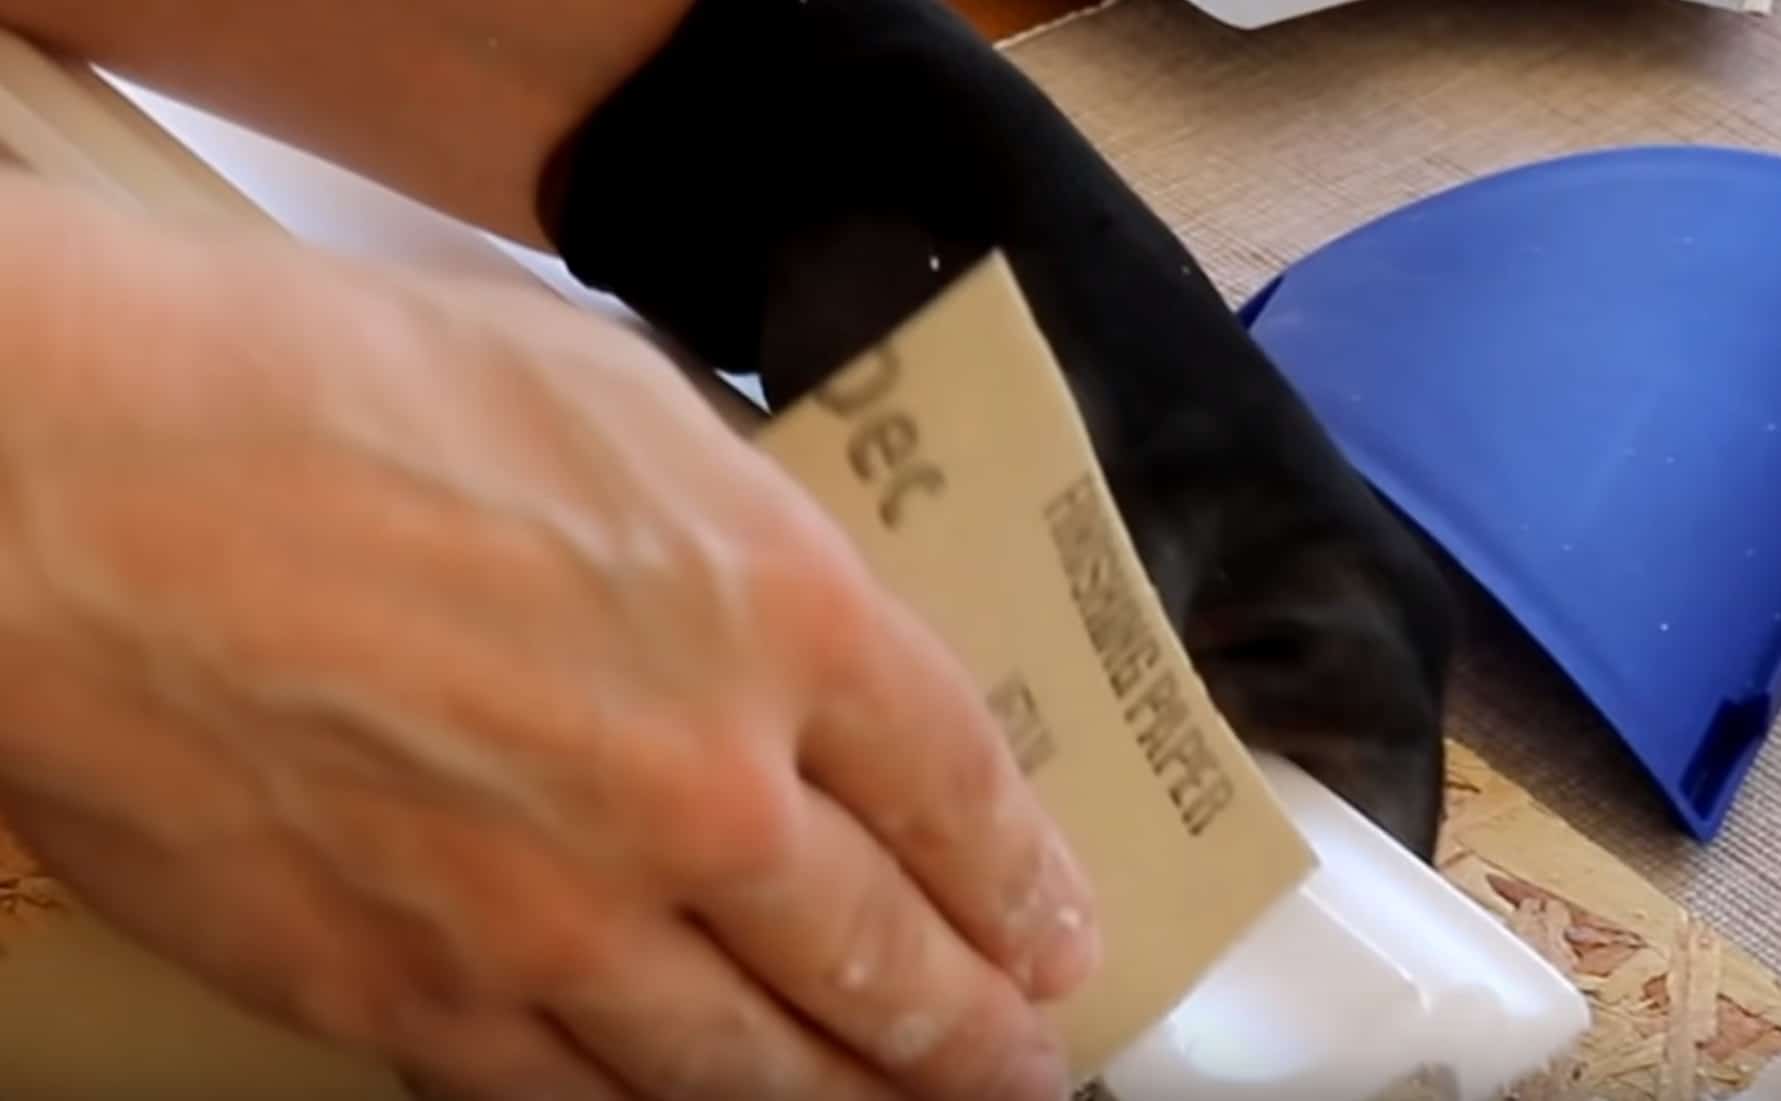
Once cut, I glued and fixed to the wall, inline with the other piece.

I also ensured a slight gap in the corner to ensure it wasn't too tight for my next mitre corner.

HOW TO MAKE MITRE CUTS FOR COVING
Getting back to the coving tool, you'll see I'm holding my mitre tool against a piece of mitre from the B&Q kit.
This was to give me a visual of which way the mitre cut should go. It's also worth noting that the first piece.

WHICH WAY DOES THE MITRE TOOL GO?
As already mentioned, there's a right and left side of the tool. This is the right and left of one particular wall, so ignore the piece already fixed to the righthand wall above.
Initially, I struggled cutting with a Stanley knife when holding it against the front of the coving.
So, I placed it directly behind the coving I needed to cut, but with the tool still facing the same way.

Note, I'd hold the tool as close to the edge to avoid waste.
Then, using a sharp Stanley knife, cut through the coving, while cutting at the same angle of the coving.
But, while cutting coving around pipes shortly after, I found a scalpel gave a much more professional finish.

Then gently bend away, making any more slight cuts if necessary and sand any rough edges.

WHAT IF MY MITRES AREN'T PERFECT?
If you have a little gap like mine, then no worries! The internal corners are the easiest to fill with caulk and wipe any excess away with a damp cloth of finger.
If they're quite big (say you've cut them while laying flat in a mitre block), then you'll just need to use more filler.
You might just need to build it up, that's all. Then paint over it. 

MAKING EXTERNAL MITRE COVING CUTS
To make external cuts in your coving, it's almost exactly the same method.
The only thing different is when you place the tool on our coving, you need to cut along the side that's away from the end.
So, if you're not sure still yet, to make an internal cut, I would need to cut along the opposite side of the tool below.

Once I made my first external cut, I needed to measure the depth of my wall as shown below.

Then mark it on the coving I'd already done an external cut on.

And after cutting an internal cut on the same piece, this is what it should look like.
Then glue as usual and you can continue the rest with ease and leave to dry overnight.

COVING AROUND PIPES
Some rooms do have obstacles, which you may need to cap off with a short external mitre.
However, if you have any visible heating pipes like I did, then you go and check out my post on coving around pipes.
This is a very neat and tidy solution I did to make it easy on the eye. I'm very proud of it!

FINISHING WITH CAULK
Before you finish your coving, you'll need to remove all pins if using. With some holes left behind, I just either painted over first. However, I also found caulking covered it anyway.
So to finish off, go along the top and bottom of where the coving meets the ceiling and wall, then run over with a damp finger or cloth.
I prefer to do one side at a time.


Then leave to dry before painting with white emulsion and that's it!
In total, this job cost £35 and I am VERY happy with it!

How to Fit Coving: Installation Guide
Equipment
- Mitre cutting tool
- Scalpel (preferred) or a very sharp stanley knife
- Sandpaper
- Tape measure
- Pencil
- Hammer
- Paint brush
- Pot for PVA solution
- Long straight edge (I used a spirit level).
- Caulk/glue gun
- Speed square
- Gloves
Ingredients
- Polystyrene coving
- Coving adhesive
- Tack nails (small nails)
- PVA glue watered down
- caulk
- scrap piece card
Instructions
- Find the depth of your coving on the packet and mark on a piece of card.
- Hold up the marked card along the top of the ceiling, then mark the walls where the pencill mark lies. Repeat in regular intervals and do the same with the ceiling.
- Hold up a straight edge, such as a spirit level and meet the lines with the majority of them. Although ignore the spirit level bubble.
- Hammer in the tack pins/nails along my bottom pencil mark all the way around the room.
- Next, if you have a painted surface, brush all over the coving area with PVA solution and leave to dry. Note, you may need to remove any loose bits of paint or plaster for good adhesion before this.
- Then, using a coving cutting tool and preferably a scalpel, cut your mitred corners. To see how I do it, refer to the video below or read the notes above.
- Once cut, gently fold the cut away and sand with fine sand paper to remove any burrs to reveal a clean cut.
- Run over the back of your coving with Everbuild's Coving Adhesive and press on to the wall while resting it on the nails. However, leave a couple of millimetres gap in the mitred corners for easy fitting your next corner later.
- If your wall is too long for the coving, then work on your opposite corner with a new piece and mark where it starts to overlap. Then draw a straight line with a speed square and cut with a fine tooth come.NOTE: if you want to be perfect with invisible joins, you are better also making these mitred cuts too, but for ease, I went for straight.
- Continue all around the room until finished. If you have any pipes, then also read the notes above.
- Leave to set overnight and remove all the nails.
- Then fill any gaps and along the top and bottom of the coving and remove with a wet finger or decorator's wipes. Note, it's best to focus on a small area at a time.
- If you haven't painted your walls yet, masking tape the wall, then paint the coving with white emulsion and leave to dry.
Video
More Painting and Decorating DIY Projects
- Can you wallpaper on artex?
- Planning a bedroom makeover
- Painting and decorating for beginners
- How to paint a circle on a wall without a stencil
- Tips for renovating a dining room on a budget
- How to paint a wooden plant stand
PIN THIS COVING TUTORIAL FOR LATER...


Al
Thanks for this! It's one of the clearest in-depth and easiest instructions I've come across
Becky
Honestly this is literally the most helpful article on the whole internet about this!!! EXACTLY what I was looking for. Thankyou!