
Here's my super easy tutorial on how to lay a patio for beginners. In fact, I'd never done this before and it's still going strong. As long as you have time, patience and some energy (and about £500), that's all you'll need!

One of the greatest things about sharing my renovation projects here is that while viewers grow on my YouTube channel, it's been encouraging to try jobs I'd never dreamt about before.
It all started out and (always will be) about saving money doing DIY while offering others the chance to do the same. You won't find me squandering on silly things much, but everyone likes some luxuries in whatever form. But you'll find our priorities are much different those with a ready-made home.
When I moved in to our do-er upper, we chose a path of paint ridden or accidentally ripped clothes, constant dust and camping from one room to the next while we worked our way through the house. It's been a fun adventure, but it's also been nice to know our bargain home hasn't come with a big stressful mortgage.

Before and After
But our front and back garden really have been afterthoughts because we originally considered ourselves not being skilled enough, yet also brushed off any really expensive quotes from tradesmen. Or that I'd been told it's really hard work.
I do like a challenge, but I also hate being told I wouldn't be able to do it, despite not knowing as I've never given it a go before. So here I am, telling you I did it. Ner-ner-ner-NER-ner. And a bit of April Wilkerson video encouragement that made me think, "If April can, then why the hell is it impossible for me?"
And with a bit of hope, I can pass on a bit of that encouragement too, because I really don't think there's enough people trying DIY for themselves. So let's change that!

How to Lay a Patio Without Cement
There were a few basics I knew about. My father in law was the most valuable source of information, giving me confidence over the phone. He told me how to do it in these steps, which I'll bullet point here for ease in order:
- Remove top soil (we dumped on the grass as it was slopy).
- Place permeable weed control sheets down.
- Lay a patio sub base by laying down a 100mm layer aggregate down (aka MOT) or a 75mm layer - I found it was debatable in forums.
- Compact with a whacker.
- Place down 50mm sharp sand and screed (I used 2" cut up pipes in the video)
- Whack again.
- Rake the top ½ inch of the sand to loosen to top slightly.
- Place down each slab, with a 2mm gap between slabs for expansion - WEAR GLOVES 😉
- Make sure each slab is level using a spirit level and mallet, but make sure it is slightly sloping away from the building for water to run off. If your slab is textured, then you'll have to do it by eye and feel like I did.
- Brush silver in to the gaps once finished and top up over the following few weeks due to rain helping it sink and stabilising each one.


Laying Slabs Tips
- Make sure you have an edging to prevent moving
- If using sleepers as an edging, secure with grass road pins or whatever is more suitable for your garden.
- Using a border with 10mm pea gravel (aka pea shingle) is self compacting to prevent movement.
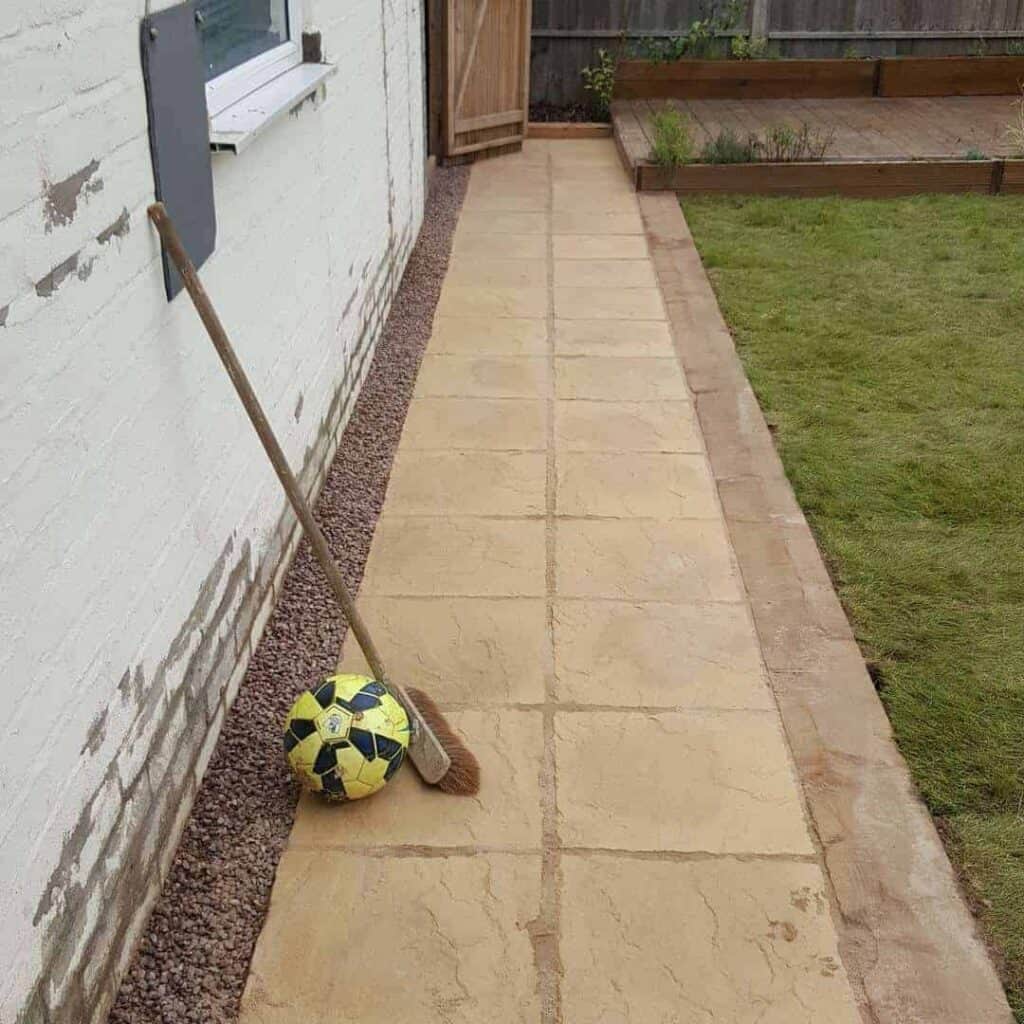

So now I've finished. Can I tell you how AMAZING it is being able to walk in to your garden barefoot? It's bliss. (It also says, Vikkie. get a hot tub, don't you think? And a BBQ).
I'm definitely extremely proud and it really does make you wonder what your limits really are.
So what's next? Well, I need to build a step for the conservatory as you'll notice we haven't replaced our made-shift stack of slabs yet and have bought plants to put in the border for more colour and character.
(Note we have painted the patched up mortar on the garage since).


The all important visual learning bit about any DIY
(I'm a visual learner for sure!)
Total spend £583, saving £1400 against a £2k quote. Not bad for a week's work.
Laying Patio Tools I Used
All materials used were purchased from a local build store that was less mainstream and considerably cheaper. So, my advice is, look for somewhere near you too. Perhaps ask in local Facebook groups as to where they would go for the best price.
Disclaimer: This is NOT a sponsored post. Some links are affiliate links, but this is by pure chance. I only share products I've used that have met my requirements for a job in question.
Gloves
Wheelbarrow
Kneeling pad
Railway Sleepers
Sharp Sand
Aggregate
Paving Slabs
Silver Sand
Rubber Mallet (I broke the first one in the video)
Railways Sleeper Corner Road Pins
Railways Sleeper Road Pins
Weedkiller
Pressure Sprayer
Brickline
Hand saw
Wickes Preserver (clear): Discontinued
Spirit Level
Folding Square (I called it Builder's Square)
My keyring tape measure
Mini trowel (Non branded £2 from my village hardware store)
Small Whacker (hire was on offer)
Ear Defenders
Bosch PSB 1800 LI-2 Cordless Combi Drill
2" plastic pipes from Toolstation (can't find link) - around £2-3
Rake
How To Lay a Patio with Sand
You can probably see the before wasn't the prettiest. And I did a lot of research and scrupulously went through every detail and ordered an absolute load of aggregate, sharps sand and patio slabs.
Laying Sleepers as a Patio Edging
Note, we'd already removed top soil and laid weed control and aggregate down years ago, but never finished this job. Hence, why I only did some de-weeding.
But I then started putting some treated sleepers down which were for a border for the grass and the edging for the patio so it didn't move anywhere.
Creating a Garden Border with Railway Sleepers
This was the hardest job because I had to make sure it was all level and square to prevent any problems later on. And once I worked out roughly where I wanted them to be, I needed to create a plumb line so just attached it to the side of the decking. And the other side to the conservatory.
Laying a Patio Against a House
I went around with a builder's square just to make sure the width of my sleepers to my garage was exactly the same all the way down. Bear in mind I planned about an 18 centimeter gap for this so could add some pea shingle later and the builder's square was useful for any corner, like the inside of the grass where the sleeper joined to the edge of the decking.
Then I used it to help me put the plumb line to the conservatory. And just to make sure the sleepers didn't move while I was working around it, I just temporarily malletted road pins in the grass to stop any movement but I later put these in properly.
Doing a Dry Lay With Patio Slabs
It's also a good idea to place slabs down for a dry lay. Not only for a visual, but to make sure your measurements are right. I started dry laying the patio slabs against a conservatory and that way I could also measure out where to cut this excess of sleeper and get it bang on right and that way,
Also, I could make sure my patio slab laying wasn't too tight. And once I was happy with the lengths, I was able to hand saw any sleepers, treat with a preserver.
Then, for possibly one of the most time-consuming bits, was to make sure my sleepers were level and padded with sharp sand. Note, underneath the sleepers were also breeze blocks.
And once level, I finally malleted the corner road pins and straights one. These attach to the sleepers with external screws.
Now, I wasn't entirely happy with how unlevel the aggregate was. It had been years since we put it down. So, I added more and hired a whacker plate from Travis Perkins, doing a few passes. This is also called a plate compactor. Note, it was £28 to hire for a week.
Screeding Sand Before Laying Patio Slabs
After watching a few tricks online to screed the sand, I cut up some plastic pipes to the width of my patio. Then dumped in the sand, roughly leveled it with a rake and then I use a closest piece of what I could find which was a spirit level to smooth over it. And any dips, I saw I just pinched from one area and dumped it in another.
Then whacked it again and did that until the whole path was done. By this point, me and my fiance had a system where every time I removed a pipe he just dumped some sand in the gaps and then we whacked that whole area a few times again.
Note, when it came to adding sharp sand in front of the conservatory, I also made sure there was a slight slope away from it.
Then I took a tip from my father-in-law and that was to just go over the very top half-inch of the sand with a rake, just to loosen this a little bit so it should help me bed the patio slabs easier.
Start Laying Your Patio Slabs
And, for the exciting part, was when I got to lay a patio slab for the first time. I purposely started off in the corner where I knew I needed two rows to meet each other. But after a while of trying to make my paver slabs level with a spirit level, I found it was almost impossible because my slabs had a groove on top.
So, I had to eyeball it laying each one very slowly and carefully double-checking every angle. I also cleared any sand between gaps with a small trowel before laying my next paver.
And I also stepped on each one to test for any wobbles, If they did, I added extra sand underneath here and there and tapped them down with a mallet.
Adding a Pea Shingle Border Between the House and Patio Slabs
I also left about a 2mm gap between each concrete slab just to cover any expansion in the heat. And after laying the last row of patio slabs, I added pea shingle along the border I left.
The pea shingle is permeable, so rain would run through and not splash back on the brickwork.
Adding Silver Sand to Finish
To finish, I brushed in silver sand, which is again, permeable and think it complimented the paving slabs nicely.
If you didn't want to pull the odd weed out each year, then you'll probably want to point pavers with mortar. This is part sand, part cement. However, note that if you haven't laid it correctly, you could get puddles when it rains.
How to Cut a Paving Slab
Fortunately, I planned this homemade patio where I didn't need to cut any. However, when laying a patio step, I cut with an angle grinder.
How Much Does Laying a Patio Cost?
The total cost was £583 pounds for my l-shaped patio.
We ordered loads of building supplies from a local place called Buildland, but you might want to check out somewhere near you. But it was considerably cheaper to order from there than a mainstream DIY store.

Lola Adeoye
Thank you . Saw the video yesterday as i was quoted £2100 for under 15m2 space with paving that i would not like. So going to get what i want and use cobbles to stop them moving on either side.
Moe
Hi great video, can you report the marshalls link as I have exactly the same slabs, thanks