
Want to install your own loft lighting without an electrician for maintenance work? Then here's how to connect an LED strip light to a lighting circuit cable with a household plug without cutting into your existing wiring.
You can follow along with my how-to YouTube video guide here.
Please note: I am not an electrician, which is why this is a project for beginners. For a loft conversion, you'll want a more permanent solution.

From the moment we picked up the keys to our new auction property, we needed to tread carefully in a dark loft and battery powered lights to fix urgent plumbing.
This task with plenty of light can be difficult at the best of times. So after installing a DIY loft ladder with hatch to replace and top up our loft insulation, it was imperative I installed some light fixtures.
And the good news? This beginner demonstration with Wago connectors is very easy to light up your loft space and you don't need to cut into your existing wiring.
Jump to:

✔️ Why You'll Love This Project
Here are just a handful of reasons why we think you'll love installing your own light source in a loft room:
- You can light up an entire space easily
- A brighter attic room is safer to work in
- It's a cheaper low energy way lighting design
- It beats worrying about battery powered lights or tripping over and untangling extension leads
- Uses Wago connectors which are so easy to use
- It's a fun project for beginners to learn some basics
- It can open up more options, such as a home office later
- The cost of tools and materials is cheaper than hiring out
- As it doesn't require cutting into the electricity, you can use extension cables to light the attic while you work
⚒️Tools and Material Notes
You can refer to my shorter printable guide in the how-to card at the bottom of this post. However, I recommend reading the entire post as I have more detailed tips, tricks, and step-by-step images.
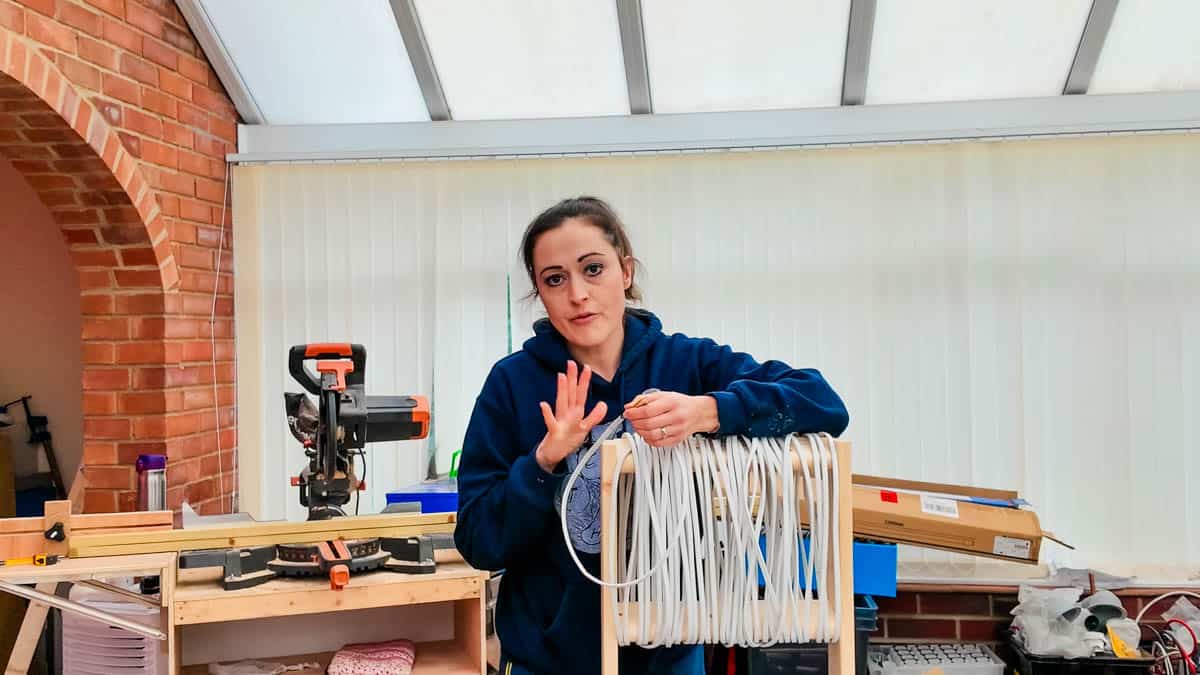
Please note that as an Amazon Associate, I earn from qualifying purchases made through affiliate links.
- V-TAC LED Batten bright lights (60W 6ft 7200 lumens) - these are a great choice for low powered artificial lighting. Mine are about ¼ of an amp each, meaning I'm very unlikely to overload a fuse
- Stanley wire strippers - although a little pricey, I recommend these as they can also strip low smoke cable, which my non branded struggled with. However, I haven't found any that can strip a flexi cable yet
- Earth sheath - I used 3mm, which is to cover any exposed earth cable
- Wago lighting box - these are to safely store the cables in place of an old fashioned junction box
- Wago XL junction box - similar to above, this is larger for extra cables to switches, or in my case, a cable with a plug on the end
- Wago 222 connectors (selection) - after watching YouTube tutorials for lighting solutions, I chose this handy selection with several port options. However, they have released slimmer ones since
- 1.5mm flexi cable 10m - this is a stranded copper cable, so that they are flexible for my plug end, where I can roll it up
- Twin and Earth LSOH Prysmian basec electric cable 300/500v bs7211 6242b 2x1.5x1 - I used low smoke cable, usually used in flats, etc, and although expensive, this is what we had
- Cable clips - although I used plastic cables, many electricians in my YouTube comments recommended metal clips in case of a fire
- Plasterboard screws - or nice slim wood screws without the need to pilot hole. This is to mount lightweight wooden battens to the roof beams to allow you to attach the lighting fixture or other overhead lighting
- Worklights - sadly in order to work in at attic, you'll need temporary lights. But for awkward spaces and dark corners, I recommend a head torch or a battery powered LoftLeg light bulbs
- Evolution mitre saw - for multiple wood cuts or use a handsaw as accuracy isn't important. Just make sure your battens are a little longer than the width of your rafters
- Worx worktable - or any workbench or work surface
- Stanley Impact driver - no need to pilot hole with this in conjunction with plasterboard screws. Or use a combi drill

📋 Step by Step Instructions

1. First, cut the wooden battens which will go high up in the air and fastened to the apex of the rafters, so they don't have to be precise, just uniform.
At this point, you can add on the clip on brackets in the centre that come with your LED strip lighting.

2. Mount the battens to the rafters where you want to position the lights by screwing on the side.
My 6ft lights need 3 battens each (1 per clip), so I spaced them out equally and put 2 screws onto each side to fasten them securely to the roof structure.
I then clipped the lights onto the brackets, ensuring the power cable was in the orientation I wanted.
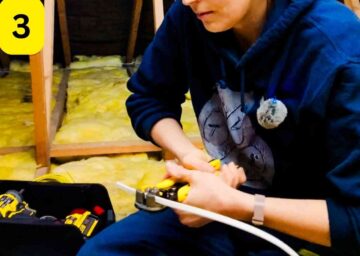
3. Now strip the power cable by 2.5" and strip 5-10mm off the wires' sheath.
Then add an earth sleeve if it is completely exposed (some don't come with them).

4. Now ensure you use a Wago connector per colour to match the colours:
- Brown connects to brown (LIVE)
- Blue connects to blue (neutral)
- Earth - is terminated with a Wago*
*Most lights don't have an earth cable so we're just going to terminate the earth on the cable with its own WAGO connector.
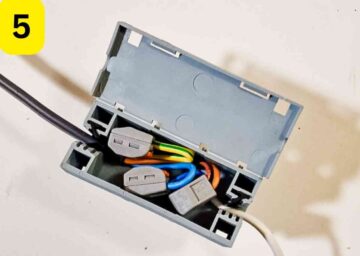
5. Now place the connectors in a Wago lighting box junction.
The wires are now secure and insulated in the connector blocks so we're just going to hide it all away neatly.
So the only things exposed on either side of the box are the outer sleeves of the power cable and the light cable.
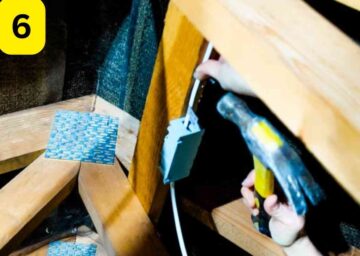
6. Next, mount the box and cables to the rafters or ridge and tighten up the cable so it's not dangling anywhere.
I positioned mine at the full extent of the lighting cable.
You will find a bracket on the back of the box that screws to the wood, where the box simply clips onto the secured bracket

7. I installed 4 lights in my loft as I live in a very large bungalow.
So at the end of my circuit, I had to connect 3 power cables and a light into an XL Wago junction box which is much larger.
So that meant I needed a 5 port connector in this part (4 ports aren't available) for 4 lives, 4 neutrals and 3 earths (all sleeved).
One of these power cables needs to have a flexible core while I plug it in downstairs, as a solid core cable could break over time and is only designed to be static and remain in place with cable clips.
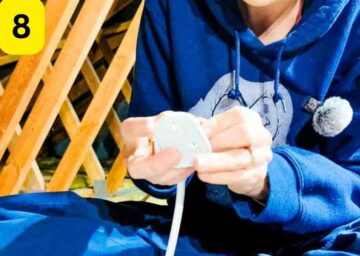
8. Ensure your flexible cable is long enough to reach from the last junction box, tied along all the roof timbers and the joists to the hatch, and also long enough to reach a plug socket inside the home.
Wire the plug to the flexi cable as per the plug instructions.
Note that the brown (live) will have a fuse in its circuit, so ensure you swap this from a standard 13amp to a 3amp (my lights are only 0.25 amp each_ so 3 is more than enough and 13 could allow too much power to flow in the event of an issue.
⚖️ Project Variations
Here are some different loft lighting ideas you can do, but with these you MUST turn off the power to these areas before you do anything:
- If you feel confident and competent, government UK guidelines state that homeowners can connect to an existing lighting circuit. See how to install loft lights here and add a switch or motion sensor
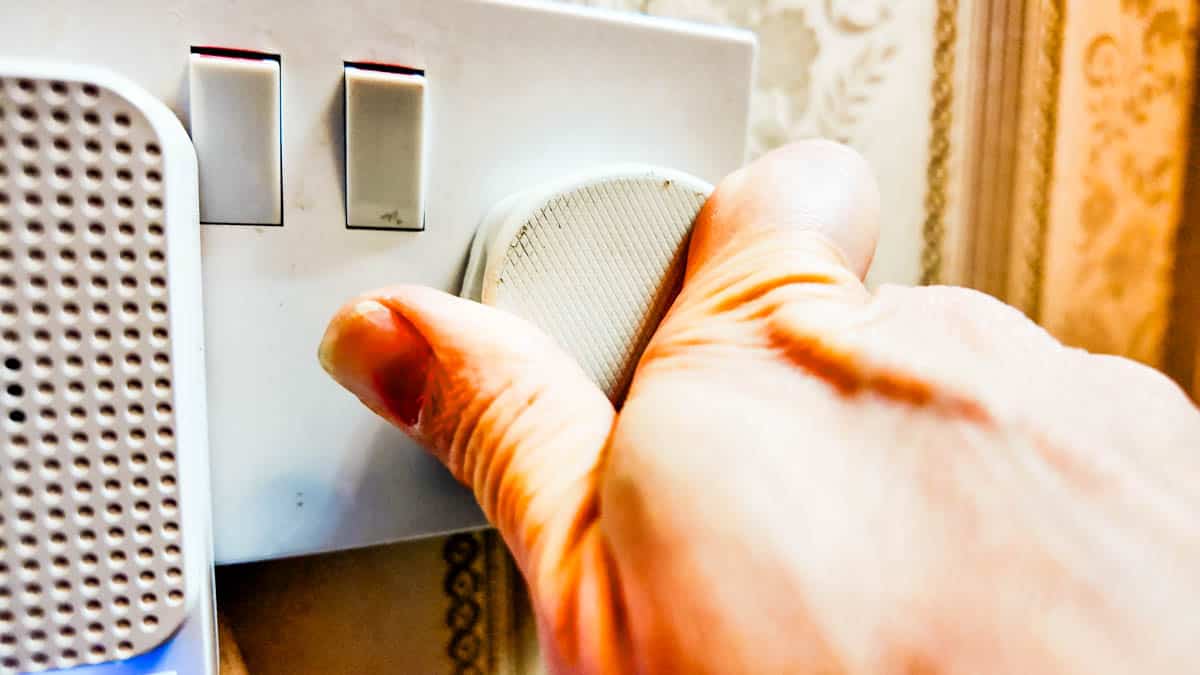
- A great way could be to tap into an existing socket circuit and add an extra plug socket in the loft that your light circuit plug can simply plug into. You can use the socket switch as your on/off switch. If you put a double socket in you could even test your Christmas lights before you bring them down each year
- If only lighting a very small space and you find any kind of wiring daunting, then these battery powered LED batten lights are excellent options. These are good if you don't need much light, but need to see pipes, etc
- If using ceiling rose bulbs that dangle, you could add bulb cages to prevent breaking them
🦺 Safety Tips
- Plan your route and wiring beforehand: to reduce the chance of accidental damage, try to do all of the cutting, stripping and connecting downstairs where possible.
- Use crawler boards: this is vital to ensure you are safely walking around on the joists
- Tread only on the joists: this is to prevent your foot going through plasterboard/drywall
- Tread carefully: there may be an area with existing wiring or plumbing on top of the rafters, which you will need to avoid stepping on. This is not always visible under an increased layer of insulation
- Choose the right cables: For fixed wiring in the loft, use solid core cable specifically designed for permanent installations. It's more robust and less prone to damage than regular flex cable. For the connection to the downstairs socket, use a high-quality flex cable with the appropriate amp rating for your chosen lights
- Securely fasten everything: to avoid loose cables becoming a tripping hazard or fire risk, secure with cable clips or conduits neatly along the joists, ridge or rafters. Also, make sure all connections are tight and concealed in junction boxes for added protection
- Mind the Insulation: to avoid a fire risk, try to secure the cable above the insulation
⚡ Care and Maintenance
I recommend that you regularly check your loft lights and wiring for any signs of damage or wear.
Look for any signs of mice gnaw marks or other rodents, such as a shrew in the attic, damp rafters, loose connections or any potential overheating.
💡Pro Tips
- Make sure the angle of your light ceiling fixtures will reach all aspects of your loft. Instead of mounting our batten lights to one side of the rafters, we mounted them from the top
- Installing loft lights with downstairs power can be a great DIY project, but if you don't feel safe, or know what you're doing, then hire an electrician instead
- Choose the right light type for low ceilings with limited headroom or high-pitched roofing.
- Measure the required cable length needed: By measuring the roof space, this will easily determine how long a cable you need to buy
- Use PPE such as a dust mask, and eye protection when working in the loft.
- Always use a junction box to safely stow away the Wago connectors and mount the boxes to the rafters
- Set it up in a way that's easy for an electrician (or yourself when you're more confident), to connect it to the existing electrics at a later date
- Once the installation is complete, remove any wire clippings or debris and ensure all tools and materials are removed carefully
- If you feel any kind of wiring is intimidating, then stop and seek a qualified electrician instead, who will ensure all regulations are met
❓ FAQ
If in doubt or uncomfortable, I highly recommend hiring a qualified electrician for most of the electrical work. This may be a cheaper solution when hiring for a list of tasks in one day.
It is very easy to install loft lights on a plug, especially when using push fit connectors like Wago, etc. For super easy DIY loft lighting, you can mount battery powered batten lights to the rafters.
I recommend LED lights as they are energy efficiency, last a long time and can be very bright, depending on the amount of lumens you choose.
We used 4 LED lights totalling £120 and the cables and connectors were about £60 and we still have lots of spares, so we were well under £200. But you may only need 1 light and a lot less cable.
Use solid core cable for the fixed wiring in the loft and a high-quality flex cable for the downstairs connection. Ensure the amp rating matches your chosen lights.
Yes, you can use existing wiring in the loft, but adding a new dedicated circuit for increased safety and future flexibility is recommended.
Electrical work carries risks like shocks, fires, and electrocution, which you may not get as 2nd chance, so ensure power is off, plan wiring routes carefully, secure cables, or hire a professional.
Always check with your local council for any maintenance and building work to be complied with. However, in the UK, there is no requirements for wiring lighting to a cable with plug.
➕ More Home Electric Projects
Looking for more projects with home electrics like this? Try these:


Why not subscribe to my newsletter to hear about the latest projects and exclusive news from The Carpenter's Daughter? You can also connect with me on social media at Facebook, TikTok, Twitter, and Instagram!
The BEST how to guide: Installing Loft Lighting

Want to install your own loft lighting without an electrician for maintenance work? Then here's how to connect an LED strip light to a lighting circuit cable with a household plug without cutting into your existing wiring.
Please note: I am not an electrician, which is why this is a project for beginners. For a loft conversion, you'll want a more permanent solution.
Materials
- LED Batten lights
- Earth sheath
- Wago 222 connectors
- Wago lighting box
- Wago XL junction box
- 1.5mm flexi cable (10m)
- Twin and Earth LSOH Prysmian basec electric cable 300/500v bs7211 6242b 2x1.5x1
- Cable clips
- Plasterboard screws
Tools
- Stanley wire strippers
- Worklights
- Mitre saw
- Workbench
- Impact driver
Instructions
- First, cut the wooden battens which will go high up in the air and fastened to the apex of the rafters, so they don't have to be precise, just uniform.At this point, you can add on the clip on brackets in the centre that come with your LED strip lighting.
- Mount the battens to the rafters where you want to position the lights by screwing on the side. My 6ft lights need 3 battens each (1 per clip), so I spaced them out equally and put 2 screws onto each side to fasten them securely to the roof structure. I then clipped the lights onto the brackets, ensuring the power cable was in the orientation I wanted.
- Now strip the power cable by 2.5" and strip 5-10mm off the wires' sheath. Then add an earth sleeve if it is completely exposed (some don't come with them).
- Now ensure you use a Wago connector per colour to match the colours:
Brown connects to brown (LIVE)
Blue connects to blue (neutral)
Earth - is terminated with a Wago*
*Most lights don't have an earth cable so we're just going to terminate the earth on the cable with its own WAGO connector. Now place the connectors in a Wago lighting box junction. - The wires are now secure and insulated in the connector blocks so we're just going to hide it all away neatly. So the only things exposed on either side of the box are the outer sleeves of the power cable and the light cable.
- Next, mount the box and cables to the rafters or ridge and tighten up the cable so it's not dangling anywhere. I positioned mine at the full extent of the lighting cable. You will find a bracket on the back of the box that screws to the wood, where the box simply clips onto the secured bracket.
- I installed 4 lights in my loft as I live in a very large bungalow. So at the end of my circuit, I had to connect 3 power cables and a light into an XL Wago junction box which is much larger. So that meant I needed a 5 port connector in this part (4 ports aren't available) for 4 lives, 4 neutrals and 3 earths (all sleeved). One of these power cables needs to have a flexible core while I plug it in downstairs, as a solid core cable could break over time and is only designed to be static and remain in place with cable clips.
- Ensure your flexible cable is long enough to reach from the last junction box, tied along all the roof timbers and the joists to the hatch, and also long enough to reach a plug socket inside the home. Wire the plug to the flexi cable as per the plug instructions. Note that the brown (live) will have a fuse in its circuit, so ensure you swap this from a standard 13amp to a 3amp (my lights are only 0.25 amp each_ so 3 is more than enough and 13 could allow too much power to flow in the event of an issue.
Notes
Safety Tips
Plan your route and wiring beforehand: to reduce the chance of accidental damage, try to do all of the cutting, stripping and connecting downstairs where possible.
- Use crawler boards: this is vital to ensure you are safely walking around on the joists
- Tread only on the joists: this is to prevent your foot going through plasterboard/drywall
- Tread carefully: there may be an area with existing wiring or plumbing on top of the rafters, which you will need to avoid stepping on. This is not always visible under an increased layer of insulation
- Choose the right cables: For fixed wiring in the loft, use solid core cable specifically designed for permanent installations. It's more robust and less prone to damage than regular flex cable. For the connection to the downstairs socket, use a high-quality flex cable with the appropriate amp rating for your chosen lights
- Securely fasten everything: to avoid loose cables becoming a tripping hazard or fire risk, secure with cable clips or conduits neatly along the joists, ridge or rafters. Also, make sure all connections are tight and concealed in junction boxes for added protection
- Mind the Insulation: to avoid a fire risk, try to secure the cable above the insulation

Comments
No Comments