
Wooden trellis comes in various styles, materials and sizes. However, you don't need to spend a fortune to create an effect. So here I show you how to DIY 3 easy trellises for £15, then fixed them to a brick wall.
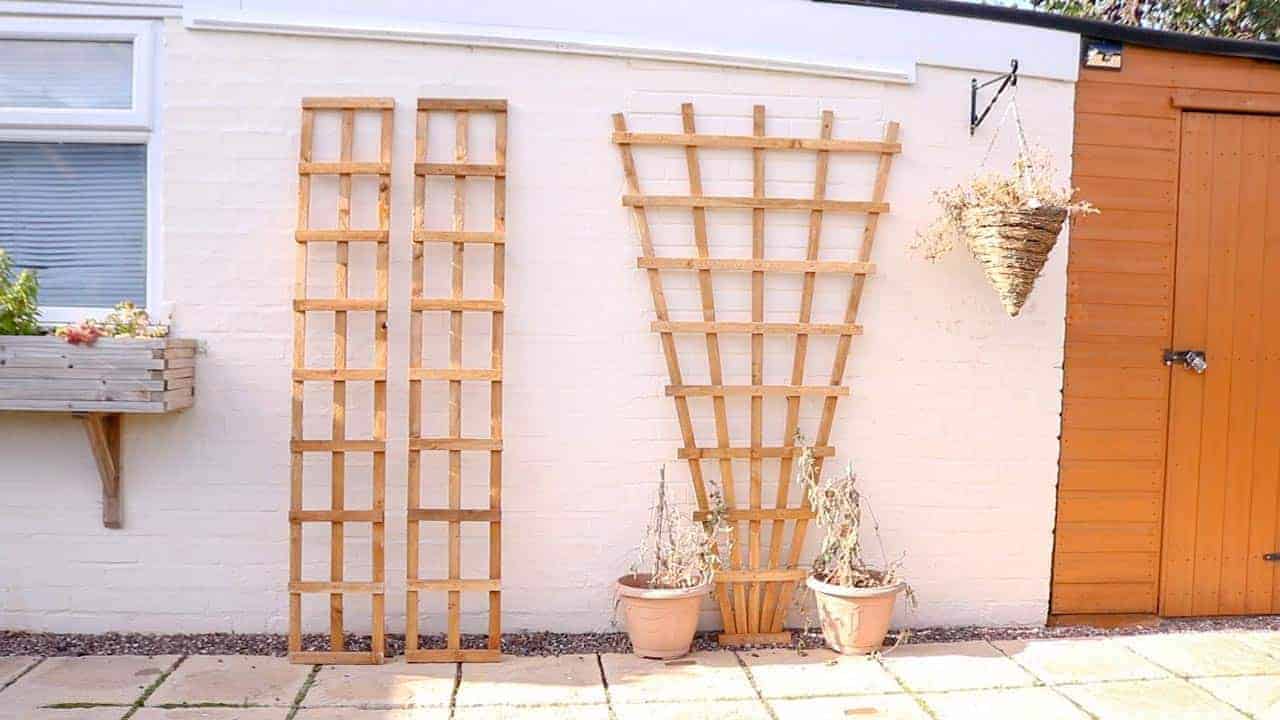
Here's the side of our garage. We've never been happy with the old doorway where the previous owners had bricked it up. And the bricks don't match in style, or how they've been put back.
Well, ok, so I'm nit picking. It's what you do when you're looking for jobs. So I thought it was the perfect place for some fan trellis. Or perhaps, even better, a large door sized piece.
However, I got lost in looking for where to buy the right wood for it. And in the end, I picked up these treated 1.8m long strips from a local fencing business at 85p each.

THINGS YOU'LL NEED TO MAKE WOODEN TRELLIS
- Treated wooden strips
- Hand saw
- Saw horses or table
- Clamps
- Tape measure
- Hammer
- Nails
- Concrete screws pack with torq bit included
- 6mm masonry drill bit
- Spirit level
- Pencil
- Combi drill
- Ear defenders
- Safety goggles
HOW TO MAKE FAN SHAPED WOODEN TRELLIS
First, I'm going to show you how I made my fan trellis. However, you can scroll down for the rectangular trellis.
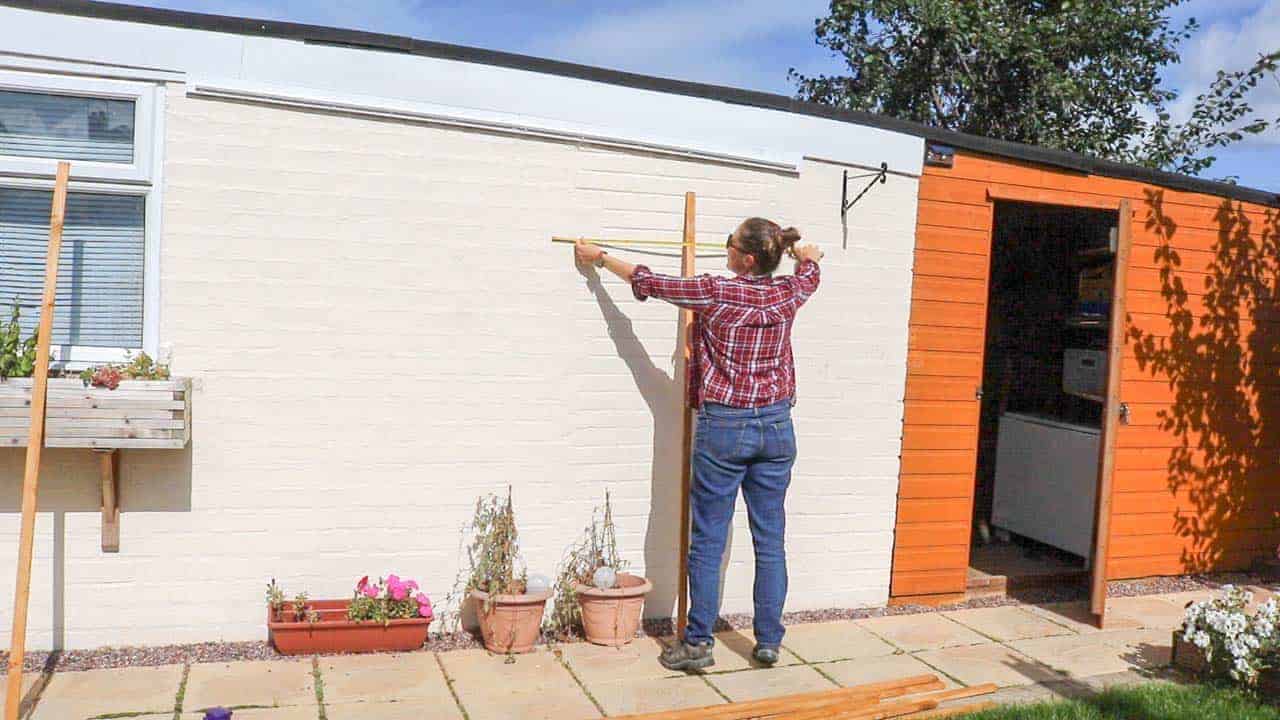
For a fan shape, I wanted to cover most of the old door way, so I'm measuring the top width of it.

Then I laid out 5 strips with the bottoms gathered together. Next, roughly fanned the top out by eye (for now) to measure out the same width of the door way.
Don't worry, we'll get more precise later. We're just doing this to determine the width of the base strip.

Now go back to the base and push something flat against the edge to straighten up the bottom.
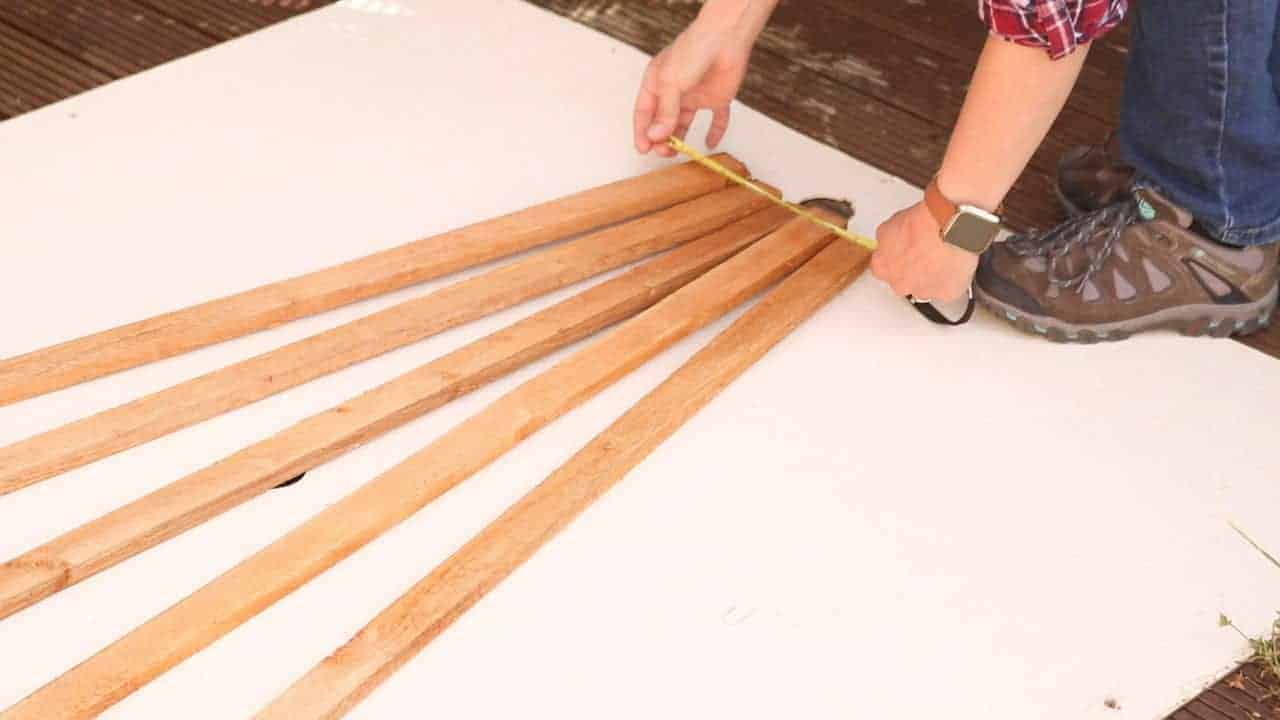
Then I measured the base's width, added 6cm and cut another strip down to this size with a handsaw. This will give a 3cm overhang either side.

Now time to nail the base strip to the bottom. Here, I'm using a nail gun while wearing ear defenders.
However, I later had to switch to standard nails and a hammer because it was firing blanks intermittently.

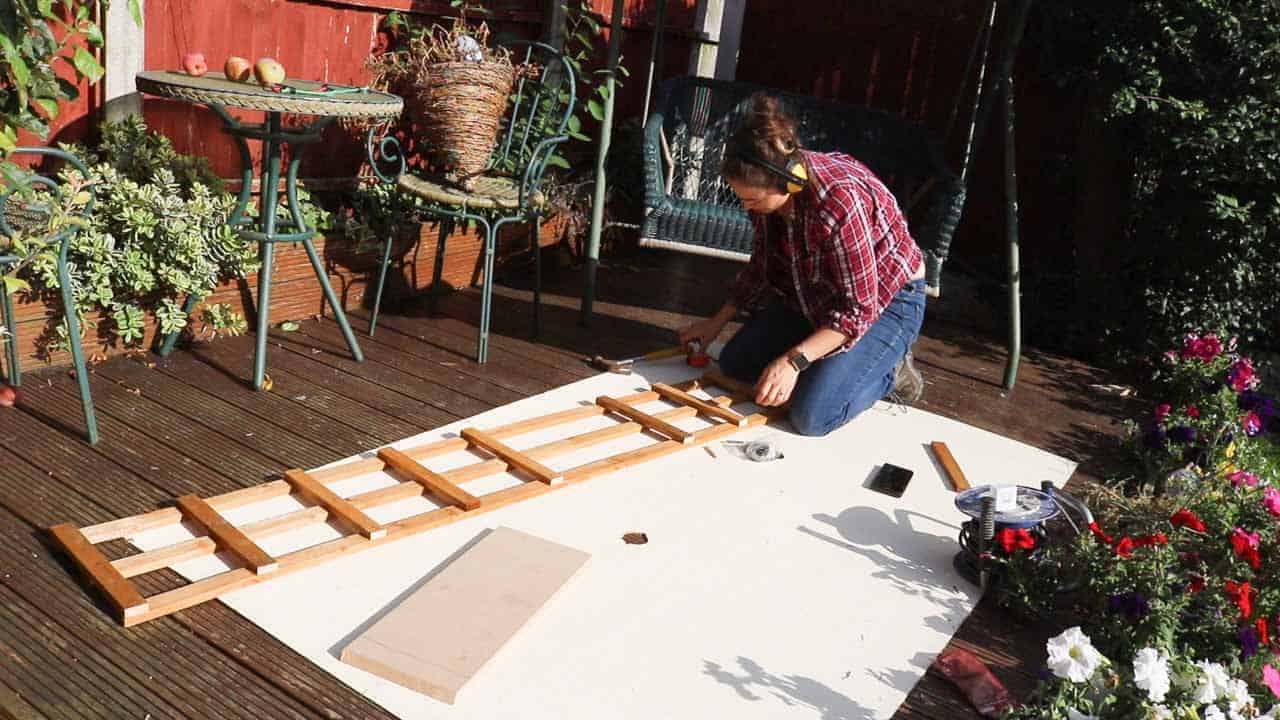
You'll notice I've got my trellis on a squared up large sheet of wood. I treated this as a reference guide for accurate measurements.
So above, I'm working out the centre point of the sheet. Then placed my trellis' base on the very bottom edge.

Now I'm measuring the centre point towards the top, then lining the centre of the middle strip with it.

And here's where I accurately laid out my fan position, ensuring each strip's distance was equal.

Now I've got my trellis shape, I'm about to work on the top strip. So, I'm measuring about 7cm from the top of the outer strips. This is where my strip will start.

After cutting another strip, (also with a 3cm overlap either side), I've lined it up with my pencil marks.
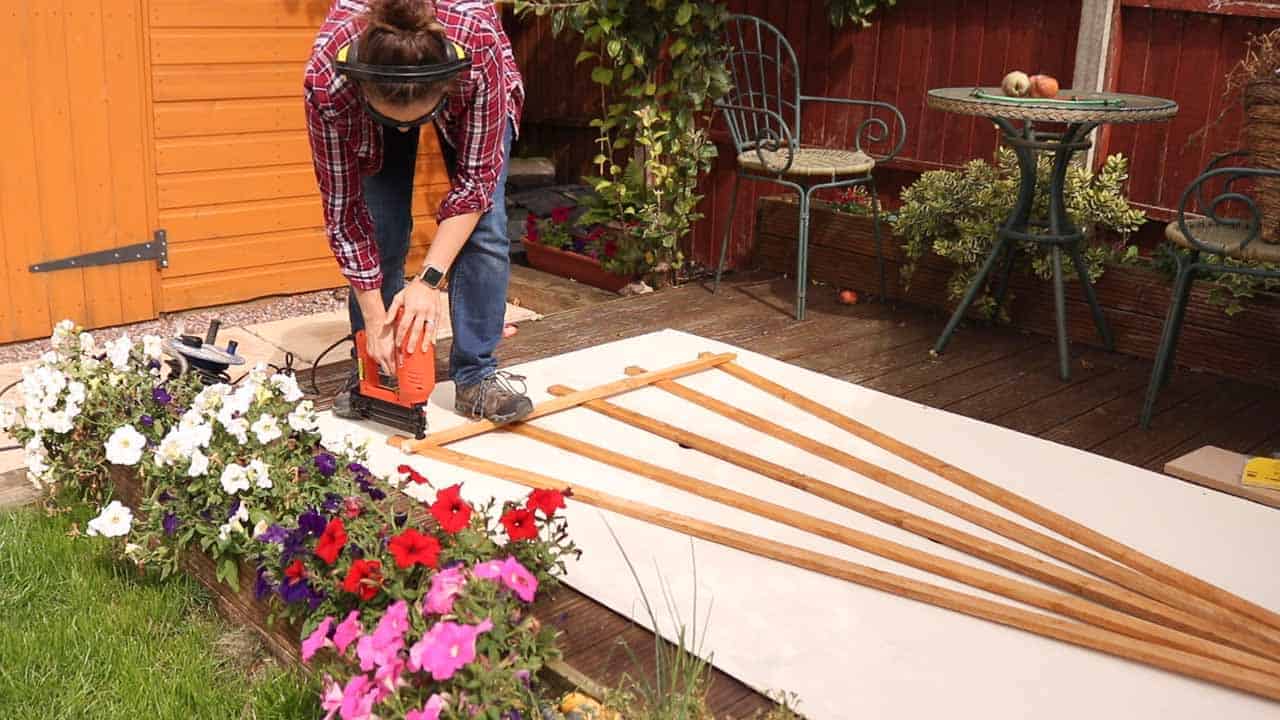
Nail in to place.

Then start measuring the half way distance between each strip and repeat.
And repeat again until to fill the spaces to your desire.


Here's the time where I realised my temperamental nail gun wasn't worth the time. So I'm just using finishing nails.
Note, I'm not using glue because once it's mounted to the wall with 4 screws, it shouldn't have any give.
HOW TO MAKE SQUARE OR RECTANGULAR SHAPED WOODEN TRELLIS

I find square trellis far more simple. Here, I laid three strips down, with one being along the edge of the straight sheet of wood.
And after measuring and marking on the sheet of wood how wide I wanted the trellis, I marked the centre point too.
Once I had my three strips laid out equally, I cut 9 strips to the same width.

First, I nailed the top and bottom strips to keep its shape. However, right after this, ensure it is all squared up again along the bottom and side edge of the sheet wood.
Note, it will still move above with them being nails. Although staples in a nail gun should prevent this.

Once you've hammered it in while ensuring it is square, you'll find it won't need to straighten it as much. Hence while it's no longer against the edges.
HOW TO HANG TRELLIS TO A BRICK WALL

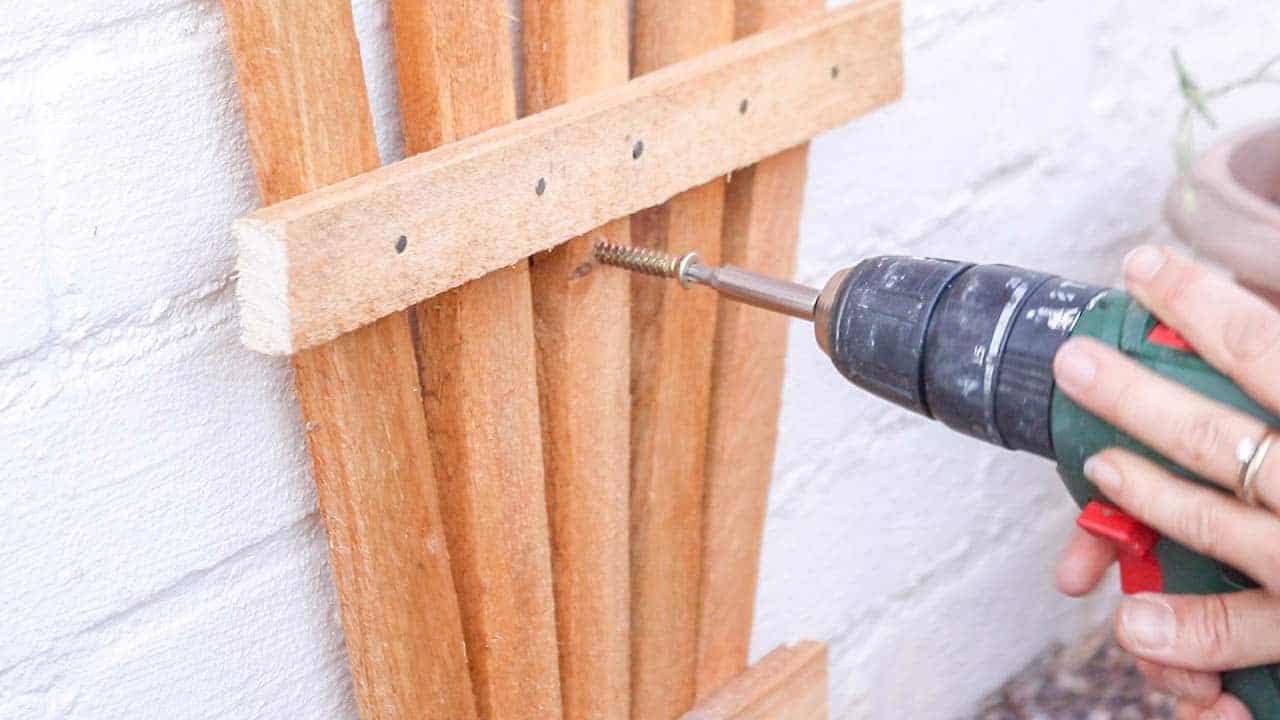
To fix something to a brick wall, most of the time, I used screws and rawl plugs. They're much cheaper. However, the easiest way is to use concrete screws as above.
You don't need to worry about what size rawl plug for screws and it's generally less messing about.
So, first I positioned the trellis where I wanted it and drilled a 5mm hole with a wood drill bit somewhere around the top centre. Once it went through, I let it make a mark on the wall.
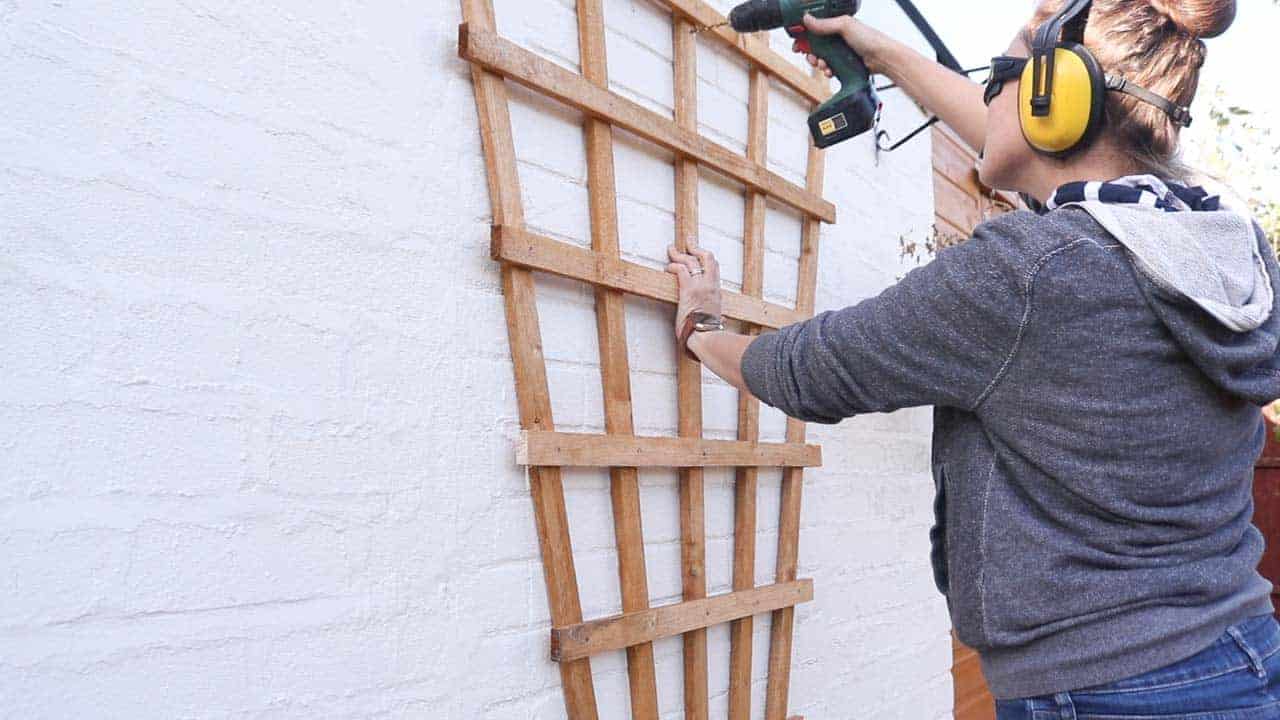
I then temporarily ditched the trellis and switched to a 6mm masonry drill bit. Note, my combi drill is on hammer drill setting.
I'm also wearing goggles and ear defenders.

Once I drilled a hole to the right depth, I simply lined up my trellis and screwed in the concrete screw.
Note, the pack (above) I bought comes with a torq screwdriver attachment that you'll need. (This is a star shape).

Then, I used a spirit level to ensure my trellis was straight. However, remember, this will only work if you've attached your strips perfectly straight.
So, sometimes it's better to take a step back and ensure it looks aesthetically correct.

Then, once you've got it where you want it, repeat with more drilling and concrete screws.
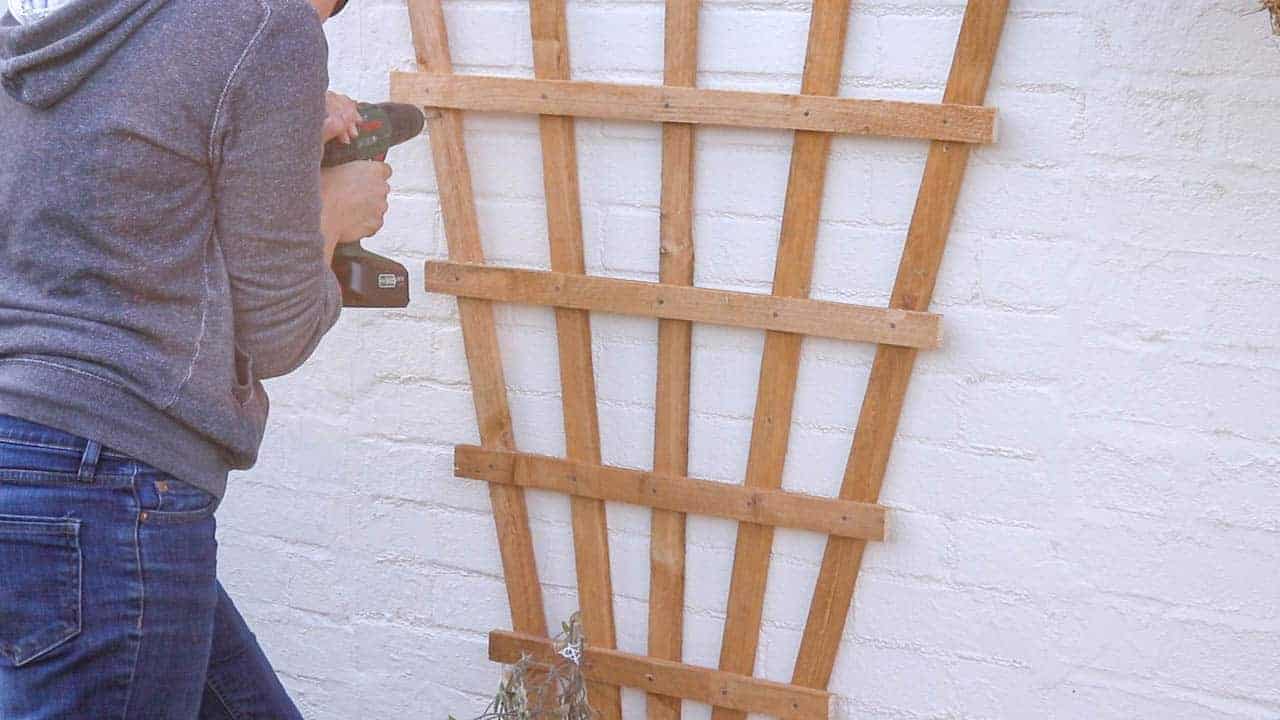
Finally, for my rectangular trellis, I repeated the same method as above.
But I also ensured it was straight by checking the side with a spirit level.


MORE DIY GARDENING PROJECTS
- DIY Dog kennel
- Window flower boxes with gallows brackets
- How to Hang Flower Baskets
- Tips for spraying fence panels
- Installing fencing with concrete posts and gravel boards
- Laying a patio with mortar
- DIY rendered breezeblock garden step
- Installing a gravel driveway
- Laying a patio with sand method
- Staining and protecting decking
- How to build decking and herb garden


How to Make & Hang Wooden Trellis
Equipment
- Hand sawHammer
- Saw horses or table
- Clamps
- Tape measure
- 6mm masonry drill bit
- Spirit level
- Pencil
- Combi drill
- Ear defenders
- Safety goggles
Ingredients
- Treated wooden strips
- Nails
- Concrete screws pack with torq bit included
Instructions
- Place the trellis wood on a large squared surface to use a reference, like a sheet of wood.
- Next, for a fan trellis, put 5 or more strips together at the bottom and roughly fan the top out to the width you want. For square trellis, skip to step 12.
- Push something flat and straight from the bottom where it's gathered.
- Measure the base's width while gathered and add 6cm to the measurement and cut a strip to that length.
- Place the newly cut strip over the base with an even overhang of 3cm either side. Then nail the strip to the base of the gathered trellis.
- Then mark the centre point of your large sheet of wood or work surface and line up with the centre of the trellis base.
- Next, measure the centre point of the opposite side of the sheet of wood and line up the centre of the middle trellis.
- Now equally fan out the remaining trellis strips with a tape measure.
- Measure and mark about 7cm from the top of the outer trellis on the fanned side and measure width ways for another strip and add 6cm. Cut a strip to this size.
- Nail to the top of the fanned trellis.
- Then measure equally between the top and bottom strip and keep repeating the strip cutting process until you've added as many strips as you'd like.
- For rectangular trellis, use the sheet wood as a guide to mark where you want the three or more strips.
- Measure the width of the trellis and cut how many strips you want. I chose 9 strips at 30cm.
- Then keep your longer strips lined up to the sheet wood and hammer your cut strips until all put together.
Hanging wood trellis to a brick wall
- Hold the trellis to the height you want your trellis.
- Drill a 5mm hole with a wood drill bit in the upper centre of your trellis and allow the drill to make a dint in the brick wall.
- Remove the trellis and drill through the brick wall with a 6mm masonry drill bit.
- Then put the trellis back and screw the trellis to the wall through the hole with the concrete screw.
- Repeat with two either side of the top and two at the bottom to prevent any movement.

ash peever
Hello from Canada !
Great presentation and the material list with instruction is wonderful !
We are ramping up for Spring here and then Summer 🙂 it has been a long winter here.
Look forward to seeing more... do you have any suggestions or design
ideas for 'raised garden beds?'
Thank you and look forward to hearing from you,
AP
HC
Nicely done. Nicely documented. Thank you.