
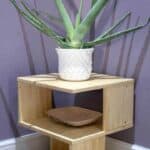
Here's how to make an easy S shaped unusual side table in an afternoon using biscuit joined pine. If you don't have a biscuit jointer, you could simply use dowels or hidden L brackets under each shelf.

It was a pleasure to make my unusual side table last Thursday in an afternoon. I was really pleased with how this turned out and was infact, worried its S shape wouldn't be particularly strong.
Well, it's not like I'm ever intending to stand on it, but it's certainly strong enough for a much heavier plant and books etc. And it's unique. It may look complicated, but the cutting list could not be simpler. Even if you use a hand saw, you can clamp and sand your pieces to match.
The design is made from 4 pieces cut to 400mm x 400mm. So, to make life easier, I bought a sheet of pine exactly 400mm in width, but length over 1800mm.

So with the length being more than I needed, I still got an off cut from it for a later date. As for the 4th piece, it is then cut equally in to 4 pieces. (200mm x 200mm squared).
It's these smaller sections that will be positioned in the opposite corner, diagonally (as above). They stack the layers up with a central shelf offering more storage. And another thing I love about it is, you can change its position 3 times to show the angle you prefer.
Either an S shape (below), twisted where it's not flat against the wall or a chess style chequered effect. And it all fits together with biscuits in slots that I cut using my biscuit jointer.

I built mine so I could dress up a plant that was sitting on the floor. And because our living room is quite small, anything with extra storage is a bonus.
But you would also make a pair as bedside tables. I think adding hair pin legs would look even cooler! Or perhaps use as a small coffee table, or printer stand with shelves for paper.
Anyway, let me show you I made it if you fancy one for your house too!

WHAT YOU'LL NEED TO MAKE THIS UNUSUAL SIDE TABLE
- Sheet of pint that can be cut in to 4 pieces of 400mm x 400mm.
- Saw (hand or circular)
- Biscuit jointer (or use dowel pins and dowels)
- 16 biscuits
- Titebond II wood glue
- 4 clamps
- sander
- router
- 45 degree router bit
- Danish oil
- Lint free cloth (an old bed sheet or cotton shirt cut up would be fine)

HOW TO MAKE AN S SHAPED UNUSUAL SIDE TABLE
First, I cut my pieces up as above with my circular saw. Note I clamped the wood to my saw horses and a straight level to act as a fence.

Then I clamped three of them together and sanded any rough edges away and ensured they all matched.
You wouldn't have to match them all if you used a table saw, but I haven't got mine out of the box yet!

CUTTING THE SIDE PANELS
Now we've got our top, middle and bottom shelf, I needed to cut the 4th piece in to four.
To do this, I clamped it to my saw horse and set up a track on my circular saw.

After setting it up to cut dead centre, I cut straight in to middle. And then two the two new cuts, clamped again and repeated to cut in half.
This meant I only needed to et the track up once. Now I have 4 pieces at 200mm x 200mm.
I also sanded these to match as prior, too.

Then lay a shelf down and position a 200mm squared piece in the opposite corner, diagonally.

Line them up in the corners and draw two pencil lines for size 20 biscuits.
Make sure they're about 4cm away from the edge.

Now using a speed square, draw the lines along the top so you can see with a biscuit jointer later.
Again, do the same with the smaller piece.

After ensuring your router doesn't cut on and angle (and is set to size 20), cut downwards on the shelf section.

Then clamp your smaller piece flat to cut your biscuit slots. It's from here, I recommend you label everything up to speed glue up later.
I would mark with masking tape which was top, middle of bottom shelf and which was the good side that faces up and inside or out).
Also, I drew matching symbols, such as * or + (or whatever works for you) to match which biscuit joins matched. This was because I didn't measure exactly where I drew my biscuits.

Now place your middle shelf on top and line it up. Note, I have put biscuits in the joins temporarily to balance it.

Draw new pencil lines for biscuits so you can then join your top middle shelf to the upper section of the lower side panels.

Repeat biscuit cutting. Then continue the same method for the last level on top.

Once I did all my biscuit joins Here, I'm doing a dry build with biscuit

And because my sheet of wood came already chamfered on the edges, my own cuts looked much sharper.
So I went over my cuts to gently chamfer with a sanding block and sand paper.

Then laid a rag on the floor and filled the slots with wood glue.

Then fill the holes with biscuits and glue the other piece that joins.
Make sure you also glue the slots here too, but don't add biscuits in and run along the glue with a finger.

I then joined up my side pieces, wiping away any excess glue.

Repeat the glue and biscuit process and slot the middle shelf on top and clamp using a speed square. *See next photo down.
Now leave overnight to dry.

After unclamping the first level I created, I then glued, biscuited and clamped the top half.
I left this for about 4 hours before continuing to work on it.

SANDING UNTIL SMOOTH
I had a lot of pencil marks on my usual side table. Also, I needed a very smooth finish before oiling.
So I took my DIY side table outside and went over it everywhere with my orbit sander and 120 grit sandpaper.

To make the top look more finished and sophisticated, I removed the sharper edge with my router.
I'm using my favourite 45 degree chamfer router bit from this set.
It's also great for removing any corner or edge damage as showed you in my recent oak restoration project.

WHAT FINISH SHOULD I GIVE IT?
I think painting this pine would have been a shame. Otherwise you may as well use MDF or plywood to make this built cheaper. But if painting, you could screw with countersunk screws and fill instead of using a biscuit jointer.
And with picking a pretty pine, I wanted to see the knots and detail which also matched some shelves we have. If you want a more natural look like mine, I ensured it was dust free and applied with Danish oil before wiping the excess off 20 minutes later.
Then leave for an hour before applying a second coat and leaving for 6 hours before wiping again. This gives it a stain and water resistant finish, but not scratch free.

I prefer this look as it's much more natural. Or you could leave it another 2 weeks before varnishing.
Other options could be using a furniture wax or even chalk paint in the colour of your choice and distress.

YOU MIGHT ALSO LIKE...
- 12 Unusual side tables
- Easy Pine Wood Coffee Table
- Make a Wooden Suspension Box File for Bookshelf
- 10 DIY Kitchen accessories made of wood
- How to Restore an Oak Table
- Discrete Kitchen/Living Room Recycling Bin Cupboard
- How to Make Radiator Covers
- Easy Faux Marble Desk with Hairpin Legs
- Garden Storage Box
- Tips on Designing and Planning a Room Makeover
- How to Fit Coving
- DIY Chevron Pallet wood Headboard
How to Make an Easy DIY S Shaped Unusual Side Table
Equipment
- Saw (hand or circular)
- Biscuit jointer - set to size 20
- 4 clamps
- Sander
- Router
- 45 degree router bit
- Lint free cloth (an old bed sheet or cotton shirt cut up would be fine)
Ingredients
- Sheet pine that can be cut in to 4 pieces of 400mm x 400mm.
- 16 biscuits Size 20
- Titebond II wood glue
- Danish oil
Instructions
- Cut the pine following the cutting list in the blog post.
- Sand all edges with an orbit sander.
- Then lay a shelf down and position a 200mm squared piece in the opposite corner, diagonally.
- Line them up in the corners and draw two pencil lines for size 20 biscuits.
- Now using a speed square, draw the lines along the top so you can see with a biscuit jointer later. Again, do the same with the smaller piece.
- After ensuring your router doesn't cut on and angle (and is set to size 20), cut downwards on the shelf section.
- Then clamp your smaller piece flat to cut your biscuit slots. It's from here, I recommend you label everything up to speed glue up later. Mark with masking tape which is top, middle of bottom shelf and which was the good side that faces up and inside or out). Also, mark the matching joins with unique symbols in pairs.
- Place your middle shelf on top and line it up. It helps to temporarily biscuit join together without glue.
- Draw new pencil lines for biscuits so you can then join your top middle shelf to the upper section of the lower side panels.
- Repeat biscuit cutting. Then continue the same method for the last level on top.
- Now sand all edges to remove any sharp edges except the top shelf.
- Glue and fill the slots with biscuit of the bottom half and join together. Also glue all areas that join together.
- Clamp using a speed square and leave overnight.
- Release clamps and glue and clamp the top half for 4 hours if using Titebone II.
- Sand everything until smooth and to remove any pencil marks and dust down.
- Apply with danish oil and leave for 20 minutes before wiping the excess off with a lint free cloth.
- Leave for an hour, then apply again.
Video


Comments
No Comments