
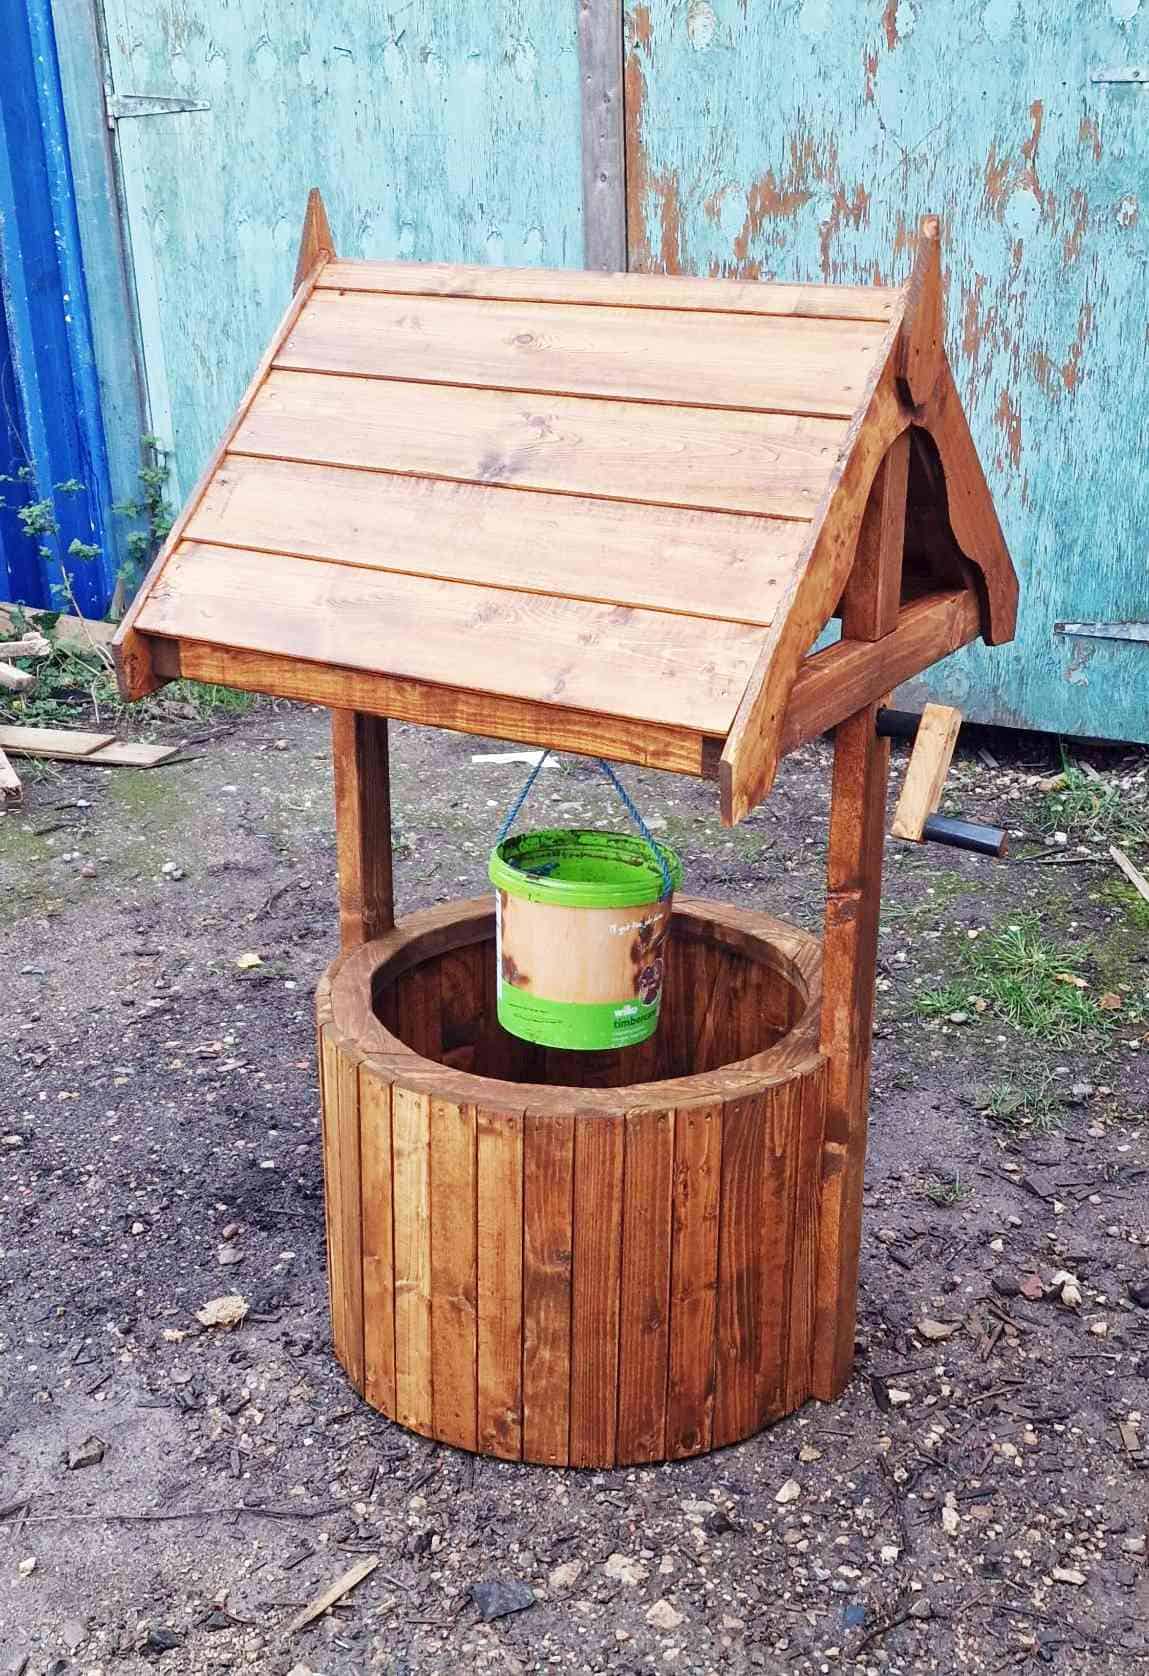
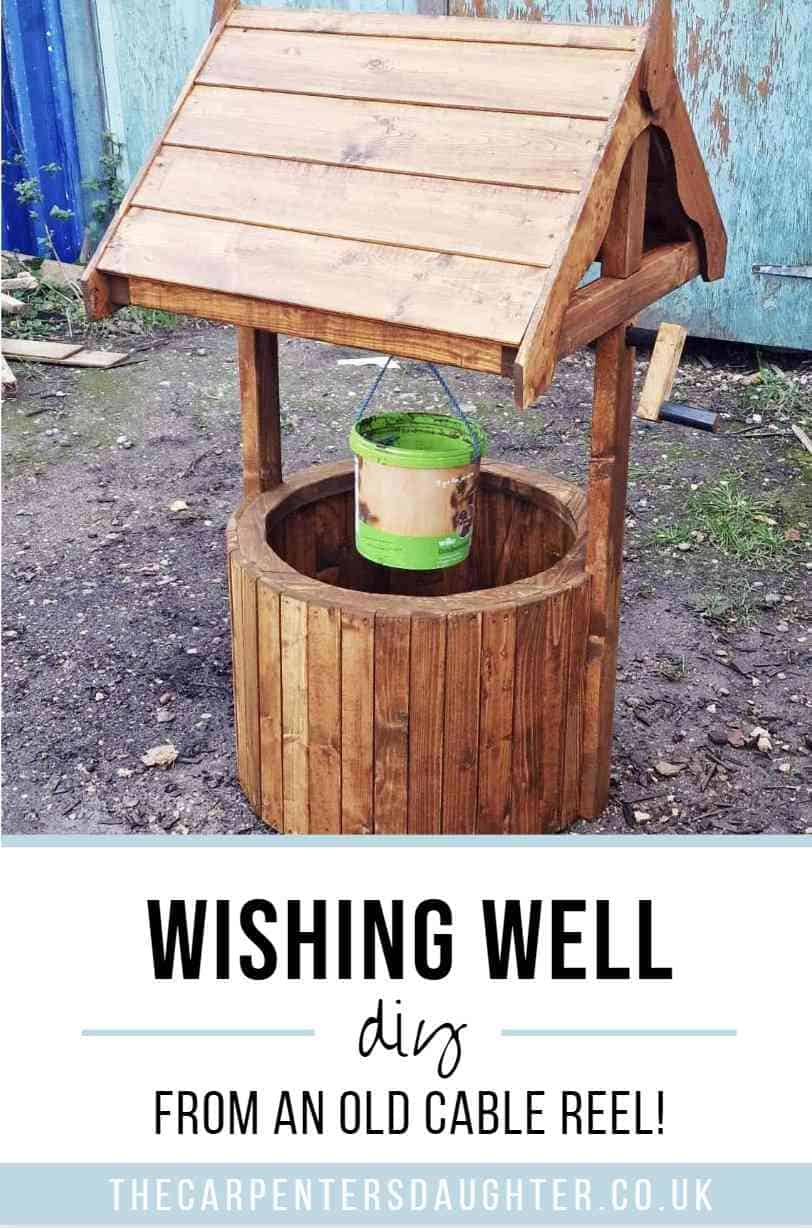
This a simple step-by-step guide on how to upcycle a small plywood cable reel and turn it into a cheap DIY wishing well planter with pallet wood and offcuts. Or, you could use it as an ice bucket for a BBQ, party, or even paint it white and add a letter box on top for wedding cards).
It's so easy, there's no need for free wishing well plans as long as you have a cable reel and follow this video!
Jump to:
🪣What is a Wishing Well?
If you're curious about what a wishing well is, it is usually a monument over a spring well. As the water was assumed to have magical healing powers, they were popular to drink from, bathe in it or make a wish over it.
After saying a wish, people would drop change down the well and their fate would depend on which side the coin's face would land.
Today, wishing wells are used by charities, where a wish would also be a donation. And also, there are lots of decorative stone or wooden handmade mini wishing wells that can be found in gardens for planters, with or without a bucket, rope, and spinning handle.

🪚Tools & Materials
If you're looking for tools to build a wishing well, please note that as an Amazon Associate, I earn from qualifying purchases made through links.
- Small plywood cable drum
- Pallet wood for cladding
- CLS structural timber for arms and roof framework
- Tongue and groove offcuts for roof cladding
- Offcuts for cranking handle and roof trim
- Broom stick/dowel
- Band saw
- Combination square
- Nail gun
- Clamps
- Sash clamps
- Belt sander
- Goggles
- Ear defenders
- Combi drill
- Drill bits
- Jigsaw
- Mallet
- Angle grinder
- Hand saw
- Mitre saw
- Tape measure
- Wood glue
- Wood screws
- Flat wood drill bit
- Rope
- Bucket
- Wood preserve
- Staining brush
📋Instructions
Cladding your Wooden Wishing Well
Top and Bottom of the Cable Reel
The main aspect of this how to build a wishing well step by step is to use an old cable drum as a round template.
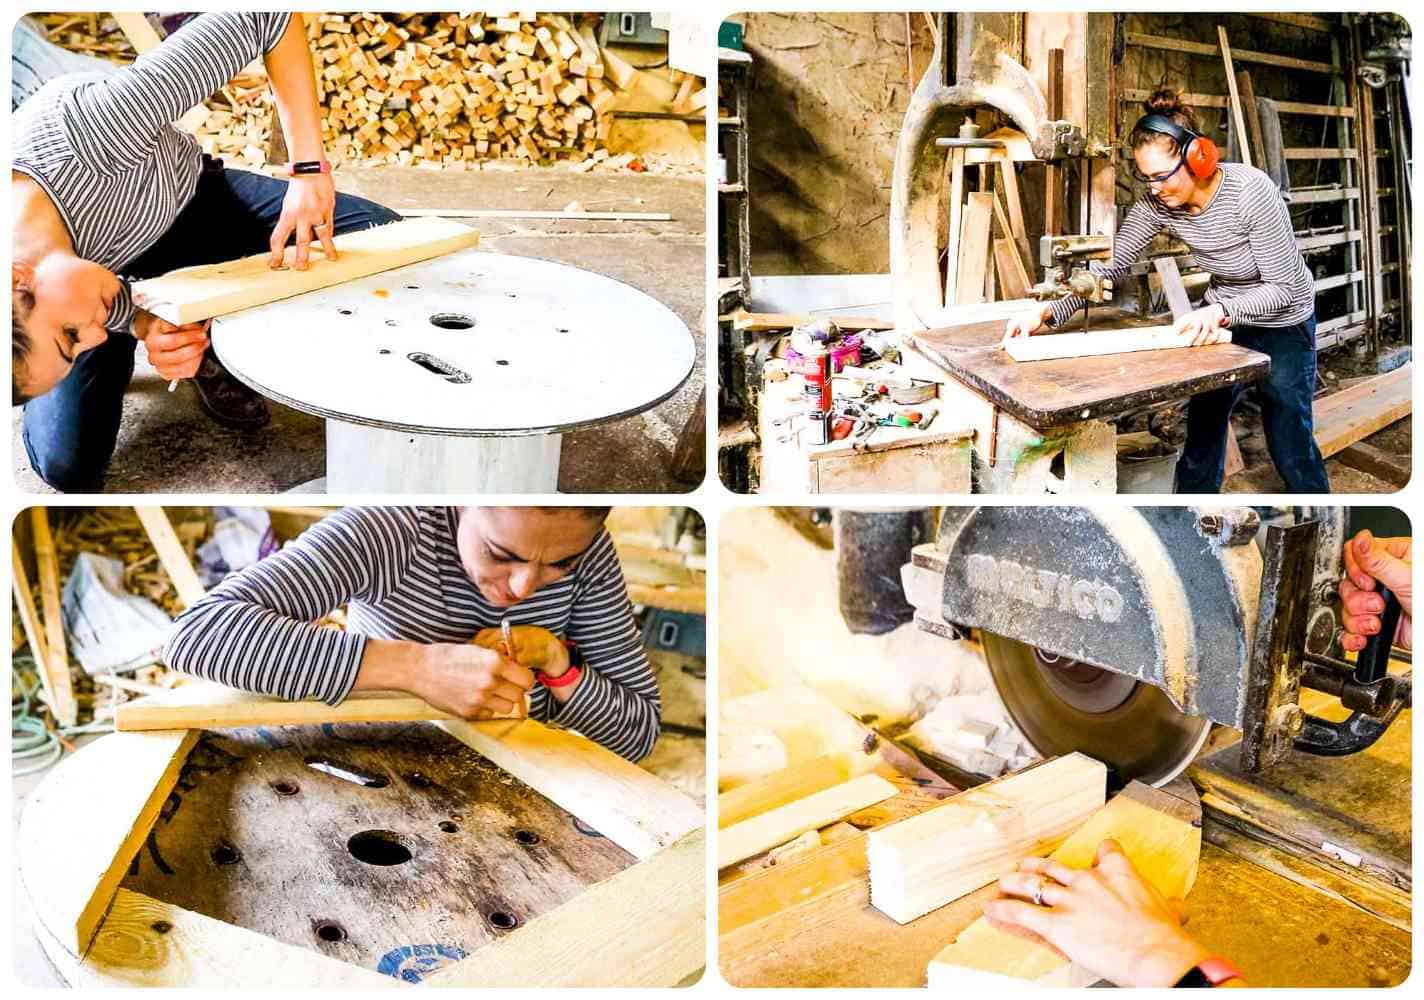
- First, with some cut-up pallet wood pieces, hold one piece slightly over the round edge of your cable spool and draw around it from underneath.
- Cut the curve with a band saw or use clamps and a jigsaw.
- Place your curved pieces of pallet wood around the top of your cable reel, ensuring the round edges are in line with your wood and carefully draw where they overlap and NUMBER them in order.
- It's these new pencil lines where you need to cut.
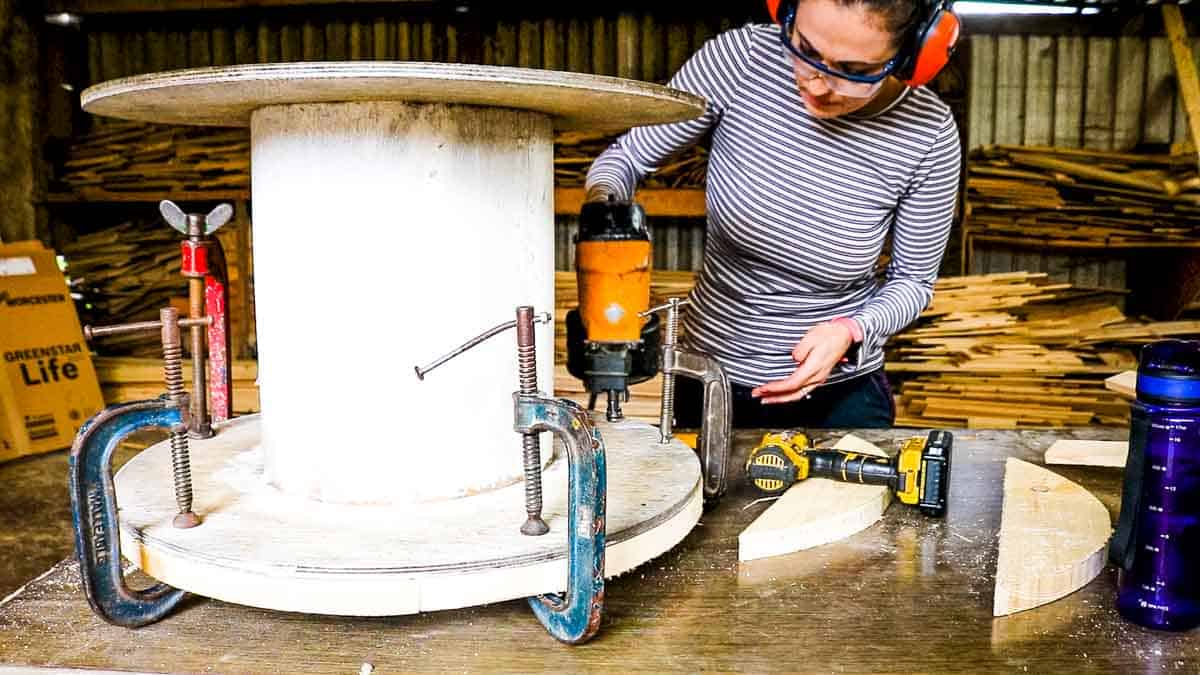
Once cut, you need to now put them back in number order and make sure they are inline with the spool's edge and clamp before nailing.
Throughout this project, I use a nail gun as it is quicker. I only have access to this tool at the woodyard with a compressor, but glue, a hammer and nails will do too.
Repeat: then repeat exactly the same for the other end of the wooden drum and sand any protruding ends on any joins as we need to clad around these too.
Cladding the Side of Your Faux Wishing Well
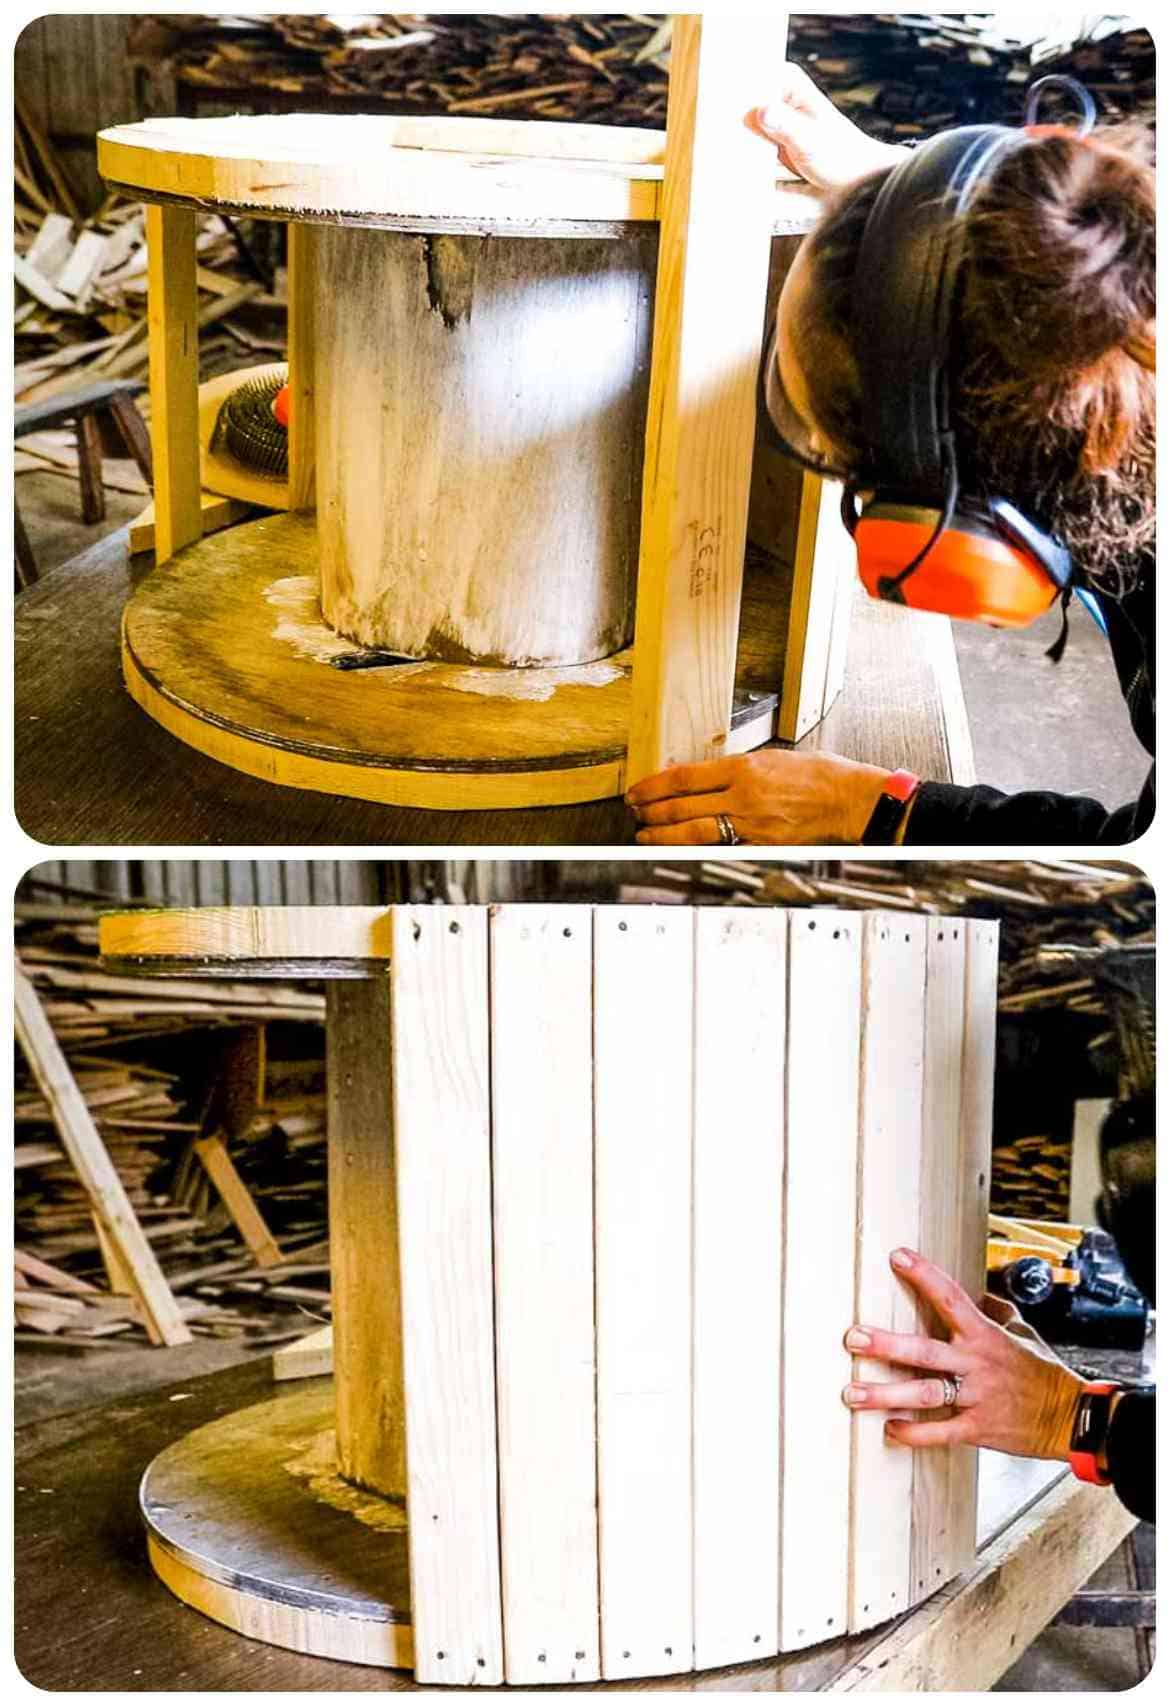
Next, you'll need to work out what is dead centre of the reel on two sides for two roof supports from CLS structural timber.
Then clad around the sides of the cable reel, but line the first one using a carpenter's square. Then nail them to the top and bottom pallet wood I've added as it's thicker - not the thin plywood.
You'll need to rip some timber down though when you get to your last slats.

Hollowing the Cable Reel
Now we've added cladding to almost all of the cable reel, it's now structurally sound to form a wishing well for the garden. Next, we need to make an opening for the well:
- Use a combination square to draw a curved opening - this is the be slightly shorter than the shorter pallet wood join.
- Cut around this pencil mark with a jigsaw
- Now use a jigsaw to cut up all of the central plywood as we don't need it.
- Mallet out the metal rods so you can get better access to cut and cut and remove the steel with an angle grinder or a hack saw.
Making the Roof
The roof starts with the two CLS structural supports that you should have left gaps for while cladding the sides of your cable reel.
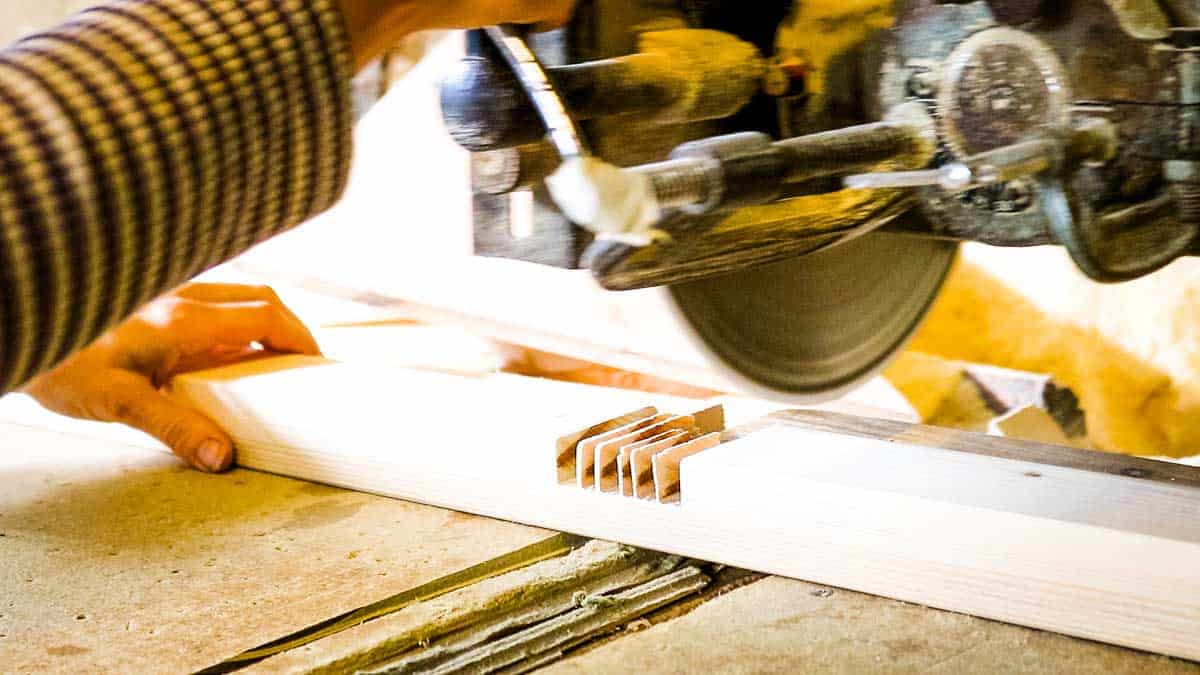
Depending on how high you want your roof to start, I start by cutting my half-lap joins on the supports. For full details, you can see how I do it during my DIY bird table feeder. But DON'T glue and screw them together yet!
What is a half-lap join? A half-lap joint is where two pieces of wood of the same dimensions, both have a notch cut-out halfway down. So when they are put together, they slot together, flush. It is a strong joint that forms a cross.
The notches can be hand sawed, then chiselled flat, or with a mitre or radial arm saw. OR, check out my tips section if you prefer using pocket hole screws!
Making a Roof Apex
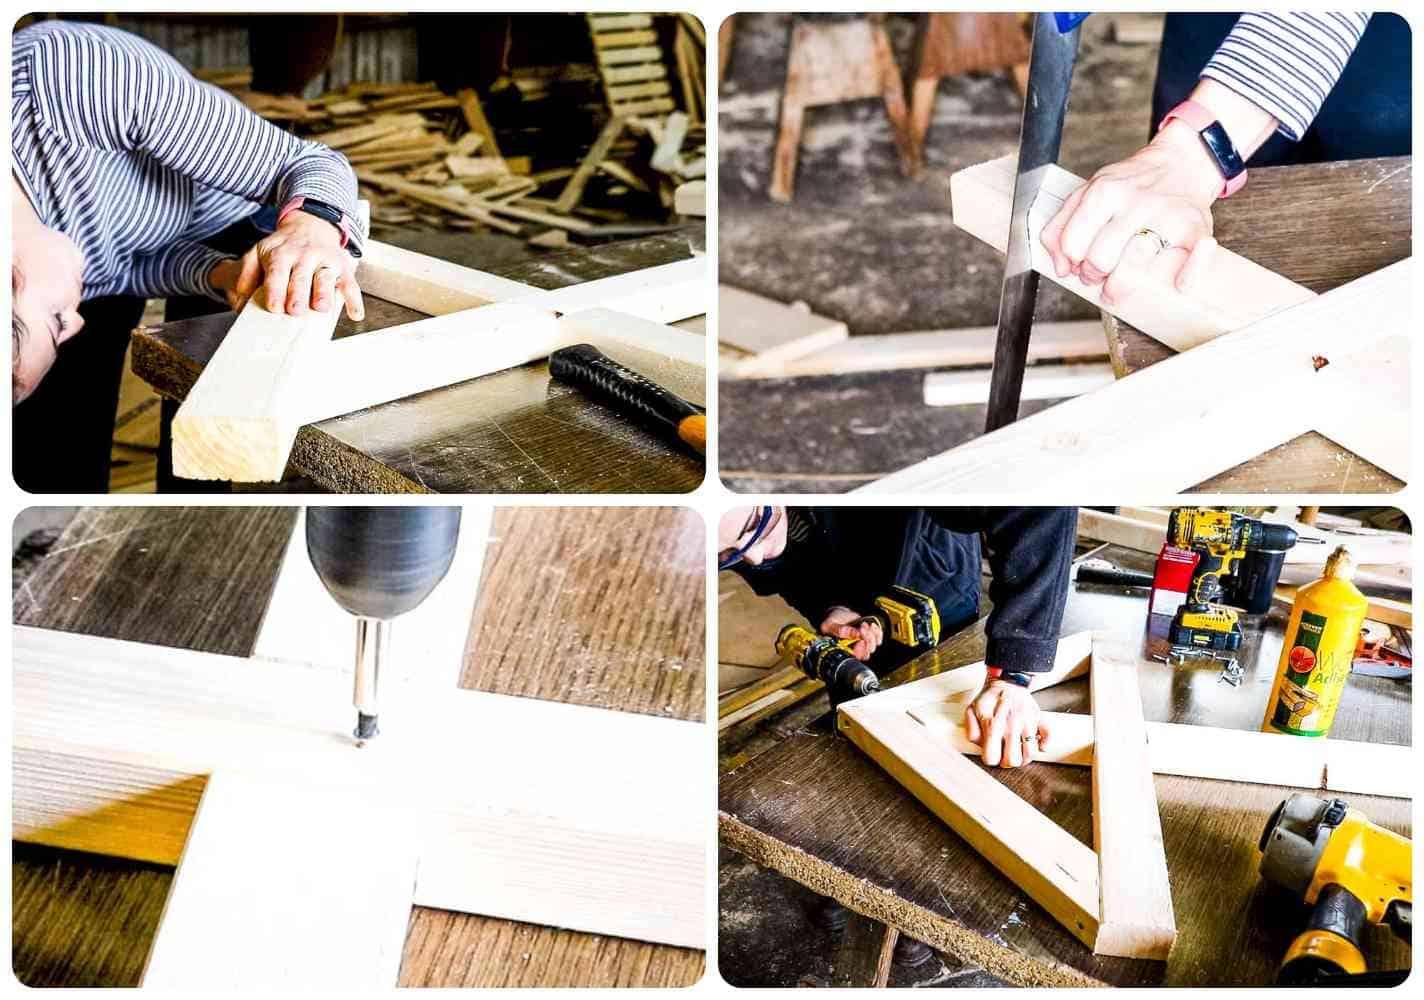
Now you need to cut some angled pieces to create a pitched roof using your two half-lap side supports. I held another piece of the same structural timber going over the cross, while in line with the corners and draw from underneath on the inside with a pencil.
As I'll have two pieces cut the same and meet at the top, I needed to then draw another line on the top piece for my new line Once cut, I also hand-sawed the top of the middle post, and transferred the same top angled mark on top and hand sawed again to create a V shape.
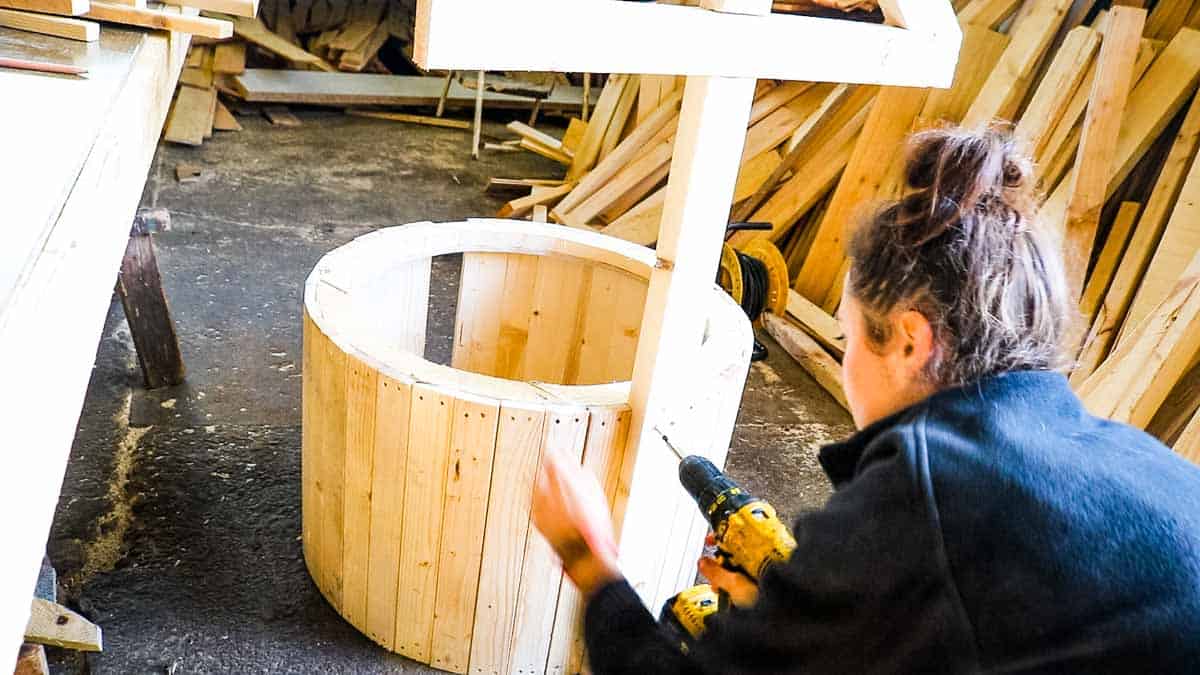
You'll need 4 angled pieces altogether, which I then glue, temporarily nail, then drill and screw. NOW, you can slot the two sides in the gaps of the cladding and drill and screw to the wishing well base.
Building a Wooden Garden Well Roof
Now you should have both side Apex frames screwed to the side of the base, it's time to fill the bits in between!
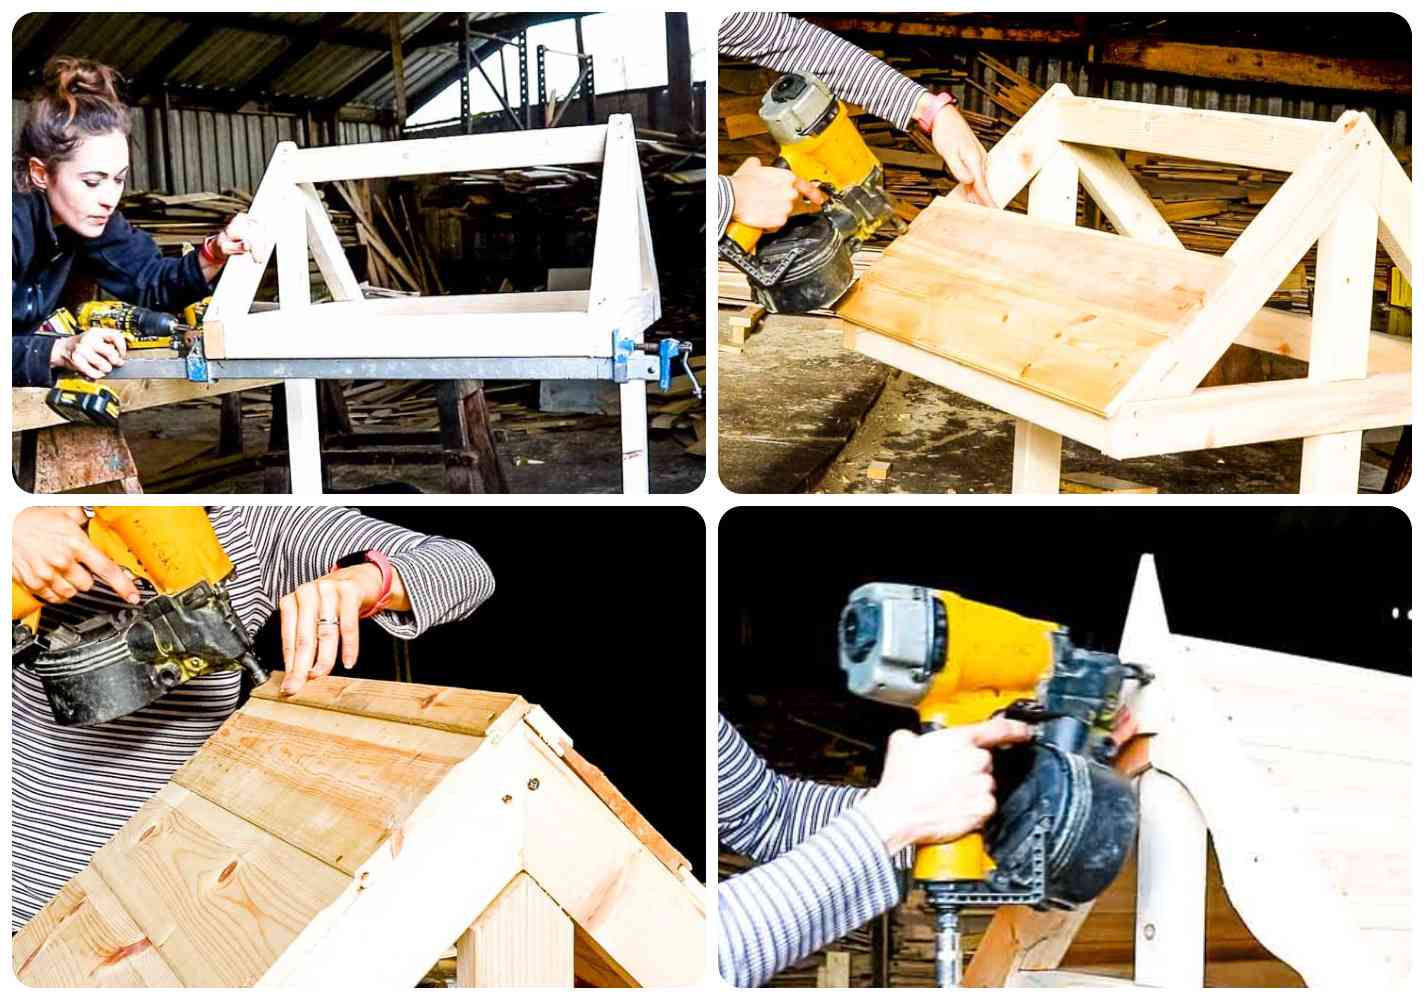
- First, take a measurement of the internal width from the bottom, between the two support posts - this is the very top of the well.
- Cut 3 more structural pieces of timber to the same length
- Now clamp one piece between the top of the apex, but make sure it isn't protruding as you don't want it to get in the way of the cladding
- Now repeat for both of the bottom corners
Next, you can clad with tongue and groove strips, cut to the same width, but start with a 1.5" overhang. You'll need to rip pieces down for the top pieces to create a corner.
Adding a Scalloped Trim
I recommend watching my tutorial on how to cut a matching scalloped trim for sheds, dog kennels, etc here.
Making the DIY Well Handle
Now to make a spinning handle that will allow us to turn and raise a well bucket of water.
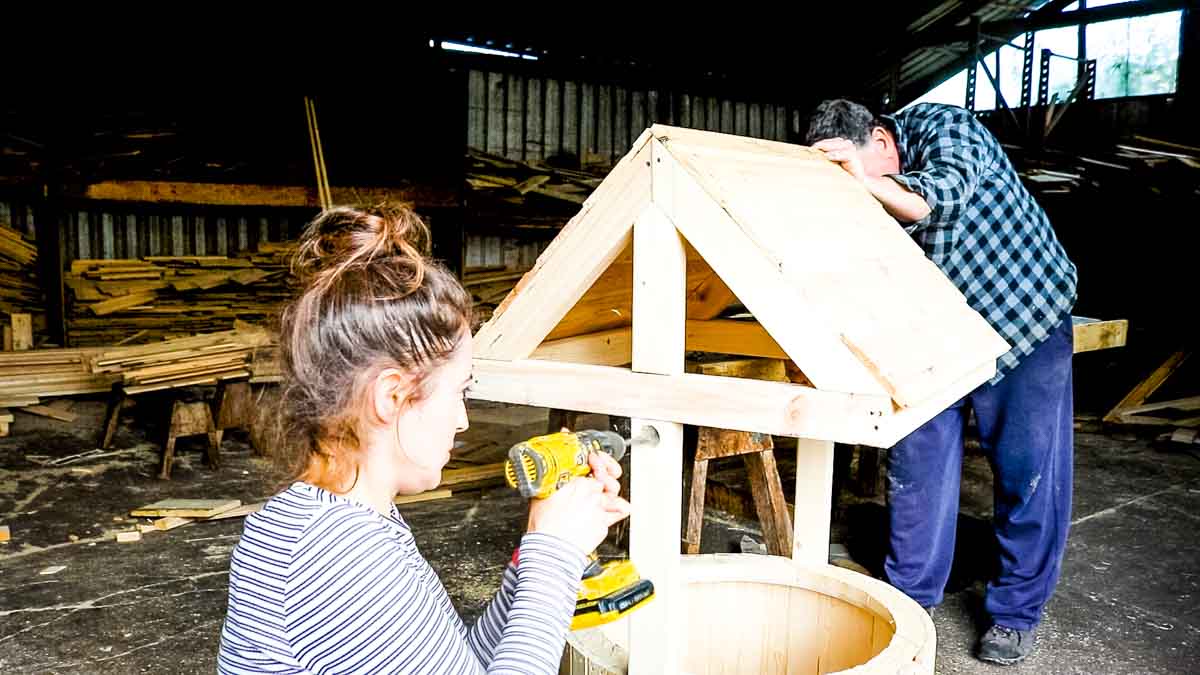
- Drill a hole in one side with a flat wood drill bit (or Forstner bit), that is marginally bigger for a broom handle to poke through
- Then ONLY a pilot hole drill on the other post with a ½ inch recess on the inside for the handle to slot in
- Poke the handle in, then mark and cut with about a 2" protrusion
- Now drill a hole for the broom handle in small rectangular offcut to slot the dowel in.
- Then a pilot hole to screw another 2" dowel and screw together - but not too tight as this dowel needs to spin in your hand while turning.
- Now slot the broomstick with the spinny handle in and screw it in place from the recessed/pilot hole side of the post - again, NOT TOO TIGHT, otherwise it won't spin!
Adding Rope
Now, you'll need to screw a piece of rope to the dowel. I recommend a few inches off-centre or more if your outdoor wishing well is quite tall.
Then wrap it around tightly and neatly until it's symmetrical on the other side and cut the rope with a Stanley knife or scissors.
Now another piece around rope across the top of a galvanised steel bucket, or to the top centre of a large handle. No, not some green tatty bucket - we didn't have a proper one at hand, so this was for demonstration purposes!
And now you should know how to make a wishing well for free or on a tight budget without buying downloadable plans!

🖌️Maintenance
Finally, you'll need to preserve your hard work as the pallet wood at least, is made of untreated softwood.
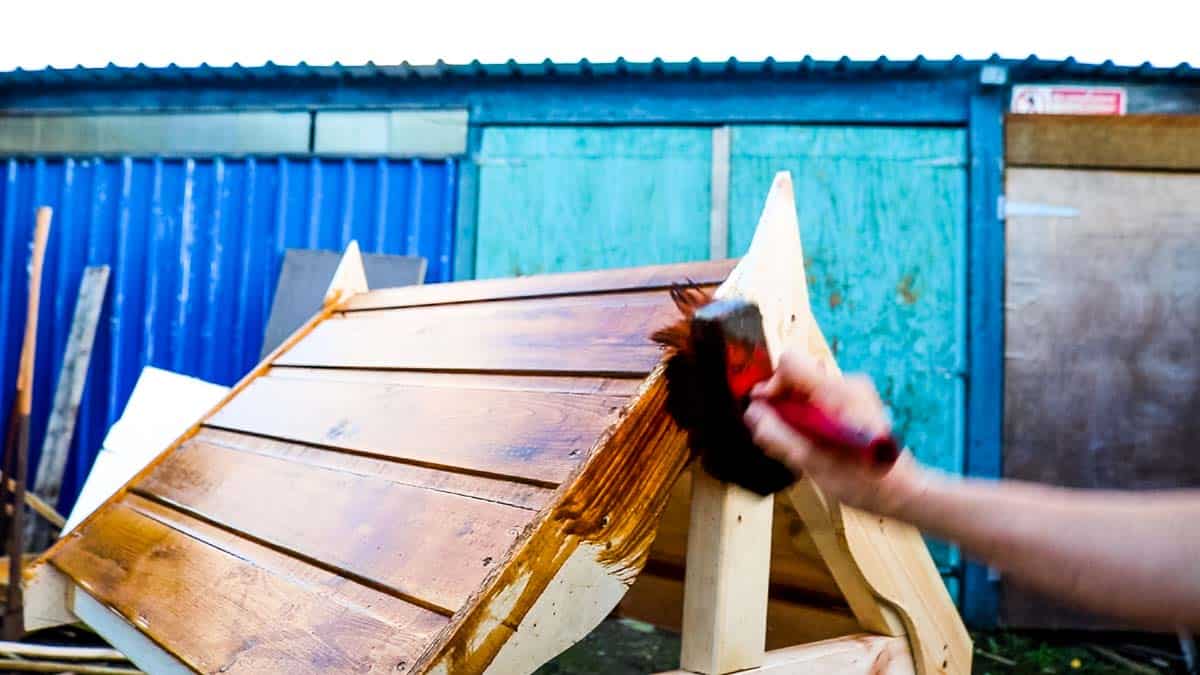
Using a large stain brush and a good coloured wood preserve, brush liberally on the base - this is the bit that will be touching the floor.
And also liberally on any end grain cut you have as they're the thirsty parts of the wood. You'll need to do this about once a year, or less frequently, depending on the product instructions.
Alternatively, if you make a cedar wood wishing well, it should have its own natural preserve. But finding it in the UK is expensive and not as good.
💡Tips
- While cladding the top and bottom, it doesn't matter how long or short your pallet pieces are as they'll be cut down. Note, I used 5 pieces that started off around 40cm/16" long.
- Note that while cladding the sides of the cable reel, the height may not be even all the way around, so I recommend cladding it while the top is facing down, flat against a flat, even surface.
- It's easy to be slightly off on your last side cladded strip. I recommend doing some tests with the 3 strips as you can evenly space them out for aesthetics, unlike I did - but this is a rustic, fake wishing well. It doesn't have to be absolutely perfect!
- If half-lap joints are intimidating, then pocket hole joins are acceptable, proving you also use wood glue, but the roof would also benefit from angled gallows brackets.
- When drilling a hole for the handle, don't drill the EXACT same sizer as the broom. I chose a flat wood drill bit that was slightly bigger so it would spin freely, even if it expanded or contracted a little during all weathers
- While treating your finished wood well, choose a stain that clearly states "preservative" on the label. If it doesn't say this, it's just coloured water!

❓FAQ
What plants go in a wishing well? I'm not a gardener, but if you look at Gardner's World, they recommend things like Hebe, Skimmia, Buddleia, and more. Some people also plant vines around wishing wells and train them to go up the walls for a garden feature.
Where do you put a wishing well? Any garden area you want to add life and colour with flowers.
➕More Cable Reel Projects
DIY Wishing Well Planter (Upcycled Cable Reel)

A simple step-by-step guide on how to upcycle a small plywood cable reel and turn it into a cheap DIY wishing well planter with pallet wood and offcuts. Or, you could use it as an ice bucket for a BBQ, party, or even paint it white and add a letter box on top for wedding cards).
It's so easy, there's no need for free wishing well plans as long as you have a cable reel and follow this video!
Materials
- Small plywood cable drum
- Pallet wood for cladding
- CLS structural timber for arms and roof framework
- Tongue and groove offcuts for roof cladding
- Offcuts for cranking handle and roof trim
- Broom stick/dowel
- Wood glue
- Wood screws
- Rope
- Bucket
- Wood preserve
Tools
- Band saw
- Combination square
- Nail gun
- Clamps
- Sash clamps
- Belt sander
- Goggles
- Ear defenders
- Combi drill
- Drill bits
- Jigsaw
- Flat wood drill bit
- Mallet
- Angle grinder
- Hand saw
- Mitre saw
- Tape measure
- Staining brush
Instructions
- First, with some cut-up pallet wood pieces, hold one piece slightly over the round edge of your cable spool and draw around it from underneath.
- Cut the curve with a band saw or use clamps and a jigsaw
- Line them up on top of the cable reel where they overlap, then draw and cut these marks
- Put them back and nail them down.
- Repeat with the other end of the reel.
- Cut more trips down to the same height and nail all the way around the reel, but leave space for 2 roof support posts that are positioned evenly only 2 sides.
- Draw a circle with a combination square around the top, and cut with a jigsaw to create a top lip
- Now cut out the remaining top and tubular sections and angle grind the metal rods out
- Cut half-lap joins in the post and another two pieces for the roof
- Slot together and cut out 4 angled pieces
- Hand saw v-shapes in the two posts to match
- Glue and screw the 2 apex sides to the wishing well base
- Cut and screw 3 supporting pieces to the roof frame
- Now clad the roof and nail some trim on
- Drill a hole in the post for a spinning handle and a recessed pilot hole on the other side
- Drill a hole in a small offcut for the end of the broom handle to slot in and screw a smaller piece of down to the other side, but not too tight so it will spin
- Slot the spinning handle in the wishing well and loosely screw it from the recessed side
- Screw some rope to the dowel and attach it to a bucket
- Now stain and preserve your garden well and fill with soil and plants if you wish!
Pin for Later

Comments
No Comments