
After recently cutting a hole for my kitchen sink, today I'm showing you how fitting a kitchen sink can be a doddle. I'll also show how I sealed it with silicone so it's water tight!

I initially put off clipping my sink down because I'd read lots of nightmare stories. Basically what I'd mostly read was that the clips would break while fitting a kitchen a sink.
And I feared this because today's clips are typically made of plastic. And, it has been the same with plastic plinth clips. They too have broken on me.
However, I had no such bad luck and believe it's because I didn't use an electric screw driver. In fact, just plain old hand tools are suitable for the job. So, here's a step by step on me fitting a kitchen sink.

ADDING THE GASKET
The first thing you'll need to do is remove your old sink. If this is the case, just scroll through and reverse my work. You'll probably also need to disconnect your plumbing as I did in this video.
Then, on to your new sink. It should come with an adhesive backed gasket foam strip which you need to stick down along the lip underneath. I made sure I didn't have any protruding bits on the edges, otherwise you'll see it when in place.
Then once you've done one side, cut it down and start again on another. And repeat until all four lipped sides are covered. Note, it's best to stick, then cut as opposed to the pic above as it stretches as you go!

WHAT ARE KITCHEN SINK FITTINGS?
Now on to the dreading half plastic metal and plastic kitchen sink clips. I actually found these a doddle to fit, so I'll show you how they work.
They are bendy, making them very versatile while you maneuver your kitchen sink.
The plastic section also slides on to the sink lip and there's a hook to line up with a kitchen sink hole. Sometimes they are rectangular slots instead.

HOW KITCHEN SINK FITTINGS WORK
So, you now know which way they bend. You'll get a selection with your sink or you may need to buy some. However, in my case, I didn't get the same amount of clips to holes.
That meant I needed to even them around the sink and line up a clip with one of them. Then slot it on and bend the sink fitting back so they're not in the way when putting your sink back.
No, it's not neccessary to take your kitchen worktop off. I just did this because I was able to have more room. Then one your sink is in place, move the clips towards the worktop.

MASKING TAPING YOUR WORKTOP
I love a good bit of masking tape. It really helps prevent mess. So, what I did was go around the whole of the sink with it and as close as possible to it.
Then flip it back upside down so you can move on to silicone sealing it to make it watertight.
Note, if the cut section of your worktop doesn't appear to have been sealed, then you'll also need to go over it with silicone or waterproof glue. You can find a tutorial for this here.
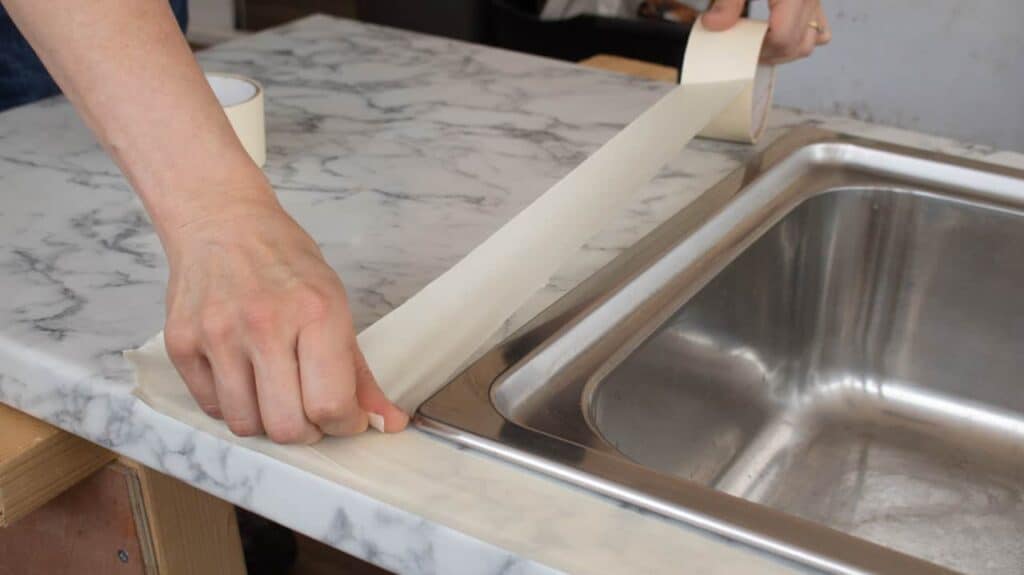

SILICONING YOUR KITCHEN SINK
Once your sink is flipped back upside down, it's now time to make it water tight.
So here, I'm just running one continuous bead of silicone all the way around. I'd aim for dead centre of the foam gasket or a little closer to the lip.
Then flip it back round and slot in to place.
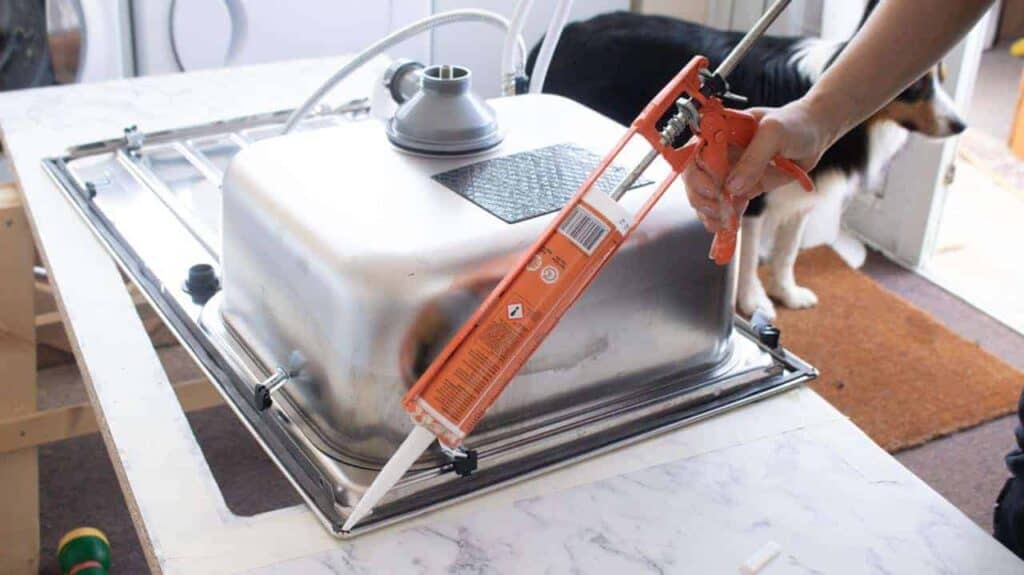
REMOVING EXCESS SILICONE SEALANT
Here, I knew I'd be taking my time to screw my sink clips to the worktop. So, I immediately wiped any visible excess before it set.

MY NEW FAVOURITE SILICONE REMOVAL TECHNIQUE
Although I didn't do it on this occasion, I've since learnt an even better way to remove excess silicone as below.
And that is to create a washing up liquid solution using a few squirts mixed with water in a clean spray bottle.
So, instead of wiping above with a damp cloth above, I now spray the silicone which makes it non sticky to surfaces. Then remove the excess with a credit card. Note, it's best not to use your finger to prevent contaminating it. You'll find it also gives a super neat finish.

TIGHTENING THE SINK CLIPS
To fit the kitchen sink fittings, you need to make sure the metal part is underneath the worktop as below.
Then tighten it with a basic non electric screw driver to avoid breaking it. I just tightening until it was firm in place.
And repeat for the rest. You'll then need to wipe more silicone excess off as above.

THE FINISH
Then to reveal my finished fitted sink, I removed the masking tape and moved my worktop back to the kitchen base unit.
See here on how I fitted my worktop to the kitchen units.

Sealing a Kitchen Sink Retrospectively
If your sink has already been fitted and you don't fancy undoing the clips, then you can seal it after. It's not ideal, but you can as I did below as few years ago.
I used my silicone gun and what I had leftover of our Unibond Anti Mould Translucent Seal for kitchens and bathrooms. Don't use white as it will stand out and even more so when it gets dirty.
After taping it down, I used a new tool I totally recommend for the sake of £3 which is Unibond's Remover and Smoother. It removed it like a charm and smoothing was easy. Also, dipping it in a little water helped too, but I would now recommend washing up liquid more.
And then finally removed the tape carefully and left to dry.


More Fitting a Kitchen Projects
- You can find my complete list of fitting a kitchen projects here
- Repair a dripping basin waste

Fitting a Kitchen Sink & Sealing
Equipment
- Caulking/ glue gun
- credit card
- spray bottle
Ingredients
- silicone sealant
- Masking tape
- washing up liquid mixed with water
Instructions
- If you have an old sink to replace, turn off the water, place something uunderneath to catch the water, disconnect plumbing and remove your old sink. Here's how I did mine: disconnect your plumbing as I did in this video.
- Then add the adhesive backed gasket foam strip on the back of your new sink, along the lip on all 4 edges. And make sure you don't have any protruding bits on the edges, otherwise you'll see it later.
- Now hook the clips on to the sink's holes or slots along the rear lip (see photo) and evenly distribute them out.
- If you haven't already brushed over your sink's cut out with waterproof adhesive, you'll need to do it now and leave to dry.
- Place the sink in situ and masking tape the worktop around the sink to catch any silicone later.
- Now flip the sink back upside down - wear gloves to be safe - and run a bead of sanitary clear silicone between the edge of the gasket and the sink lip.
- Place the sink back in to place, then tight the clips from underneath with a non-electric screwdriver. This should prevent any plastic parts from breaking.
- Then once the sink is fixed to the worktop, spray the excess silicone with washing up solution, then remove with a credit card. You can use cleaning wipes instead, but the above method is MUCH quicker.
Video
PIN ME FOR LATER...


Comments
No Comments