
This week, I show you how I cut my kitchen worktop with a handsaw to fit in a tight spot from a novice's perspective. I also follow this by adding some edging. However, if you're looking to cut it to create a corner, then this post is not for you as I will be sharing my joining strip method very soon.
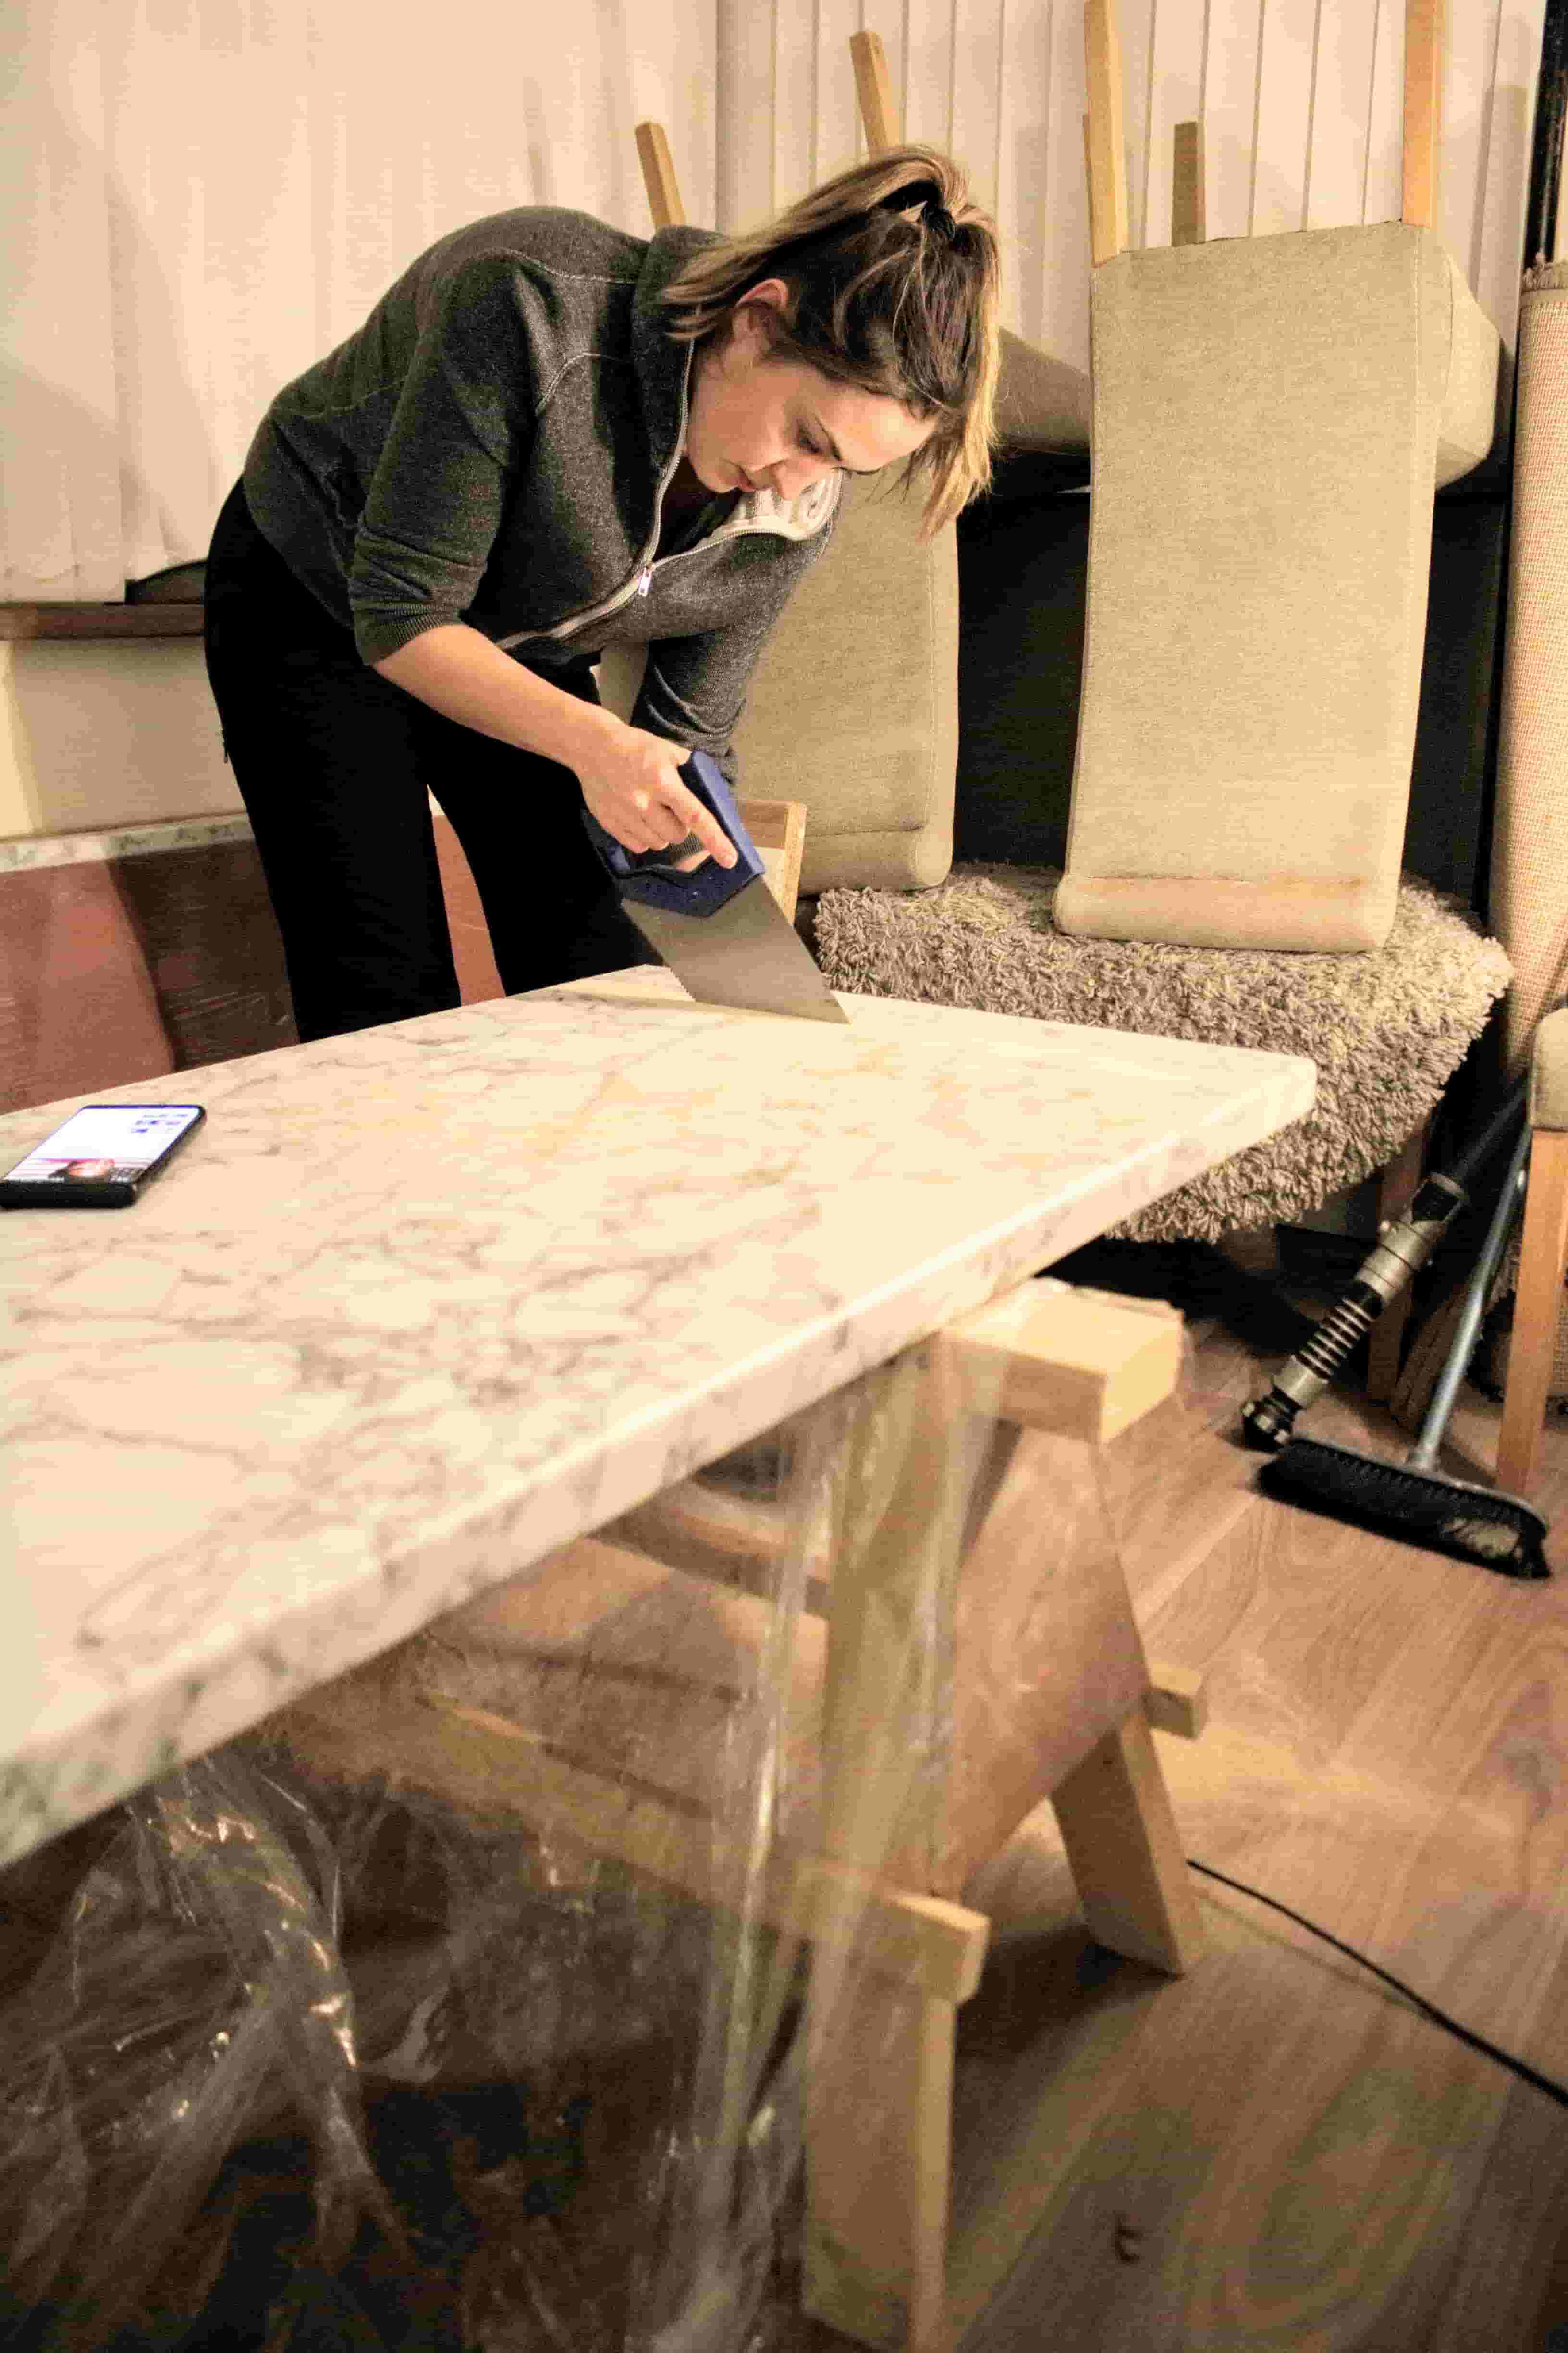
I think hand tools are completely underrated. Sure, occasionally I've needed a power tool for absolute accuracy while renovating. These have been an angle grinder to cut slabs exactly in half, my combi drill and perhaps just a wet tile cutter. They also speed up a job up too.
But with quickness can come costly mistakes, particularly when you're working on something you've never done before and you need to position your next move. And of course, they don't come cheap.

Note this is a 600mm deep worktop, temporarily pushed back.
SHOULD YOU USE A CIRCULAR SAW?
If I'm ever in doubt, I always ask my Dad. He's a great source of information as he's a professional, he's someone I can trust and he has a good idea what I can and can't do. In turn, he usually recommends methods that don't set me up for failure.
Also he and pro followers on Facebook recommended a hand saw to prevent chipping; just as they did when I fitted three doors. I don't mind a bit of elbow grease. In fact, I find it very therapeutic.
Yet I know when I release the video version, it will prompt people suggesting it's about time I buy one. I'm sure I'd look quite cool, but I prefer to do things in my comfort zone and feel in control. But there's a few tips you should follow, and I felt reassured to see the manufacturer suggest this method, or a circular saw.

HOW TO CUT WITH A HAND SAW
To cut your formica style worktop with a hand saw, the good side should be facing up. (Although my white balance above is poor, the worktop I picked is this Wilsonart Torano from Selco and I found it the cheapest place to buy). You see, hand saws have some give, so don't always give perfectly straight cuts. In this case, I'm talking from top to bottom during its thickness. Also, any tear out should end up on the bottom side that no one will see.
If you're using a circular saw, it's recommended to cut while the worktop on the opposite side: upside down and along a clamped straight edge for a perfect cut. But here's some tips I learnt to cut it with my panel handsaw:
- Use a handsaw with 10 to 12 teeth per 25mm. I used this Bahco.
- Have the good side facing up
- Use masking tape to cover the area you saw
- Mark your measurements on the masking tape
- Start cutting on the front profiled edge (the curved detail), not the back with the raw edge
- Saw on a downward angle as shown in my main pic at the top
- Remove the masking tape an use a belt sander or sandpaper and block to remove any rough edges and straighten
HOW LONG DOES IT TAKE TO CUT A WORKTOP WITH A HANDSAW?
About 5 minutes. I kid you not.

SEALING THE EDGES BEFORE SITTING AGAINST THE WALL
Something I've seen pop up constantly along my research travels is to seal the cut exposed edge with silicone. This prevents any leaks from expanding the chipboard.
Here (above), you can see me applying Geocel silicone adhesive while wearing disposable gloves along the raw edge. This is the side that will be sat against the wall. This is also a requirement before adding a joining strip while I will be doing to create my one kitchen corner.
This particular sealant is shower safe in 30 minutes, however, it still felt tacky, but I thought this claim would allow me to apply and put in to place after this time scale. I've since used it on my end panel too.

Temporarily held in place with my knee
HOW DO I CUT AND STICK ON WORKTOP EDGING TRIM?
I believe most worktops come with matching edging strips, just like mine did above. After watching a few videos on how to apply, I held the stip along the edge (above) and drew around the curved edge.
One mistake I made was not cutting as much excess as I could have done (read below for how I did it). This would have made things much quicker in the long run. Plus it was comforting was that this side wasn't going to visible when entering the utility as it faces outside through a window.
So there's another tip. Always trial on your least important side first to hone in your skill when you need to go for gold!

WHAT IS CONTACT ADHESIVE?
As recommended by many, I bought some Evo-Stik instant contact adhesive. Having never done this before, I was unsure how firm and sturdy this glue would be, but had nothing to worry about. Plus, I always ensure I buy DIY things with great reviews to be safe.
It's very gooey stuff. Stinky too, so make sure you open the windows. And it also dries like a gummy texture that was very easy to remove by rubbing when I accidentally got a bit on the worktop.
However, I don't reckon much to the applying tool. I would have been far better as a rectangular sharp edged and narrow flexible piece for a quicker job.

HOW TO USE CONTACT ADHESIVE
Before using contact adhesive, first ensure your worktop edge is smooth and dust free as you want it to adhere well and have no lumps showing. Above, you saw me use a sanding block for a smooth edge because I'm only cutting sides that aren't going to be joined up. Note: I will be using a joining strip, but using the manufactured cut. If you need it absolutely straight to join to another worktop, my Dad uses a belt sander.
Now ensure your worktop is protected with masking tape to avoid glue spills. I also used spare cardboard on top to protect my worktop and give me some extra working space. Then apply a thin coat of the contact adhesive to both the strip and the cut edge of the worktop using the applicator. Note: some reviewers on Screwfix say you have to work quick with it.
Then according to the instructions, leave this particular adhesive for about 5 to 10 minutes until it's touch dry (I waited 5) and then stick on the edging strip and apply even pressure. For this, I started off using my hands to smooth over, following by using an old rag to rub side to side for a better glide.

REMOVING THE EXCESS EDGE OFF THE TRIM
A few people, including my Dad, said they never use a stanley knife. Now I know why. It's rather tough to cut and can imagine it's so easy to slip and cut yourself or the wrong part of the strip (because the effort needed). For this job, I used a flat file at a 45 degree angle to take the edge off. But if you've left too much excess on, then you need to be careful as to not chip too much off too soon.
I diligently took my time for the top, but rushed the bottom assuming no one would see this part. DON'T DO THIS. I am an absolute nit picker, so when it comes to adding trim to my most visible edge (the area I'll see as soon as I walk in the room), I will be trimming as much off as possible right from the start before gluing, then taking my time on both top and bottom of the edge.
Also, make sure you don't file at a 90 degree angle as you could take too much off one side than the other. But if you fail and aren't happy with your results, in the worst case scenario, you could seal off the edge with silicone, then screw on a brushed silver end plate, which I may do anyway as I think they look tidy. And it is just a utility after all.

Then once I filed my trim down to the edge of the worktop, I just peeled off the masking tape and removed any minuscule bits of glue that found their way on to the corners and edges.
Thankfully it easily rubbed off with my hand, but you shouldn't use this as an excuse to not protect your surfaces.
You'll notice in the below picture that I also put protection on my floor using a plastic sheet. These are always so handy, so never throw them away until they completely dog eared.

So there you go. One down and one more to go.
Please note that I am not a professional. I'm just an ordinary girl who constantly calls my pro Dad for tips and advice while we're miles apart. What you are reading is my first hand experience and I enjoy learning and sharing in case it helps answer any novices' questions too.
If you are a pro and have any tips, then feel free to comment below and hopefully it'll help my future self and others.
You Might Also Like
- Applying melamine edging tape to a kitchen cupboard doors
- Complete list of fitting a kitchen projects.

HOW TO CUT A WORKTOP WITH A HAND SAW & ADD EDGING TAPE
Equipment
- hand saw
- Scissors
- Pencil
- Tape measure
- contact adhesive
- file/ rasp
Ingredients
- kitchen worktop
- edging tape *usually comes with the worktop
- masking tape
- pencil pencil
Instructions
- If cutting with a handsaw, you'll need to cut from the top of the worktop's surface.
- Measure where you want to cut it, then masking tape roughly where it falls.
- Measure and mark again with a pencil on top to the masking tape.
- Then, using a fine tooth hand saw, start from cutting at the front section (where the profile usually is).
- Saw while aiming the hand saw downwards to get a straight cut.
- When you get towards the end, clamp it in place from the already cut side to prevent any damage. Then saw until you've finished, while supporting the last part with your hand.
- Sand the end with a block and sand paper. You may want to use a belt sander, but I did it the long way round while having more control.
Adding Edging Tape
- Ensure your worktop edge is smooth and dust free, then protect your work surface.
- Hold the edging strip against the end and draw around it. Keeping it in place with bits of masking tape is useful.
- Then, using sharp scissors, cut the excess off. This will save you a lot of filing time.
- Now apply a thin coat of the contact adhesive to both the strip and the cut edge of the worktop using the applicator.
- Leave for about 5 to 10 minutes until it's touch dry (I waited 5), then stick on the edging strip along the top and apply even pressure. (I smoothed over with my hands then followed by applying pressure by rubbing with a rag).
- Then, using a file/rasp, file at 45 degree angle, very carefully and slowly. Take extra care around the curved edges (front profile).
Video
NOT READY TO CUT IT YET? THEN WHY NOT PIN ME FOR LATER?


Martin Masialeti
I guess this will be helpful, alot of information on the guide.
toria
Hi, I am so glad to have found your site being a quite handy novice DIY woman myself. Very clear advice so thanks!
Here are a couple of great tips I've come across that people might find helpful.-
1. It's supposed to be really difficult to get woodchip/vinyl wallpaper off. It's not if you use an orbital wall scourer. There are palm sized sort of domes with 3 rotating gizmos of sharp teeth inside set to just perforate the paper without messing up the wall. Once perforated put water on the paper which can now get through to dissolve the wallpaper paste, so the paper just peels off easily after 10 or more minutes of soaking. (Tool station sell a Stanley 3 headed monster suitable for men, but it's more fun to use a single one eg from Amazon).
2. Sanding mesh is brilliant, literally a mesh coated with abrasive. The holes allow the sawdust etc through, so it doesn't clog up. Lasts much better than normal sandpaper. Tool station are the only place I know who do sanding mesh in rolls.
Great site with clear good advice!