
Here's how to build a chicken coop - a step by-step with pictures, video and free chicken coop plans. This chicken coop design was featured on ITV's Love Your Weekend with Alan Titchmarsh. You'll also find me on the show as resident carpenter, Vikkie Lee.
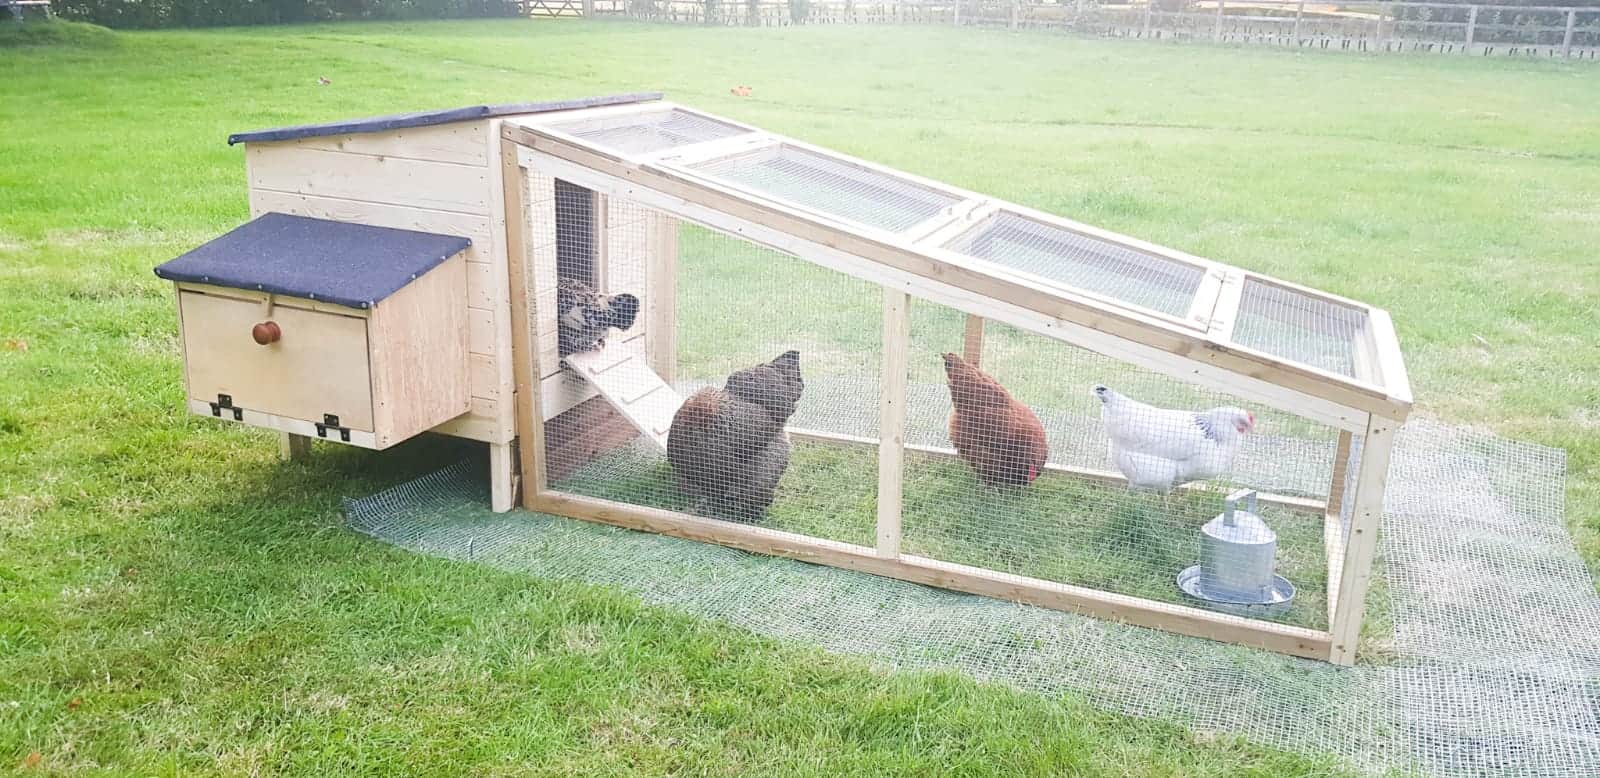
One of my proudest TV presenter moments to date so far, was making this chicken house for Alan Titchmarsh. As far as luxury chicken coops go, there are endless possibilities. And you can build one, too!
And the beauty is, if you build your own chicken coops, you can make it as big as you want to. Or chicken huts - call it what you will. And even add chicken perches inside, depending on their personality.
Also, chicken expert, Suzie Baldwin of Hollywater Hens, said, a small chicken coop makes the perfect Bantam chicken coop, which is a smaller breed. And having a chicken coop for 2 chickens is ideal for a family as people don't tend to eat eggs every single day. This size also makes it a portable chicken coop to move around to any spot in your garden, depending on the weather.

Or you could have it in a larger walk in chicken run enclosure to ensure they have more space while still in a fox proof chicken coop. But what I'll be showing in this post, are much like mini chicken sheds or chicken a chicken hutch.
Once you've made one, anything like a rabbit hutch will also be really easy for you. I'll also show you how to make homemade chicken nesting boxes to attach on the side. But also, a drop down chicken coop door opener and a removable drawer for easy cleaning of your chicken coop bedding.
But sadly, you'll have to wait a couple of weeks to see how I made the chicken pen! I much prefer this natural home to a plastic chicken coop. And you'll be proud you made it.

What I Used For a My DIY Chicken Coop
Hopefully, my list of all the tools and materials I used here will encourage you to stop looking for chicken coops for sale.
Note, if you want to make a large chicken coop, simply increase the amount of wood, screws and felt.
- Structural timber
- Tongue and groove cladding - (or why not a chicken coop made from pallets?)
- Mitre saw
- 12mm plywood
- Lots of offcuts for stop lats and chicken coop steps
- Carpenter's square
- Combination square
- Speed square
- Nail gun or ring shank nails
- Combi drill
- Drill bit
- Wood screws
- Hand saw
- Tape measure
- Felt for chicken coup roof
- Stanley knife
- Router
- Flush trim router
- Drawer knob or off cuts with screws
- Hinges
- Drawer handle
- Panel pins
- Clout nails
- Hammer
- Ear defenders
- Safety goggles
- Clamps
How Do I Build a Chicken Coop?
So I'm going to walk you through my step by step chicken coop tutorial. Free DIY plans can be found below and very loose ones at that as unfortunately, I didn't have time to take all measurements.
But your chicken coop size will differ depending on the size of your chickens, how many and other chicken keeping needs, such as where.
Here's loosely, my free chicken coop blueprints:

Making a Frame For Your Chicken coop
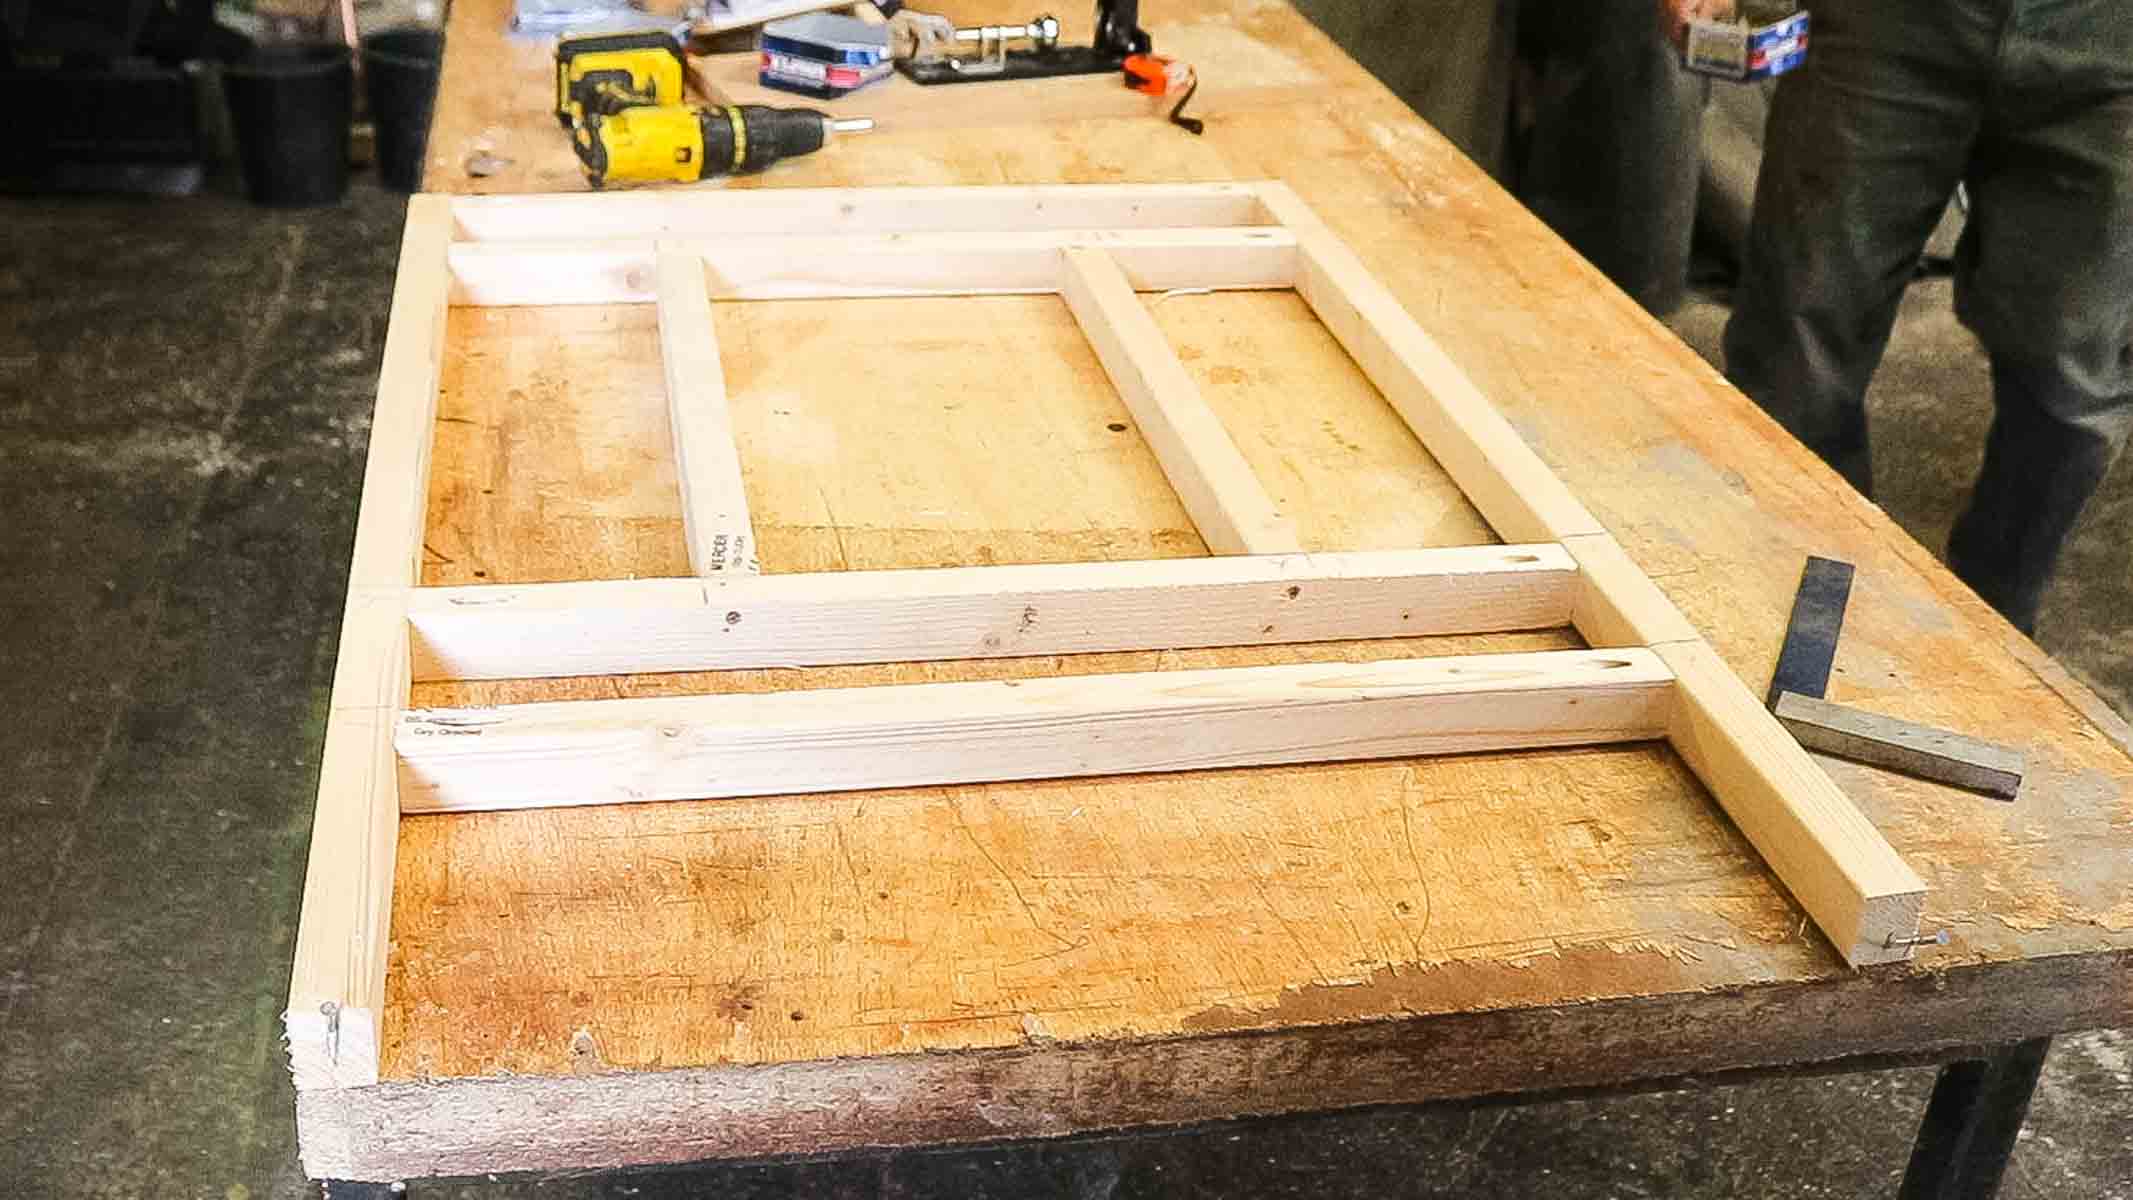
I first started with the front of my coop's chicken door opening. I also added another stud along the bottom, horizontally with about a 3" depth for the drawer to go.
The drawer will also be the chicken coop floor with a plywood base. This can be pulled out as and when to remove any stinky chicken poo as and when.
Also, the drawer was off the floor by about 4 inches, making it a raised chicken coop. This is vital to keep your chickens nice and dry and prevent moisture from rotting your homemade chicken house. Or, you could place it on some breeze blocks.
Quick Tips For Making Chicken Coops
You can view my how to build a chicken coop for laying hens video here, showing you everything listed below. And more in depth details I may not have covered here.
- Remember, we have a lot of rain, so make your chicken coops UK friendly by giving your chicken a slope backwards away from the door
- While making your frame, partially nail it to a workbench (see the "toenail" nails on the feet on an angle), then and check with a tape measure from corner, diagonally, to see if it's the same for squareness. If one measures longer, tap that side with a hammer and check again.
- Once square, nail the rest down along the sides, but not from the top as we'll be stacking more chicken coop framework above shortly
- Make the door opening slightly lower than the top frame, allowing space for another stud. It will look better and you really need space for a door latch to go. Your chicken home also needs to have a large enough door for them to walk through easily

For the rear chicken coop frame, because I already knew the front was square, I copied it exactly, but made it shorter.
I used the door opening's framework my new height position for reference. So above, I'm basically cutting and toe nailing more studwork on top in the same position.
And as it will be fully cladded, I just predrilled and screwed one single batten in the middle.
Note: for larger chicken houses, I recommend studding every 40cm so the chicken coop cladding is strong.
Building a Sloping Chicken Coop
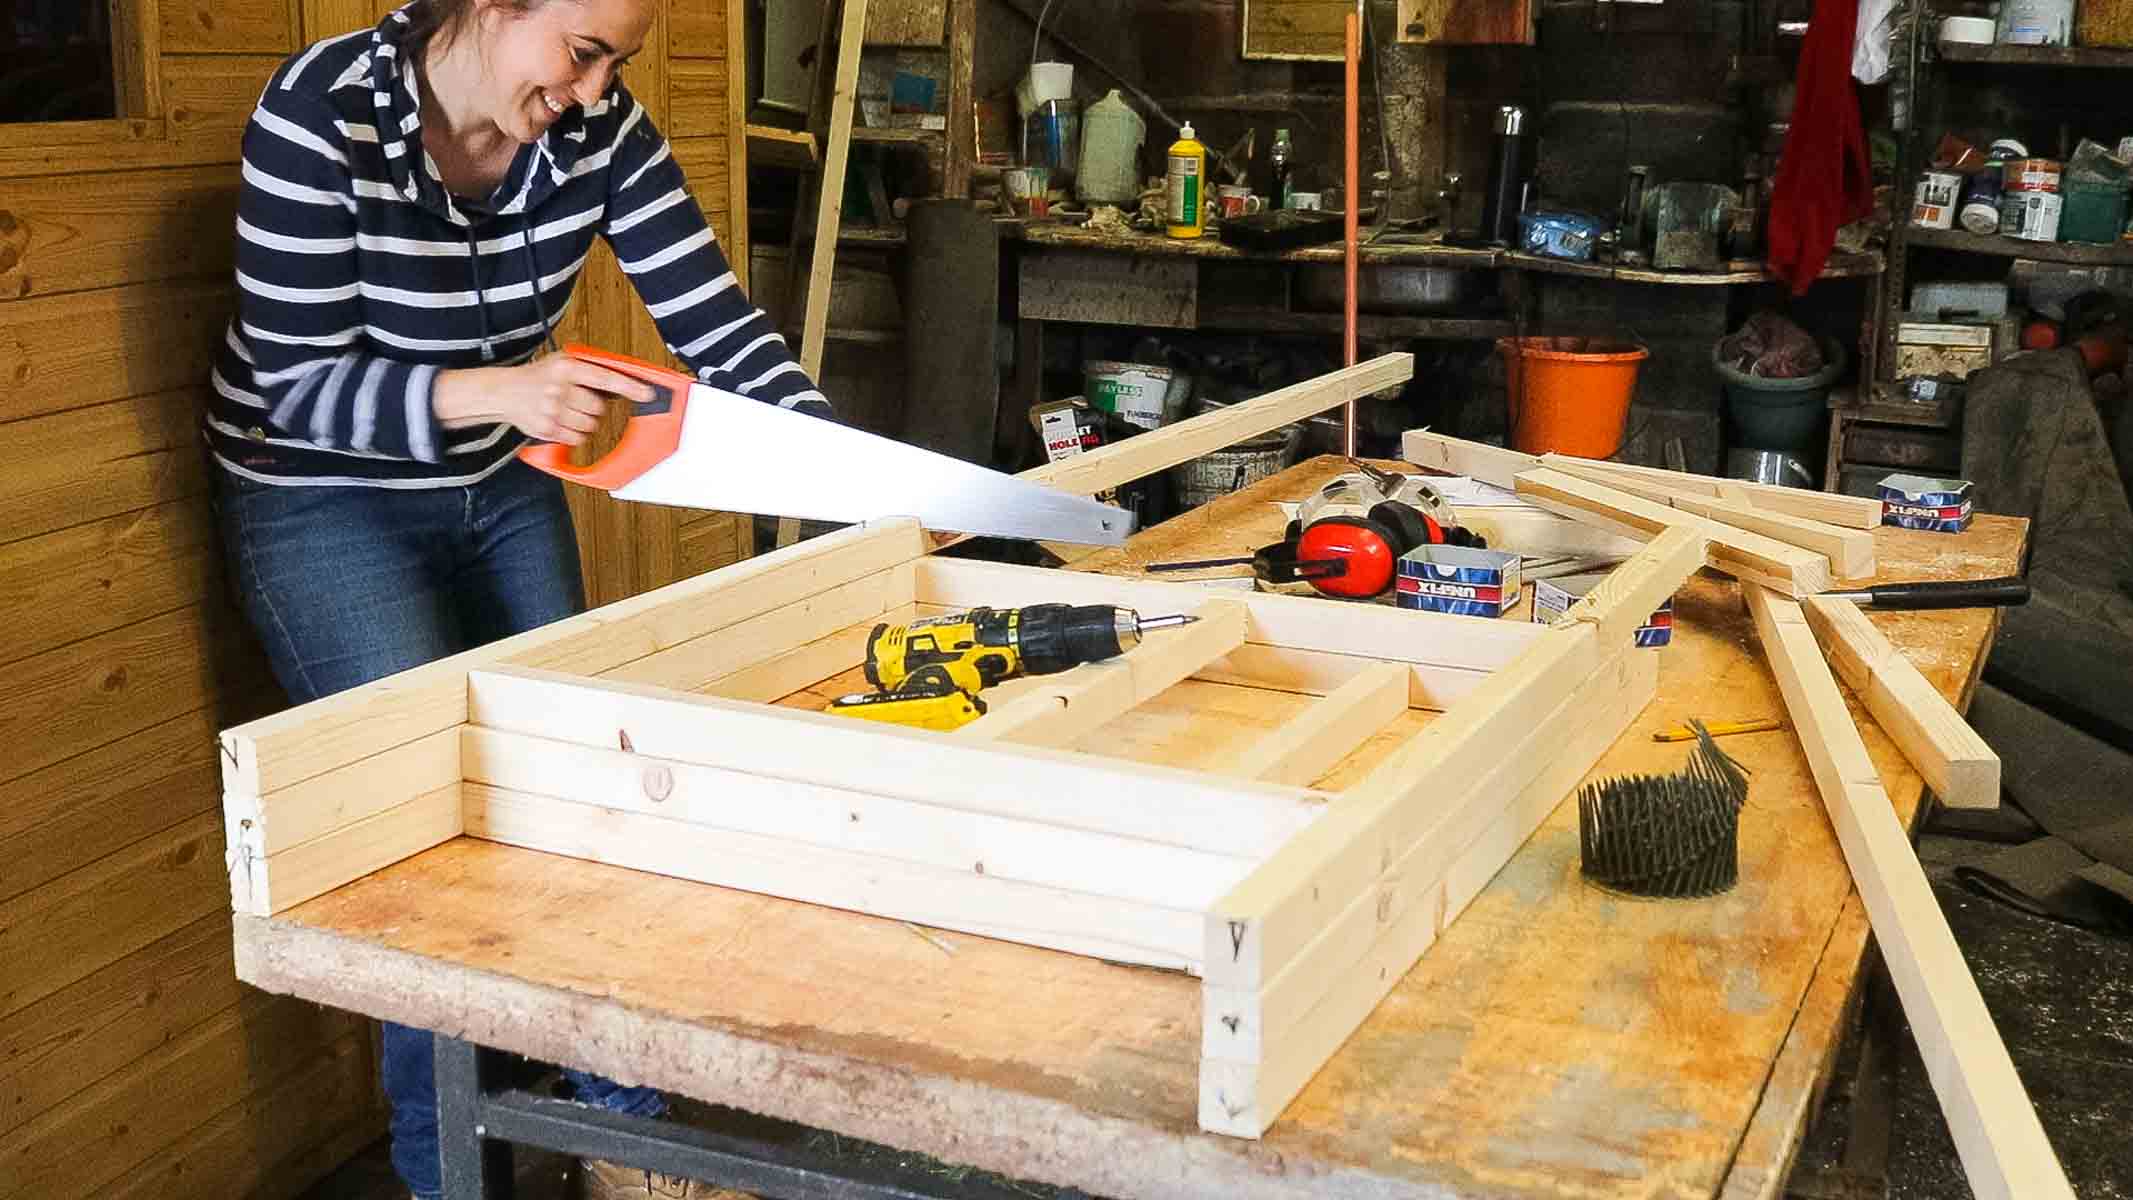
As I stacked more battens on top to now work on my side panel, it was important I matched the chicken house's taller and shorter front and back.
So above, I nailed on two longer lengths and transferred the front's height on one length and the shorter on the other.
Note: these marks are from the inside of the framework, as I'll show why below. However, if you wanted a pitched roof style, front and back, then I suggest you read my DIY Summerhouse build to see how we built the framework.

Screwing Without Drilling Technique
I then added a slightly longer straight piece all the way on top, then screwed from above for the chicken coop roof.
And then cut the overhang on either side with a handsaw to match the coop's sides. I also added a support in the middle, vertically, too for cladding to be supported
Because I'm not screwing too close to the edge, it means I won't split the wood, providing I use slim screws. If you use really thick ones, you'll need to pre-drill regardless.

Plan Your Nest Box
My favourite part of this DIY project was how nesting boxes are raised off the floor. They're like little wings on a shed. I'd love to start raising chickens, so I enjoyed making this throughout.
I screwed in two horizontal studs on the side panel, which will later supports to attach to a nesting box for chickens. If you really wanted to, you could have two DIY chicken nesting boxes - one on either side. Maybe even one at the back, too, if you insisted.
But to give the boxes even more support, I screwed two CLS structural pieces either side (above). This would take any pressure off the screws later.

Cladding Your Chicken Coop Build
As I'm building a wooden chicken coop, I'm using a softwood tongue and groove cladding. But mine will require treating with a safe paint for chicken coops.
I cut down each piece of tongue and groove to the same width as the chicken shelter's framework, then started nailing at the bottom with a nail gun. Then continued with shorter pieces around any openings and worked my way to the top.
Note, regarding wooden cladding: don't worry about if it overlaps. I'll show you how to shape it around your frame later with a router or jigsaw.
How to Build Chicken Coop With Cheap Cladding Alternativess
If you're looking to save money and make a cheap chicken coop, it could be a:
- Chicken coop made out of pallets. However, it's important you know where they came from as some are toxic.
But, how to build chicken coop with pallets?
Ensure all nails are removed, and nail your pallet the same way to the framework. You may need some more studding if working with shorter pieces - Cladded with a recycled sheet material, such as external plywood for a basic chicken coop
- Clad with PVC and nails for a plastic chicken house from such places as Quay Plastics or Eurocell
- Other sheet plastic with vent holes drilled in

As I have a sloping roof, I needed to cut the top piece to the same size.
So, using a straight edge, I marked on the front of the top piece as to where the frame was from behind.
Then, using a straight edge, held it in line with my pencil marks and drew a straight line. This is where it needed cutting.
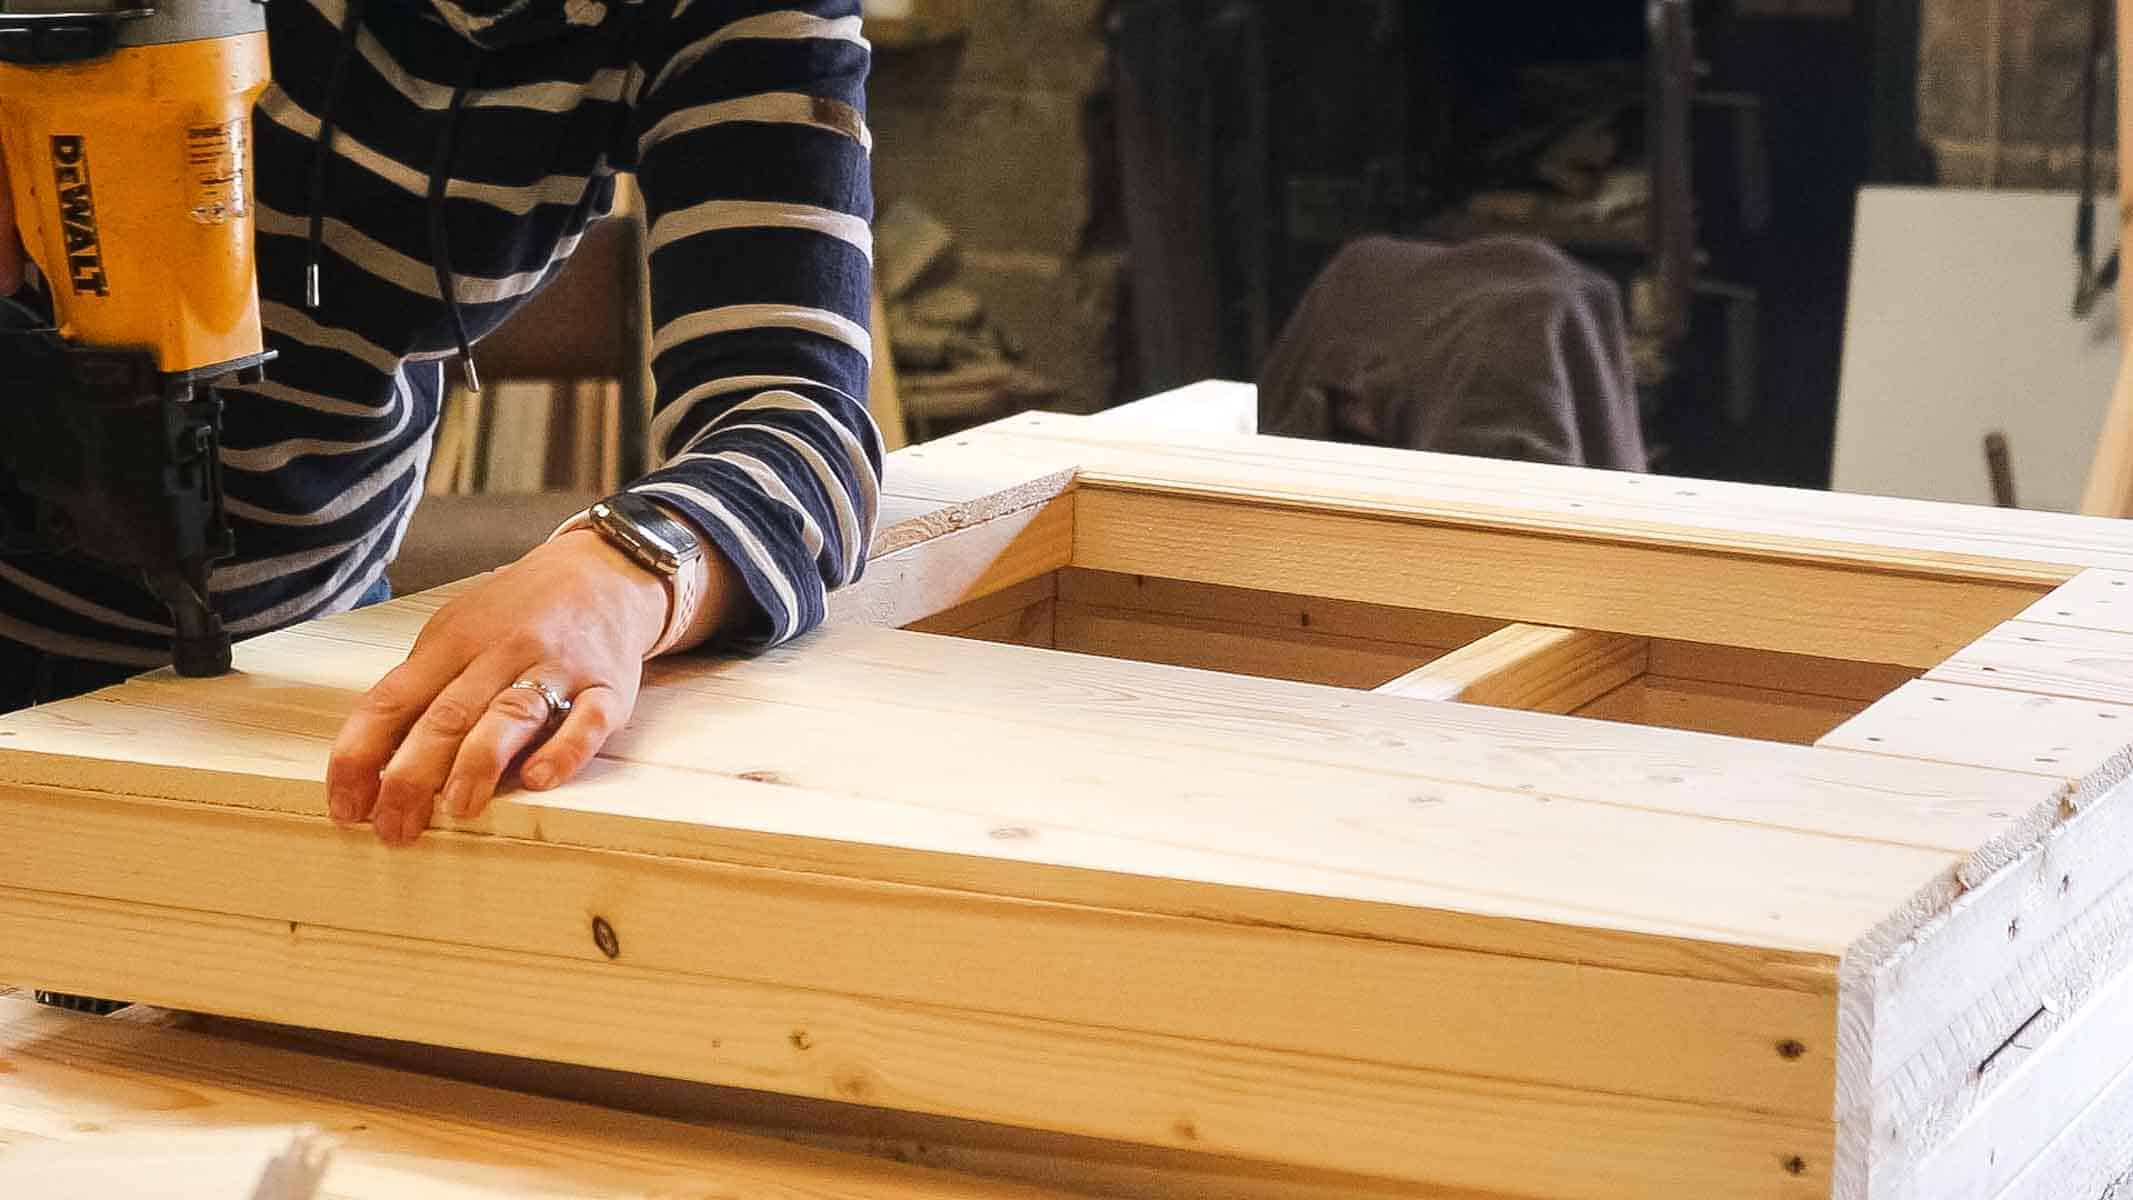
Once cut, I slotted it in like the rest and nailed it to the frame. Note, my Dad cut this top piece as I built it in his woodyard and his commercial tools scare me, unlike my home DIY power tools.
However, here's some of the methods I've used that work great after you've nailed it to the framework:
- Cut the excess with a jigsaw - don't be forceful if it resists as you don't want to cut into the framework
- Trim off any excess with a hand saw
- Use a router with a flush-trim router bit (below) a method that is more technical, but will give you the best results as it has a bearing to run along an edge you desire. It trims the excess cladding to match the framework
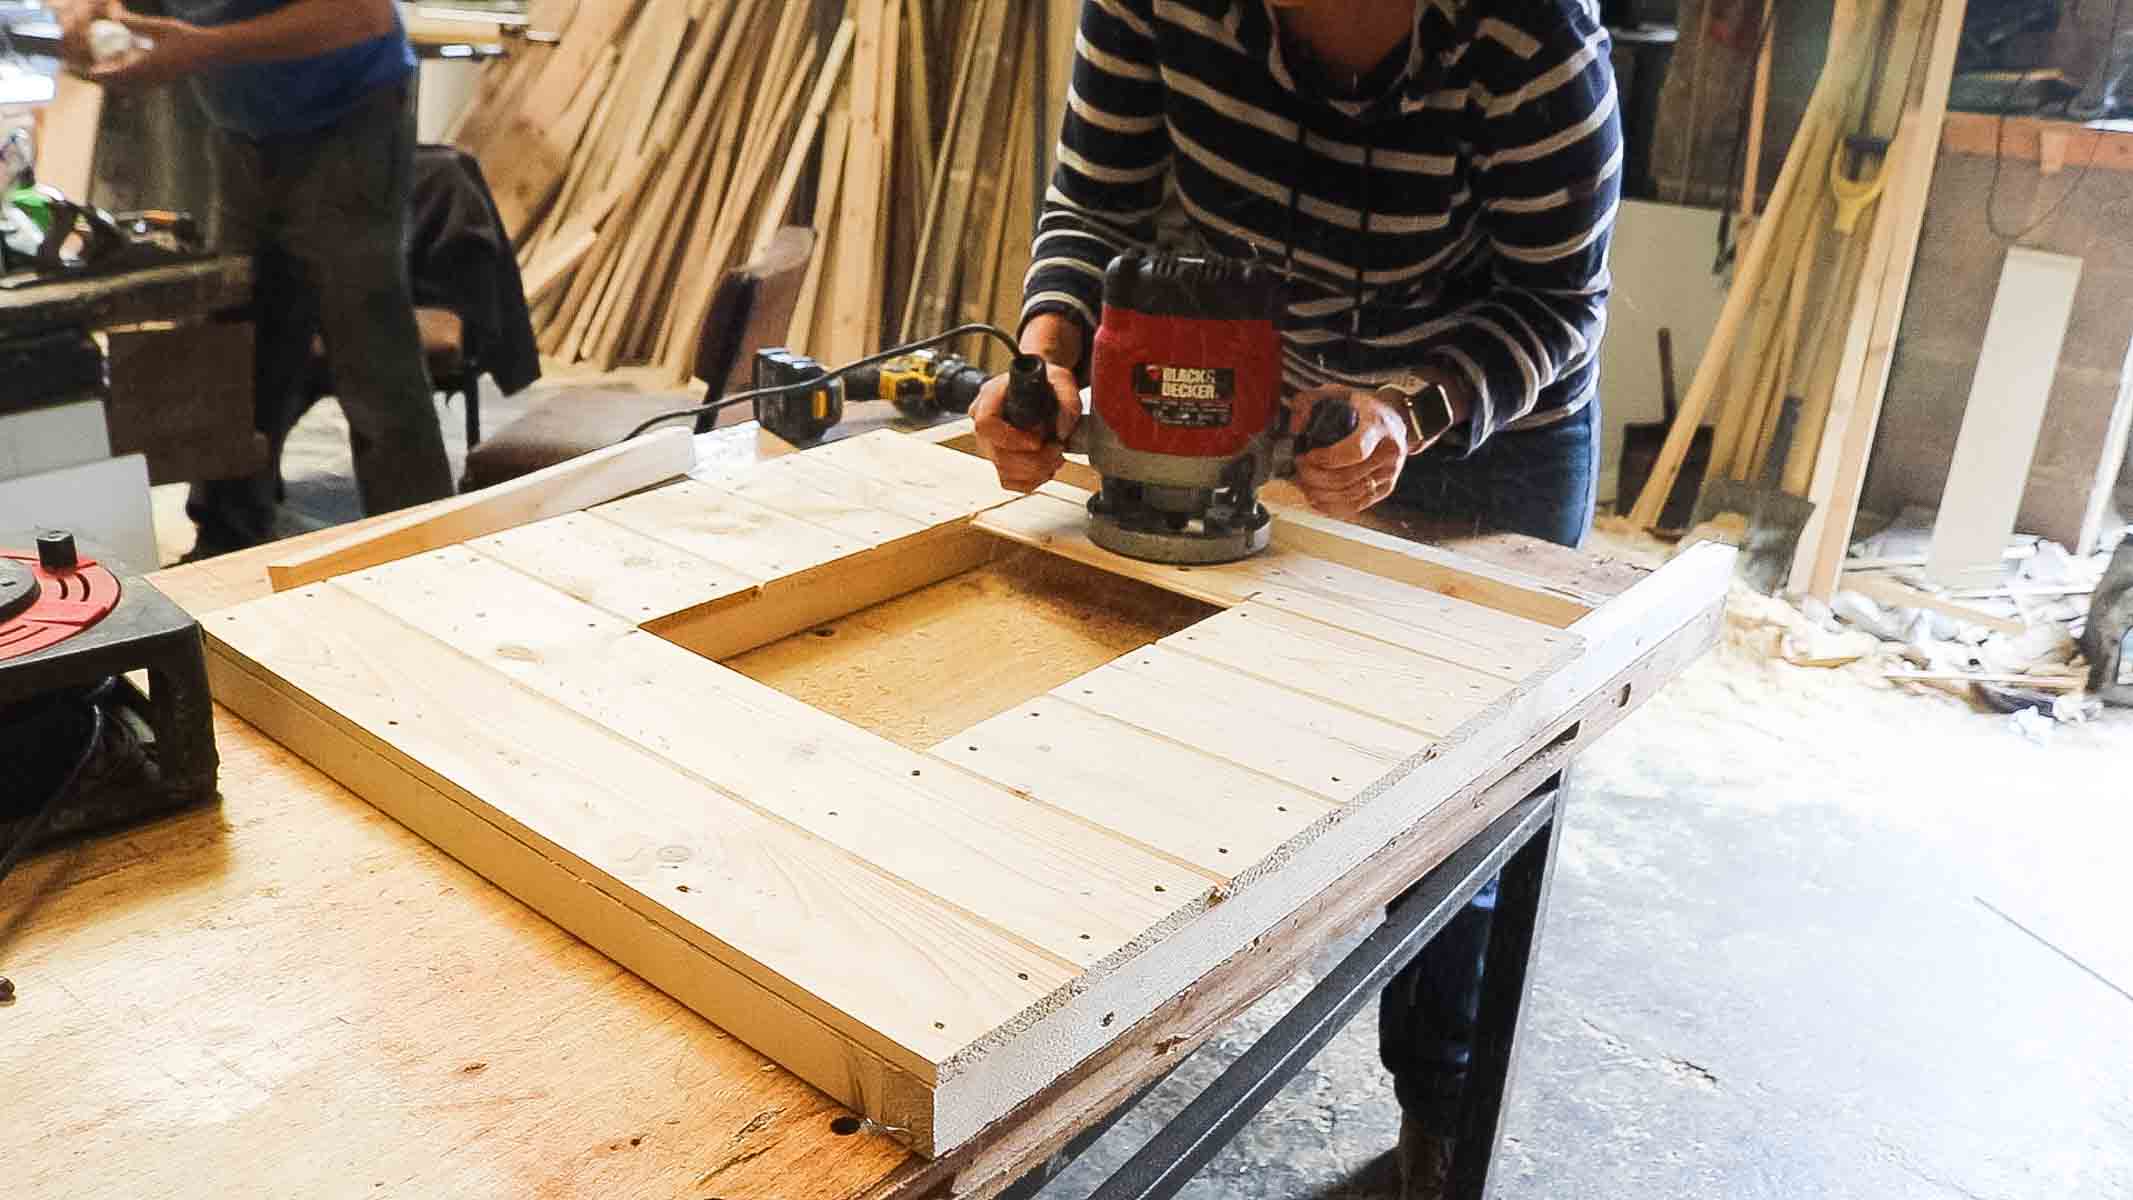
How to Build a Chicken Coop Door
Before we move on to making chicken doors, one key thing we'll need to add are stop lats.
Below, I nailed down some trim on the longest sides of the door frame. This is simply to stop the drop down hinged chicken coop door falling in on the chickens when closed.
The same will go for the chicken nest box too when you build it.
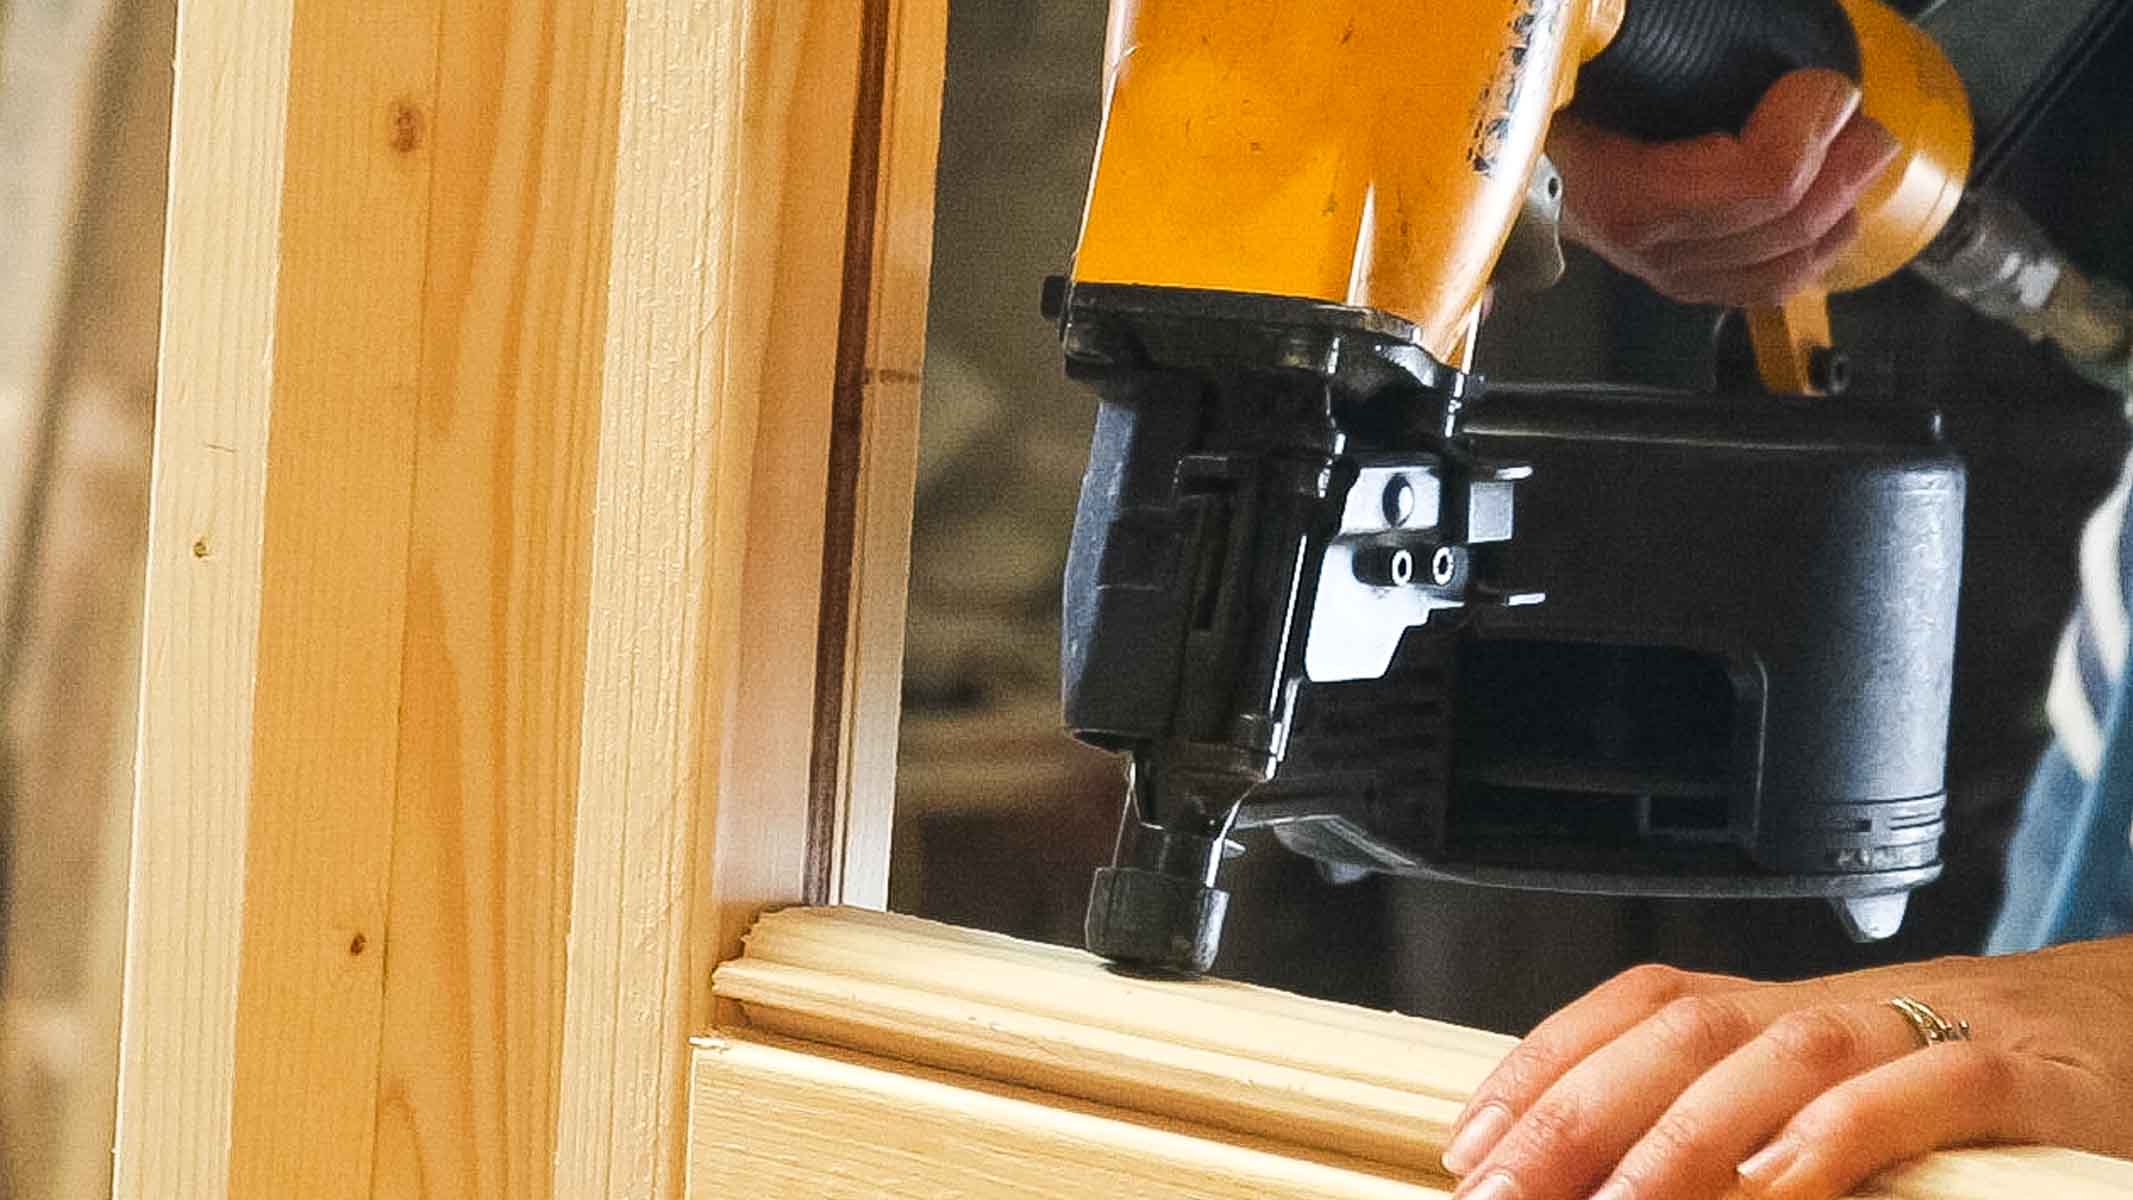
Making a Chicken Coop Door
Next, for the hen coop door, this was made from 12mm thick plywood and cut with a 5mm clearance all the way around.
I then:
- Screwed on two hinges along the bottom
- Nailed on some plywood offcut strips to the back of it for chicken steps, evenly spaced
- Drilled and screwed on a chicken coop catch at the top, to close it at night
- And hammered, then screwed a drawer nob on the chicken coop door (this type had a screw on the back, fixed in the knob).
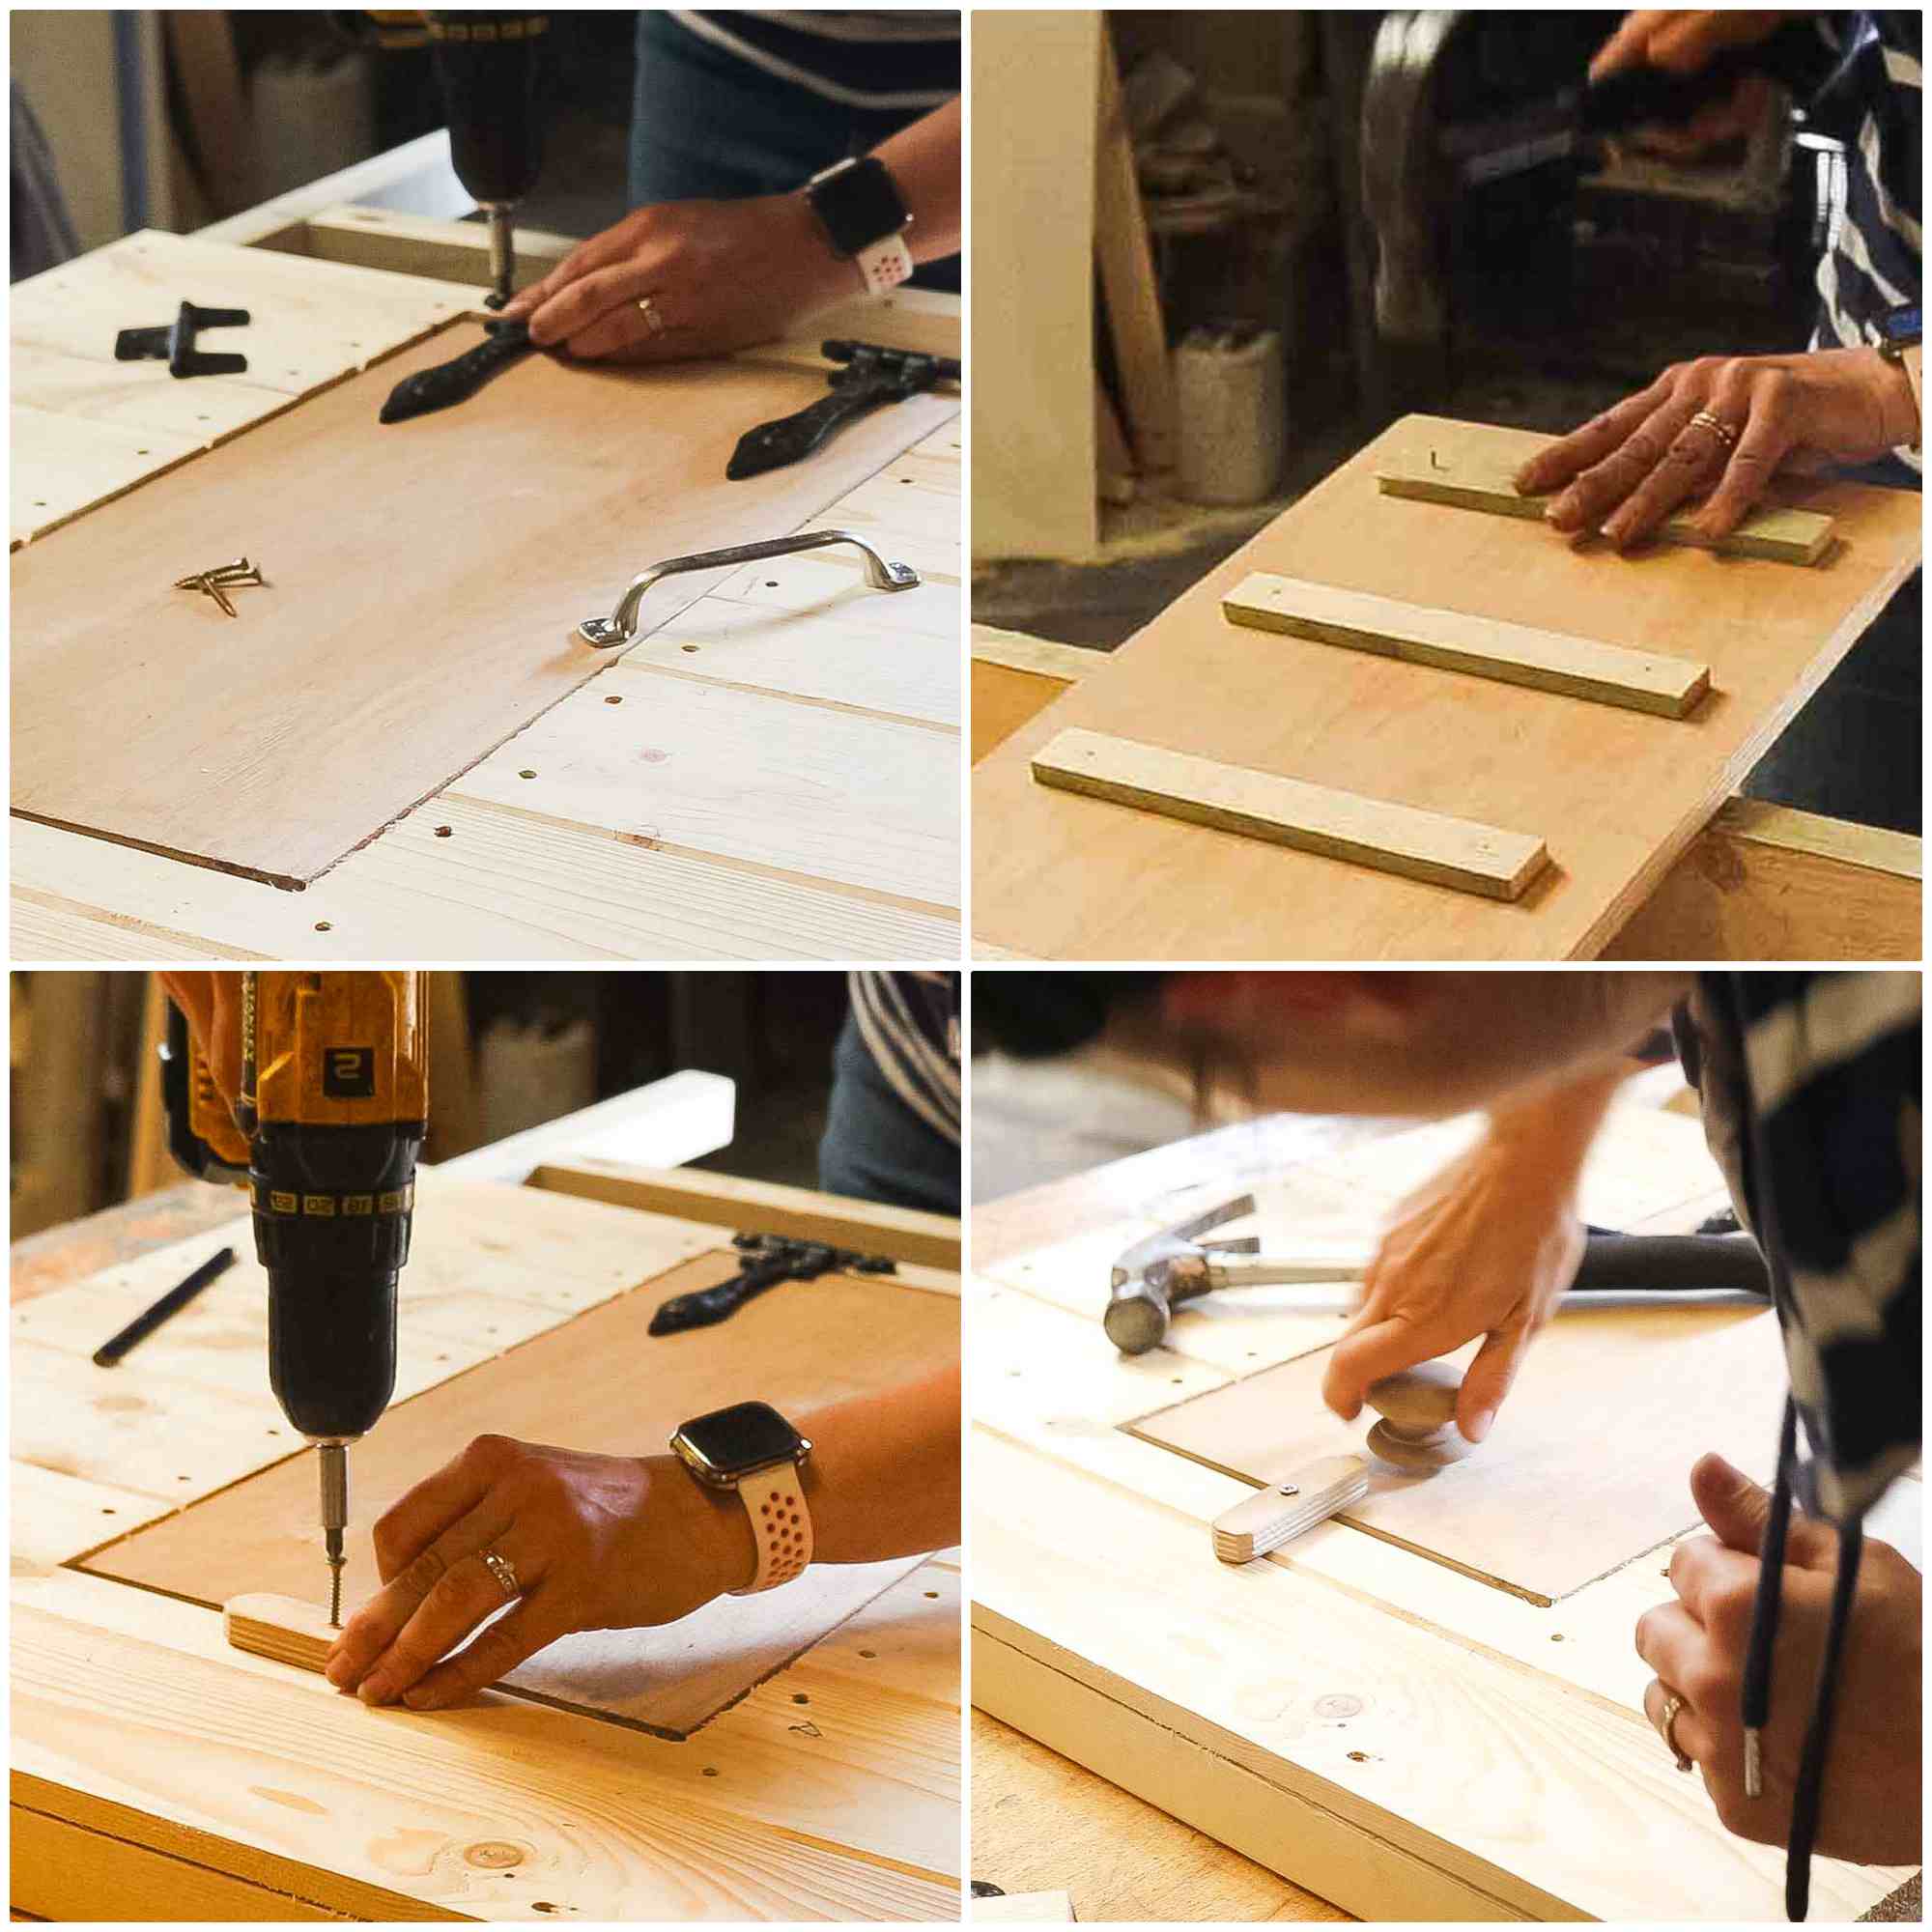
Putting the Chicken Coop Together
Next, I needed to temporarily screw all the chicken coop panels together so I could work on the bedding drawer.
To do this, I screwed everything together from inside the framework. About 3 screws per frame is enough. But don't screw them from the outside, as you'll need to nail on trim.
And if you ever need to make it a flat pack chicken coop for someone, you're blocking the screws for the next bit.

Adding Trim To Your Chicken Coop
If you're looking to make quality chicken coops, then nailing down trim to cover the framework really finishes it off.
Not only is it aesthetically pleasing, but it will also cover the rough cut edges of the tongue and groove cladding.
It's these rough edges, where the grain is exposed that loves to soak up water in the rain. So below, I'm covering them with timber to the same length as the framework.
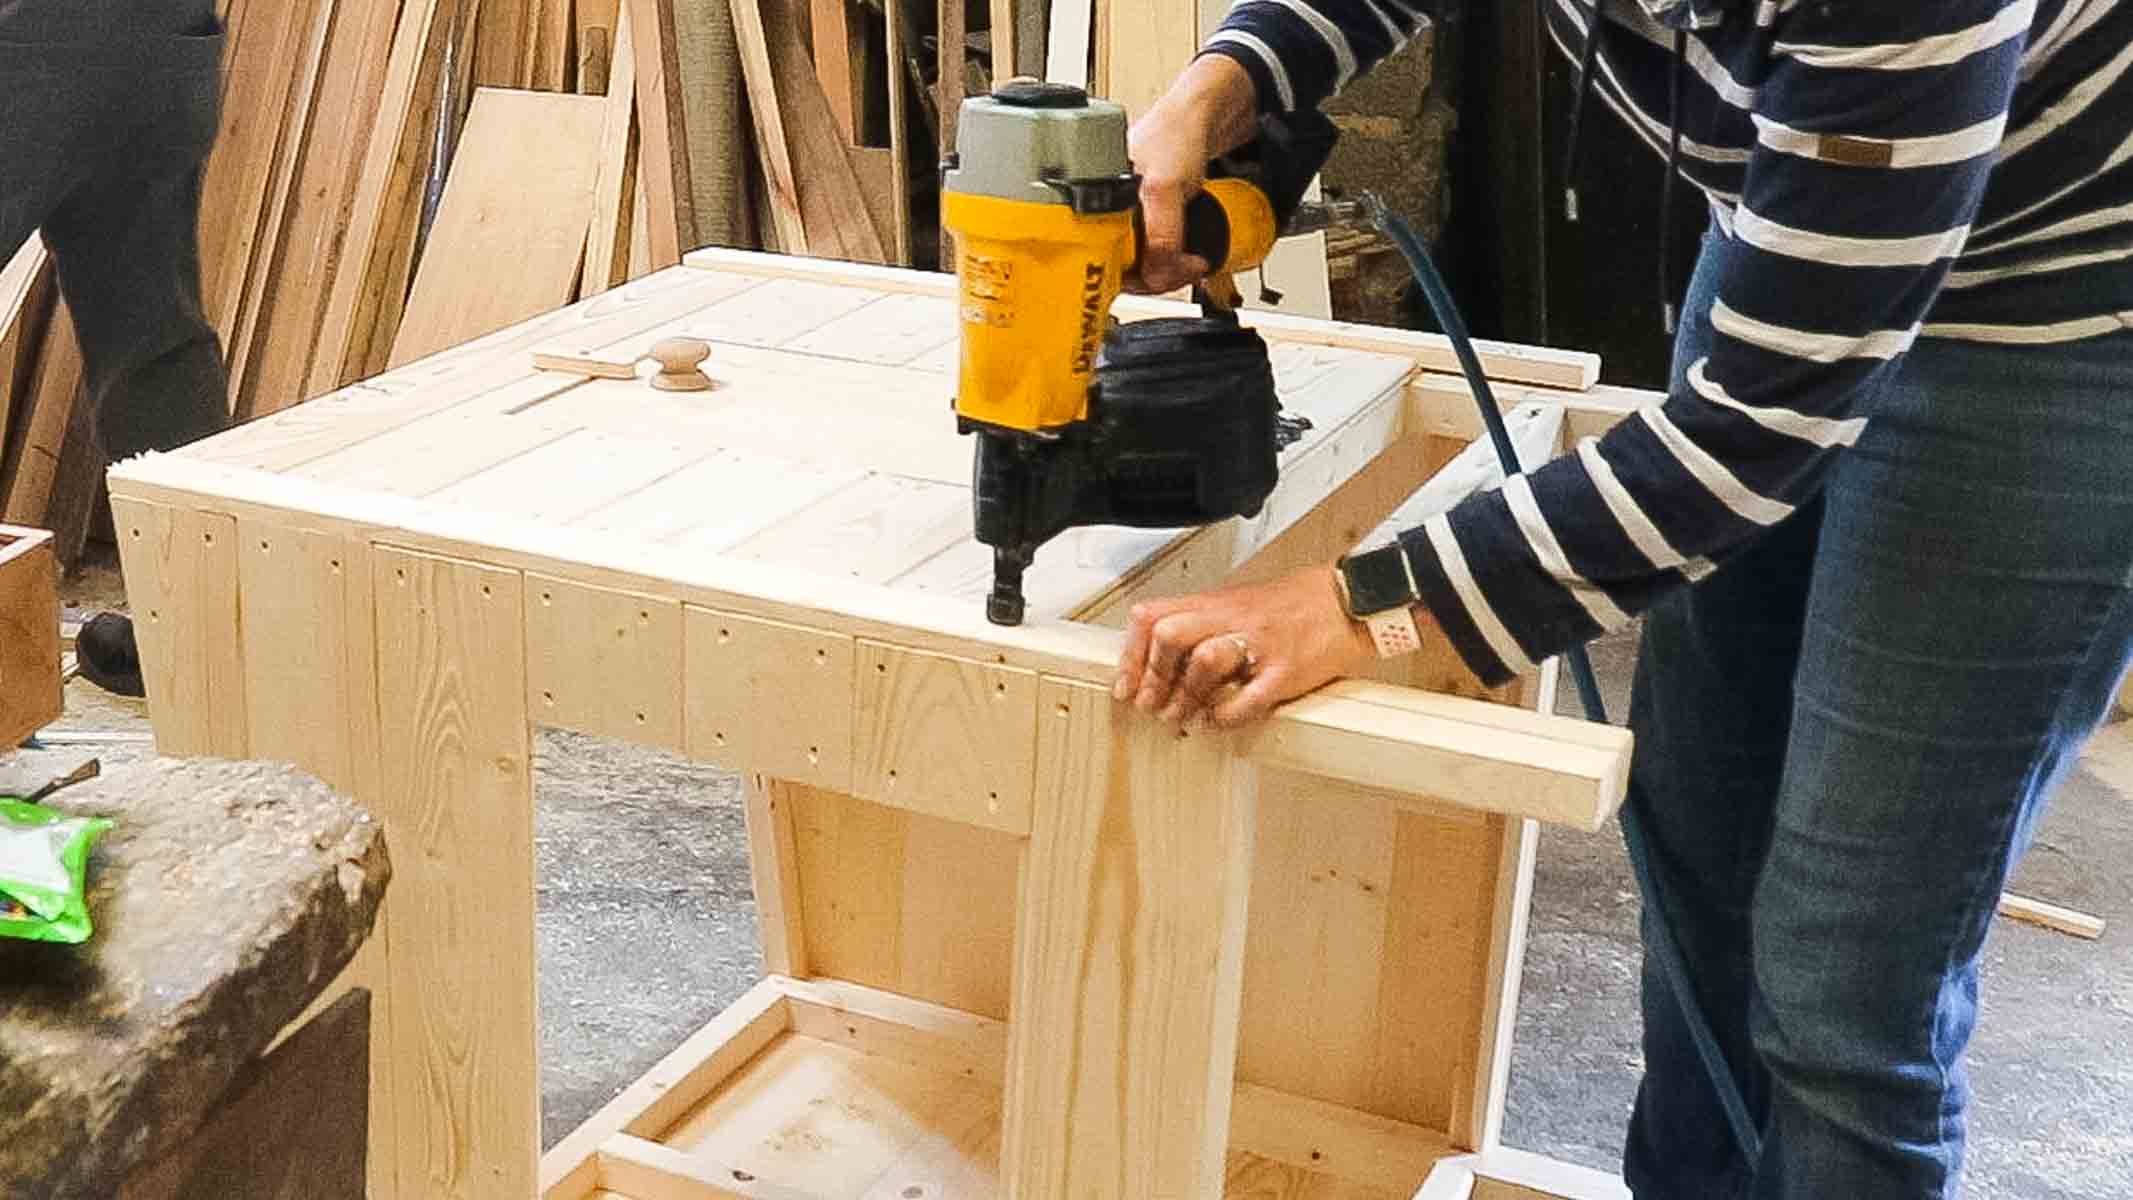
How To Build Chicken Coop Nesting Boxes
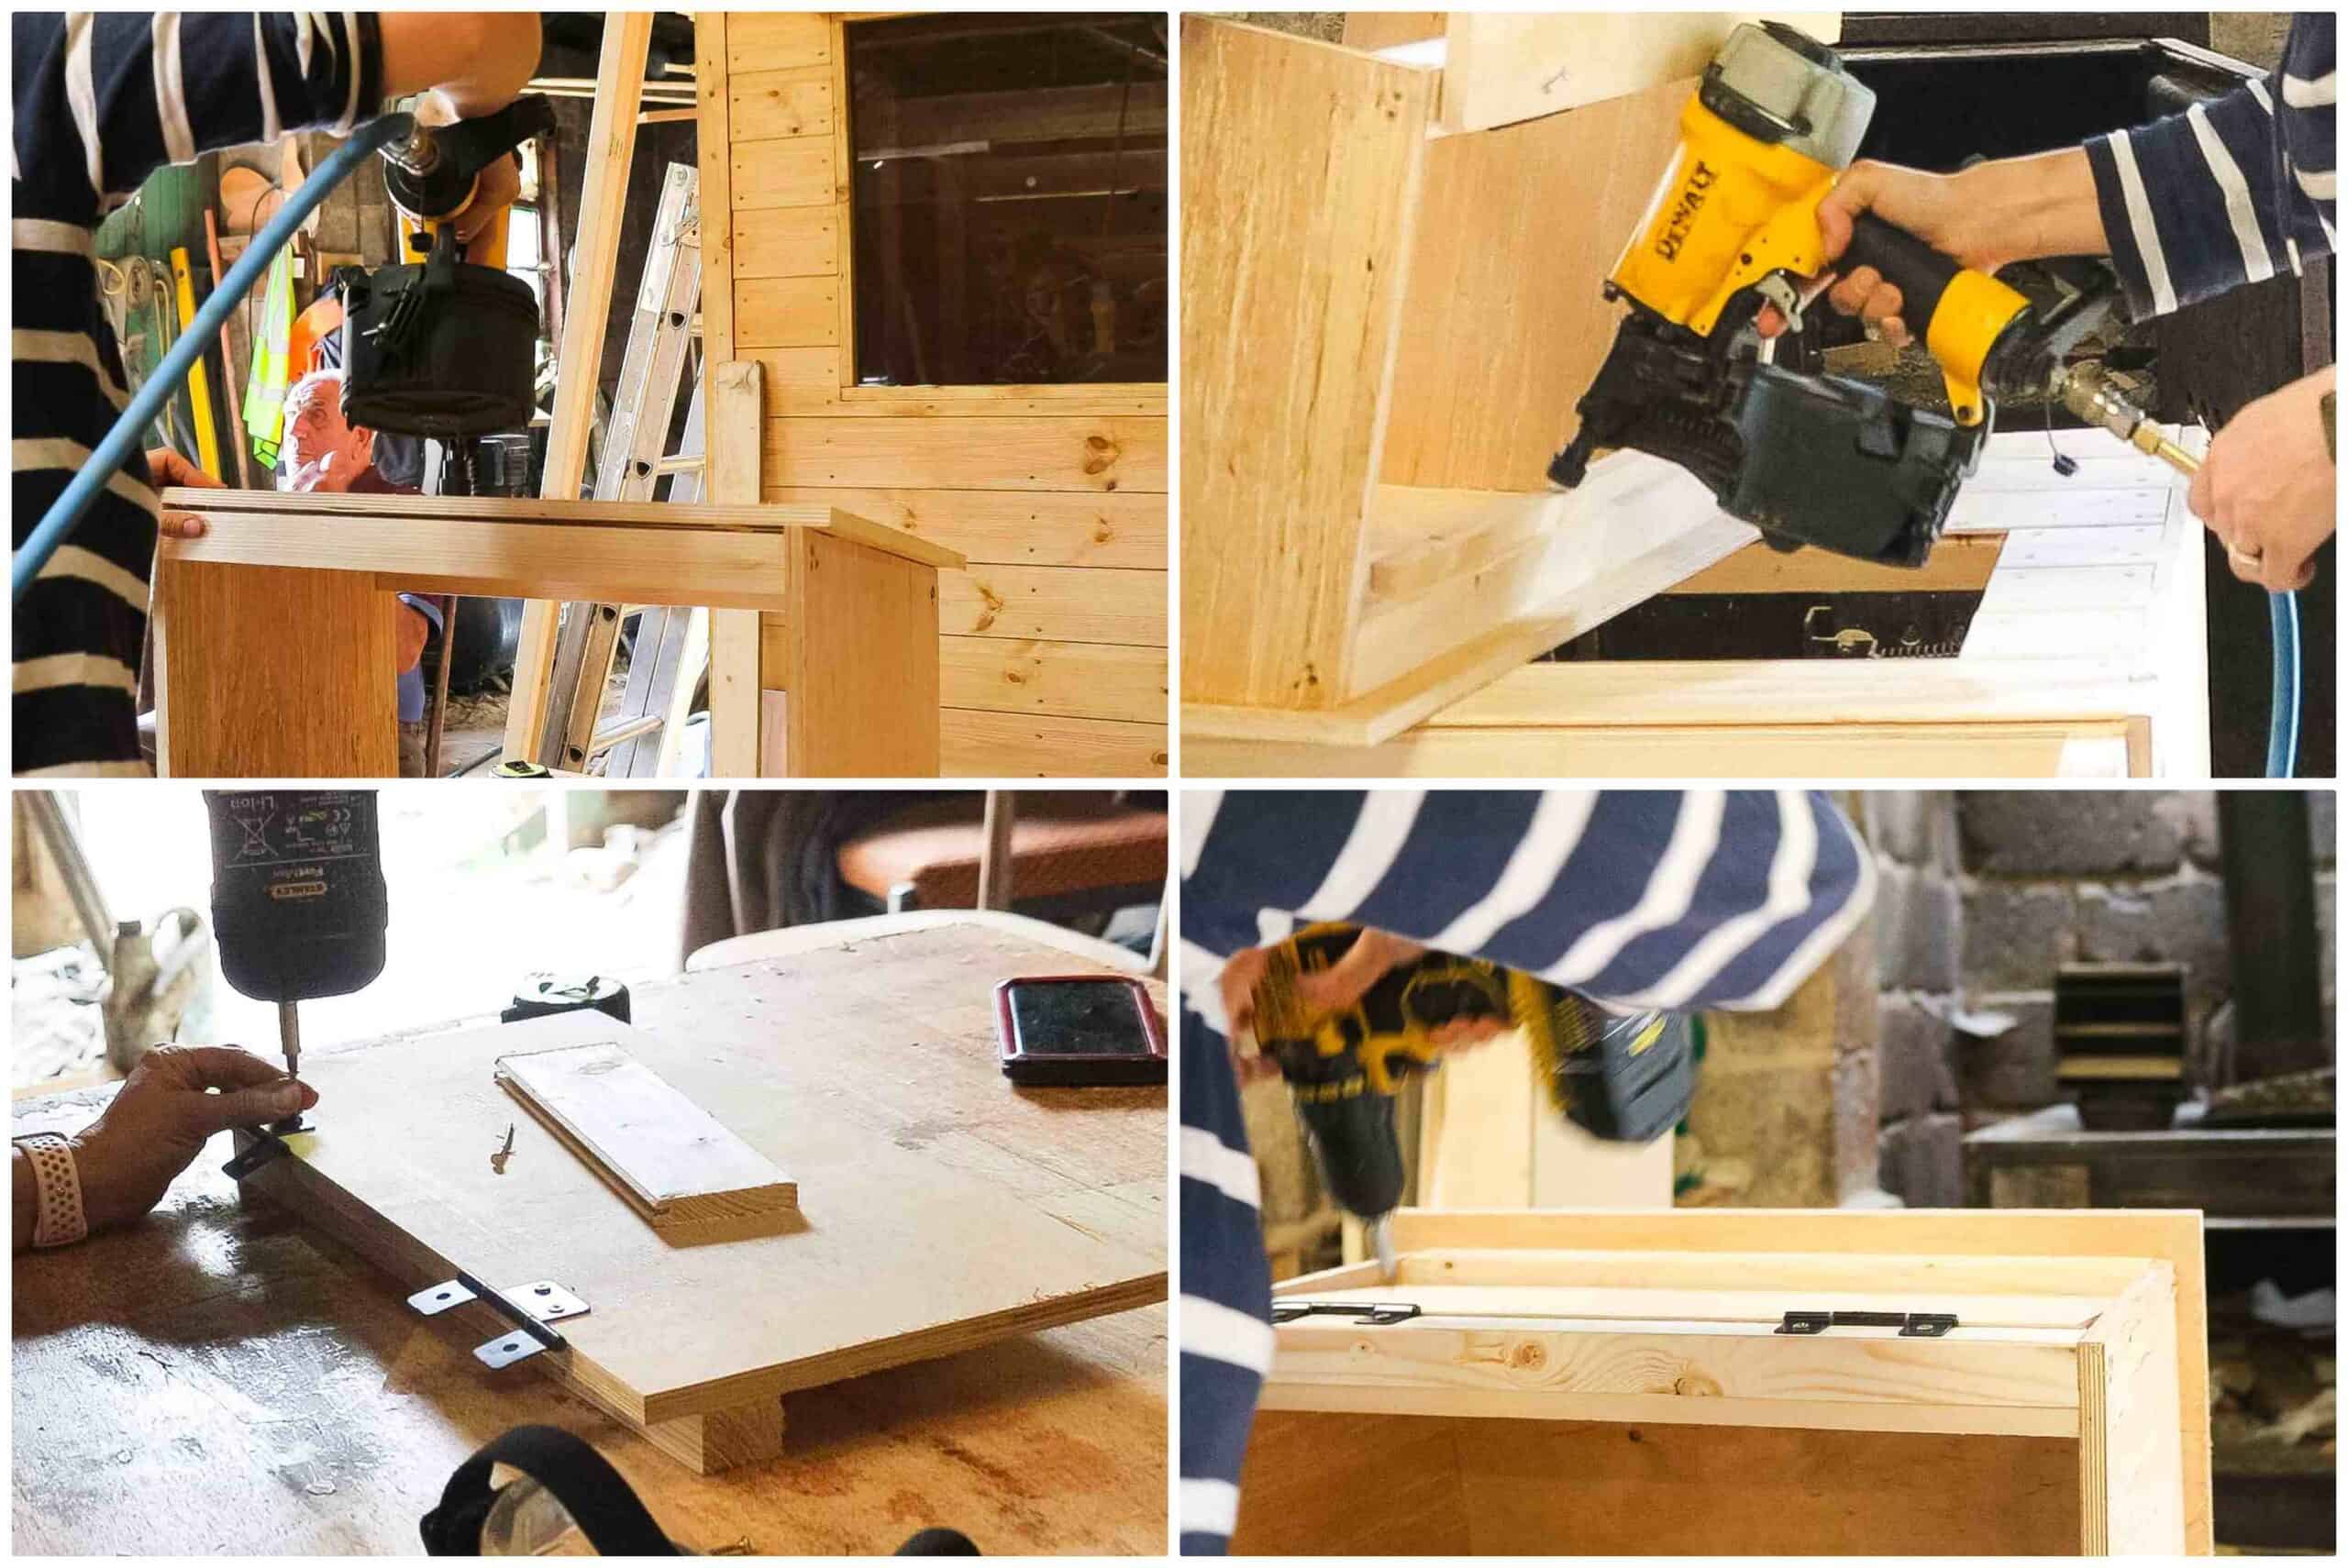
For my next building a chicken coop step, it was time to work on the chicken coop boxes. The one I made has a hinged front door. Some, you'll find lift up, but I prefer this as the felt roof won't get damaged over time.
Also, it's very simple. Below, I have two matching plywood side sections. Again, with a sloping roof, but the slope will aim downwards, away from the coop.
Then I nailed and screwed 4 pieces of structural timber in all 4 corners.

Then, I:
- Nailed another sheet of ply for the chicken coop roof directly on top. Note, it has 20mm overhang on all sides, apart from the back so it can attach to the coop
- Cut another plywood sheet for the drop down door, the same depth as the front's gap, with 5mm clearance all the way around
- Added a stop lat, offset by the thickness of the plywood door
- And screwed two hinges on the door, which I then attached to the coop
Adding a Removeable Chicken Coop Floor
One of the best features about this coop is the bottom drawer that's also the floor. After adding more trim on the base for the drawer to sit on, the drawer consists of 4 plywood strips to create a box.
A plywood base was nailed on top that can be replaced later if it's starting to rot. Then a piece of cladding nailed to the front as a face. I later screwed a handle on the front, too.
Now that I know the chicken coop build only needed some finishing touches, I dismantled it to flat pack and drive it down to the ITV's Love Your Weekend studio set at Manor Farm. It's from here on, I built it in front of Alan Titchmarsh.

While being filmed for the final touches, I first worked on cutting some roof felt down for the nest box. Then folded it over all of the edges and nailed down with a hammer and clout nails.
To remove any excess, I sliced off with a stanley knife. You could add trim to this later to finish it, but sadly, I never had time.
There was also a running joke about me working in the background as I wasn't able to make any noise on set while Alan interviewed. DIY isn't the quietest of professions.

How to Attach a Nesting Box to a Chicken Coop
Because I'd added framework earlier for the nesting box, it was easy to mount.
Originally I was concerned about needing gallow brackets for supports, but they weren't needed.
I lined up the framework's hole with the nesting box frame and predrilled and screwed it together.

How to Build a Chicken Coop Roof
There's a few ways you could build a chicken coop roof:
- Have it hinged, where ¾ of it opens and felted
- Butt some sheets of ply together, join with battens underneath as I did with my DIY dog house build, then felt for a removable lid
- Add a sheet of wood, then tile it
- Corrugated roofing with screws that are covered with caps
- Or, the quickest method I did here: screw offcuts of sheet of plywood, butted together, and pre-drilled, then screwed it down to the framework, followed with felt and and clout nails

The Finished Chicken Coop
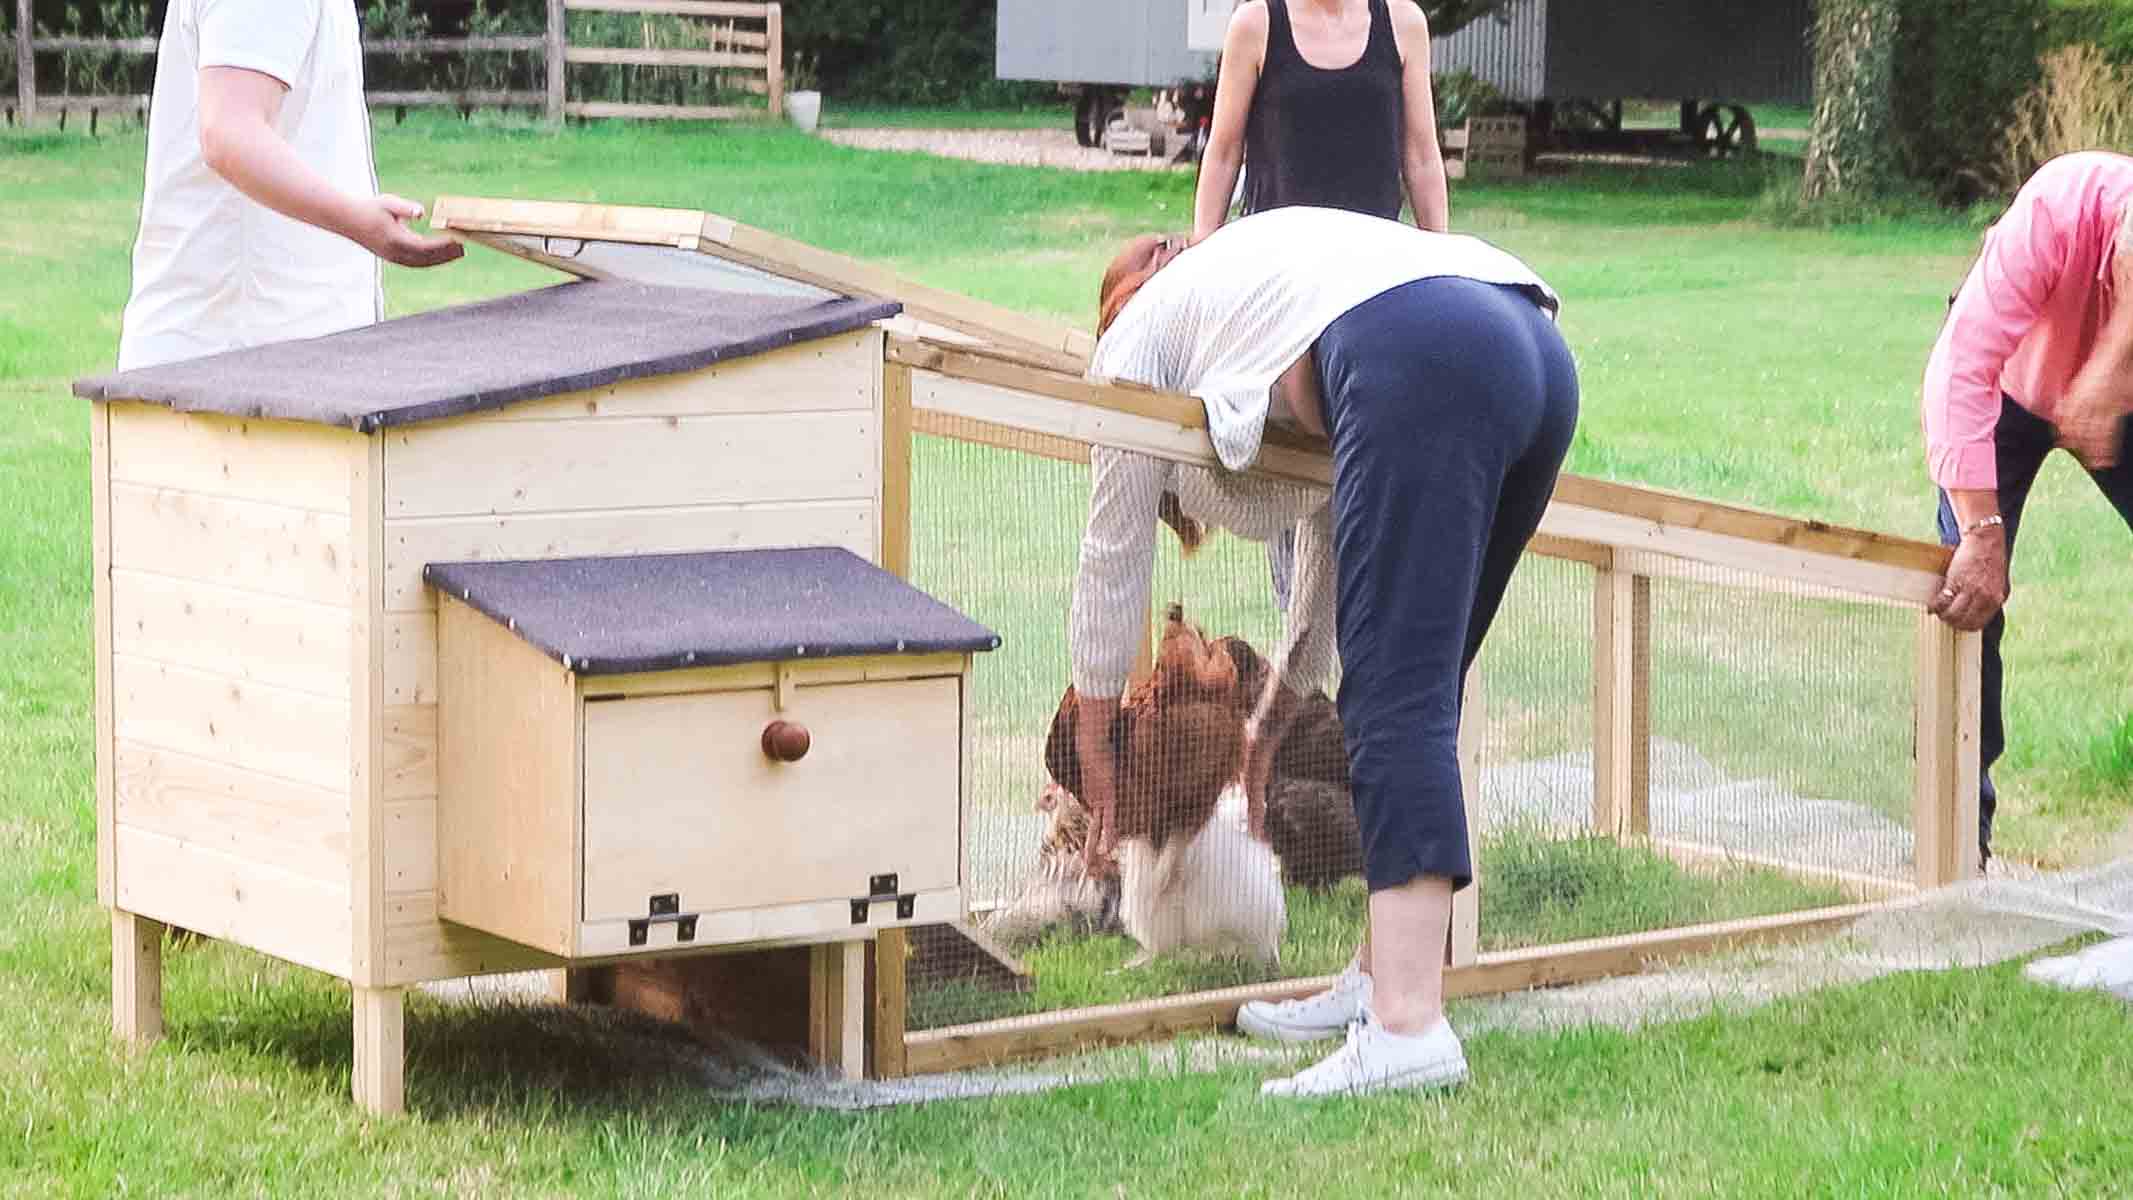
And here's how my chicken enclosure looks today! I hope you found my do it yourself chicken coop plan very useful. Personally, I think it's perfect for a small family and you can now also see how to make a chicken pen here too.
And also talk about the types of chicken runs you could make, too. In fact, I'd say it's the best chicken coop ever that can be made in a day, but I am biased, of course!
Also, another suggestion is that, if your ground is solid, you could make it a chicken coop on wheels by screwing on castor wheels on each foot.

Adding a Perch Inside Chicken Coops
Something my Dad suggested, if I wanted to, was to mitre some ends of structural timber and screw a length inside the chicken coop.
Some like to perch while sleeping, some don't. So you may not need it fitting inside a chicken coop.
Again, that's the beauty of a homemade chicken coop. You can make exactly what your chickens need, instead of buying something that won't be used.
If you want to see how I made my chicken coop and run combined, then don't forget to sign up to my newsletter. You'll find my sign up form at the bottom of this page. I'll also talk about how to keep foxes away from chicken coops.
Now, if a DIY chicken coop isn't for you and the yearly maintenance it may require, then you may want to look for plastic chicken coops. For example, you could shop around for an Eglu Cube instead, also known as an Omlet cube with automatic doors. There's a few second hand chicken coops on eBay that can be found at a good price.
I completely get it. It's less likely to rot. But remember, plastic can fade in the sun and become brittle. So you may prefer keeping it in the shade.
Can I Have a Hen House in my Garden?
To make my hen coops for your own backyard, firstly, check your house deeds. Some covenant restrictions don't allow a poultry coop for backyard chickens or other live stock kept at home.
Also, for a chicken nursery of over 50 or more, including game birds, by law, it is compulsory to register for a licence. You will also be obligated to not cause a nuisance.
If adding a Chicken Pen
When you come to attach a lean to chicken run or pen on the side, you'll need to block of the leg space.
You could either use some chicken wire, cut with tin snips and stapled on. Or, for example, I nailed on some lap panel offcuts I had.
Note, chicken coop wire mesh is perfect as it's galvanized and won't rust in all weathers, including Winter.
Where Could You Build Chicken Coop?
Other chicken coop ideas could be to convert a shed into a large chicken nursery. You can also make very simple perches, too, on the floor.
Why Build a Chicken Coop?
I haven't mentioned it in this post, but my Dad is often building chicken coops as keeping chickens is a hobby for him and my Mum.
My Mum enjoys keeping them as pets and she also enjoys eating fresh eggs, but giving them to family and friends. In fact, I cook with her hens' eggs every week and also share healthy recipes as a full time food blogger.
When to Build a Chicken Coop?
You can build a chicken coop whenever, but it's much better doing it in the sunshine, as I did on Love Your Weekend with Alan Titchmarsh.
Also, it's best to make it and treat it before it starts raining, giving it plenty of time to dry.
How Difficult is to to Build a Chicken Coop DIY?
Building a chicken coop is as easy or as challenging as you want it to be. To give you an idea, I made this in less than a day.
As mentioned before, you could add two nest boxes, or even none at all. However, nest boxes make it easy to collect eggs.
Where Can I Buy a Backyard Chicken Coop?
If you like the the view of this chicken coop, but don't want to make one, there are lots of places with chicken houses for sale. For example:
- Ask a local woodyard for a handmade chicken coops for sale in the UK and I'm sure they could build this exact one for you
- Plastic hen houses (ie, an Eglu chicken coop)
- Buy a chicken coop from Pets at Home
- Solway chicken coop, which offer eco chicken coops using recycled plastic that clips in to place
- Cocoon chicken coop, such as a chicken ark
How Steep Can a Chicken Coop Ramp Be?
It is recommended by many chicken owners that the ramp should be set at 45 degrees.
Also, you'll notice on the ITV Alan Titchmarsh show, we placed a brick underneath the drop down door. This stops the wood sitting on the ground and eventually rotting in contact with water.
So that's something to bear in mind when trying to get the perfect slope.
How to Build a Chicken Coop

Here's how to build a chicken coop - a step by-step with pictures, video and free chicken coop plans. This chicken coop design was featured on ITV's Love Your Weekend with Alan Titchmarsh. You'll also find me on the show as resident carpenter, Vikkie Lee.
Materials
- Structural timber
- Tongue and groove cladding
- 12mm plywood
- Lots of offcuts for stop lats and chicken coop steps
- Wood screws
- Felt
- Drawer knob or off cuts with screws
- Hinges
- Drawer handle
- Panel pins
- Clout nails
Tools
- Mitre saw
- Carpenter's square
- Combination square
- Speed square
- Nail gun or ring shank nails
- Combi drill
- Drill bit
- Hand saw
- Tape measure
- Stanley knife
- Router
- Flush trim router
- Hammer
- Ear defenders
- Safety goggles
- Clamps
Instructions
- Cut and predrill, then screw the chicken coop frame together
- Add extra supports for chicken nesting box
- Nail the frame with tongue and groove cladding
- Remove excess cladding with a router and flush trim router bit
- Add a stop lat on the inside of the door frame
- Cut plywood for the door, leaving a 5mm clearance all the way around
- Screw hinges on and a knob and catch
- Build the next box as shown in the above post
- Repeat the door process
- Screw everything together, except the nesting box on and make the drawer and add a handle
- Ensure trim is nailed inside the base of the coop to stop the drawer falling down
- Now felt the nesting box and screw on from the inside of the coop
- Add plywood on top and screw down directly to the chicken coop
- Nail on more felt and remove the excess with a stanley knife
- Add more trim, if desired around the edge of the roof and nesting box roof
- Treat with a pet safe finish to prevent rot
Notes
As seen on the new ITV Sunday morning show in September 2020, Love Your Weekend with ALan Titchmarsh.

Claire
Eggcellent!!! Ive made many chicken coops and runs and I think you did great with this design. Most people could have a go with these plans and produce a great little home for their chucks. These things don’t have to be complicated. Works great, looks great. Well done 🙂