
Here's how I had to lay bricks to cover up the old fireplace hole after knocking out the chimney and chimney breast. However, if you still have a chimney breast, please read the notes as the method is different.

For the last three weeks, I've been documenting on YouTube how we've been helping my parents renovate their latest bungalow project. I say helping; it's more that my Dad is teaching me and I'm totally up for the ride!
One of these project videos covered how I got on the roof to help remove the chimney. Then the chimney breast itself. The reason for it all was it's not necessary. In fact, this bungalow had a gas fire anyway. Also, the chimney took up room in the kitchen, making it considerably smaller.
So, really, it's been a lot of effort to make room for one of two more kitchen units and worktop space. But we all know how valuable extra storage is. Particularly here in the UK where I believe our average kitchen sizes are smaller than the US. So here's what we were left it before bricking it up.

HOW TO I BRICK UP A FIREPLACE WITH A CHIMNEY BREAST
After I'd bricked up the old fireplace and shared it on my Instagram page, I had a few comments about needing a vent. So I think it's important to talk about this in case it's not obvious. As in our case, it's a single bricked wall. However, if you still have a chimney breast and chimney, it's advised to leave a vent.
This is for the chimney to breath and prevent damp. You can do this by leaving a small gap and fixing a vent like this. But I can't stress enough that you should have a cap or net covering the top of the chimney. The reason for this is to prevent birds from falling down and dying.
It's a horrible thought, but it happened to us when I was a kid. Thankfully my Dad knew how to disconnect the gas fire and removed it to save the bird. It looked a tedious task, then once the bird was freed, he flew in to my bedroom and pooed on the nets frightened. Poor thing, but I'll never forget it.

GUIDE TO LAY BRICKS TO COVER A HOLE IN THE WALL
First, I'd like to point out that I am not a professional and you should always do your own research depending on your situation. In some instances you may need to add metal pieces in to the mortar as you go to ensure it's structural sound.
My Dad informed me we didn't have to as we're laying the bricks in a "running bond" fashion. And that the bricks were keyed in to the remaining frame (as in adding brickes the notches) so when we lay bricks, they matched with the rest.
So I started (above) by sweeping away as much debris as I could.
WHAT MORTAR MIX RATIO SHOULD I USE?
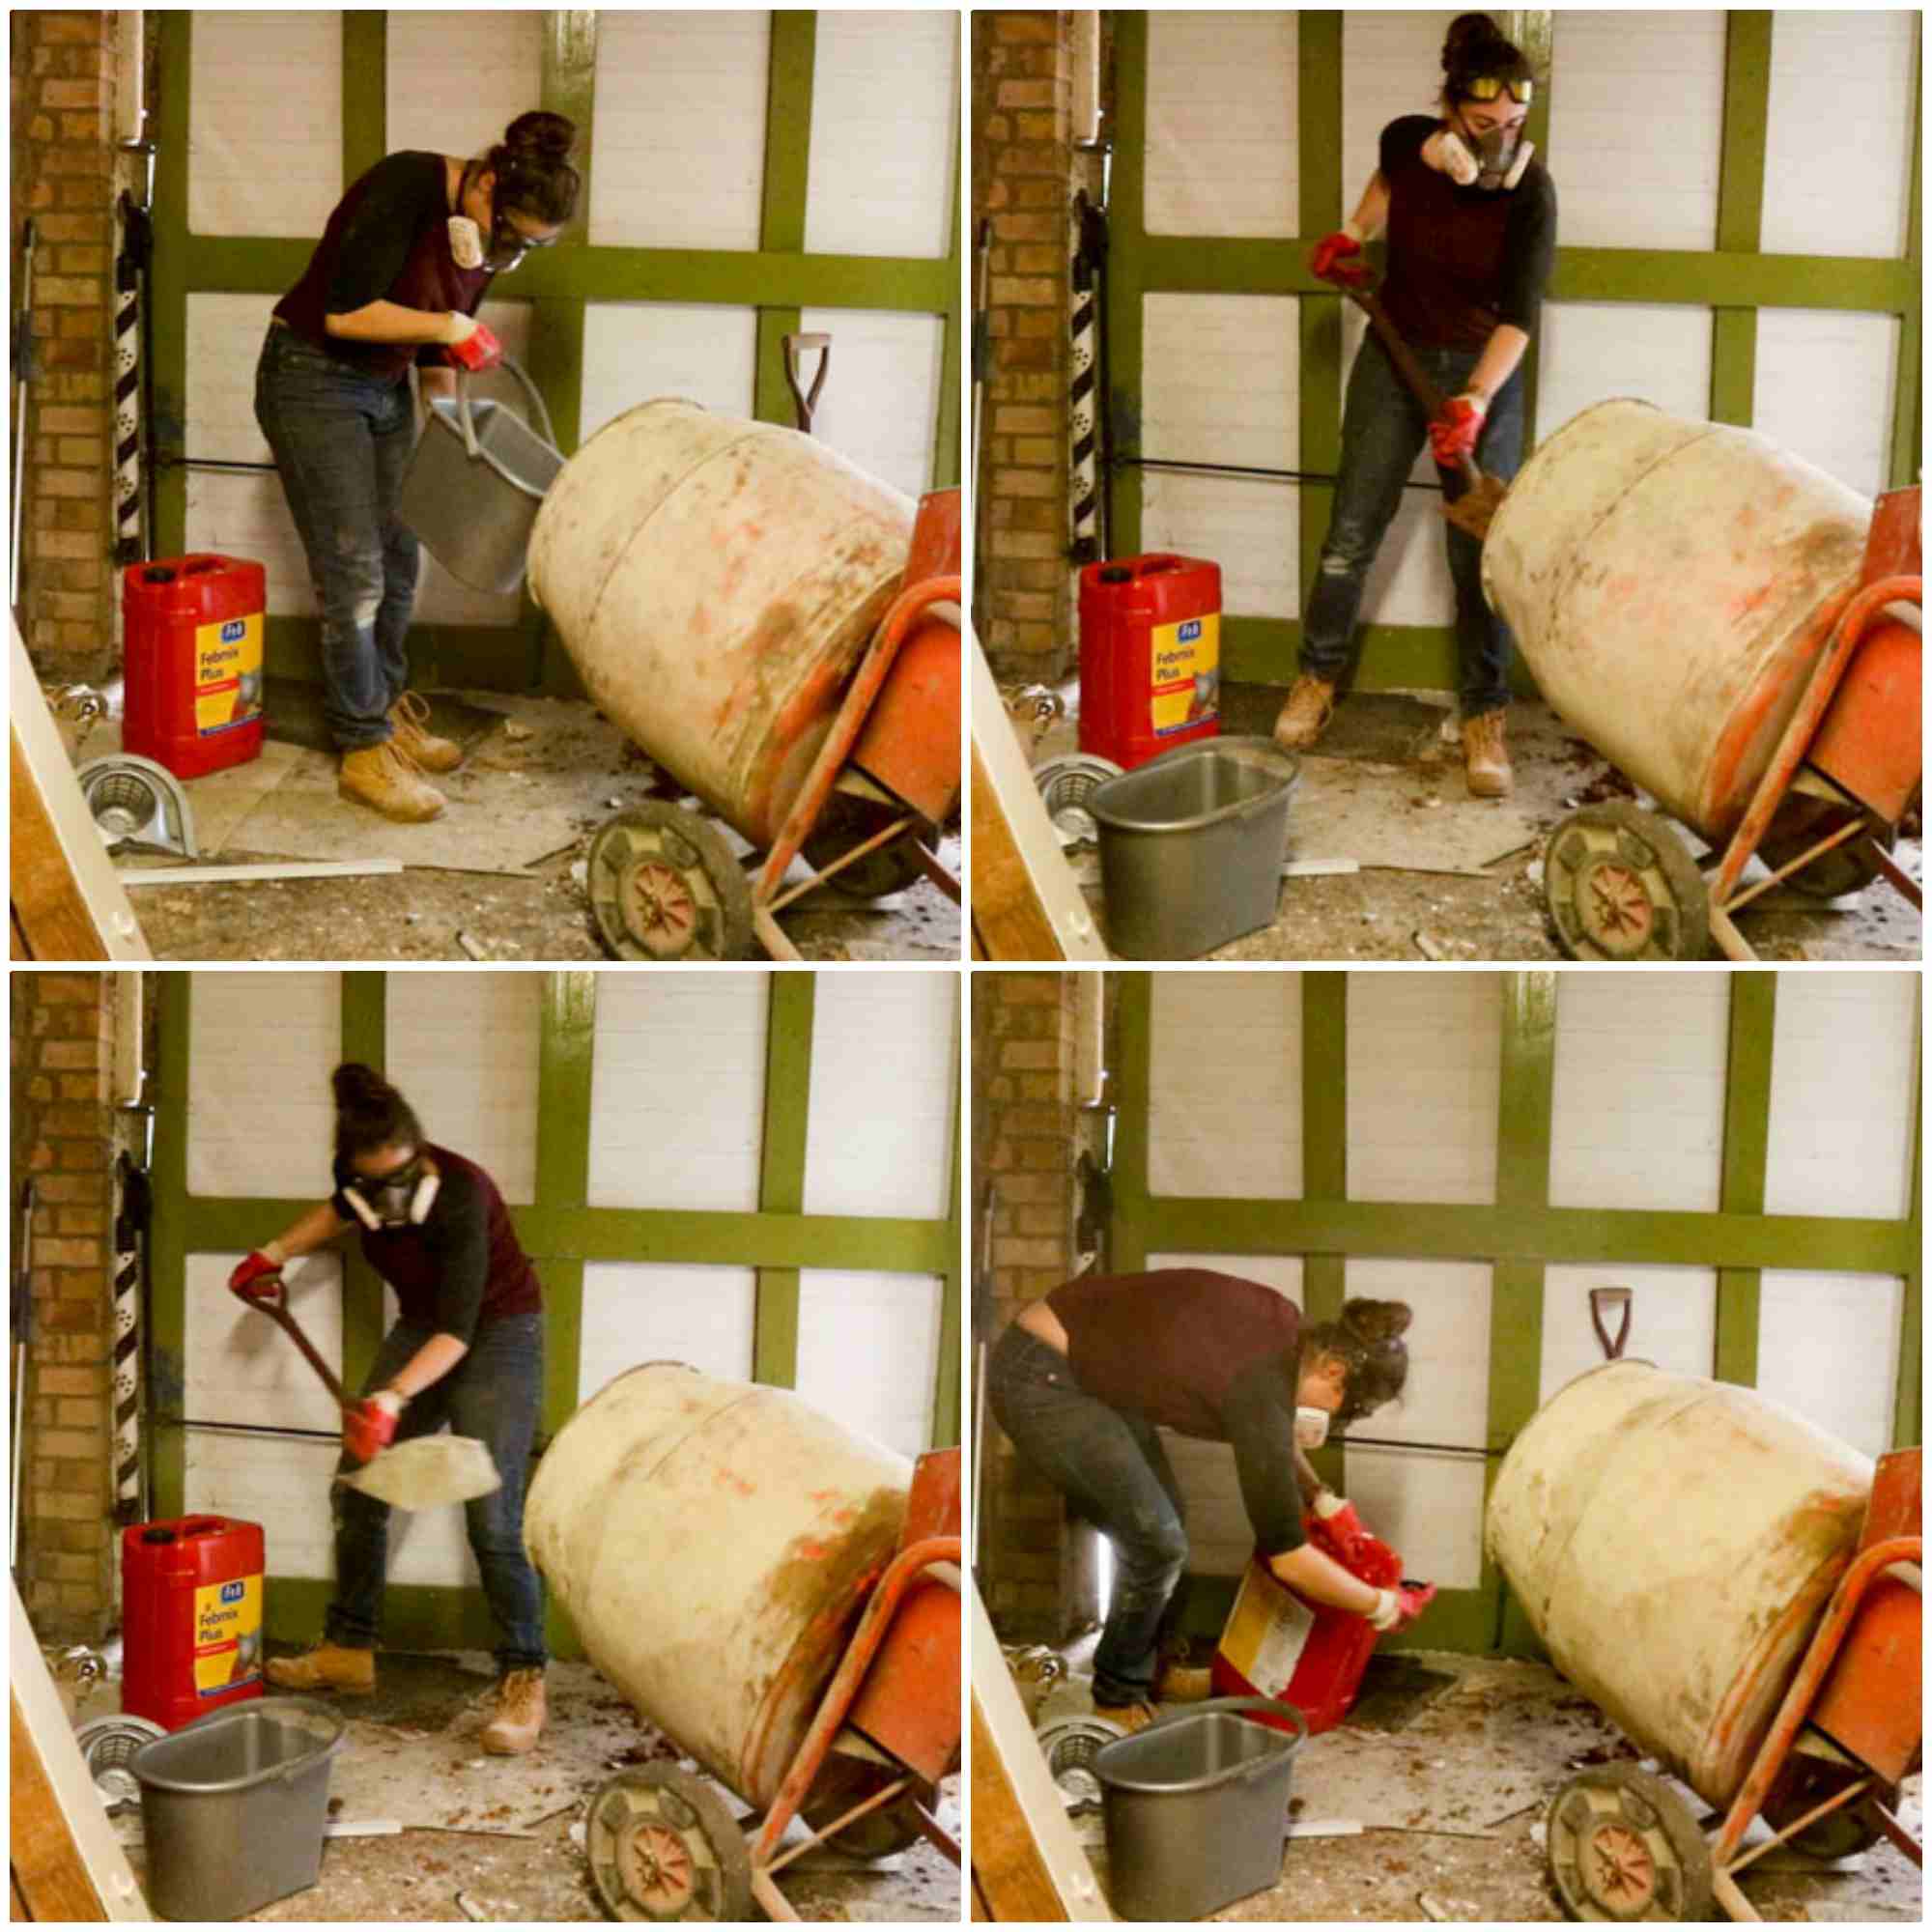
What I've found since shring my projects is that things like mortar mix ratios are debetable. People have their favourite recipes and even after following Tommy Walsh's mix in the past, others have disagreed. So, I'm going to share my Dad's method today. Above, you can see I started by adding a dash of water.
It's always hard to add towards the end for a lump free consistency. I probably added about 500ml. Then I added 4 shovels of building sand to 1 shovel of cement. Note, it's more accurate measuring in volumes, ie, in containers with measures. Then add a capful of plastisiser for a smooth texture.
DO I NEED A CEMENT MIXER?
Technically no, you don't need a cement mixer. But it makes life so much easier. Often I've just mixed in wheel barrow and mixed with a shovel. But you'll need more energy to mix in batches. It will also set overnight, depending on the temperature, so you don't need to work super quick. And ensure you clean your mixer before it sets.
BEGINNING TO LAY BRICKS
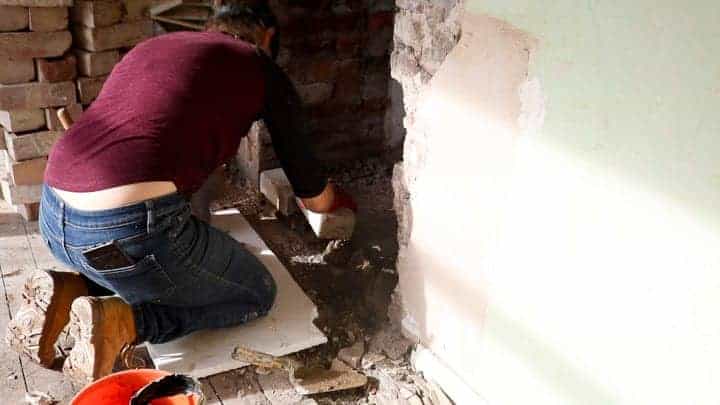
If you haven't seen my safety warning above, the please don't work with mortar unless you're wearing safety gear. Above, I'm wearing steel toe cap boots, rubber gloves, goggles and a mask. And I have a makeshift kneeling pad.
Mortar and cement burns, so if you get it on your skin or eyes, wash it off immediately.
Then, using a trowel, lay a bed of mortar and lay your first bricks in line with the existing ones around it. Make sure you add mortar to each side of your brick as you go and with plenty along the sides of the hole. This "plenty" is called "gobbo".

CUTTING BRICKS WITHOUT A CUTTER
I just need to fast forward briefly to how I cut down the bricks. We had so many left over from demoliting the chimney breast, so we recycled them. If you do this too, you'll need to make sure old mortar is removed. So for the half bricks we needed, I would find one to the closest size I needed.
If I was lucky, I'd find a perfect match, but the chances are, you'll need to trim them. I'd then hold the brick on the floor and hammer the ends off with a hammer. You'll absolutely need to wear goggles for this as brick chips will fly everywhere.
Sometimes the brick would completely break, but it's not like our brick supply was low. So I'd find a new one and take another crack at it. It wasn't as time consuming as you may think.
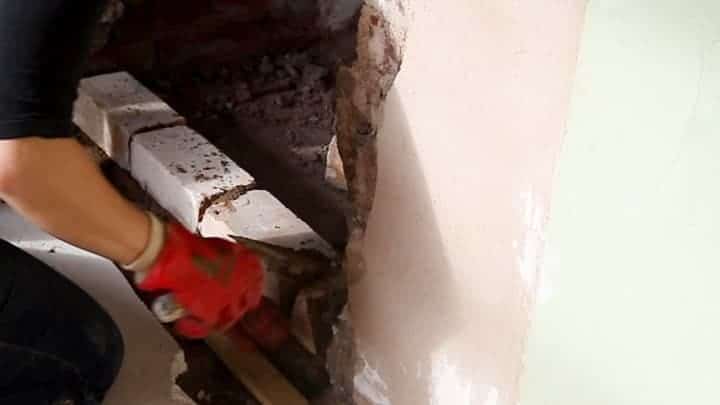
Then add plenty of "gobbo" (aka a big dollop of mortar) to fit in to the sides. See above for reference.

LAY BRICKS THAT ARE LEVEL
Normally, a bricklayer would use a spirit level to ensure they're straight. And some string as a plumbline. But as we need to lay bricks in a hole in the wall, we used a flat, straight batten. Note, the batten is long enough to lay against the existing exposed bricks.
Any longer, then we wouldn't be able to get it in line with the old bricks. Too short, then we can't hold it against the existing bricks. So I held it against the bricks while resting on the old ones. Then tap from behind to ensure the new bricks were inline.
Then rest the batten on top and gently mallet down so it was inline again, horizontally. They didn't need to be accurate down the the mm, but close enough that nothing would protrude when plastered.
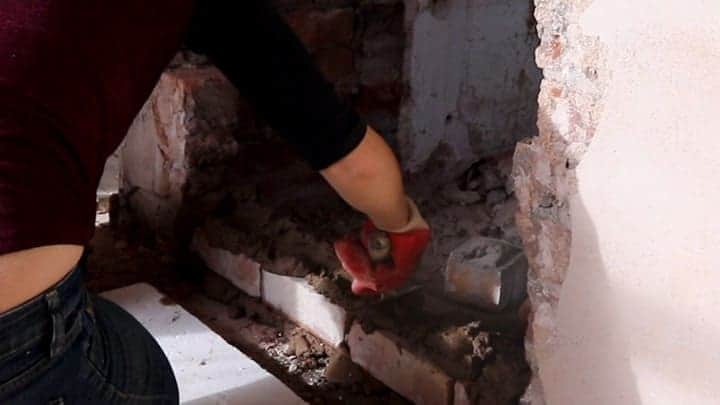
Then repeat with your next course.
It's very important you fill the brick' hole along the top with mortar. This indent is also called the "frog".
However, I'm also informed some lay the bricks with the frog facing upwards. Some facing downwards. We're going upwards here.

Make sure you add mortar again on the sides as you go.

Now we're tapping again from the back. Don't worry that it looks messy though. We'll remove the "snots" later.
Snots are the bits of protruding mortar.

Use the batten again to hammer down the bricks and ensure they're all inline with the existing courses.

Having a running bond (a usual brick laying effect), also meant keying in the bricks above.
So I'm adding plenty of mortar (gobbo) in the notch to lay bricks during my next course.
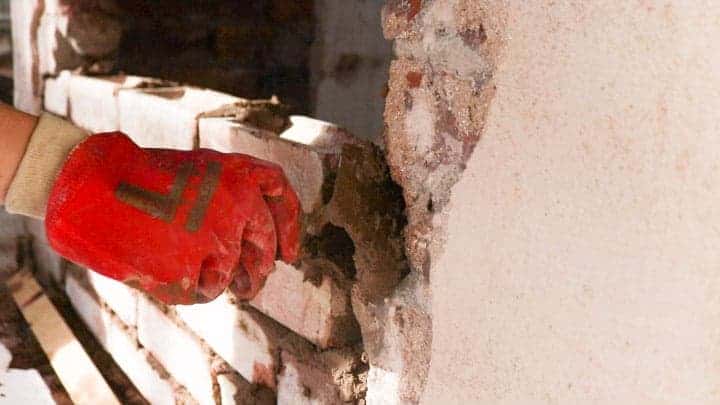
Then continue to lay bricks as usual. And add some more gobbo.
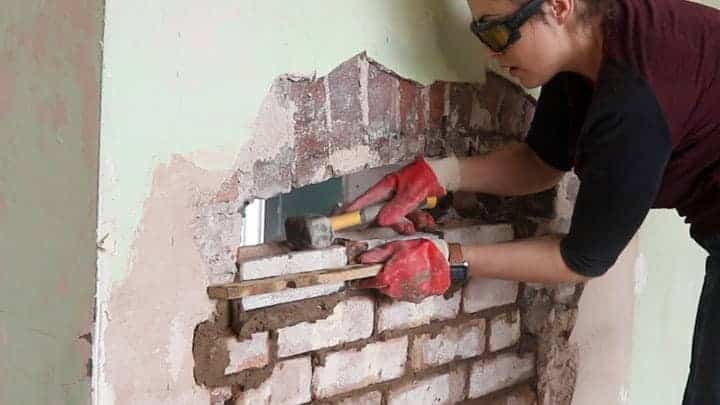
As you get to the top, it will get tighter. So I'm using the side of a club hammer to ensure I can straighten the tops.

REMOVING THE EXCESS MORTAR (AKA SNOTS)
As you go, or towards the end, you'll need to remove the excess mortar.
This is because when it sets, you won't want any protrusions for when it gets plastered.
Above, I'm scraping them off with a trowel.

Then for the upper narrow gap which was much tighter, I filled with plenty of gobbo. Then squeezed in narrow bits of bricks.

Then went over the entire bricks and filled any gaps with more mortar where needed.

Here, I'm doing my final mortar "snots" removal. Then leave overnight to set.
More Home Removations You Might Like
If you need to do an array of home improvements in your house, then here's a few you I've had to do too that you might find useful.


HOW TO LAY BRICKS BEFORE PLASTERING STEP BY STEP
How To Lay Bricks in a Fireplace Hole
Here’s how I had to lay bricks to cover up the old fireplace hole after knocking out the chimney and chimney breast. However, if you still have a chimney breast, please read the notes as the method is different.
Materials
- 1 or 2 bags of sharp sand
- Bag of cement
- Plasticiser
Tools
- Sweeping brush
- Bricks
- Trowel
- Shovel
- Bucket
- Cement mixer (or mixing bucket, or wheel barrow to mix in)
- Batten just a bit bigger than the hole to line up with existing bricks
Instructions
- Sweep the area you want to brick lay and ensure there's no loose bricks. Also, make sure your hole isn't perfectly straight as you'll need to tie the bricks in for stability. We'll be slotting them in like a game of Tetris later.
- Wear safety gear, such as goggles, respirator, steel toe cap boots and rubber gloves.
- To mix the mortar, add about 500ml of water in a wheel barrow or cement mixer. Then add 4 shovel fulls of sharp sand, followed by the cement and a capful of plasticiser and mix well.
- Shovel the mortar in to a small easy to carry bucket.
- Lay your first bed of mortar. See my video or notes to see how I do it.
- Lay your first course of bricks to flow with the existing ones. Make sure you add mortar in between the bricks and towards the ends. Also, you may need to cut some of the bricks, which I used a hammer to break some up.
- Use the batten to straighten the bricks from the side and front.
- Keep repeating until you get to your top layer. If your chimney also has an arch, add plenty of mortar and smaller bricks to fill the gap.
- Then fill any gaps with mortar and remove existing protruding mortar before it sets.
- Leave to dry overnight then plaster over the bare bricks, or hire a plasterer.
Notes
You can watch the full indepth video with talk through here: https://www.youtube.com/watch?v=52rRjul7V_Q
Recommended Products
Thiss post includes affiiate links. I earn a small commission when you buy through them at no extra cost to you.
-
 Jantex CD804 Round Plastic Buckets, Blue
 -
Blue Circle 25k mastercrete Cement 25kg
-
Dickies Womens/Ladies Corbett Leather Composite Toe Cap Safety Boot
-
2 PAIRS x RED RUBBER PVC GLOVES - heavy duty safety gloves, builders, plumbers, gardening etc -FREE DELIVERY
-
Force 8 Half-Mask with PressToCheck P3 Filters (JSP BHT0A3-0L5-N00)
-
BeeSwift (BEESQ) GENERAL PURPOSE GOGGLES CLEAR
-
Draper 31391 Hardwood Shafted Square Mouth Builders Shovel
-
140L Portable Electric Cement Mixer
-
Amtech G0230 Pointed Trowel with Soft Red Grip, 6-Inch
-
Vitax Sharp Sand - Large - approx. 20kg


Comments
No Comments