
Here's how to fit a shed lock using coach bolts for extra security. I believe this reduces the risk of anyone entering without creating a lot of noise.
This DIY tutorial contains a paid AD for Wickes. I have been a regular shopper for years as I can find everything I need to complete both small and large projects.

Recently I showed you how we built a 6 x 3 Wickes shed, dedicated for all our camping gear. It's a very neat solution filled with adjustable twin slot shelves. Most of the things aren't that precious in here. However, I still wanted to prevent trespassers from helping themselves to our things.
So to make things difficult for burglars, not only did I install the Wickes lock that came with the shed, but bought some coach bolts too. Here's how I did it.
To also ensure I made my shed secure, I checked Wickes' stock levels online. But they also offer a click and collect service so you can get things when you need them.

THINGS YOU'LL NEED TO FIT A SHED LOCK
- Bolt with loop handle for lock (mine came with my Wickes shed) or Wickes Brenton Bolt (comes with coach bolts)
- 65mm M6 mushroom coach bolds (no screw heads)
- Hack saw
- 6mm wood drill bit for bolt
- 3mm wood drill bit for screw pilot holes
- Combi drill
- Combination square
- Pencil
- Combination lock or one with key
When creating my shopping list on each project, Wickes offers a wide range of products and tools for amateurs to professionals. This also goes for their extensive how-to guides for ideas and support which has given me lots of confidence over the years.

First, find the stud work on the back of your shed door. This should be a strong place to mount your shed lock. (You can see this is the area where nails are on the front of the cladding).
Then hold a combination square or speed square against the edge of the door and draw a straight line.

Hold your bolt against the pencil line and make sure your bolt is close to the edge of the door.
Now mark with a pencil where the round holes are.
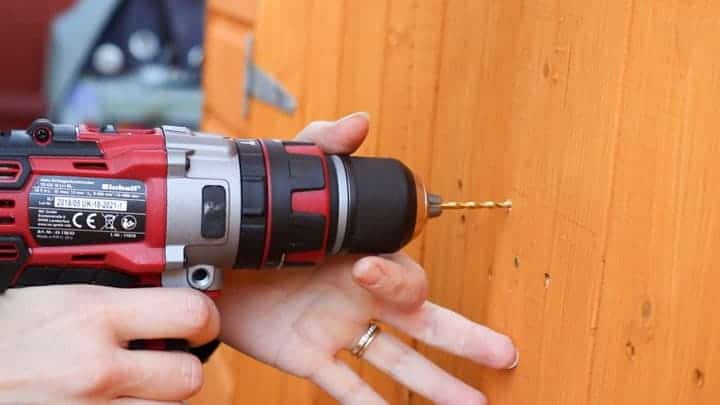
Using a 3mm drill bit and combi drill, drill pilot holes where your pencil marks are. Note, 3mm is on basis that the screws are slightly thicker.
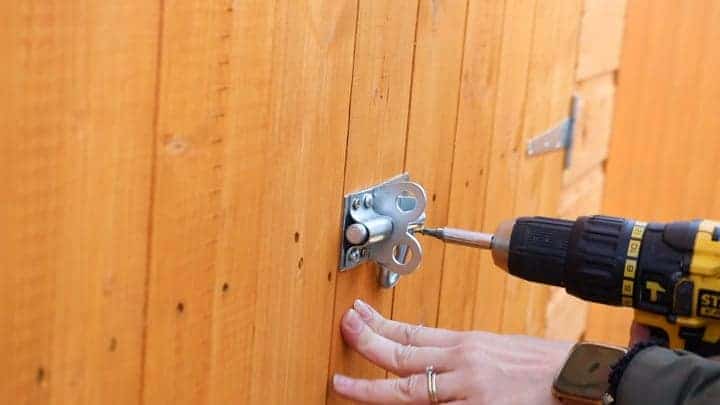
Line the bolt back up with the screw holes and attach with screws.
*I would make sure the setting is quite low on your combi drill to prevent wearing the wood out.
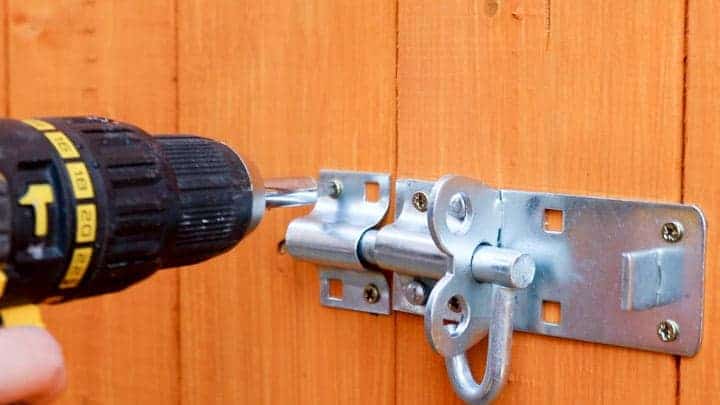
Now line the adjoining bolt cover on the other door and do the same as above.

ADDING THE COACH BOLTS FOR EXTRA SECURITY
Using a 6mm drill bit, drill through the square holes on the bolt and matching piece.
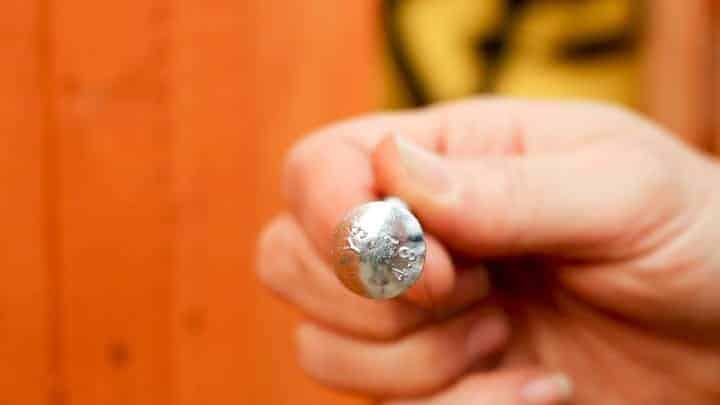
Make sure your coach bolts have a solid head so there's no way for someone to attempt to unscrew from outside the shed.
The idea is that we're fastening them on from behind the door.
So even if someone unscrewed the bolt on the right side, they'd still have trouble getting in.

Mallet in the bolts. I used a rubber mallet in the pic above.
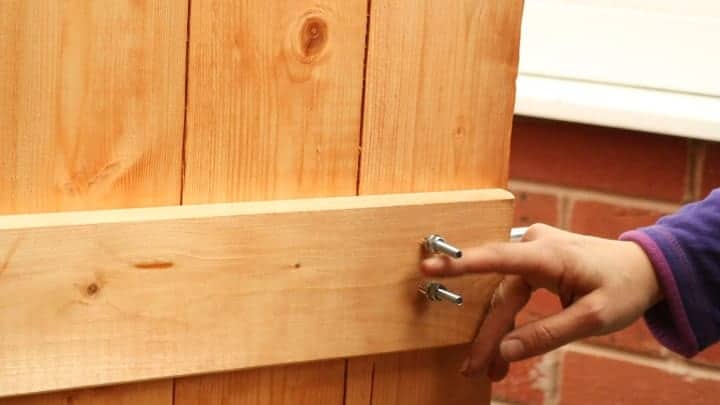
Add a washer on each, so when you tighten with nuts, it's less likely to sink in to the wood.

Then using a hacksaw, saw off the protruding coach bolt from behind.
It's important that you cut the excess off after as you may struggle to get the washer and nut on.
Also, you don't want to catch yourself on it later.

Now using a rasp, file away any of the sharp metal burrs.
DO NOT be tempted to rub over with your finger to test for sharpness.
It's so easy to cut your finger here without knowing. It's much better to sand with fine sandpaper if you're concerned.
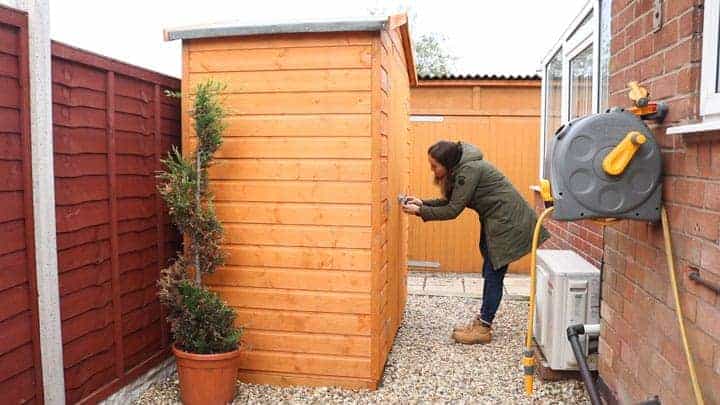
Then add a padlock of your choice. I prefer combination locks to cut down the chances of losing keys.
YOU MAY ALSO LIKE...
- 20 Ideas You Can Do to Organise Your Tool Shed
- Making a Subframe for a Shed Base
- How to Build a Wickes Shed
- Fitting a Twin Slot Shelving in a Shed
- How to fit a 5 lever mortice lock on a shed
How to Fit a Shed Lock
Here’s how to fit a shed lock using coach bolts for extra security. I believe this reduces the risk of anyone entering without creating a lot of noise.
Materials
- Bolt with loop handle for lock or a Wickes Brenton Bolt which already comes with coach bolts
- M6 mushroom coach bolts, 65mm long (no screw heads)
- Combination lock or one with key
Tools
- Hack saw
- 6mm wood drill bit for bolt
- 3mm wood drill bit for screw pilot holes
- Combi drill
- Combination square
- Pencil
Instructions
- Look at the front of your shed door and locate where the nails are on the cladding. There should be a spar in the middle, behind the door or similar and this is where you ideally should add your lock for strength.
- Now hold a combination square or speed square against the edge of the door and draw a straight line.
- Hold your bolt against the top of the pencil line and make sure your bolt is close to the edge of the door.
- Mark inside the round holes with a pencil.
- Now drill those pencil marks with a 3mm drill bit, providing your screws are slightly thicker.
- Place the lock back up and screw it on using those drill holes you just created.
- Line up the adjoining piece of the lock and repeat.
- To add security, now drill 6mm thick holes in the squares on the lock/bolt.
- Mallet in your M6 coach bolts.
- Add washers and nuts from the back and tighten.
- Cut the protruding coach bolts with a hacksaw.
- DO NOT touch this area with your finger until you have filed away any sharp burrs with a rasp. Then finish with fine sandpaper if you wish.
- Add a combination padlock lock of your choice, or one with a key.
Notes
Full video here: https://www.youtube.com/watch?v=ceaq9guULBk

Mike
Thanks for the instruction. Round head bolts are good. I am also into lock picking. Putting a Master Lock 4 wheel combo on there is slightly less secure than a pice of hairy string with a difficult knot. They are easily defeated without tools. Have a look at https://youtu.be/e7bqPakq2gI. With a little practice, it can take less than 2 minutes