
Here are 27 easy ideas I created for organizing a shed full of tools in a workshop on a budget. These shed storage ideas also apply as garden tool racking and in a garage or other space.
You can watch my shop organization ideas video and 7 more to follow along if you need a helping hand!

Over the last year, I've had to force myself to learn the best methods regarding how to hang tools in a shed after building a summerhouse. And believe me, how to organize my shed did NOT come easy, as many seem to think as expressed in my YouTube comments.
The truth is, I'm not really an organised person. But I knew once I'd get into it, I'd get obsessive, which is kind of why I'd procrastinated in the first place. But, the problem is, there are SO many ways to organize your shed!
There's an unbelievable amount of info on the internet because we all have different tools and spaces. And some of us need small workshop ideas. So, I'm going to show you my personal experience of how to organize the inside of a shed spanned over a year.

Getting Started (Before Hanging Tools in a Shed)
Before I show you how to organize a shed, I'm going to list a few things to consider before you get started. Especially if you're looking for small shed ideas.
- Empty the space completely if possible and work on one area at a time so it's less overwhelming
- Store rarely used things in loft, etc, if they're taking up a lot of space
- Try and plan things with adjustable shed organization systems where possible, to give you scope to reconfigure when you accumulate
- Consider things with castor wheels so you can move things easily
- It doesn't need to be cool garden storage for tools. Just what works for you - even if it's mostly using offcuts!
ANYWAY - let's crack on with my ideas for organizing your shed or general workshop organization!

1. Easy Shed Workbench
As I'll be working in here from time to time, the first step for organising a shed workshop was to fit install a simple workbench. A quick way to do this, if you're happy for it to be fixed, is to use a new or old laminate kitchen worktop.
Simply screw timber supports to the height you'd like your worktable to the studs. Then screw laminate worktop on top and add more supports, such as staircase spindles.
Alternatively, if you're looking for the best wood for a workbench and - it depends on your budget. Here, you can see how I made a DIY workbench with CLS and OSB offcuts which would work great with castor wheels to move about.
2. Simple Workbench Shelves
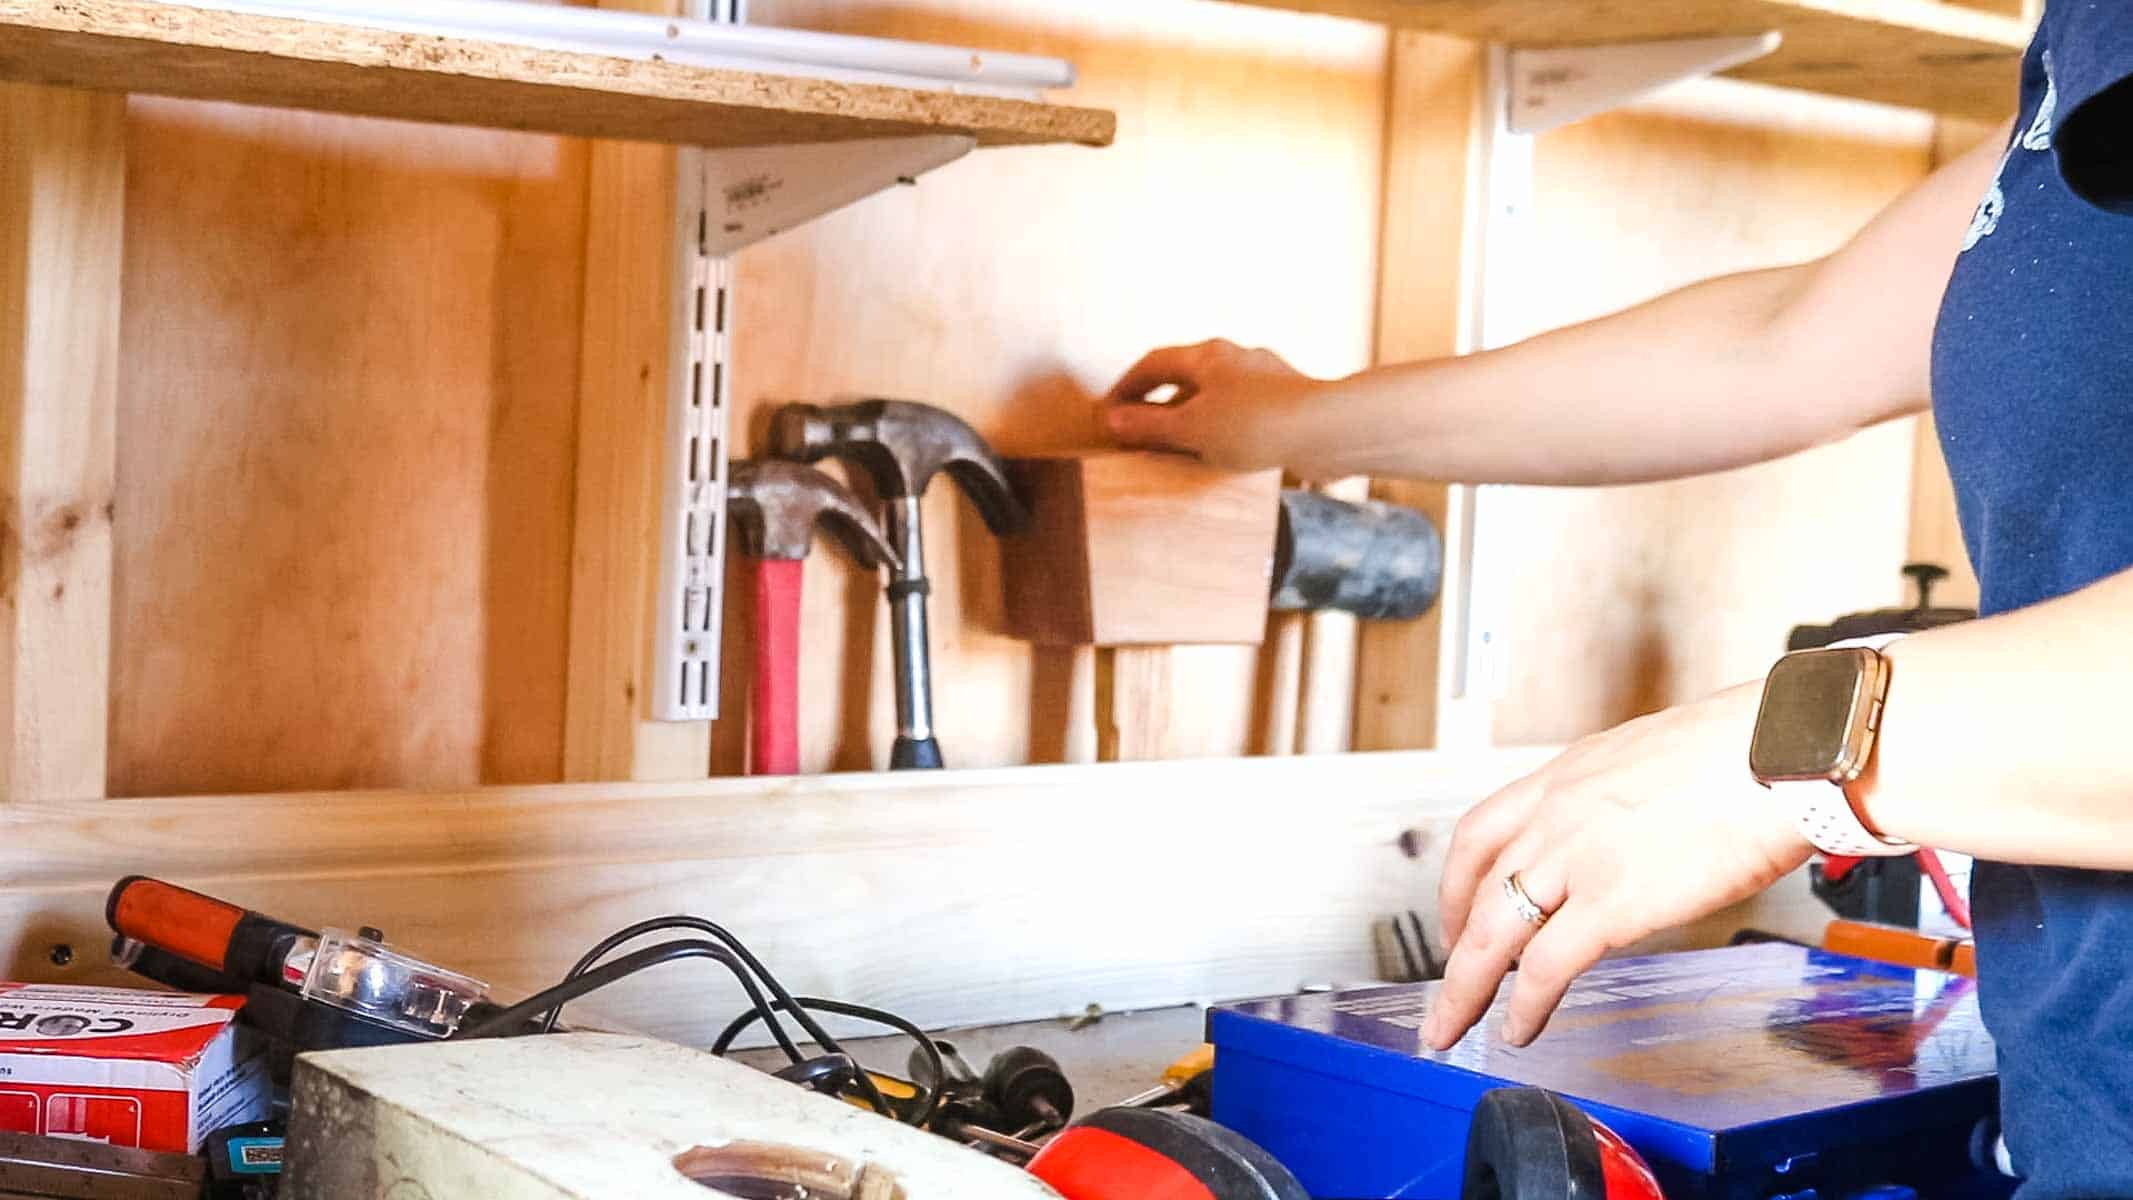
If you've installed a laminate workbench in a shed without insulation, then you'll have gaps behind. These can make bonus shelves for a shed.
I created an extra back workbench shelf by screwing offcuts at the back from the supporting timber.
This has been great for hammers, mallets, speed squares, etc. However, ensure you avoid screwing through your shed cladding.
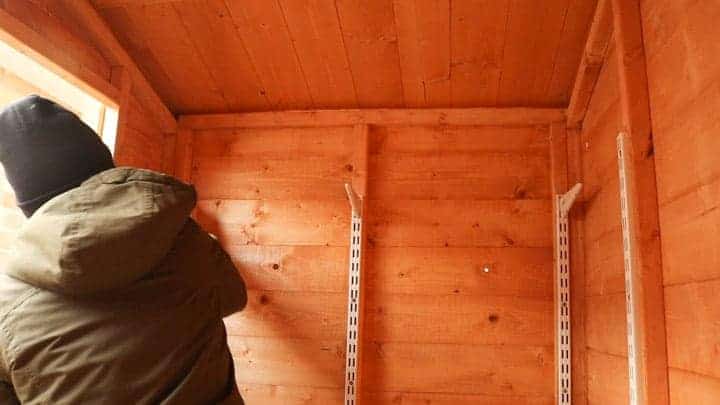
3. Adjustable Shed Shelving Ideas
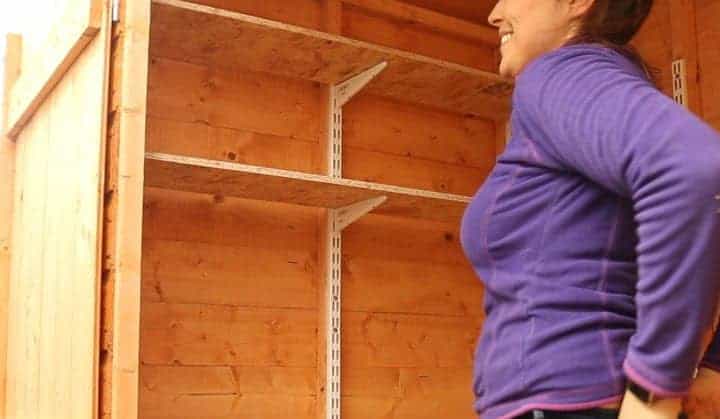
There are lots of fixed storage shed shelving ideas online using CLS screwed to spars. Admittedly, they are cheaper than adjustable ones, but if you accumulate tools, you need to spend time moving things around.
Instead, I prefer using twin slot shelves with brackets so I can move them whenever I want as I did half way through the year.
They're extremely strong as I'll show you shortly. For the wooden shelves part, I have so many 10mm+ OSB offcut strips which are great in damper conditions. You can also buy brackets in different depths. Or, you could use old wardrobe doors, laminate flooring strips etc.
4. Easy Fixed Shelving in Sheds
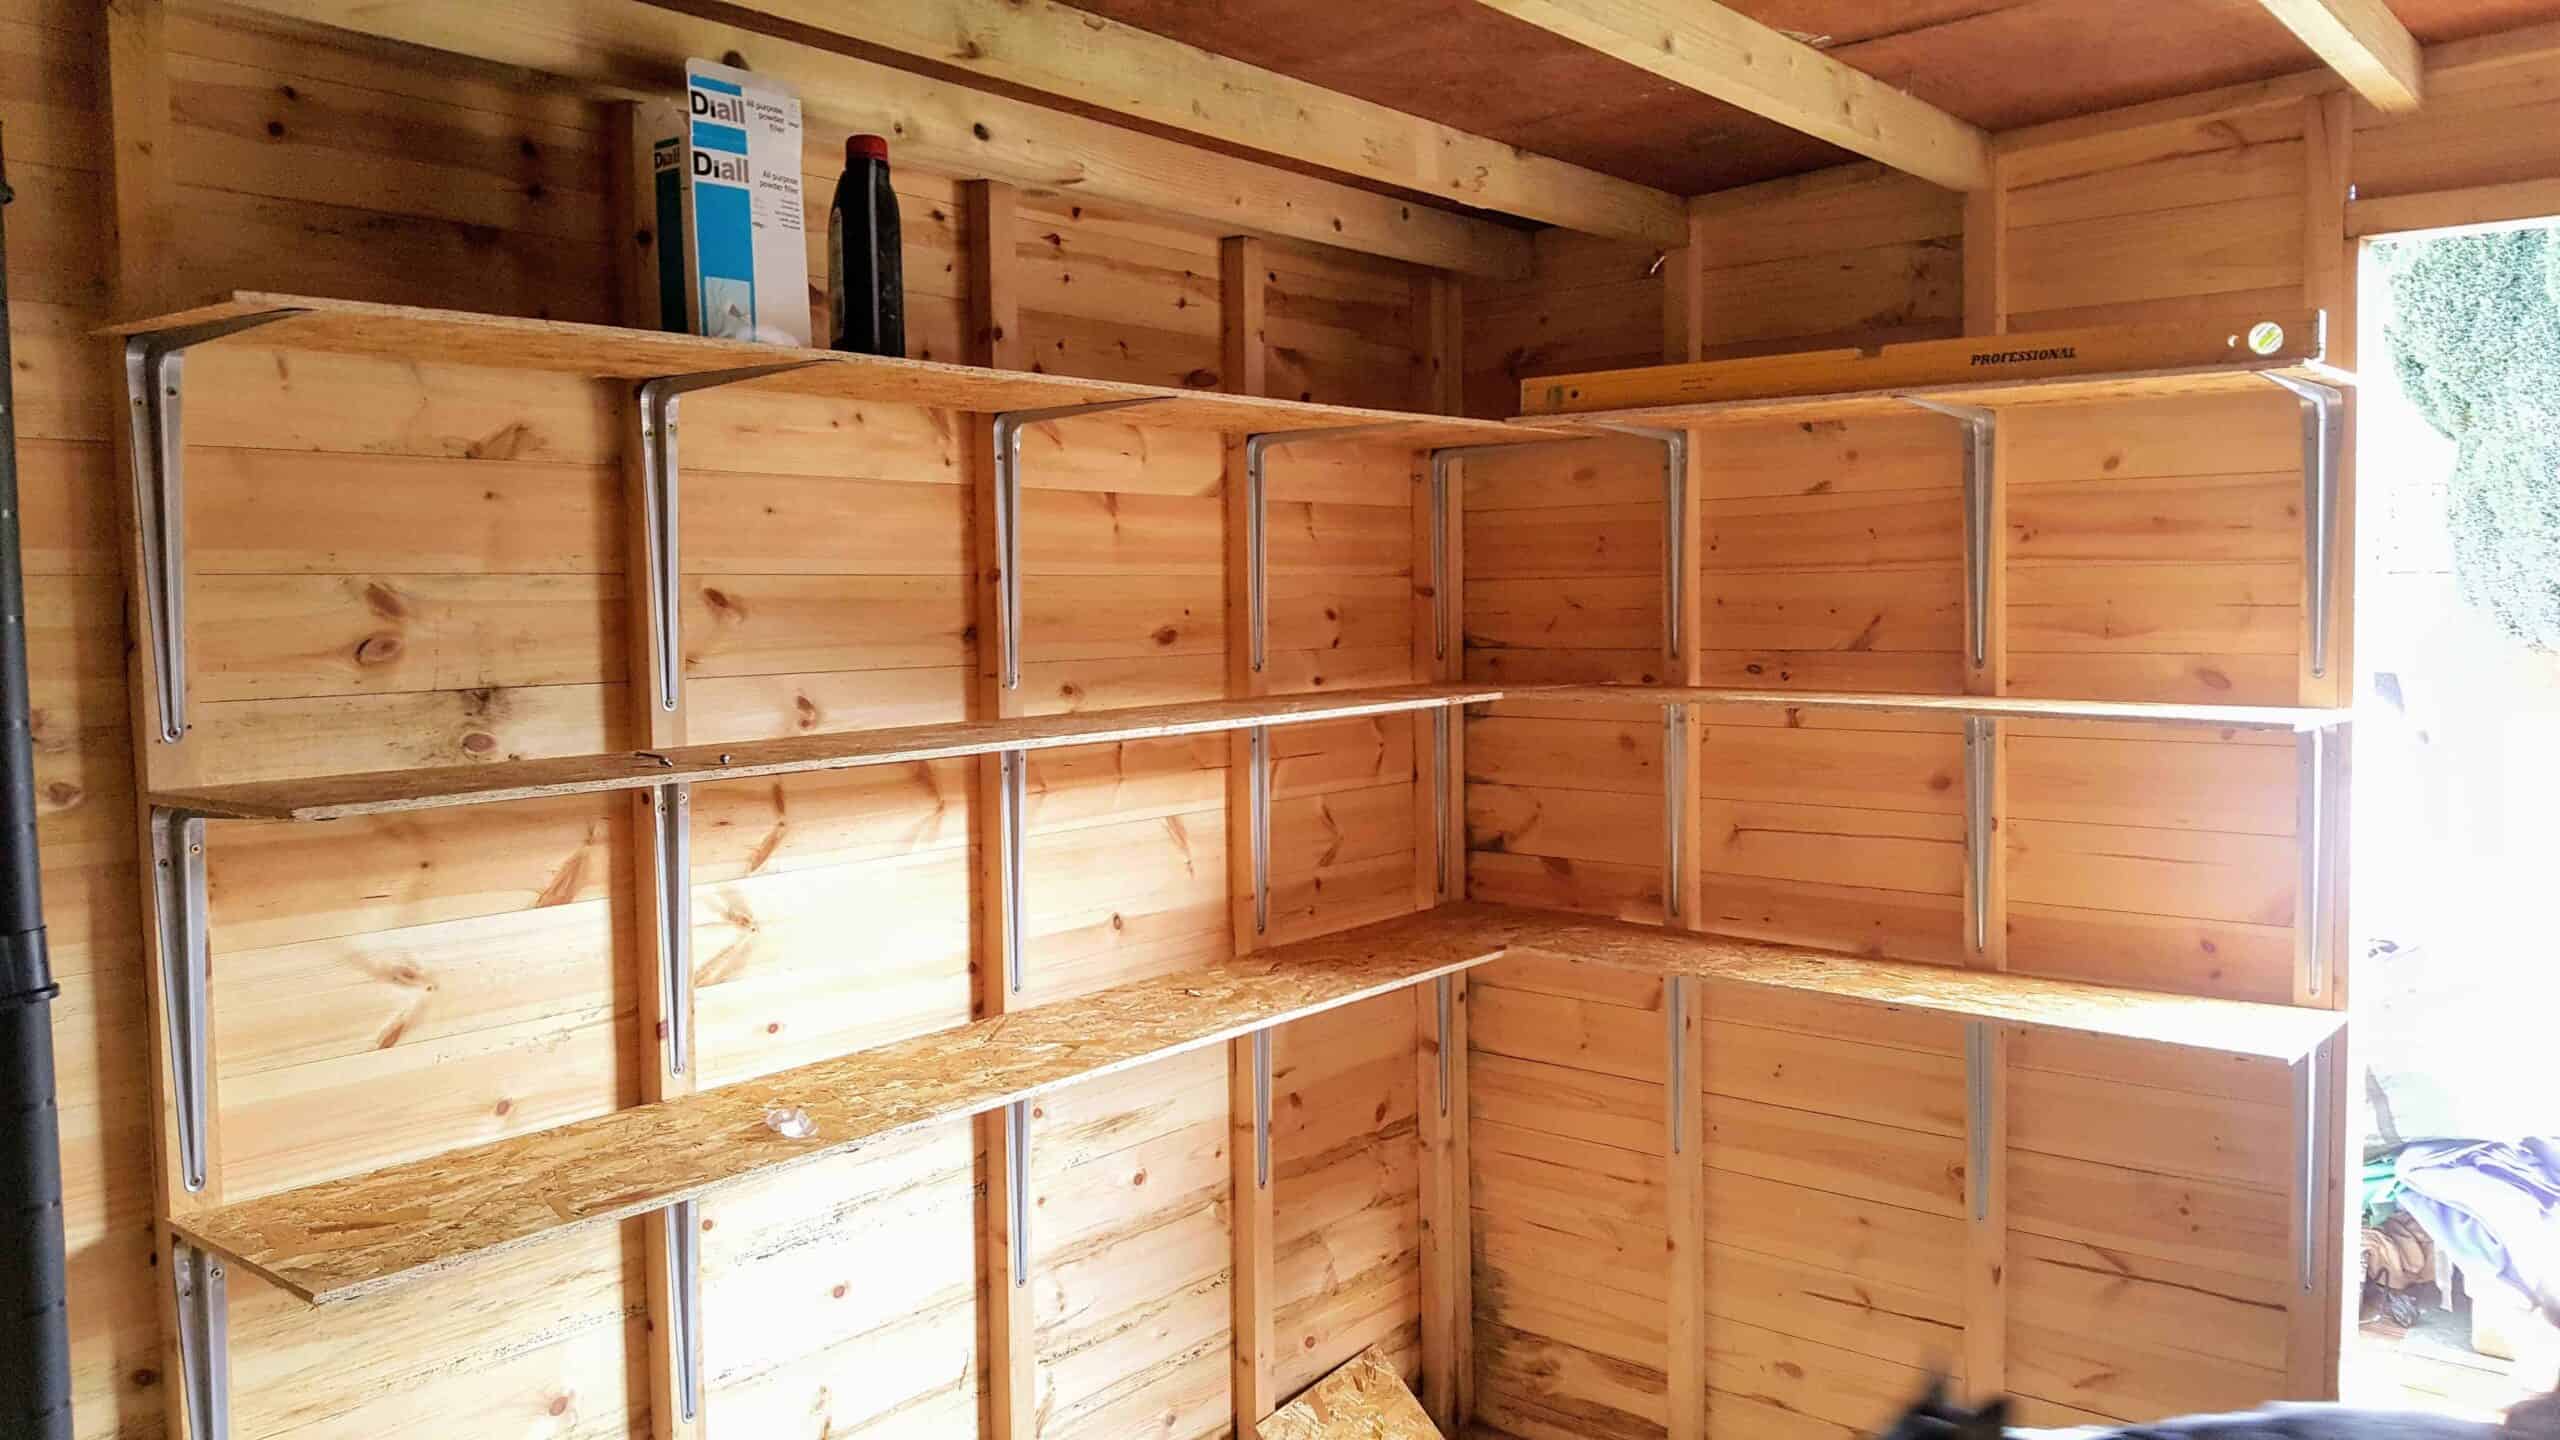
Another one of my DIY shed shelving ideas is using London brackets. Note, this is also cheaper than installing twin slots and extremely sturdy as you can see me using London brackets in my kitchen here.
They're as simple as marking shed spars with a spirit level, then screwing the brackets on. But ensure you check the reviews of which ones you buy as some are flimsy. *I can thoroughly recommend ones from Screwfix.
For the tops, I again, recommend a strong but lightish timber, such as pine shelves or OSB. The only downside is that they're not as quick to move around.

5. Shed Roof Storage Ideas
Using shed roof spars is a great way to store larger things out of the way when not in use, such as spirit levels.
Or, you could be like me and hoard bits of furniture, such as table legs, drawer runners to recycle them at a future date.
I built a pitched roof Summerhouse (apex) with a centre strip light, so I screwed OSB offcuts to the spars towards the sides. But, if you have a flat roof shed or a lean-to shed, you could hang ladders in the roof too.
6. Quick Wood Clamp Rack
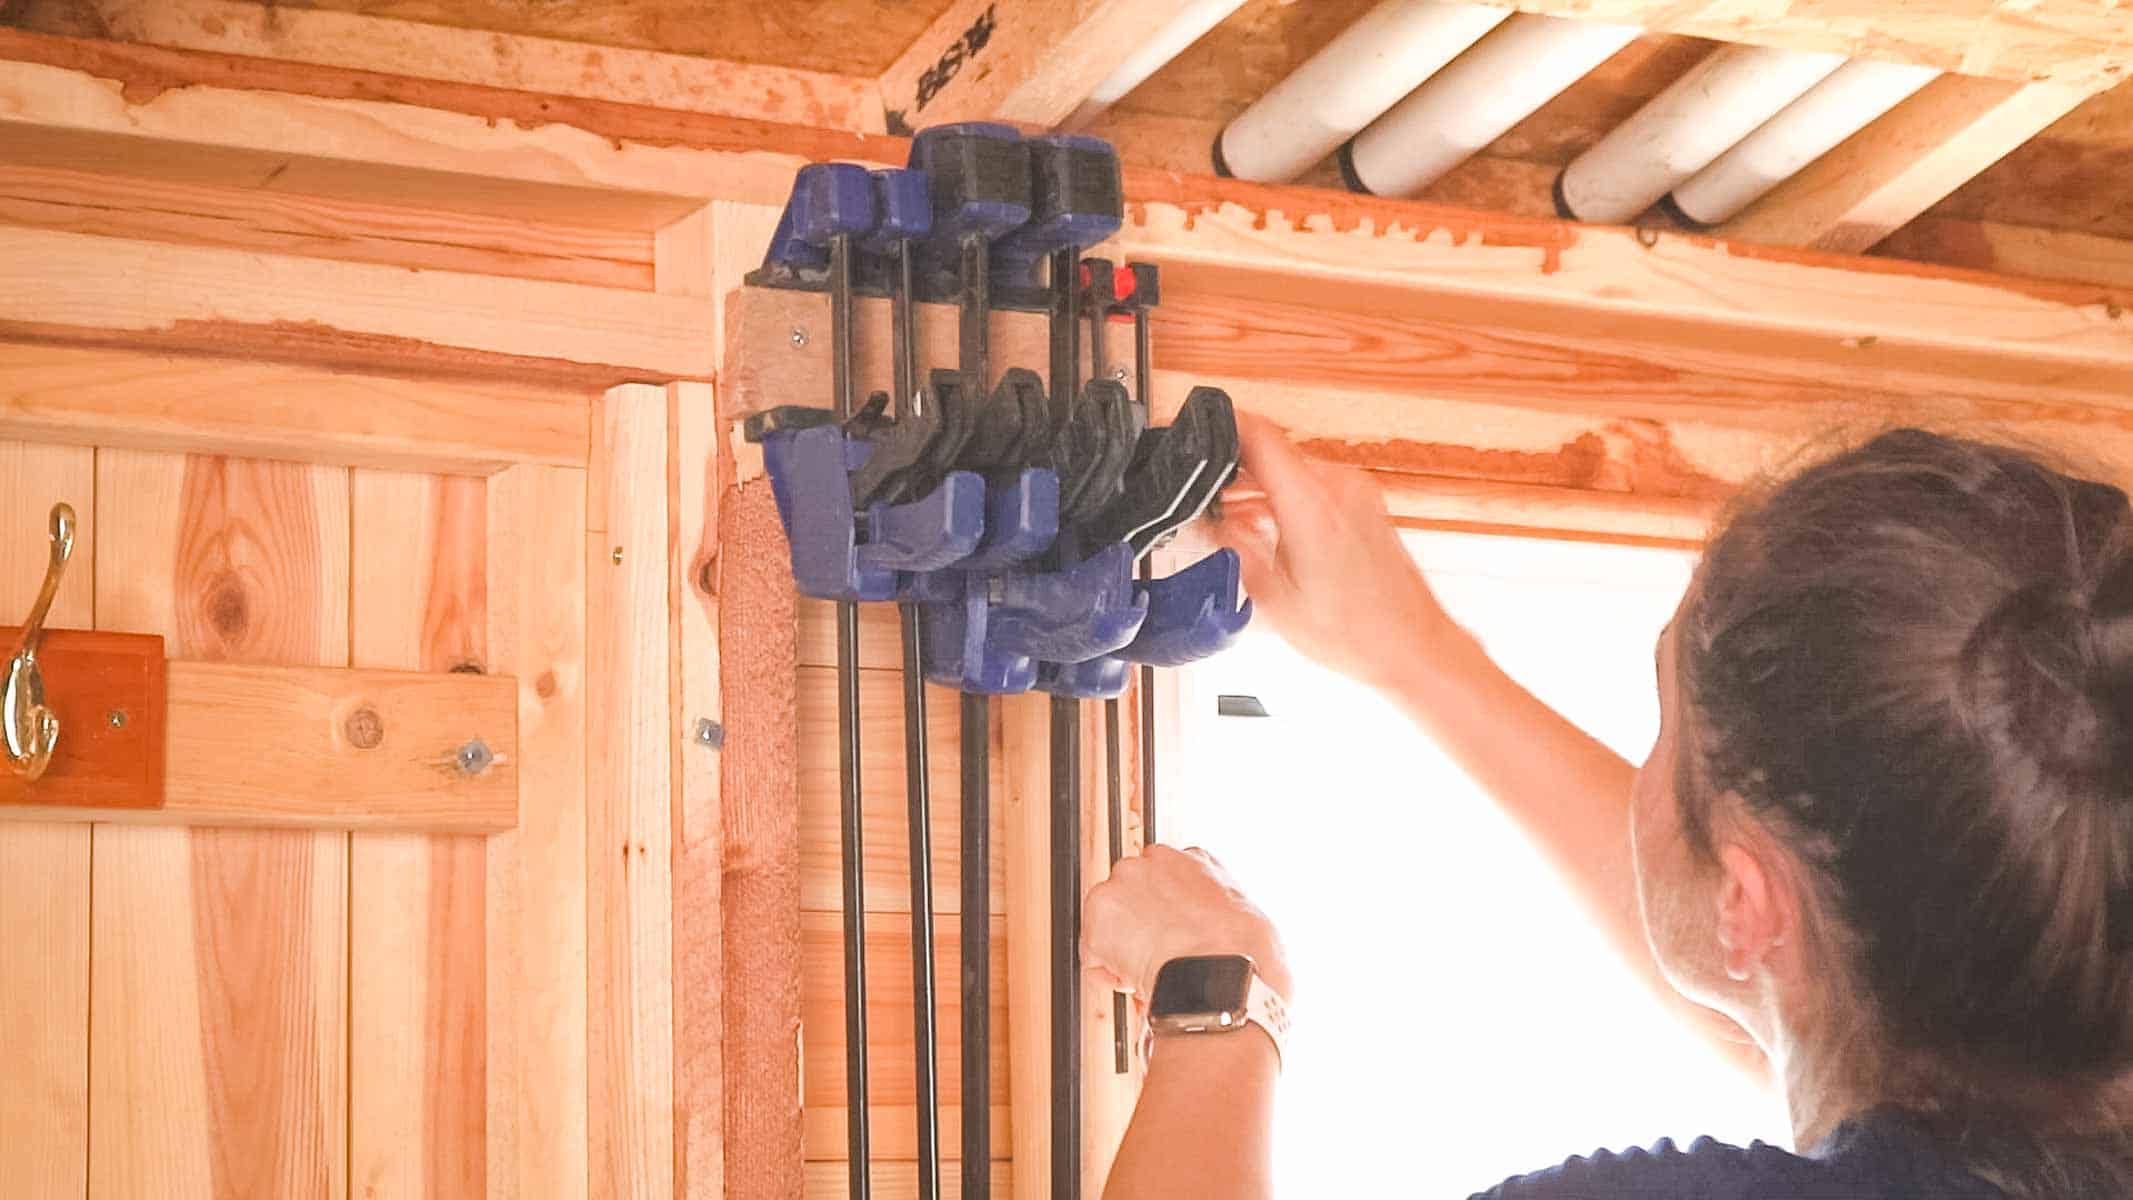
If you're starting out on beginner woodworking projects, you might not need a huge DIY clamp rack. I found a small section of spars, then cut offcuts to screw across.
Then simply clamped them to it. It's nothing fancy and gets the job done!
7. Storing Sash Clamps
Lower down the same spar section, I again screwed a baton across, but half way in the middle of the sash clamp while they're resting on the floor. This keeps them upright until I'm ready to use them.

8. Making a Pliers Rack
For a simply pliers rack, I used the same method as above and screwed an offcut to the spars and hung them.
However, I do recommend cutting the top with a bevel on both sides using a mitre saw to create an v-shaped angle.
This should help your pliers stay upright. Although I was too lazy to bother. I'll do it one day when I get around to it - but only with some sheet material, then trim it down for safety reasons. *I haven't unboxed my table saw yet.

9. Making an Easy Screwdriver Holder
Something you'll find in almost every tool shed or carpentry workshop is a set of screwdrivers.
To use more offcuts, I cut up some CLS timber to the same width between a section of spars. Then drilled a series of zig zag holes to hold them where the handles won't clash.
Don't make the holes too tight in your screwdriver organizer in case it's hard to remove them when the wood expands. And once made, you can screw them in between the spars.
*As for a screwdriver bit holder, I'm temporarily storing them in a plastic box until I make one myself.

10. Flat Wood Drill Bit Holder
As I continue my list of shed organization ideas, you'll see a fair bit of repetition. And for my flat wood drill bit, I used the same offcut method.
I drilled a few holes, spaced out enough for the spade section. However, for the smaller one, I needed to wrap tape around it to top it from falling through.
11. DIY Drill Bit Holder
Exactly the same as above, if you have lots of drill bits, then drill a series of larger holes to store each size.

12. Jigsaw Blade Holder
If you're not very good with tool box organization, this easy jigsaw blade storage is a great idea to keep them together and visible on the wall.
I cut an old waste pipe on an angle and glue gunned a scrap piece of wood on the base.
Then predrilled and screwed it to the spar. Or, you could glue a series of cut plastic pipes on top of the CLS offcut to store pencils, Stanley knifes, etc.

13. Shop Vac Wheels Platform
As you work in your shed workshop, you'll probably make a lot of sawdust. I was recently gifted this Wet and Dry shop vac, but I felt it needed castor wheels.
I found an old kitchen end panel offcut, roughly as a square piece. Then screwed a wheel in each corner.
Then, to stop it from slipping off as I pulled it around the shed, I screwed 4 lips around the hoover. Simple!

14. PPE Storage Idea
It was about time I created PPE storage as I've been guilty of throwing everything into a giant plastic box. Everything was jumbled up it was such a mess.
To organize all of my PPE equipment, I built 4 wooden boxes and turned them into drawers using OSB offcuts of similar heights. The frame for the drawers was from my old drawer plant stand as featured on Love Your Weekend With Alan Titchmarsh.
The OSB was rather thin, so I glued and nailed supports to the front and back sections of each drawer. Then fixed bottoms to each one, before suspending them with more offcuts as quick drawer runners.
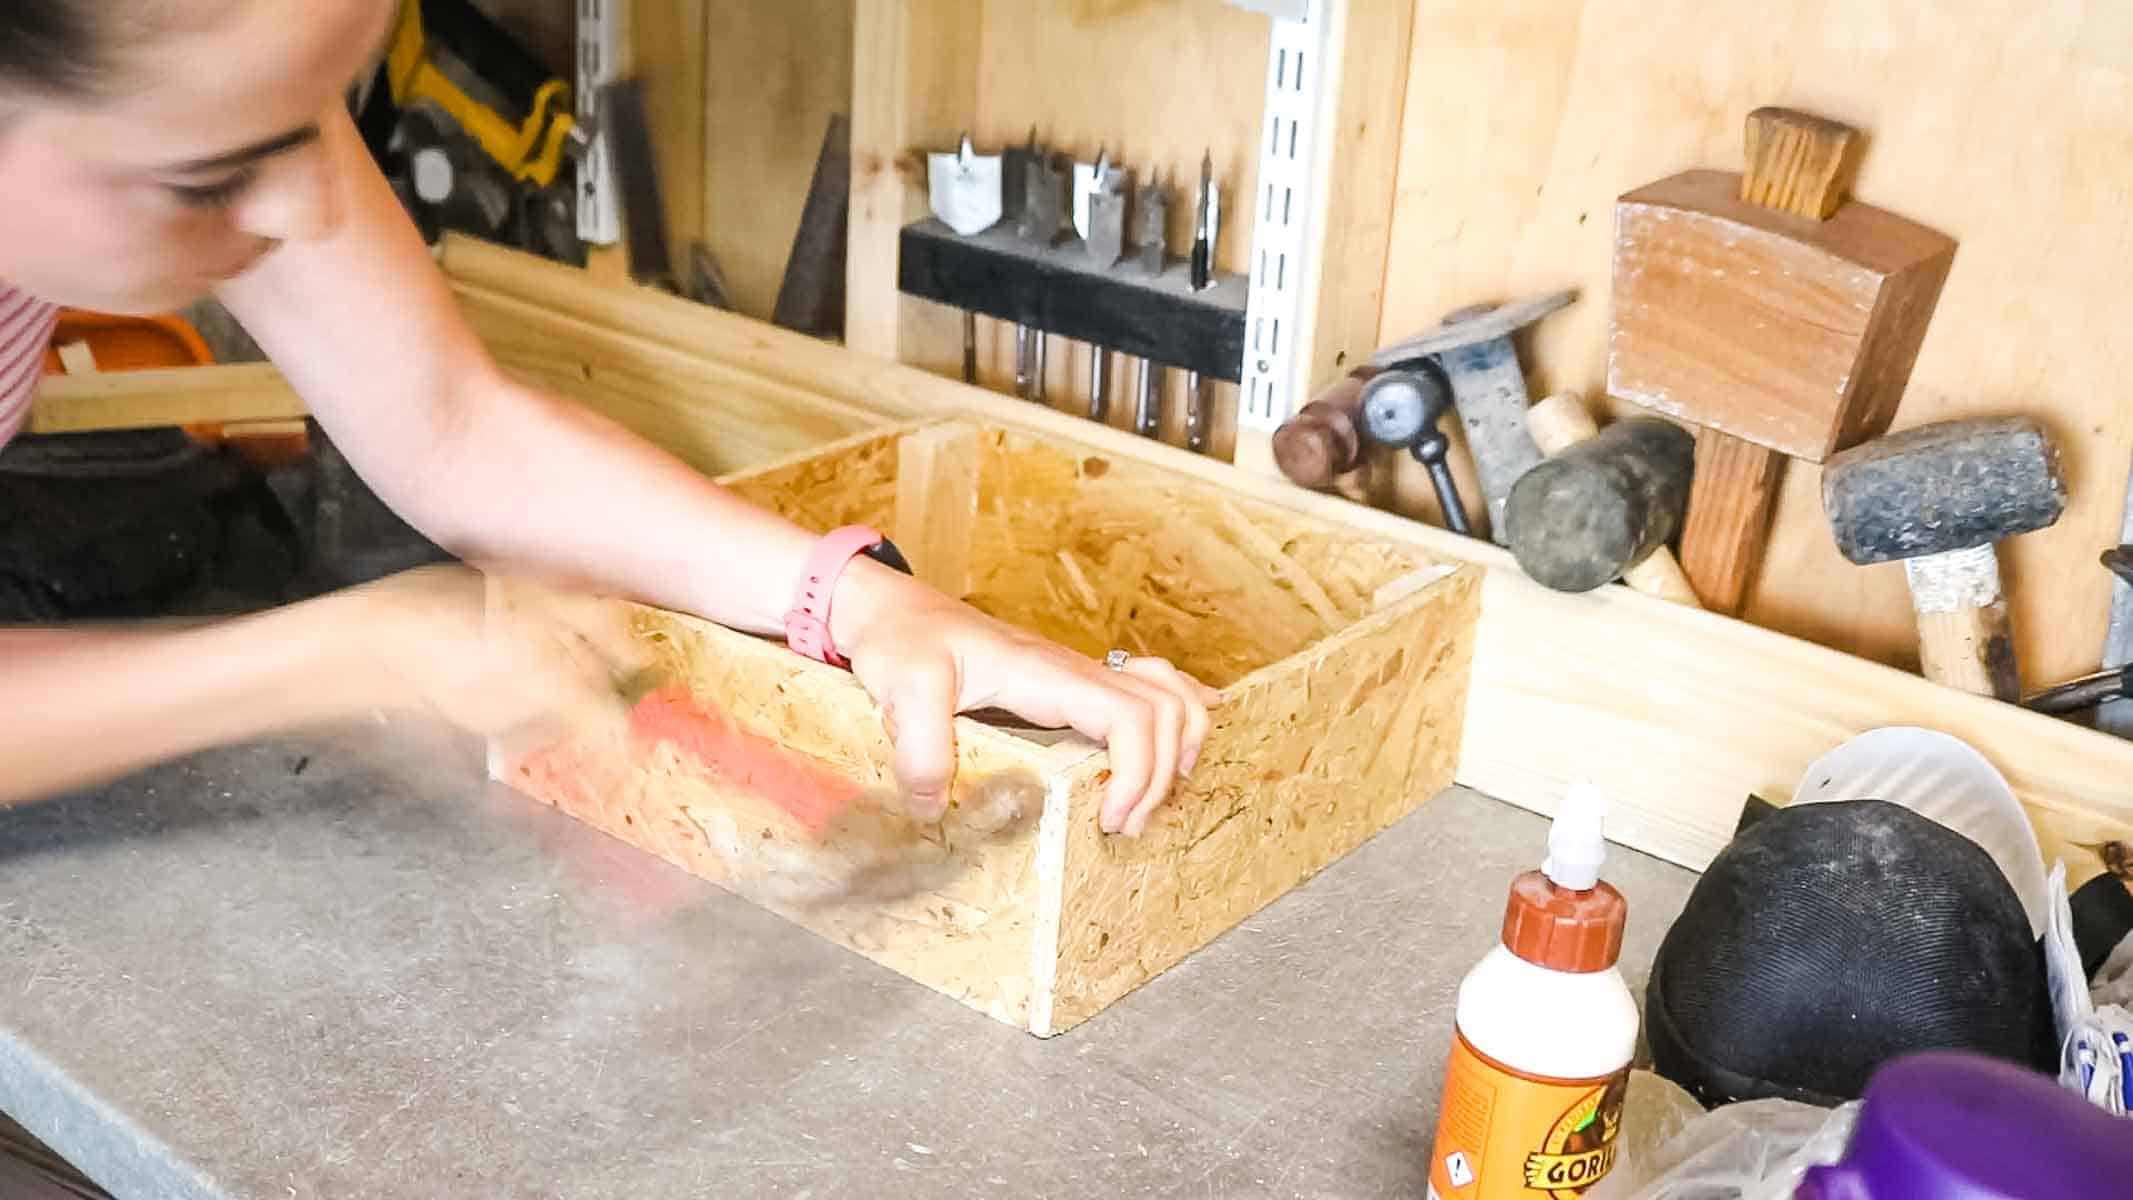
Making a Box Out of Wood Tips
As you'll notice, my drawers are all different heights. This was for quickness. However, it was important that they were all square as I left around an 8mm allowance on either side. To ensure for square, I recommend reading my how to build a shed door.
In short, I check the length diagonally with a tape measure and knock the longest measurement side with a hammer until they match.
Bonus Shed Organizing Idea
When storing rubber gloves, I was inspired by Tale From the Tinkerage by keeping them in pairs using bulldog clips.

15. DIY Sandpaper Storage
Another thing I needed was a DIY box shelf sandpaper organizer. Again, everything had been in a giant box. Terrible, I know!
You might see that I don't like throwing anything away and I'd saved 4 thick cardboard boxes. I also had some old conteboard after dismantling a bookcase as featured in my narrowboat interior tour!
Making shed shelves to move around meant some easy repetitive cuts. I essentially made a sandpaper shelf system on wheels to hold 4 boxes of sandpaper sheets, blocks, etc, all divided. The great thing is, if I want to develop more sandpaper storage ideas, I can always use these for something else.

16. DIY Silicone Tube Holder
One of my absolute favourite shed storage solutions is this DIY caulk tube holder built between shed spars made with offcuts.
I lined and screwed deeper pieces of wood along two spars, then screwed scrap pieces of wood as shelves in between.
- Each silicone pot holder shelf is spaced 10cm apart
- Screwed at a 45 degree angle to stop them from falling out
- The shelves are deep enough to store smaller things, like pots of glue, WD-40 cans and spray paints
- The bottom section has a shelf to store silicone nozzles
- Screws are added on the side to hang caulking guns and a silicone remover tool
Alternatively, you could use an old wine rack or buy a sealant tube holder to the inside of an insulated and ply-lined shed.

17. Nail and Screw Storage Shelf
Something I'd dreamt about for a while was a screw organizer fitted between the spars. I also use this same space as bolts and nuts storage, nails, plasterboard fittings and my Screwfix cases of screws.
But, you can do it many ways:
- Recycle lots of glass jars and screw the lids to shelves
- Cut up milk bottles and use them as screw holders
- Make small wooden boxes and even hang them on French cleats as seen in my DIY chevron pallet headboard
The quickest method (albeit, more expensive, but I have SO many), was to use a selection of Really Useful boxes in 0.14L and 0.2L. I organized them first before screwing shelves around them to store them between my shed spars.
Also, if I ever want to insulate my shed, I can leave my integrated shelves as they are, then cover everything else.

18. Offcut Storage
Going back to the London brackets and twin slot systems, I find them strong enough to store my offcuts.
Note, I store my longest pieces along the top shelf, so they're out of the way until I need them.
I originally made the mistake of storing them under the workbench, but I plan to make more cabinet storage under there.
19. Easy Tool Wall
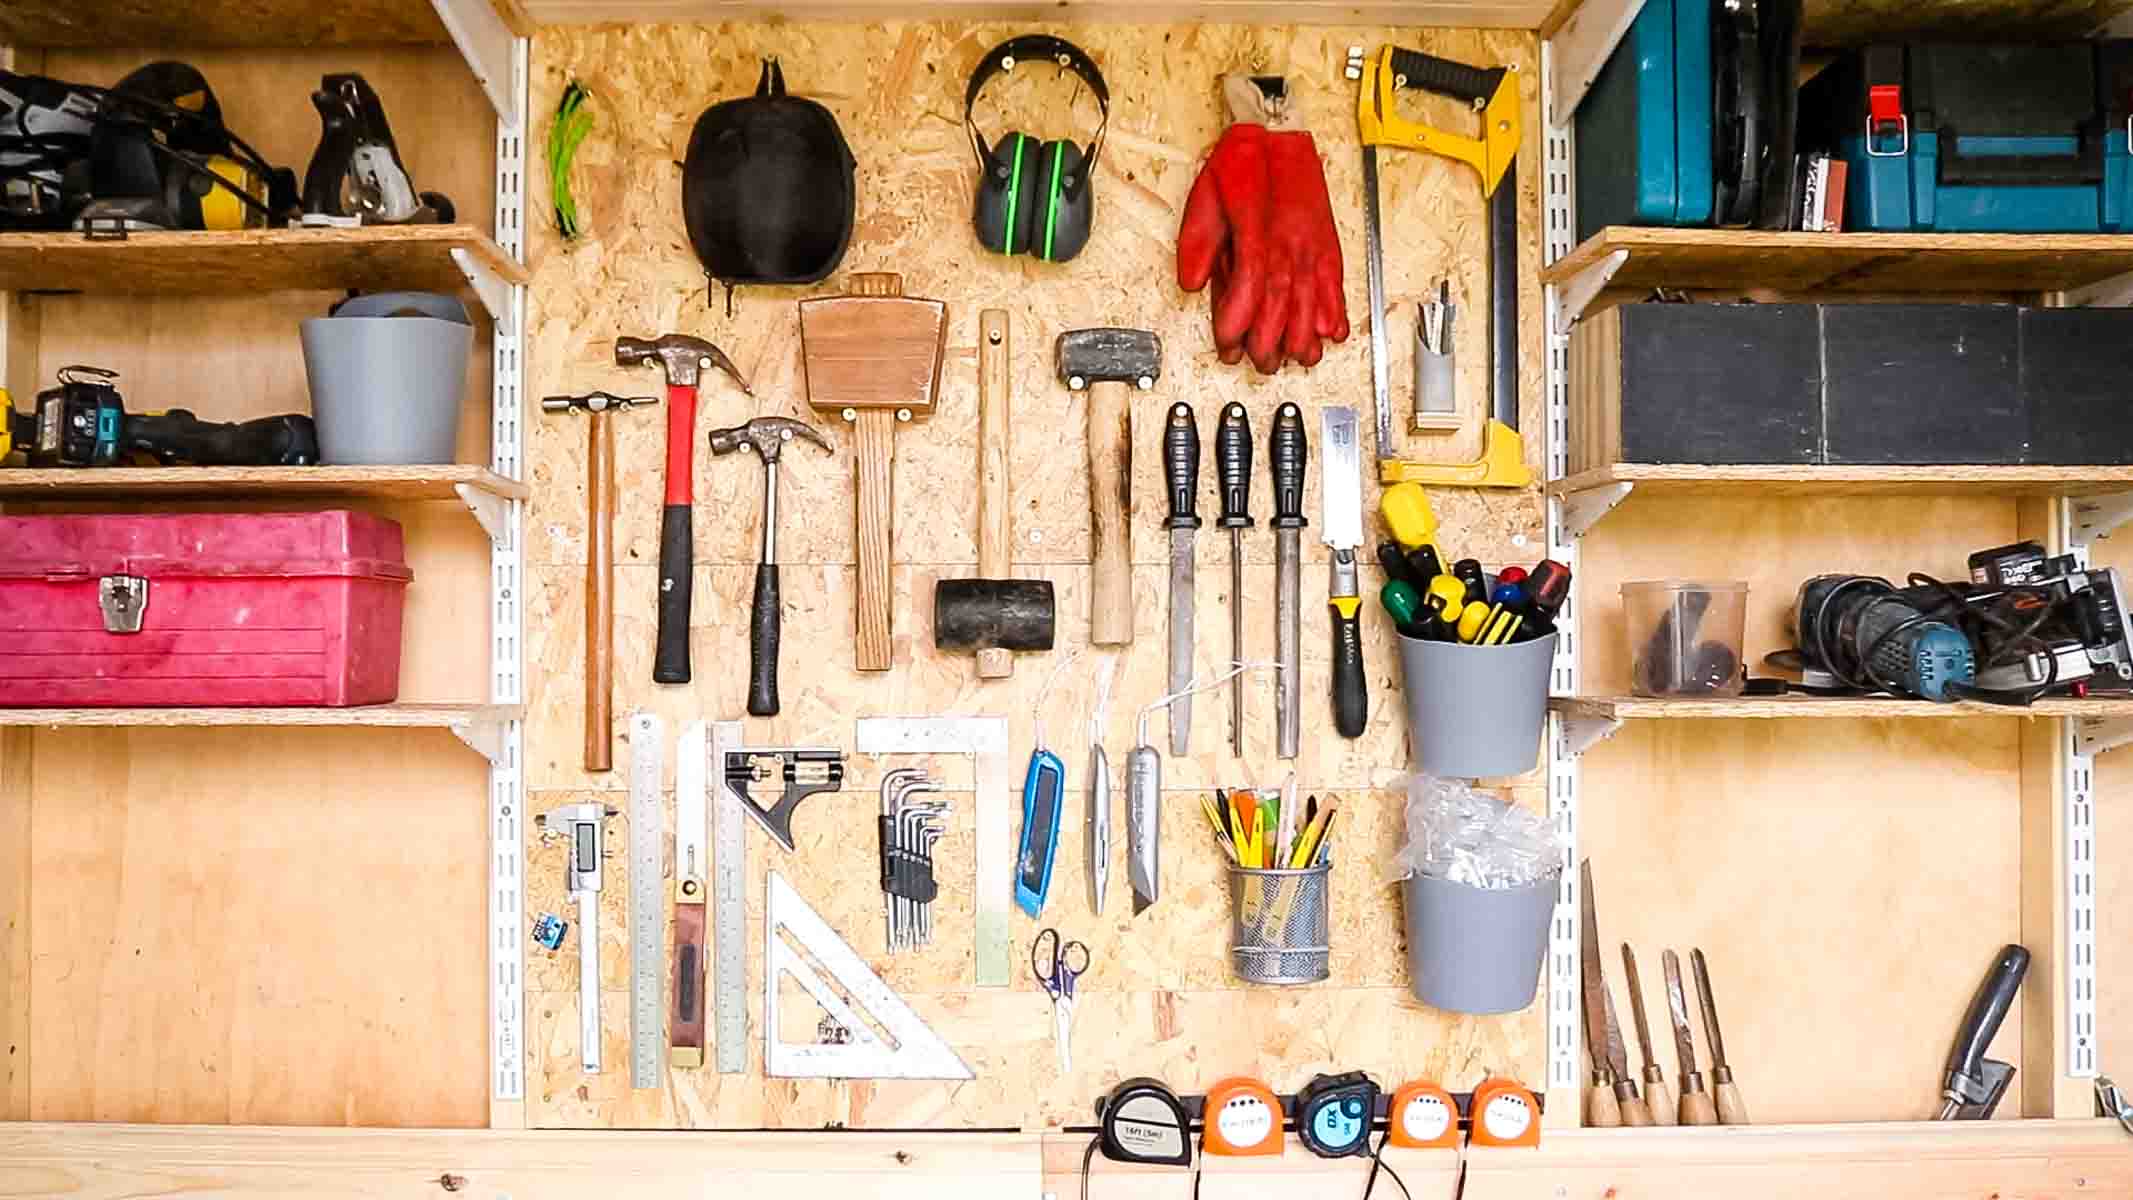
Forget looking for the best pegboard system, using loads of wood up for a French cleat wall system or other tool board ideas. The quickest and easiest way is to clad a section of spars with wood, then add screws to hang up your most used tools.
I added additional CLS spars against the existing ones as I have twin slot shelves on them. Then cladded with a few offcuts of OSB.
To start, I hung my Stihl Dynamic bluetooth ear defenders, Stealth mask and continued until I was happy. This is great to hangs things like:
- Hammers
- Mallets
- Rasps/files
- Screw an IKEA mesh Dokument pen holder
- Mount a metal strip with washers behind to hang tape measures
- Speed squares
- Sliding bevels
- Stanley knives
- Rubber gloves
- Hack saws
- Scissors
- And SO MUCH MORE!
Bonus Handy Shed Tool Rack Tip
Although I haven't done it yet, it's a good idea to draw around the tools with black marker pen. That way, you know what's missing when you haven't put it back.
I'll do this once I know I've completely finished designing my garden shed tool storage.
20. Easy Hand Saw Storage
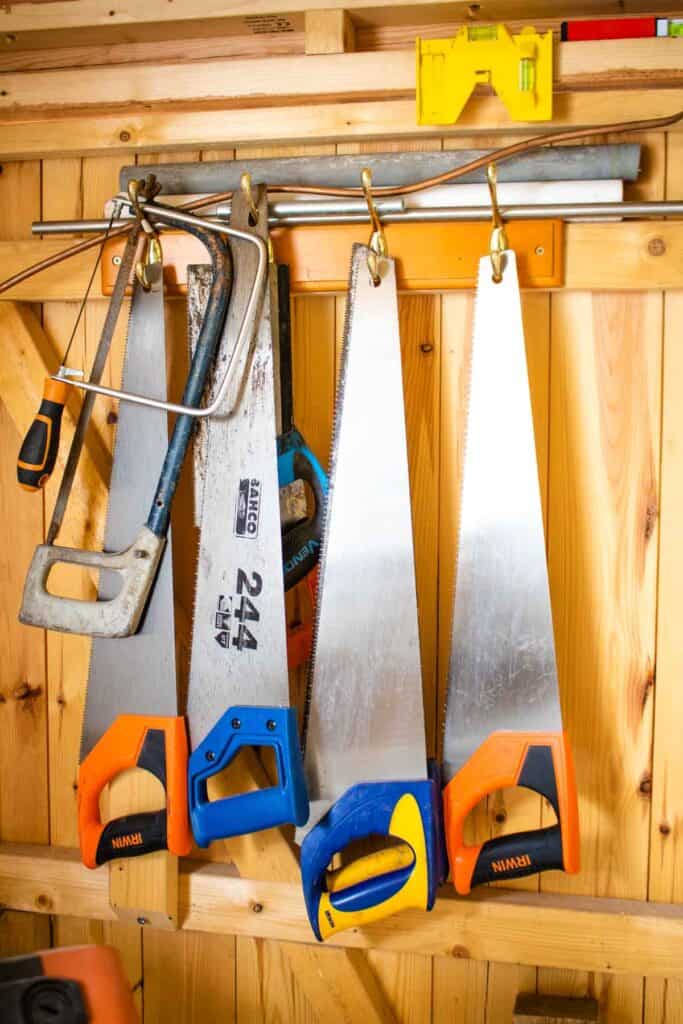
One of the most simple hammer storage ideas I use is just hanging them behind my shed door with a mounted coat rack.
You could, of course, use any hooks you can find for your own workshop storage ideas. Again, these are something I tend to hoard, for example, this for this utensil holder on my Upcycled Drawer DIY Mud Kitchen.

21. Use Lockers to Store Paints
Recently, I had a problem with a leaking wood preserve being stored on a top shelf and needed to clean it all up.
This brings me to something I've read recently that for health and safety reasons, chemicals such as paints, etc, shouldn't be above eye level.
And since spotting these 2nd hand lockers going spare at my Dad's woodyard, I turned them into my own hazardous storage cabinets. However, I had to make some quick shelf inserts made from offcuts.
22. Installing a Compartment Drawer Organizer
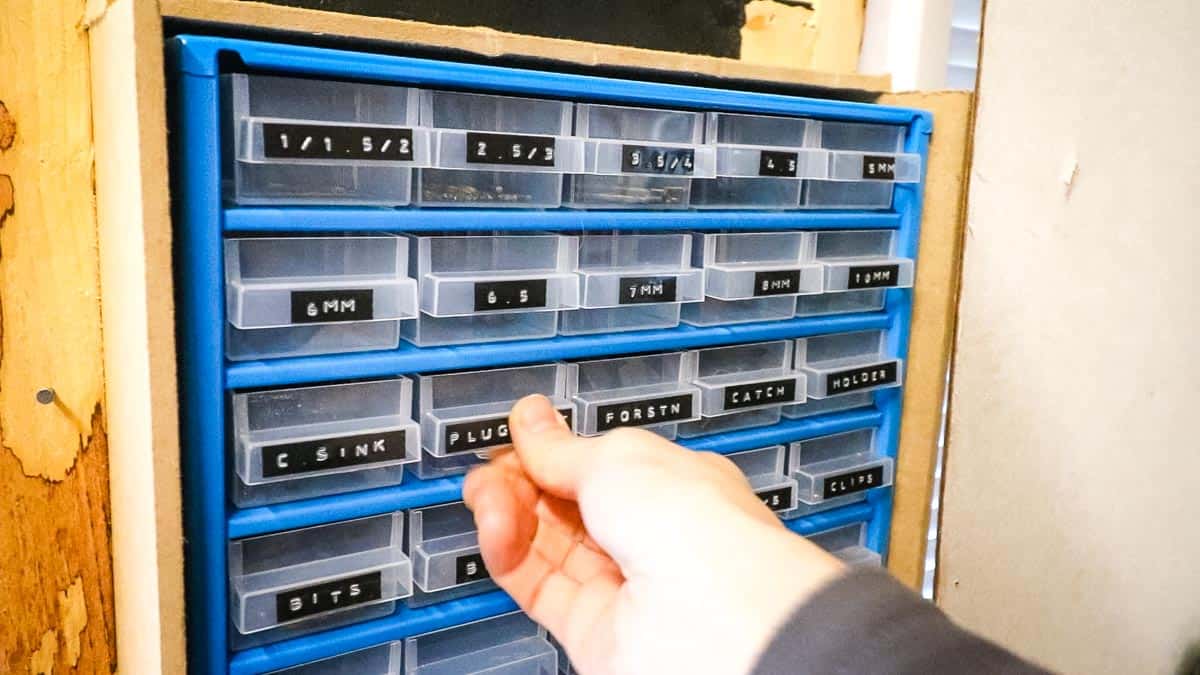
An impulse purchase recently while picking up wood in B&Q was this 25 compartment drawer system. I was able to mount it between shed battens, similar to my silicone holder.
It's been great to separate the MANY drill bits I have and anything else small.
To label them all, I bought this cheap DYMO Omega label maker. I wish I had this set up sooner!

23. Magnetic Tool Holders
Another adjustment I've done since publishing this post a few months ago is hanging my screwdrivers on magnetic tool holders.
These are unbelievably cheap considering you get 3 and they're all different lengths.
It's also allowed me to hang my spanners on the wall too, instead of fumbling through a bag for the right size.

24. Make a Box on Wheels
One of the most frustrating things in my workshop has always been how to store paint rags. I like to reuse them to death, while the pile keeps growing and it's too heavy to lug around.
Instead, I created a basic box, starting with structural timber for the base and worked my way up.
Then added more uprights for the framework and cladded it with whatever scrap piece I could find. Then screwed castor wheels underneath. It's not pretty, but it was dirt cheap and is easy to move around.

25. Add Bonus Under Desk Drawer Storage
I love this simple DIY hack as featured in my DIY faux marble desk with hair pin legs.
All you need are some IKEA Trofast drawers or similar with a lipped egde. Then mount some wood with a lip under your desk so your drawers can hang on them.
You can either use:
- hard wood oak end trim like this *preferably old offcuts like mine for free
- Screw two different widths of wood together before mounting underneath
- Or do a rebate in a piece of wood as I show in my wooden box files
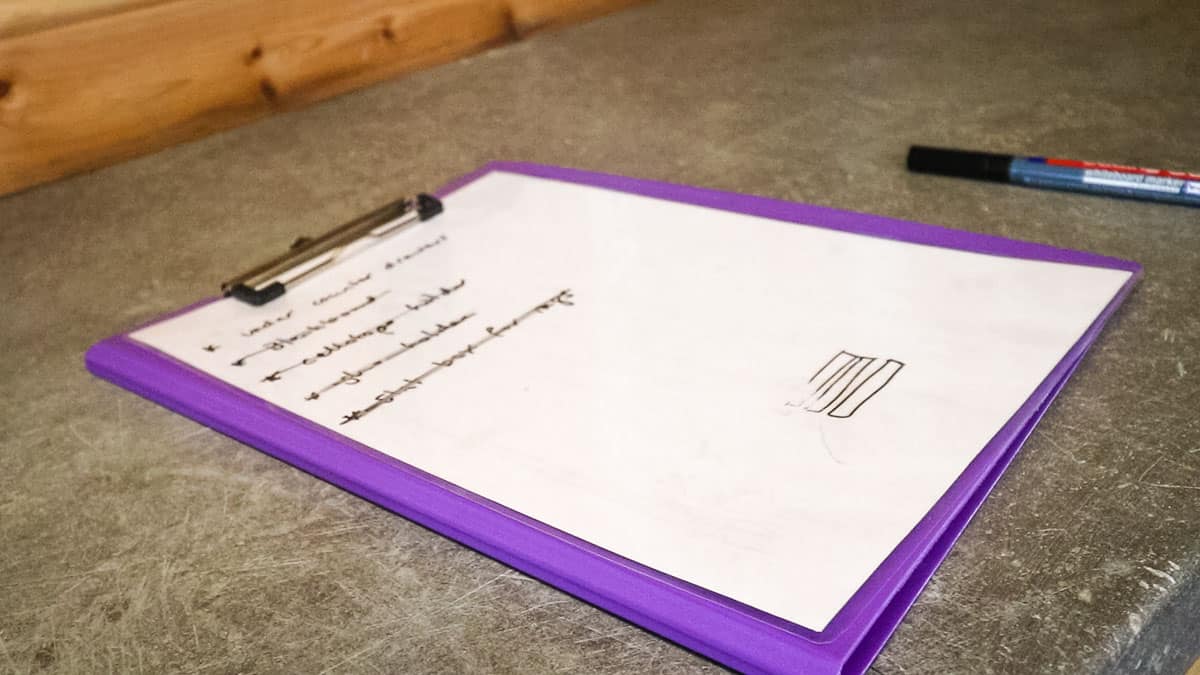
26. Create a Quick Workshop Whiteboard
I was going to have fun making a blackboard with frame for my workshop because we all need to write down ideas, lists or measurements from time to time.
Instead, I found some old laminated sheets which I felt would be a waste to throw away.
I found they're perfect to use as a whiteboard on a clipboard. It's also REALLY easy to wipe off with Silicone WD40 and can be written on immediately after!

27. Upcycle an old CD rack for a Drill Holder
This was possibly a big lightbulb moment! I've had this old CD rack for years and didn't know what to do with it. After reorganizing my workshop, I realised that if I cut notches out of the bottom, I could hang my drills.
Note, I'd love them to be facing the other way, but the CD rack isn't that deep. OK... so technically I can temporarily, as I have space between the shed's battens. BUT, I plan on insulating and ply lining it, so won't be able to then.
And once mounted to the wall, I was able to store all my drills batteries. Can you spot the non-drill though??
More Tool Hangers for Sheds
I don't think the workshop will ever be finished in terms of organization, which is why you can find 21 more DIY shed shelving ideas. There is ALWAYS something that could be improved to maximise your shed space!
If you have any tool storage ideas you'd like to share, then please don't keep them a secret 🙂
You Might Also Like
- How to Build a Wickes Shed
- 50 Scrap Wood Projects to Organize Your Home
- How to Fit a Shed Lock
- Make a Shed Base
- Easy DIY bookcase
- DIY TV Stand (Scrap Wood Project)
- Make this bike shed into a smaller workshop shed with double doors
- DIY Z Shelf as a 3 Tier Trolley for Basket Storage
- How to Fit a Pop Up Socket
- Featheredge DIY Wooden Box with Lid
Pin My 27 Shed Workshop Ideas for Later
More Ideas Using Offcuts
Since this post, I've put a list together of 25 ways offcuts can offer a helping hand. I highly recommend checking it out before throwing them.
And if you're like me, you'll find parting with scrap wood is a very painful part of organising your workshop.
27 Organizing a Shed Ideas For Workshop Tools

Here are 27 easy ideas I created for organizing a shed full of tools in a workshop on a budget. These shed storage ideas also apply as garden tool racking and in a garage or other space.
Materials
- Scrap wood
- Screws
Tools
- Screwdriver
- Circular saw
- Hand saw
Instructions
- Create an easy workbench using studding and kitchen worktop

- Screw strips above at the back and underneath to create another bonus shelf

- Fix twin slots to the spars to create adjustable shelves

- Screw London brackets to spars and place OSB or similar as shed shelves

- Mount offcuts of wood to roof spars to store long things, like spirit levels, etc
- Screw strips of wood over shed spars to attach clamps easily
- Fix scraps using the same method as above, but halfway up sash clamp lengths
- Repeat to hang pliers and tin snips
- Cut CLS offcuts to the same width between spars and drill holes or screwdriver before screwing the offcut inbetween spars
- Repeat above for flat wood drill bits

- Use method above for drill bit holder
- Mitre some plastic pipe and glue gun a scrap of wood on the bottom to store jigsaw blades, then drill and screw plastic to spars

- Create a mobile platform for a shop vac by screwing on castor wheels and lips on top to prevent it from rolling off
- Make basic boxes using offcuts and a frame with lips as drawer runners to store PPE

- Recycle boxes to store sandpaper and make a basic shelf around it using scrap wood, then add castor wheels on the base
- Create a wall-mountable silicone tube shelf with strips screwed on the inside between two spars to extende the surface area. Then screw offcuts as shelves on a 45 degree angle.
- For screw storage, repeat as above, but screw shelves level and store in plastic boxes
- Store long offcuts on top shelf using twinslot system to keep them out of the way
- Create an easy tool wall with timber cladded on spars, then add screws here and there to hang your favourite or most used tools
- Use coat hooks to hang hand saws
- Store paints etc in metal lockers

- Install a compartment drawer organizer between shed battens and store drill bits, etc, then label each one
- Hang screwdrivers and spanners etc with metal tool holders on the wall
- Make a cheap cladded box and add wheels to storage rags, offcuts, etc
- Screw rebated wood strips under a workbench to hang IKEA trofast drawers
- Use the reverse of an old laminated sheet of paper as a quick whiteboard
- Upcycle an old CD rack into a drill holder


JOHN NEWELL
Awesome Ideas! Thanks for posting!