
Here's a step by step on how to fit a 5 lever mortice lock to make a shed more secure. This comes from my DIY biked shed project and features a reversible sash lock, but you may need to change a mortice lock a screw to replace an existing one.
AD | The YouTube video for tutorial is sponsored by Hiatt Hardware. All opinions are honest.

A few years ago, I needed to learn how to change a mortice sash lock on a double shed door because it started to stick.
In fact, I'd replaced a 3 lever mortice lock, like for like. This resulted in a few people commenting that insurers won't pay out it in the event of a burglary unless it was a 5 lever deadlock. (Feel free to check out the different mortice lock types if it helps).
And while planning my homemade bike shed, I decided the main single door to be a 5 lever one. So, here's how I fitted my secure bike shed lock with Hiatt handles.

Tools Used to Fit a Sash Lock to a Shed Door
Please note, as an Amazon Associate, I earn from qualifying purchases made through links.
- C16 block (to screw to shed door frame to house the 5 lever lock)
- Weatherproof wood glue
- Wood screws
- Pencil
- Combination square
- 18mm auger drill bit (for 5 lever lock) *PR gift from Abracs
- 12mm auger drill bit (for handle spindle) *PR gift from Abracs
- 8mm auger drill bit (for keyhole) *PR gift from Abracs
- Duct tape for drill bit depth marker
- Combi drill
- Safety goggles *PR gift from JSP
- Chisels
- Hammer
- Door wedge (to keep it steady)
- 22mm flat wood bit (for lock keep)
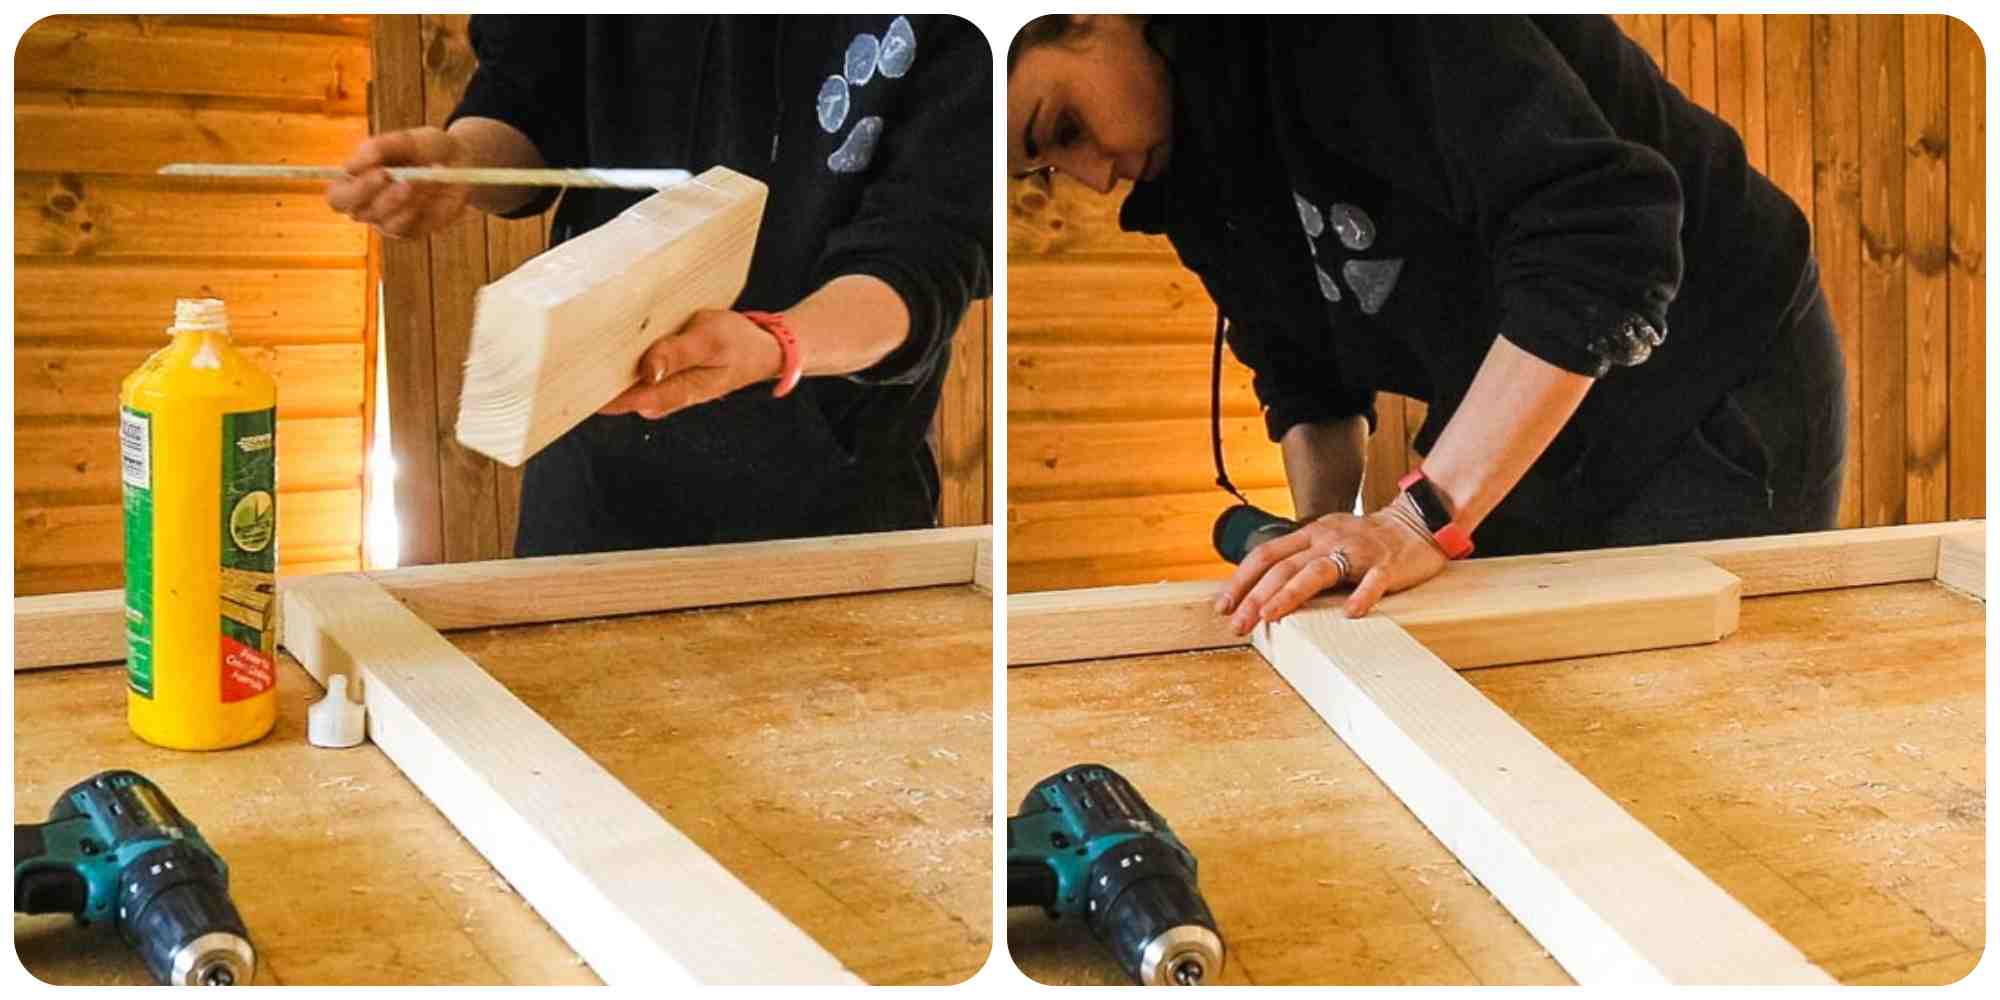
Adding Structural Timber to Shed Door
Before you even get started fitting a 5 lever shed lock, you need to make sure you have enough wood to hold it.
If you haven't built it yet, then above, I'm gluing and screwing a C16 offcut just above the middle spar. Of course, it's important that you don't screw where your lock will be and avoid nailing shed door trim in that area.
For Existing Shed Doors
You can glue and screw a structural block for existing sheds, too. Note, you may want to add a nail or two from the cladding side, too, but ensure you avoid your planned lock zone.

Fitting a 5 Lever Lock
If you haven't bought your sash lock yet, then from experience, do yourself a favour and buy one that is reversible if you know the catch is the wrong way.
Above, I'm fitting a Hiatt 5 lever lock which is MUCH easier to flip around, otherwise you may need to unscrew it, twist and re-screw. All meanwhile, ensuring you don't lose the spring.
Let's take a look at how easy your life can be with a reversible lever lock!
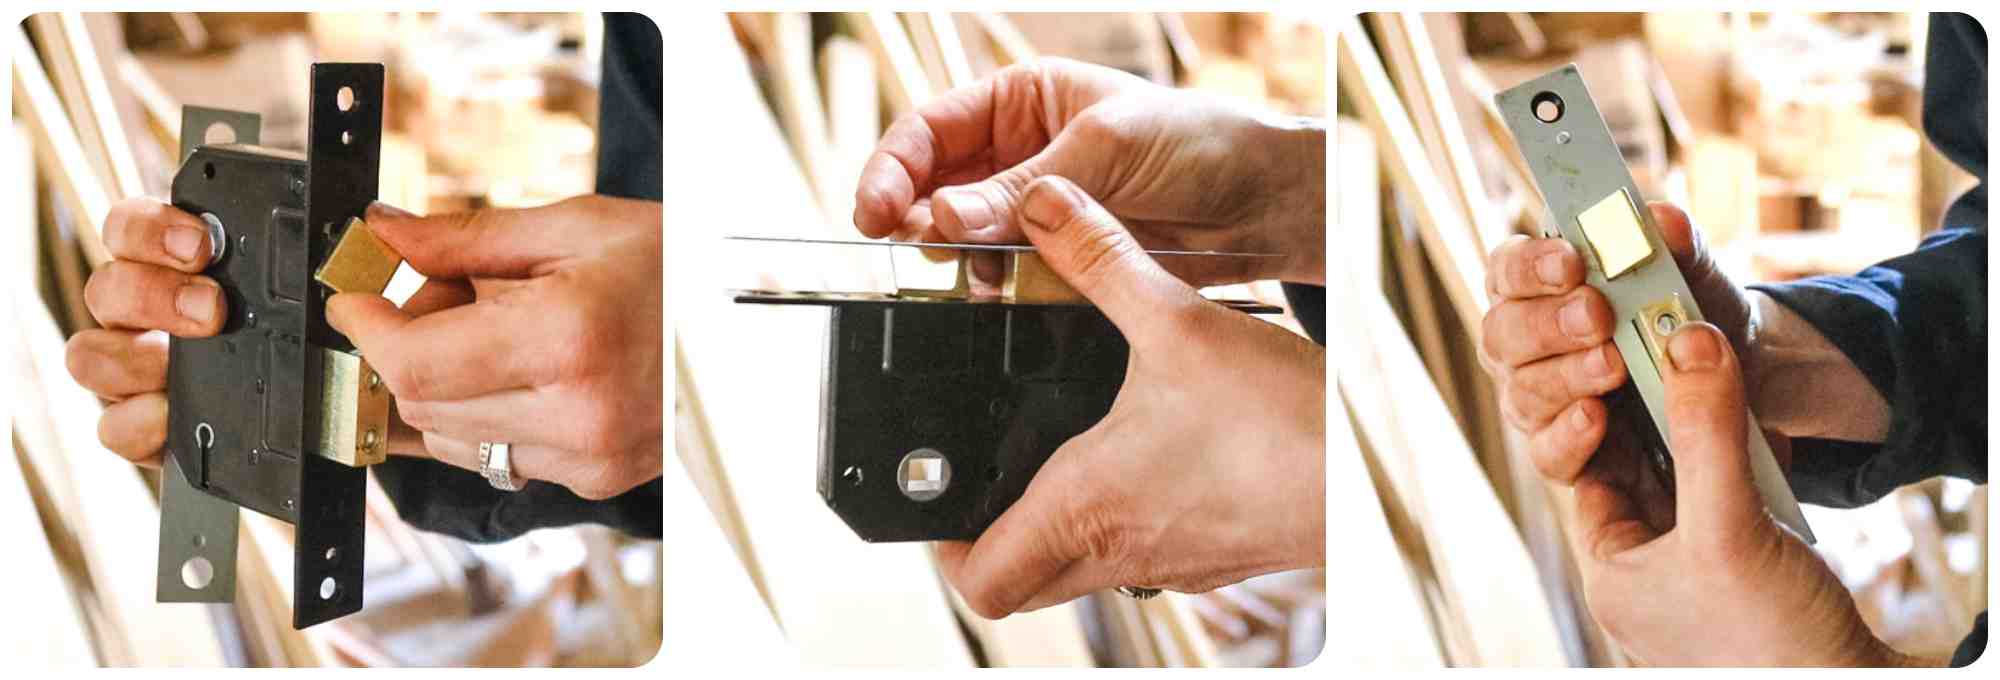
How to Turn the Catch Around
You'll need to be able to push the door closed without the need for turning the handle. If that's not the case, you'll need to change the direction of the catch.
With a reversible lever lock, the first image above shows how I don't have the cover plate on. You can then twist the catch around, then place the plates back on and it fixes it all in place.
Note, there are two cover plates. The final plate can come in a variety of colours, usually either be brass, nickel or chrome, etc.

Positioning the Sash Lock
Next, you'll need to decide where you want your lever lock to be on your shed door where that C16 block is.
I'll give you a tip, ensure you leave yourself plenty of space to screw your final handle on, on the back of the door where the framework is visible. I narrowly missed having to glue and screw another block above the existing one.
Then hold the lever lock flat on its side, on the edge of the door and draw along the top and bottom to get the height.

Find The Centre
Next, I drew a centre line to meet those two pencil lines I did in the step before, using a combination square.
Tip: I recommend avoiding a carpenter's pencil as it's rather thick to avoid going off centre.
And, preferably use a sharp pencil for better accuracy.

Drilling The Shed Door For the Lock
To reduce time chiselling, my Dad advised me to use an 18mm auger bit to drill a series of holes, top to bottom of my pencil line. But, start just above the line, too.
Drilling Tips
- Put some tape around the drill bit to reference the depth of the lock with an extra 5mm.
- Use torque setting 2 (the 1 or 2 switch usually at the top) with it being wood, not masonry
- Regularly take it out to clear the hole of sawdust before continuing
- Wear safety goggles. It might sound daft, but shavings fly everywhere
Then check to see if it slots in ok, but if it's really tight, remove some sides with a chisel because you'll need to be able to take it out again for the next steps.

Mark Or Score Around the Lock
I'll be honest, my least favourite part, but it's essential, is to set back the lock by chiselling. It's really more that I'm still learning and want to be better with practise.
You can avoid this by using something like a Trend door lock jig and a router, set at the right depth.
ANYWAY, using a sharp pencil or Stanley knife, score the wood around the late and remove the lock.

Chiselling the Door
Next, make a series of notches with a preferably sharp chisel, then clear it with a chisel. It helps to wedge the door to prevent it from moving.
Also, if you've only done this a few times like me, there's no shame in just taking your time.
I recommend watching how I do my notches in my comprehensive guide on how to hang a door here.
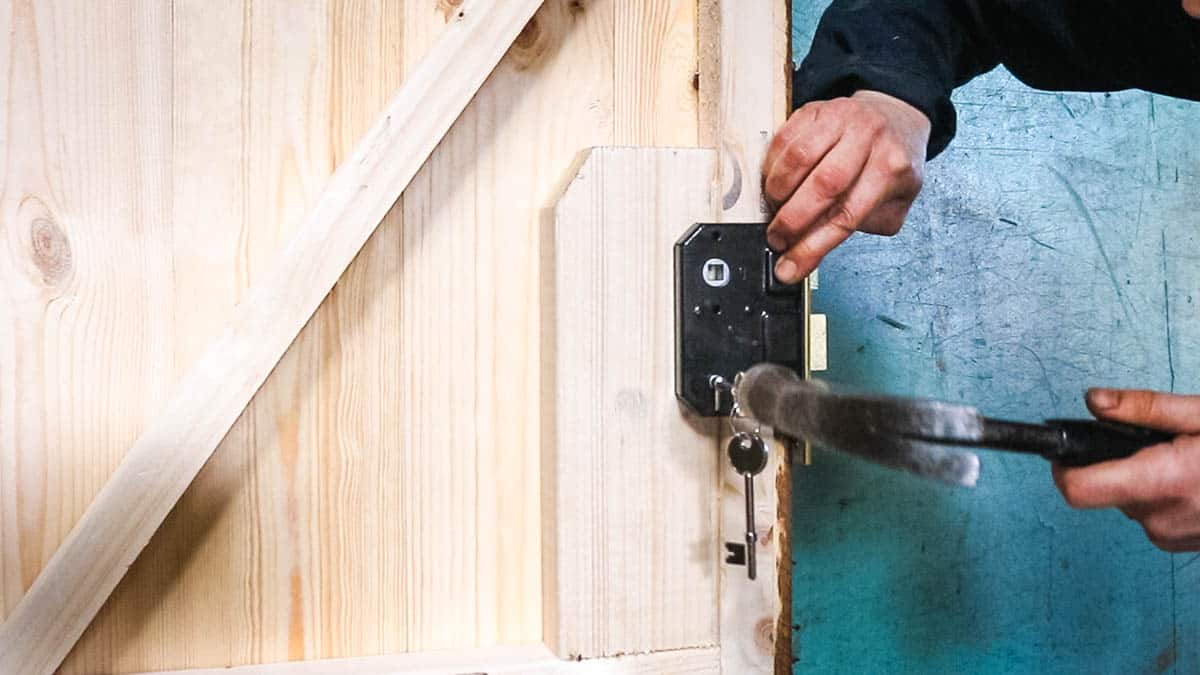
Drilling the Keyhole and Door Handle Spindle
The next job I had to do was line up my lock with my chiselled area, but this time, on the back of the door. I drew a pencil mark where the spindle handle needed a go, and hammered the key gently to make an impression on the frame.
For the keyhole, you'll need to draw on the impression and extend it lower, to allow for the depth of the key.
Then slotted in the lock and predrilled and screwed it to the door.

Then, using a 12mm auger drill bit, drill the spindle hole from the back. But unlike me, (I got distracted), ensure you stop before it drills through to the other side.
Then, drill from the opposite side. This ensures you don't split the wood. Fortunately, the handle covers any slight splitting, but if it's for an internal door with a small handle, this may be a costly mistake.
For the keyhole, drill two holes vertically with an 8mm auger bit.

Screw the Handles On
Now slot the handle spindle through the top hole and screw on the handles on the front and back.
Then check to see if you can get your key in properly to lock and unlock your lock. Otherwise, you may need to make the hole slightly bigger.

Drilling For The Lock Keep
The final main step I needed to do was mark on the door frame as to where the lock keep goes. Another tip I'll give you is, open the door and turn the key to the lock position so it sticks out.
Hold the lock keep over the lock and close the door as much as possible, then draw the top and bottom of the lock keep on the frame.
Then mark the centre position again and drill another series of holes, but this time, with a 22mm flat wood bit.
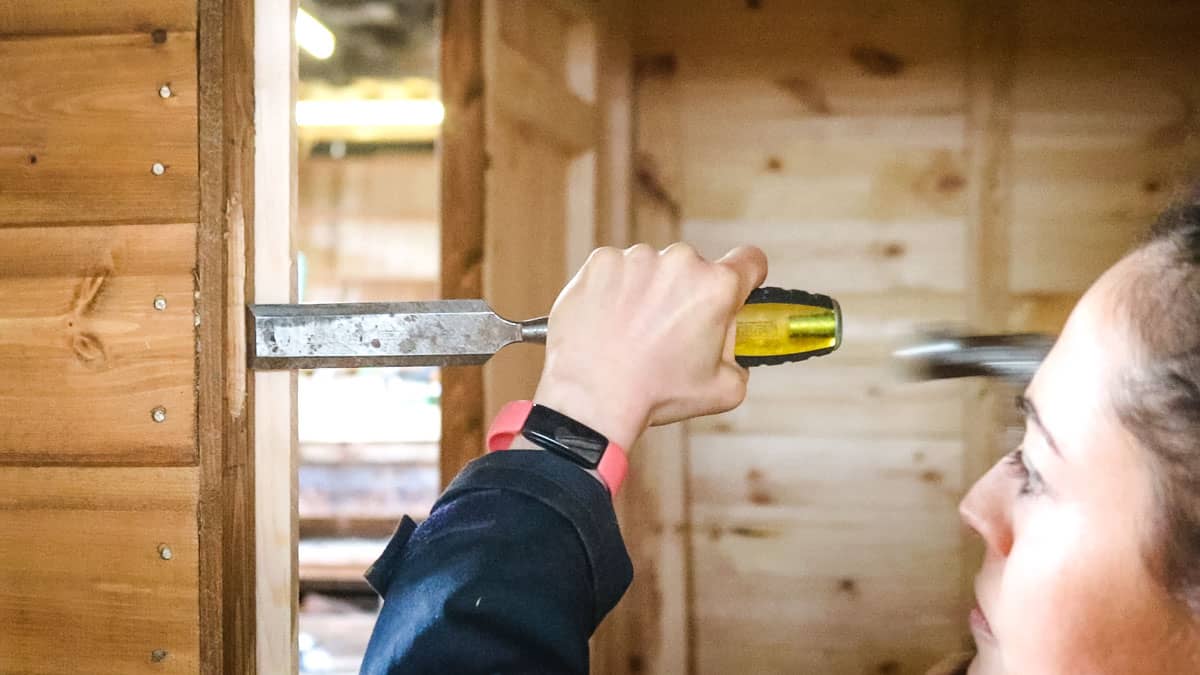
Chiselling For the Lock Keep
Then repeat the same chiselling technique as easier to set back the lock keep.
This also goes for the lip, although sometimes, you can hammer these to make a dent in the wood.
Note, you may need to chisel more where you drilled holes, so just take your time until you get it right.

Then slot the keep in, predrill and screw it to the frame and check if you can lock it.
If Your Lock Doesn't Lock
As I built a bike shed in my Dad's woodyard to flat pack and build at home, the lock and the keep didn't line up. And that's because the ground wasn't level.
Ensure your shed is level by adding shims or packers under the base.

How to Fit a 5 Lever Mortice Lock on a Shed

Here's a step by step on how to fit a 5 lever mortice lock to make a shed more secure. This comes from my DIY biked shed project and features a reversible sash lock, but you may need to change a mortice lock a screw to replace an existing one.
Materials
- 5 lever lock
- Door handles
Tools
- Chisels
- Auger drill bits
- Combi drill
- Duct tape
- Pencil
Instructions
1. Position where you want the lock, resting on the front edge of the door and draw along top and bottom
2, Draw a centre line from the top and bottom of the pencil lines
3. Drill a series of holes along the time with an auger drill bit
4. Place the lock in and score around the face
5. Chisel the area out to offset the plate
6. Place the lock on the side of the door, inline with the chiselled area and draw where the spindle handle hole is and the key hole.
7. Drill the holes partially on one side, then finish from the opposite
8. Screw the lock in, following with the handle spindles and handles
9. Mark the lock keep on the door frame opening and repeat the drilling and chiseling process.
10. Screw the lock plate on and lock.

Comments
No Comments