
A step by step driveway gate installation with double metal gates with enough clearance for your drive top open properly. We'll also show you how to prevent them from being stolen and drilling holes in the ground for drop bolts. Also includes a how to video to follow along.

Back in 2019, I fitted these second hand 5ft metal gates with my Dad on the driveway of their bungalow project.
Originally, there were some old fashioned wrought iron gates here. There wasn't anything wrong with them as such. But we just gave them an update for free.
So, I'm going to show you how to fit metal driveway gates or metal garden gates. Particularly double metal iron gates ones to bricked pillars. Or, you may have other gate posts.

Tools & Materials Used To Fit Double Driveway Gates
- Metal gates*
- Metal gate posts and cement if you don't have a bricked pillar
- Hack saw
- Spirit level
- SDS hammer drill
- combi drill
- Masonry drill bit
- Concrete screws *do not need rawl plugs
- Long structural timber for clearance gauge
- Long straight edge (longer than the width of each gate)
- Adjustable spanner
*Note, when looking for metal gates for sale, check out places like eBay, Gumtree, etc. For example, my parents sourced cheap driveway gates as they were free. However, metal driveway gates cost from £150-200 brand new.

How to Install Metal Driveway Gates
Firstly, I'm not going to show you how to make metal gates as it would require welding. This is something I'm yet to learn. So, I'm assuming you have your metal gates.
You can find a metal gates measuring guide here if you haven't got them yet. (This is not sponsored and I have never ordered from Metal Gates Direct).
Finding the Right Clearance
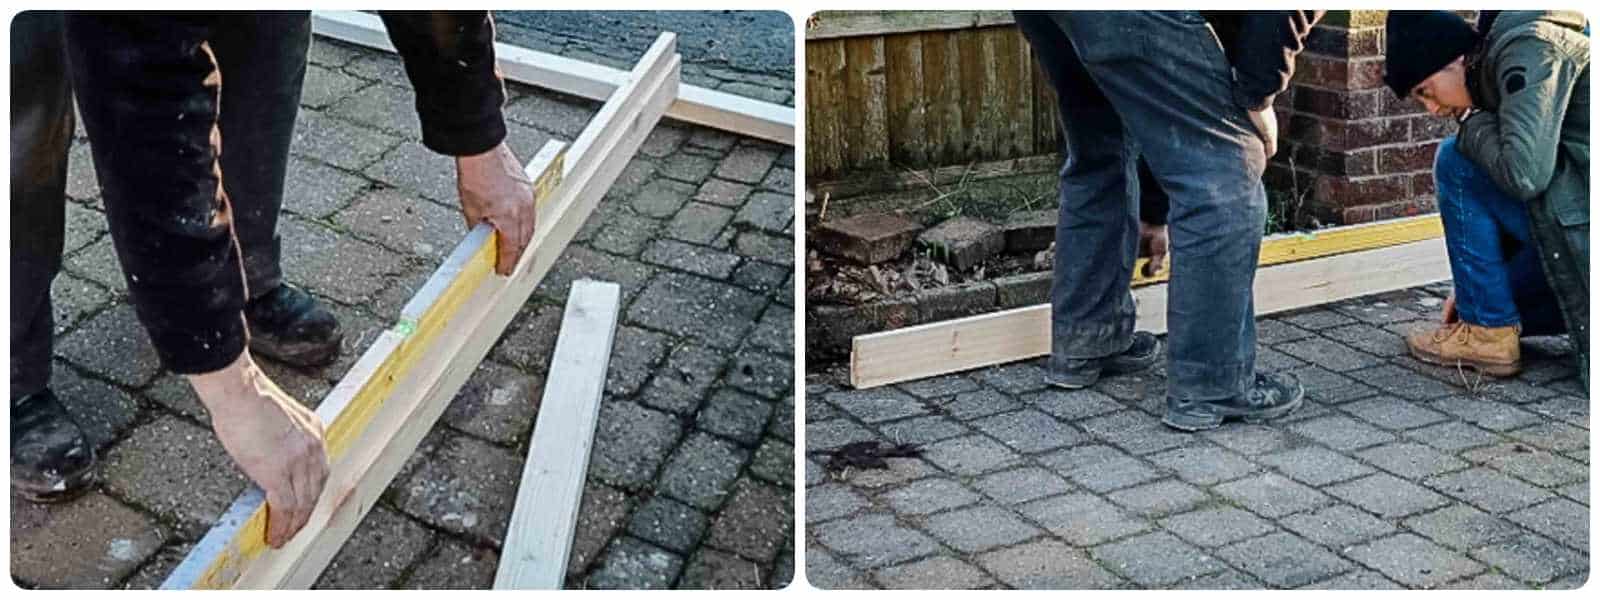
In the picture above, my Dad showed me how to the right clearance at the bottom of your gate by laying structural timber across the opening.
This is important in case your driveway or garden has a slope and that you can open your gates fully.
Then place another piece on top and check with a spirit level. If not level, you'll need to pack it.
Checking the Clearance While "Open"
To prevent you from installing a gate that doesn't open fully, then use the 2nd straight edge again from either outer edge.
Let the straight egded timber rest on the floor while you lift the spirit level until the bubble is centre.
The gap between the spirit level and the timber is the gap you will later have between the ground and the bottom of the gate. *We had a 1" gap.
Top Tip
Make sure you do this for both sides as it's likely that your clearances aren't exact.
If There's No Gap
Note: if there's no gap towards the outer edge, but one leading towards the gates themselves, you'll need a bigger clearance and test again.
So, you could stack two lots of structural timber on top of each other across the width of the gate opening.
Line Up the Gate Hanging Strips
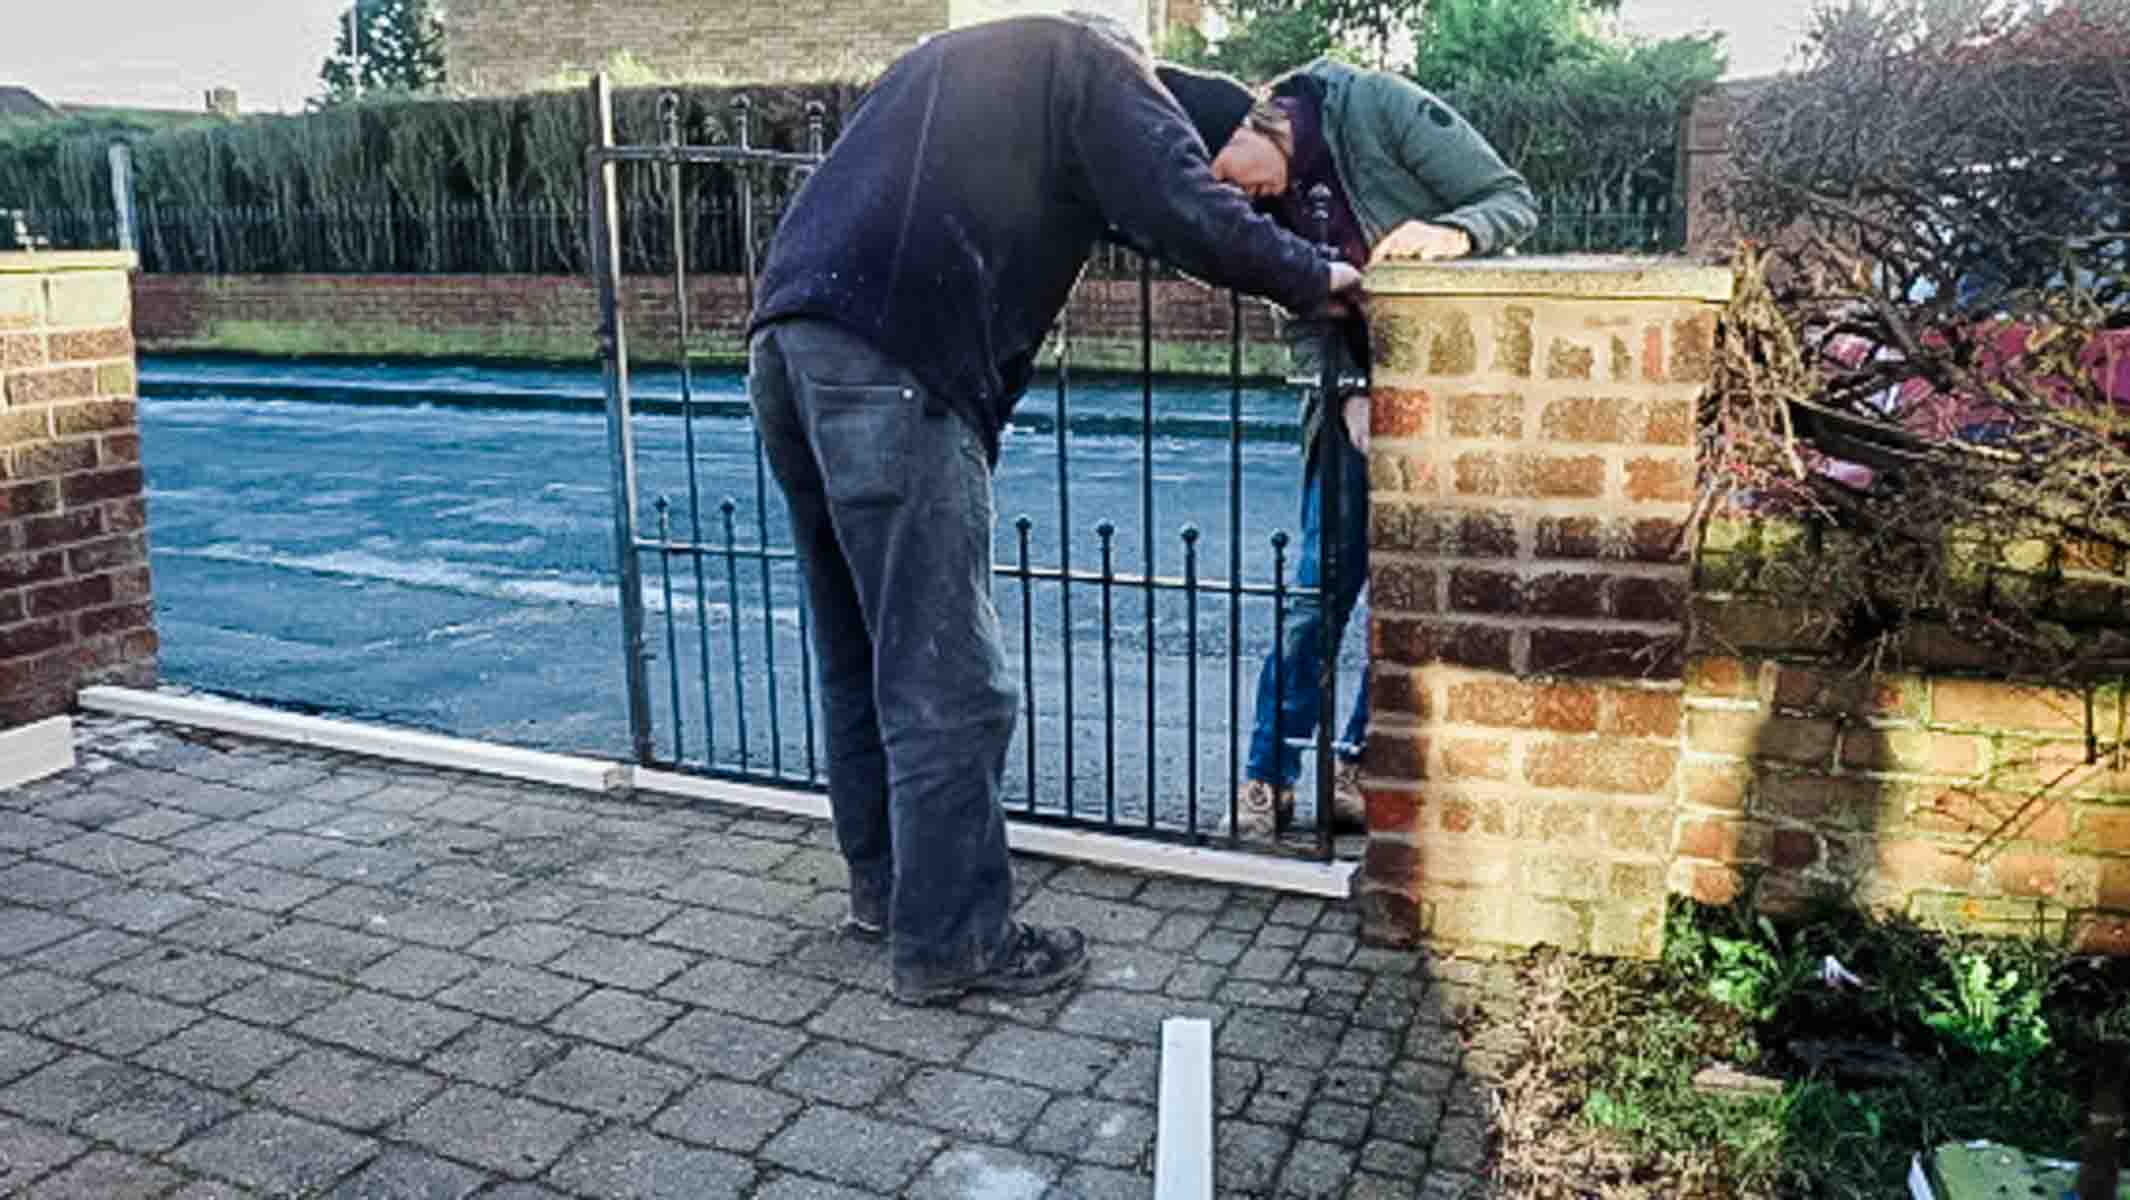
Once we knew we would have a 1" gate clearance during the open position, it was time to mount the gate hanging strips.
Note, we are using second hand gates, so while trying to line them up with the gates themselves, we realised we needed to cut ours down.
I'll show you how to do it below if needed.

Cutting Gate Posts Down
As we're fitting metal gates to bricked pillars, we just had strips.
You could, of course, have gate posts, which could be fitted into the ground using a post hole digger and cement.
But above, we cut ours down with a hack saw. Or, you could quickly use an angle grinder. Then, I needed to drill another screw hole in each.

Screwing Gate Hangers to Brickwork
First, rest your gates on the clearance timber you used with the strip attached.
Note, this should also be in line with wherever you want to hang your gates on the bricks.
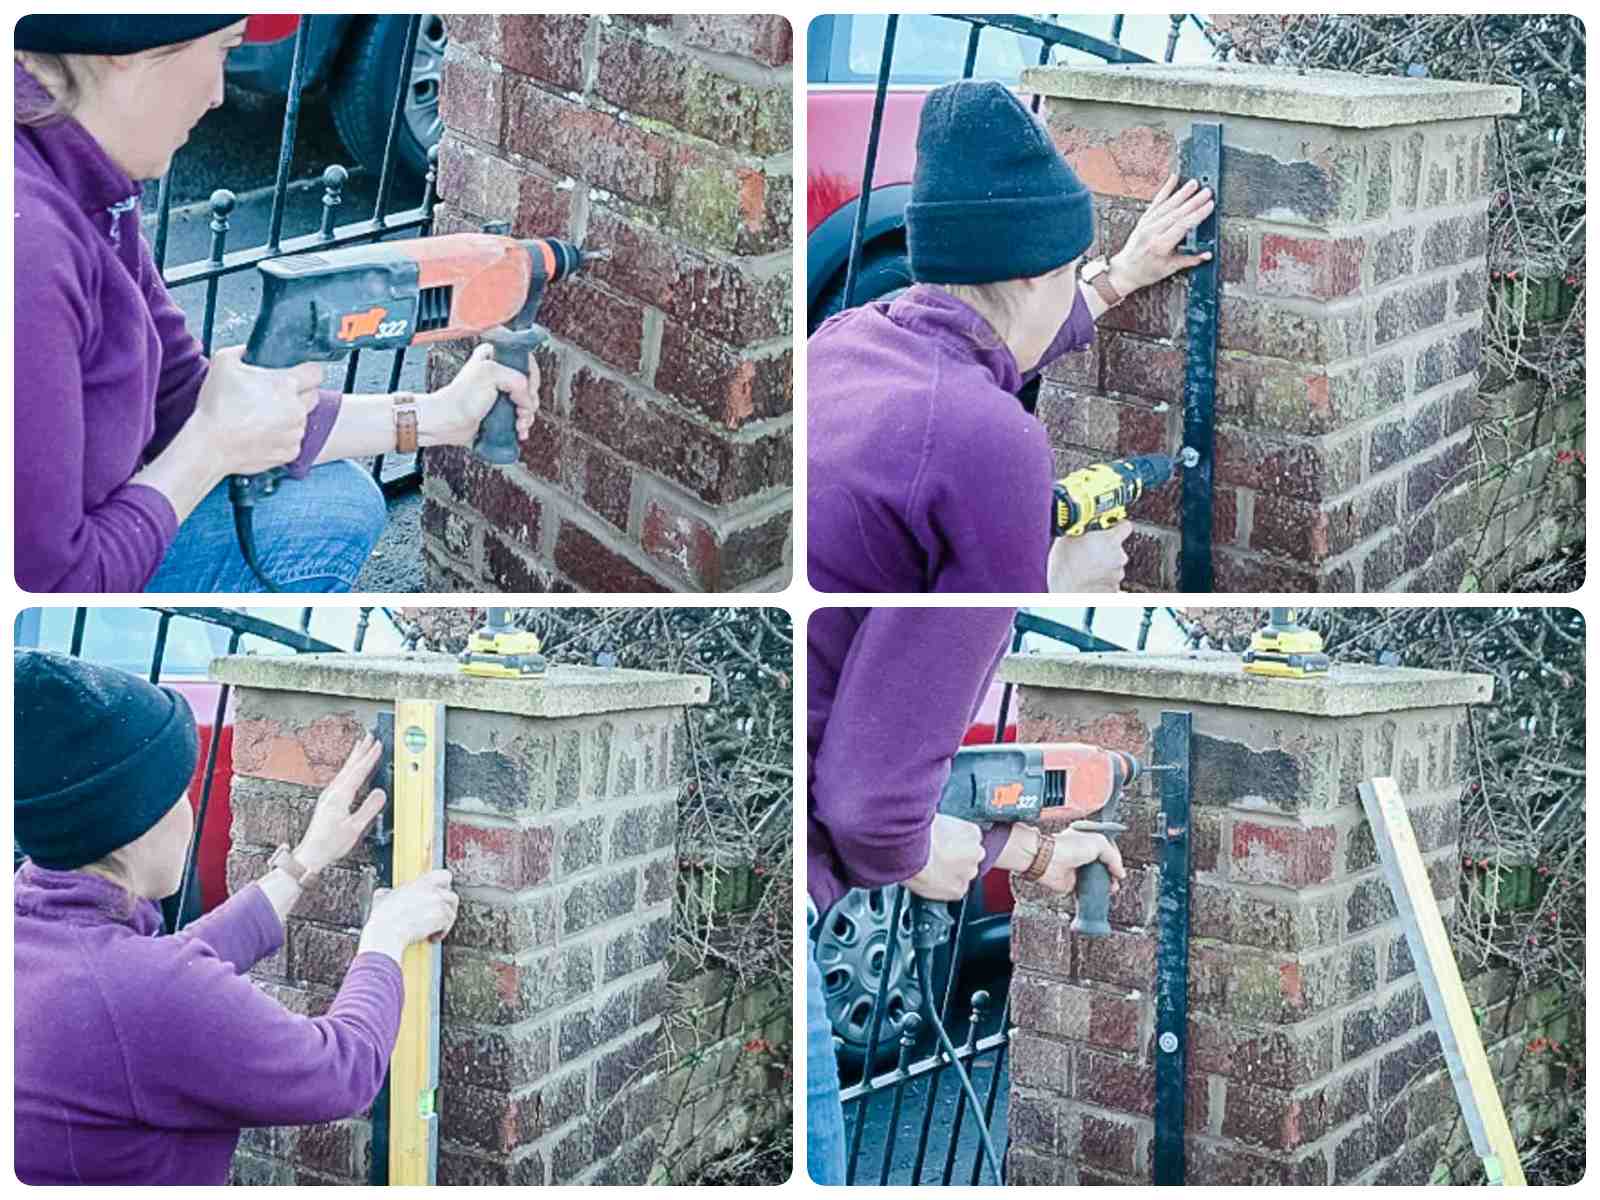
Then mark the middle screw hole with a drill bit so you can see where to drill properly for the next stage.
Getting the Gate Strips Level
Next, I drilled a 4-inch deep hole on the mark. Then screwed the gate strip it to the brickwork with a 4" concrete screw and a washer.
Note, concrete screws (AKA masonry screws or Spax screws) don't require rawl plugs.
Then, using a spirit level, get the strip straight and repeat drilling and screwing the next two holes.
Hanging Metal Gates
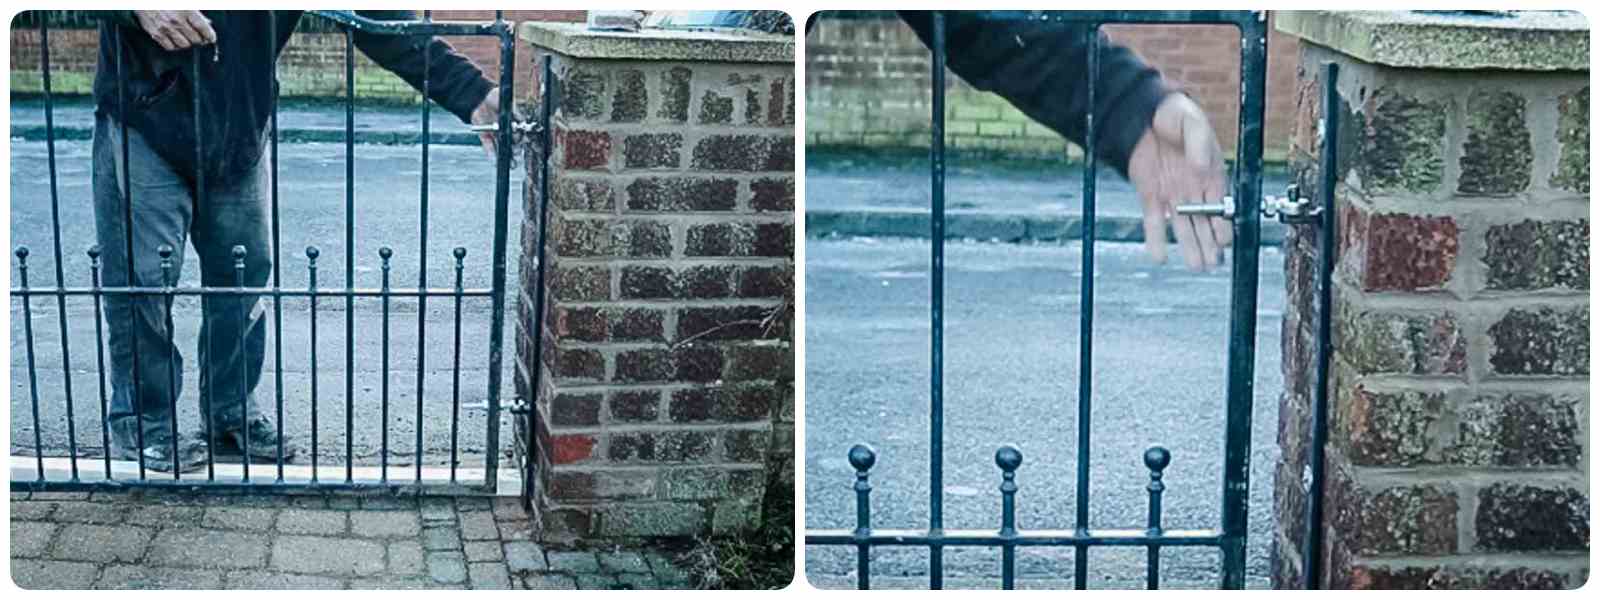
Now, hook on the first gate.
To fix, tighten the bolts on the hinges.
Although, note, you'll need to make a few hinge adjustments, so just hand tighten them for now from the top and bottom.

Getting the First Gate Straight
In order to start working on your 2nd gate, you'll need to get the first one straight.
Note, it's much easier to work in pairs where one is using a spirit level, while the other is directing which it should lean.
Which Way Should I Adjust the Gate Hinges?
If one part of the needs to lean towards the brickwork more, loosen the outer bolt and nip it in from the inside.
Or, if it is too close to the brickwork, loosen the inner bolt and tighten from the outside bolt.

Hanging the Matching Gate
Remember, that your driveway is likely to be a different height.
And once your have one part of your gate up, you need to match the other.
In our example, we needed to create a slightly deeper clearance to rest the gate on. Our spirit level was the perfect depth.

Line up the Gate Hanging Strip Again
While the 2nd gate was resting on its clearance, we lined up the final gate mounting strip.
Then marked the middle screw hole with a drill bit.
Make a Level Line
Next, we removed the gate and reclaimed the spirit level and drew a level line across the drill bit mark.
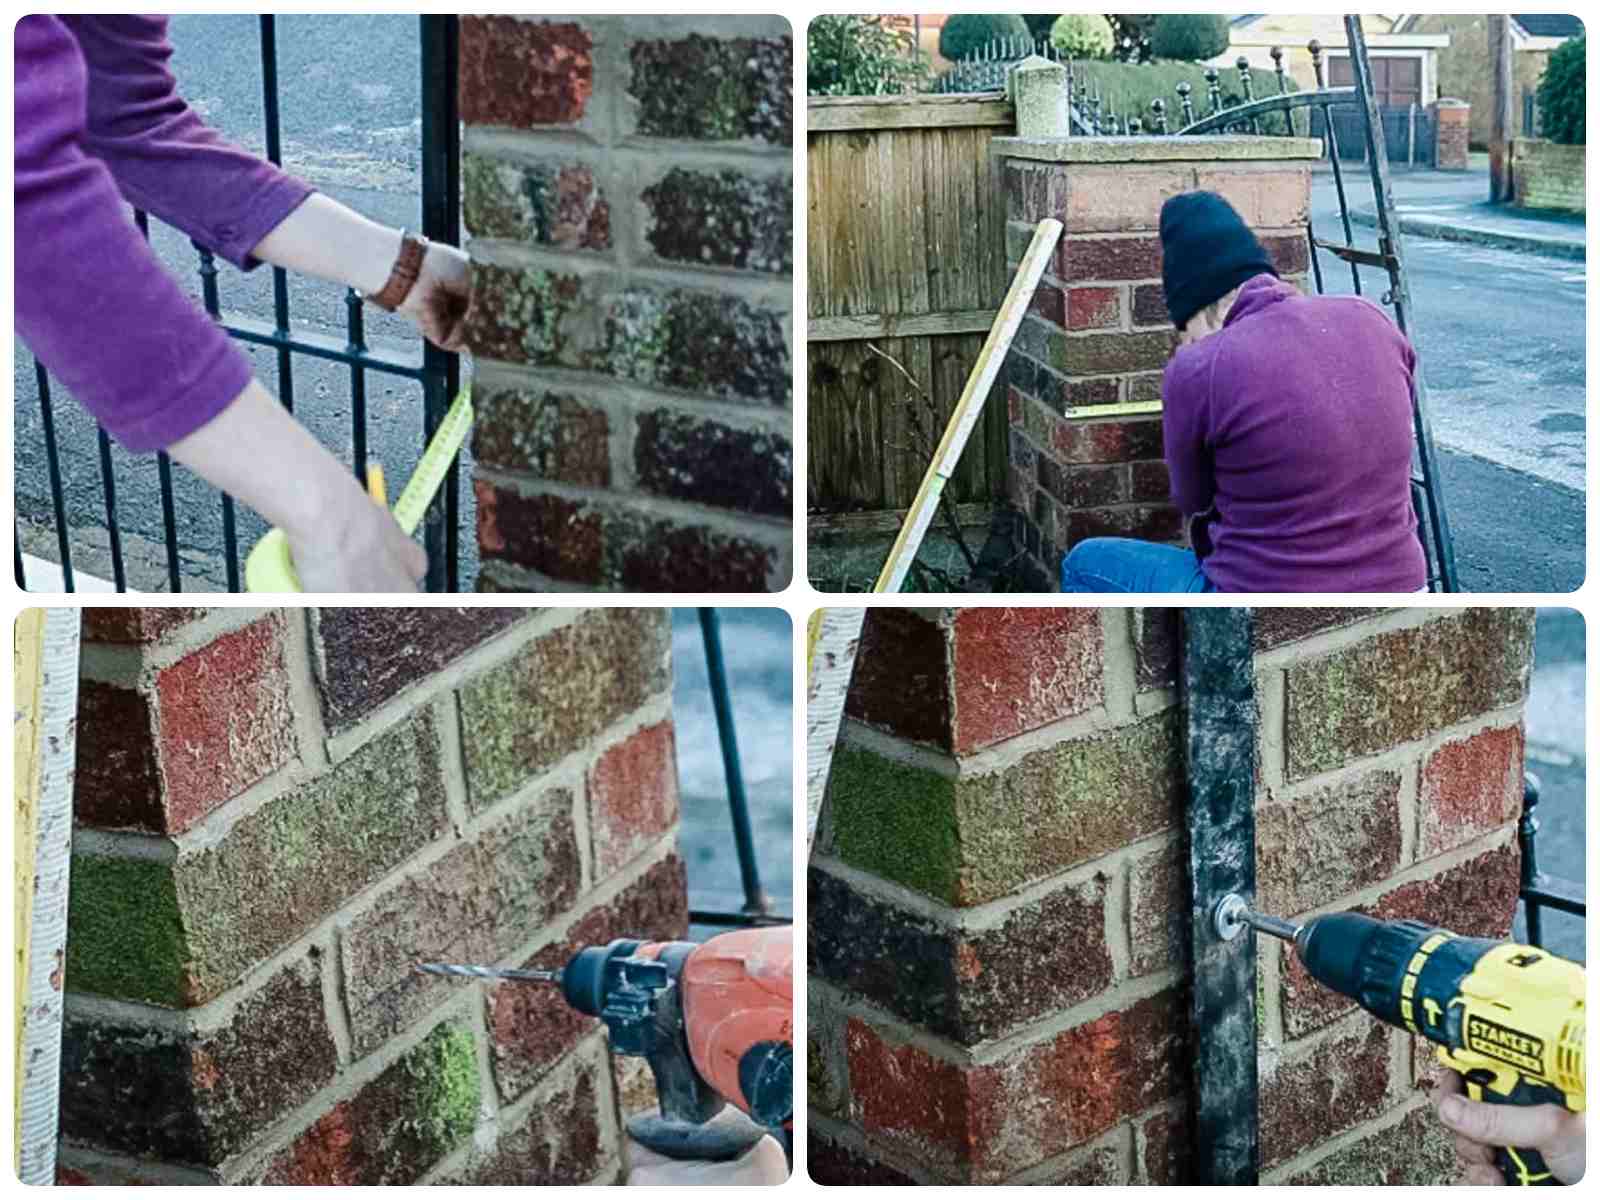
Copy the Same Depth From the First Gate
After drawing a spirit level line on the 2nd gate, I then copied and transferred the same measurement from the first gate.
Then drill another 4 inch deep hole.
And screw the mounting strip with a concrete screw and washer. Then straighten again and drill and screw the holes.

Adjusting the Hinges
After adjusting the 2nd gate's hinges, you then need to repeat loosening them if you latch doesn't catch on.
Then give them a final tighten with an adjustable spanner.
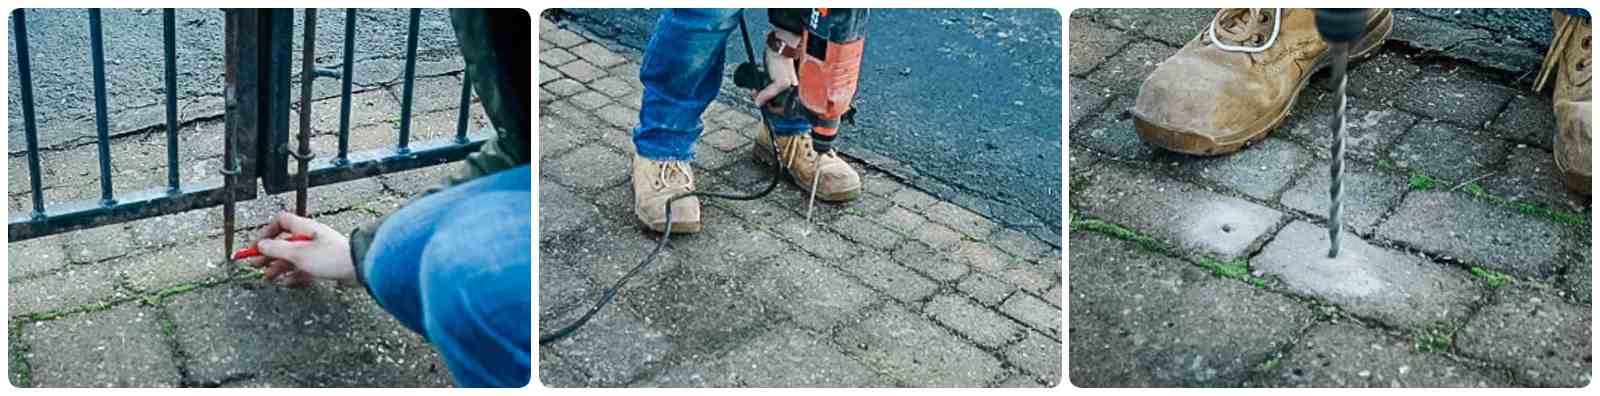
Drilling Drop Bolt Holes
To ensure the gates stay closes, or open when needed, we then worked on the drop bolts. While closed, we eyeballed what was straight, then lowered the drop bolts.
Then drew around them and started drilling into the block pavers with a small drill bit. Next, I drilled with a bigger one while swirling it around for a looser and easy fit.
Repeat while the gate is open for cars to drive in and out.

Installing Hinge Pins
To prevent the gates from being lifted and pinched, I then used an SDS drill bit and drilled into the hinges.
With it being curved, this takes a lot of patience.
Top Tip
Slot a washer on top, then drill. This helps prevent clashing with the other side.

Slotting in Hinge Pins
Our hinge pins are mini nut and bolts.
Above, I'm screwing one while my Dad is clamping the nut.
Then, spray paint the screws and washers black to match the rest of the gate.
Yes, if your gate is over 1m high while being next to a road used by vehicles. This also includes if it is a listed building, or forms a boundary with a neighbouring listed building. Read here for more details.
Painting a Rusty Gate
After nearly two years of hanging these gates, I finally got around to removing rust and painting with black metal paint.
More Projects You Might Like
- How to build a wooden gate
- DIY double wooden gates
- Tarmac driveway repair
- How to build a shed door
- Fence post extensions DIY
- How to lay a patio on sand
- Laying a garden patio on a bed of mortar
- DIY rendered breeze block patio step
- Garden storage box DIY
- Trellis planter DIY
- How to build a shed
How to Fit Driveway Gates
Double Metal Driveway Gate Installation

A step by step driveway gate installation with double metal gates with enough clearance for your drive top open properly. We'll also show you how to prevent them from being stolen and drilling holes in the ground for drop bolts. Also includes a how to video to follow along.
Materials
- 2 x straight egdes
- Concrete screws
- Gates
- Gate Hanging Strips
Tools
- Hack saw
- Spirit level
- SDS hammer drill
- Combi drill
- Masonry drill bit
- Adjustable spanner
Instructions
- Work out the gate clearance using a spirit level and timber. See notes in the post above.
- Rest the gate on the clearance timber and cut the hanging strip if needed with a hack saw or angle grinder.
- Drill a screw hole for the middle of the hanging strip and attach it with a concrete screw and a washer.
- Use a spirit level to make sure it's straight, then repeat with the other screw holes.
- Hang the gate and level with hinge adjustments. See notes above for tips.
- Match the other gate, which you may need to prop up with packers for clearance to get the same height.
- Line up the hinge strip again and mark a screw hole.
- Draw a level line with a spirit level.
- Copy the same depth position as the first gate's position.
- Drill a centre screw hole and repeat with the other screws.
- Adjust the hinges until the latch catches in the closed position.
- Make the gates level in a straight line while closed.
- Drop the bolts and draw around where they fall.
- Drill holes in the ground.
- Repeat while the gates are open.
- Drill holes in the hinges and thread bolts in and tighten with nuts.
Pin This Driveway Gate Installation


Comments
No Comments