

Just over a month ago, I made an action plan of all the jobs needed to ultimately be at peace in my bedroom when collaborating with JYSK uk. And as it's well documented that I live in a house that has required a lot of work, our bedroom really has been an afterthought.
Why? Because there were lots of new challenges to learn and had I knew how to fix them, we might where we are today much sooner. DIY is all about learning, but it's extremely rewarding as you're about to find out.
So I'm going to talk you through my most recent design process.
ABBETVED desk and JONSTRUP chair.
MAKING AN ACTION PLAN
Ok. So it helps massively that I'm accountable to my YouTube subscribers. It's a win-win situation to learn one job a week and pass it on. It may not sound a lot, but when you tally it up, that's 52 new completed tasks a year!
And to get my room ready, I did a floor walk and made a list of jobs needed doing before I had new carpets fitted. These were:
- Filling and painting the walls and skirting board
- Hanging a new door (yes, it was my first time!)
- Fitting an electric fire suite (very Hygge, I've been told)
- Install coving
- Order carpets to be fitted
- Hire a plumber to fit a new mirrored radiator and remove protruding pipes
You'll be surprised what you can achieve when you're determined enough to get what you want.

FRITS gold tray with artificial plants, Plant Pot and mirror.
HOW TO CREATE A DIGITAL MOODBOARD
This is the first ever room I've sat down and created a moodboard. Just staying still for me can be a challenge enough. But I took a week off from DIY and scrupulously planned it and nothing became a surprise when everything was in its place.
From now on, I will ALWAYS create a moodboard. So, here's my tips:
- Use free editing software. I used Microsoft Paint so it didn't cost ink or cutting up catalogues.
- Copy and paste stock photography of items you like.
- You can move items around on the screen to sit adjacent to this, that or the other.
- Scan colour swatch samples (or pick from the internet) and use a colour picker to fill the walls on the screen.
- Use Pinterest and search engines for tricky areas, ie, fireplace in bedrooms
- Trust the styled room stock photography from company's websites. Designers know what they're doing.

LED candles and MIKKI tray.
CHOOSING COLOUR
Up until last year, I was hopeless with colour, other than safe boring magnolia. I'm now sick of the sight of it.
It's far more rewarding to be adventurous for bolder rooms that pop. But, although I love the hallway I decorated last year, I hadn't heard of the 60, 30, 10 rule.
It may sound obvious, but it's 60% your main colour and so on. And in a room, the 10% can apply to accessories which are extremely quick and easy to replace. I chose 60% pink, 30% is my bold colour, then 10% was used as white furniture. It's far easier on the eye. As for decorative items, I opted for earthy tones, such as wood, goldy coppers and concrete greys in planters, faux rugs and curtains.

Floating Wall Shelves, & Letter, Pictures, Plants, Wardrobes.

USING A WALL FEATURES
One of the things I'm proudest of in my new room is my wall feature. I think I stumbled across is on a YouTube search, but couldn't find an easy way to get the perfect circle. It was something I'll be staring at a lot, so didn't want to be picking faults.
It was also a way to marry up my two choice of colours, but introduce some JYSK floating wall shelves and stylish bedroom-like accessories above a fireplace.
To make it, I used a picture hook, string, pencil and masking tape. Or, perhaps you could create a geometric pattern, or opt for a square. I found creating a feature opened more possibilities, like creating a focal point around some pictures on a wall without a shelf.


Bowl, Pictures, Scented Oil.
THINK ABOUT YOUR NEEDS
One of the things I used to love doing is walking around brand new house showrooms. Even house layout displays in stores.
But you have to think, how realistic is it for your needs? I used to buy things with good intentions that I'd look after them. These days, however, I make sure I invest in things that suit my lifestyle. For me, the answer was storage. I needed drawers, so picked specific pieces with them, such as my bed, wardrobe inserts and ones to match my dressing table.
By planning our layout, I also realised I could introduce an extra chest of drawers without the room looking too cluttered. I think having majority white furniture has really helped.

Pictures, Cushion, Bedding.

NOT EVERYTHING GOES TO PLAN
Where I was weakest on my planning were the final accessories. That's because I hadn't expected to love my wall feature SO much, that I used almost all of the accessories I'd picked.
Luckily, I found JYSK's range really easy to mix and match, rather than hunting around from shop to shop (which I no longer have time for these day).
So, by this point, my bed wall was bare, but I found two elegant wall hanging picture frames and a last minute pink cushion to tie everything together. I was also left with a bare space in the corner if I wanted symmetry with my bedside tables and a nice walk way. Luckily I found a pair of lined, weaved plant baskets so I could bring some of my house plants in.
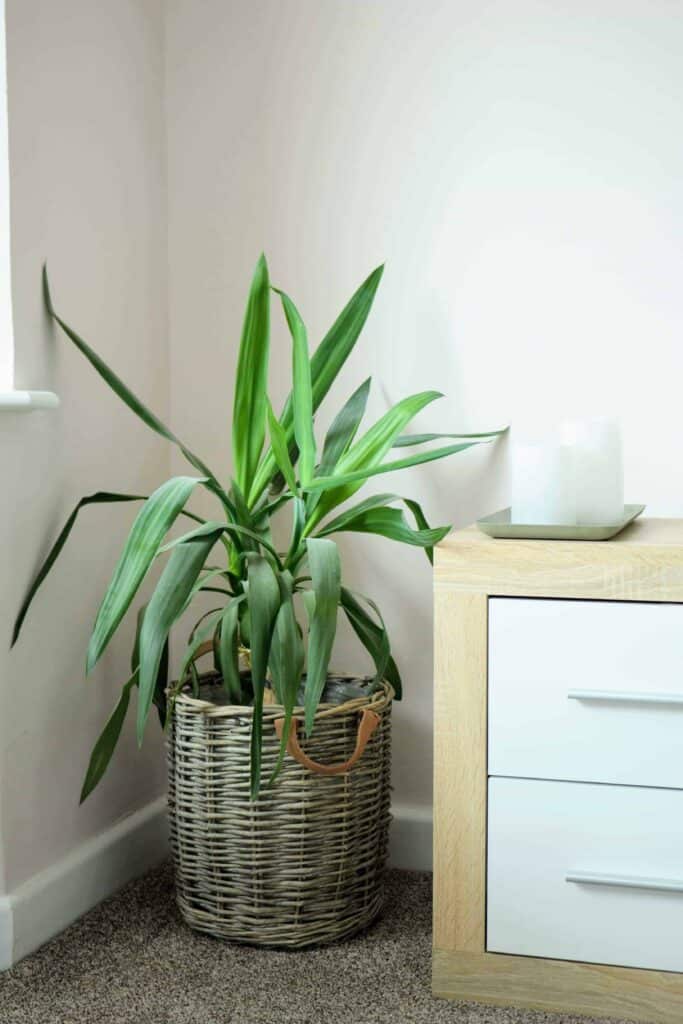
Plant Baskets, Bedside Table.
And just like any other DIY project I challenge myself to, I didn't realise I had it in me to create such a beautiful, soothing room. It's also very easy to maintain and generally feels much more spacious because I made it work for us.
What I think is very hygge about my room, is that it's:
- Refreshing with neutral colours
- I've picked earthy wood tones
- Snuggly faux fur throws
- I have a cosy electric fire
- Plants, bringing me back to nature
- No TV (less distractions).
If you'd like to follow along on how I achieved my final design, then here's my visual guide!
And finally, for those who are based in or around Doncaster, JYSK are opening their first Concept 3.0 store in the Danum Retail Park on York Road.
The store opens Saturday, 9am on the 28th July and there will be free Danish breakfasts with offers of upto 75% off. Being a Doncaster lass, I think it will do very well as they have pretty much everything for your home at affordable prices.
You Might Also Like
- Painting and decorating for beginners
- Scribing and adding filler pieces between a wardrobe and chimney breast
- Painting a circle on a wall without a stencil
- The Carpenter's Daughter Q&A
- DIY safety gear essentials for home improvements
- Hallway room renovation and tour with before and after
- Installing scaffold boards as windowsills
Disclosure: This is not a sponsored collaboration. However, I was gifted a set amount of furniture for my final look and bought more pieces myself.

Comments
No Comments