
Here's my comprehensive guide on how to hang a door with lots of tips and tricks. I'll also walk you how to hang a door in a new frame (and old). What to do if your frame is shorter than recommended for cutting and how to fit flush hinges as well as butt hinges.
Disclaimer: This interior door installation includes an Unpaid AD as I was gifted some door handle sets by the Handle King. As always, all thoughts are my own.
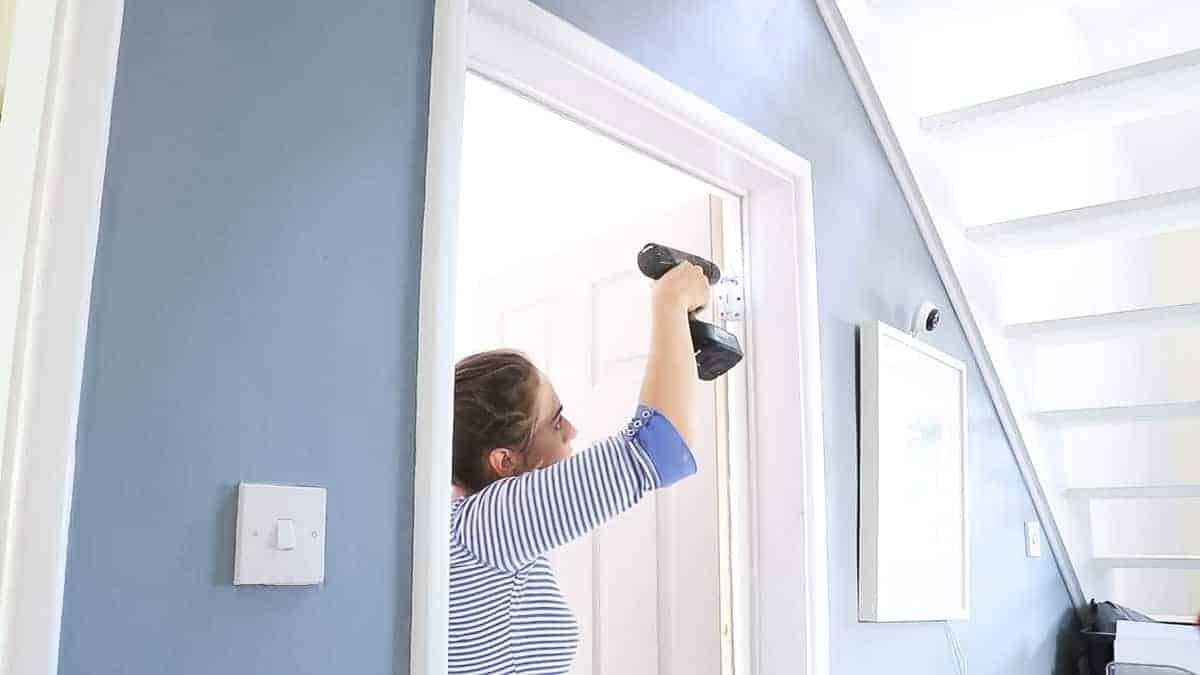
There are many jobs I've assumed I needed a professional and how to hang a door was one of them. And that's because a family member told me once that he "can never get them right".
So, back in 2018, I was curious and up for a challenge to hang a door all on my own. And with a bit of fear instilled in me, I didn't find it as difficult as I was informed.
However, if you're new as I was, there are a couple of character qualities you'll need and that's time and patience. But I'm also going to show you the much easier how to hang a door with flush hinges as well as butt hinges.
Jump to:
- 💲How Much Does it Cost to Hang a Door?
- 🪵Hollow vs Solid Wood Door
- 🪛Tools & Equipment
- 🚪Flush Hinges Vs Butt Hinges
- 📋Instructions
- 🪚How Much Can I Cut Off a Door?
- 🚪Installing Door Hinges
- 🪛How to Install a Door Knob or Handle and Latch
- 🚪How to Install a Door Handle
- 🎨Painting Interior Doors
- ➕Other Projects You Might Like
- 💬 Comments

💲How Much Does it Cost to Hang a Door?
Now if you don't have a selection of tools, it may cost you more to hang just the one than a professional. Obviously, it differs on your location. But I can confirm I was once charged £40 to hang a solid wooden internal door. (This, of course, didn't include the door).
If I lived on my own, then for a heavy door fitting, I would still probably hire someone if the quote was around this price.
However, for cheaper hollow internal doors, you can expect to pay for the door itself between £10-30 each. Then add your tool costs on top which won't seem as bad if you have to swap all of them.
🪵Hollow vs Solid Wood Door
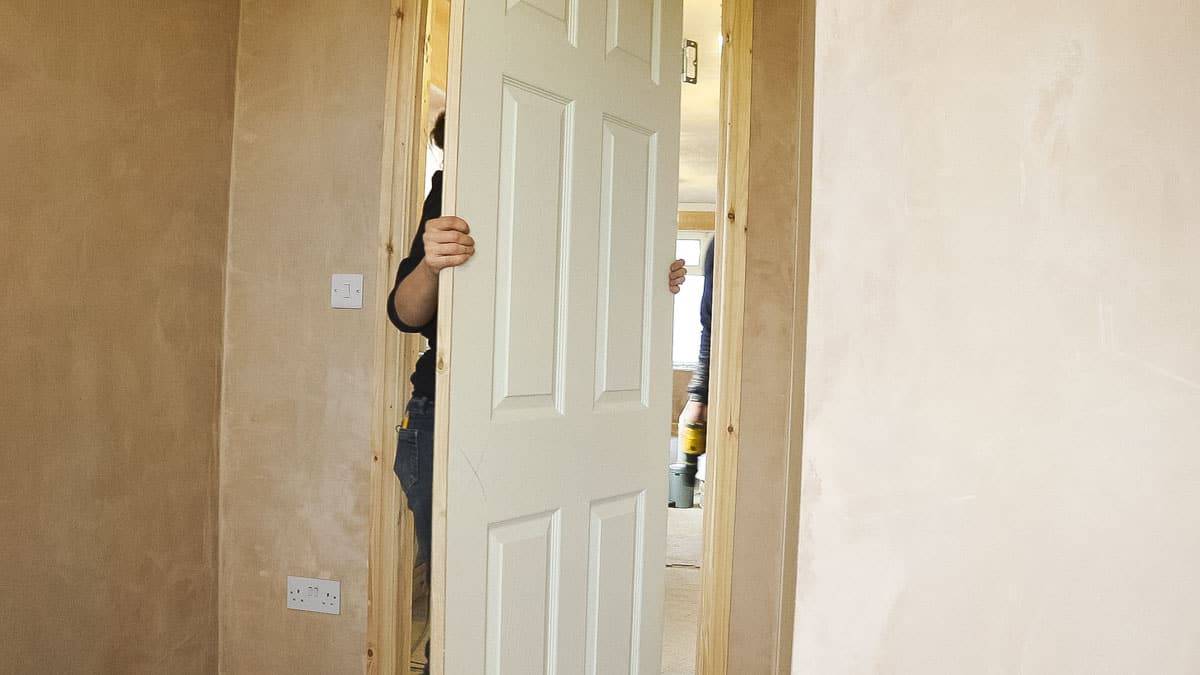
Throughout this how to hang a door guide, I worked with cheaper, hollow doors. But I think they're great for a beginner's interior door replacement project as they're so lightweight at around 13kg.
They're also a fraction of the price than solid doors and have less wood to potentially warp as the climate changes. And they're easier to cut. However, they also have cons, which I talk about:
Hollow door PROS
- They're lightweight (around 13kg) with a cardboard honeycomb centre, so you don't need much strength o work with them
- There's less wood to warp in different climates
- They're usually a 3rd of the price of budget solid wood doors
- You don't need to prime them, but they'll still need painting
Hollow door CONS
- They're not solid enough for a dog door in a door
- Natural wood colour isn't an option as they need painting
- They're not great if you have kids that fight and can kick a hole in the door
- You'll need special hollow door fixings if you want to hang a hook, over an over the door hook
🪛Tools & Equipment
- Tape measure
- Internal door (chose your type above - I used these)
- Butt hinges or flush hinges (differences below)
- Combi drill
- Door handle *gifted by Handle King
- Door latch *gifted by Handle King
- Electric plane
- 1m Spirit level
- 25mm flatwood drill bit from a set
- Pencil
- Masking tape
- Sandpaper after trimming a door down
- Wooden wedges for propping up (or see a hammer and chisel technique below OR some swear by these pump wedges)
- Pennies or two pence coins
- Hand saw
- Set of chisels
- Sawhorses or a workbench

🚪Flush Hinges Vs Butt Hinges
Above, you can find two types of hinges. First, is the more traditional butt hinges which you'll find a purist carpenter fitting. The adjacent flush hinge is better for a novice or someone short of time.
The differences are:
- A butt hinge requires chiselling out for door hinges or can be done with a router. The hinge is set inside to offer more strength, making it ideal for heavy internal doors.
- The flush hinge is what it says. It is flush while in situ as the opening mechanism slots inside a gap of the larger side. This means it's half the thickness of the butt hinge and doesn't require any chiseling. It's also great for cheaper, lightweight doors and novices with little to no skill (or time!).
As a feisty novice in 2018, I wanted to push my limits and fitted with butt hinges first. However, remember that whichever you decide, you will still need to do a little bit of chiseling for the door latch to sit inside.
Pro Tip:
When choosing a flush hinge, my Dad prefers 4" ones as opposed to the common 3" ones. They're bigger and stronger.

What Size Door Do I Need?
I remember feeling very overwhelmed about what size door I needed. That was until I found they're usually quite standard for door frames in the shops.
First, you'll need to measure the door width inside the door frame. It's a good idea to measure it towards the top, middle and bottom and note your largest size. This does NOT include the frame, just the gap inside it.
And now take the measurement from the top of the door gap to the floor and start shopping. However, remember that your hardware store is VERY unlikely to offer a free cutting service on a door. It may seem obvious, but I did hear someone ask once while I was in my local DIY store. It's never a one size fits all and will require some tinkering.
Important Tips:
- Note that some doors will have a maximum amount you can cut off. This also goes for many solid-looking ones. This stumped me too, until I learned a hack which I'll talk you through in my guide.
- Don't worry if you need to know how to hang a door in a crooked frame. I have a tip below too as I once faced the same problem!

📋Instructions
Acclimatise Your Door
With any wood, it tends to change size or shape in different weather. So once you've bought your doors, you'll need to let them acclimatise to the room they'll be in.
When researching, I found it was recommended anywhere around 3-5 days. So I'd remove the packaging, then lean them against a wall, or lay on sawhorses.
This is important as you may find you need to trim off more later and who wants to do the same job twice?
Determine Which Side is For Installing Hinges And The Lock Side
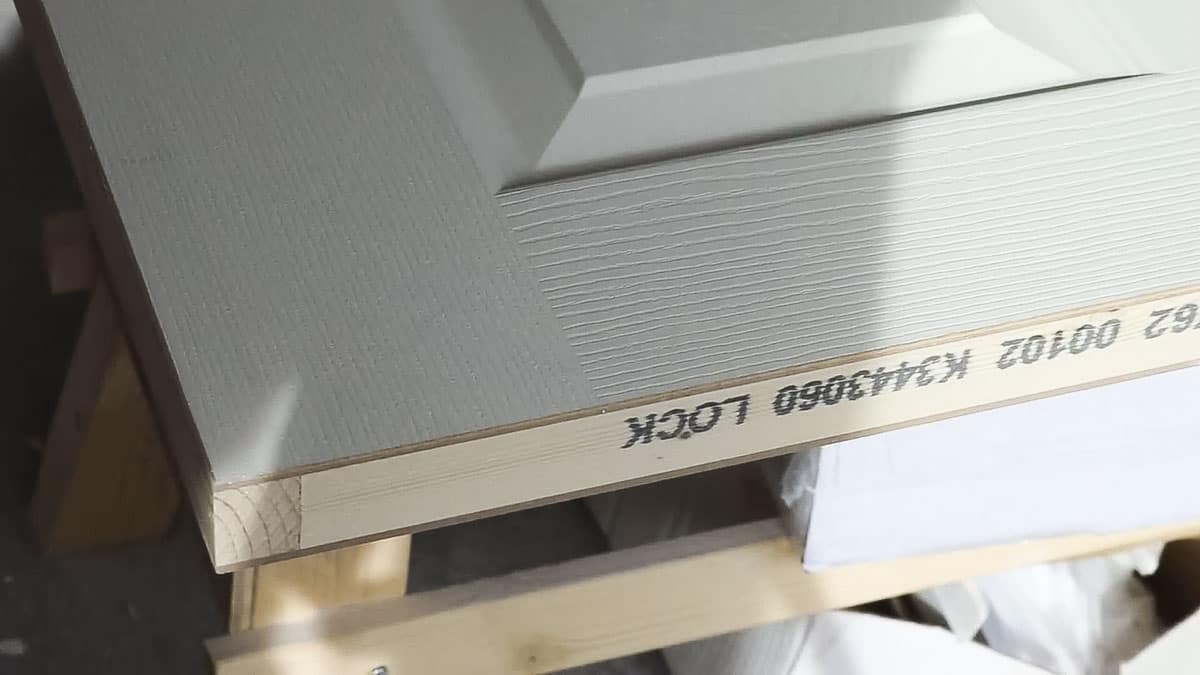
A very important part of this job is to only fit the hinges and locks on the right side. And that's because inside engineered veneer doors, they aren't symmetrical.
The lock side is stronger, so if you get it mixed up, the handle will never be as strong. So, unfortunately, you're better off starting again with a new door.
Pro Tip:
Draw an X on both sides of the door where the lock side is, so you never get mixed up! It usually tells you on the top of the door in print which is the lock side.

How to Trim a Door Width
Firstly, if you're replacing an old door and you still have it and it was a good fit, then you could draw around here. However, we're hanging a door in a new frame.
So, first, place your door inside. Push it to one straight side and see what gap you have on the opposite. Remember, you'll need to shave off the thickness for clearance and hinges.

I'd start off drawing on the door where it's tighter, leaving the areas that are larger. Or, an easier way to do it (above), is masking tape the edge of the door and transfer the door opening's width onto the door itself.
The masking tape is useful as when you draw a continuous pencil line with a spirit level, it's more visible.

How to Plane a Door
To trim a door down, it's much quicker to shave off with an electric plane. However, they are very dangerous in the wrong hands.
Safety tips:
- Wear goggles and ear defenders (and a dust mask if shaving wood like MDF
- ALWAYS have one on the handle, the other on the knob
- NEVER have your hands at the side when turned - it's so easy to forget when you've just finished planing a door
- Keep it away from the cable
- ALWAYS wait for it to stop when you place it on the floor.
Unfortunately, I think we all know someone who knows someone that's had an unfortunate experience.

No Electric Plane?
If you don't have an electric plane, you could use a hand plane, but they're tricky for novices to set up. However, it's not impossible.
Or, you could use a palm sander. This is NOT ideal as it could take you a long time, depending on how much you need to trim off. Personally, I would avoid a belt sander as you'll have less control and could take off more than you want.

After you've planed, test the door to see if it fits and where any gaps are uneven. And repeat planing.
Then, my Dad recommends one final straight run with the electric plane so it's nice and even.
How to Trim a Door For Carpet
In my most recent how to hang a door video, we fitted in new door frames with no carpets down. We'll probably run into the issue of needing to shave off. But remember, you can cut off and it's a fiddly process to add it back - (although it can be done).
You can either match the old door if the length is fine, or take off a bit at a time. However, I think having a ¼" gap from the floor is a good guide.
Trimming a Door Height
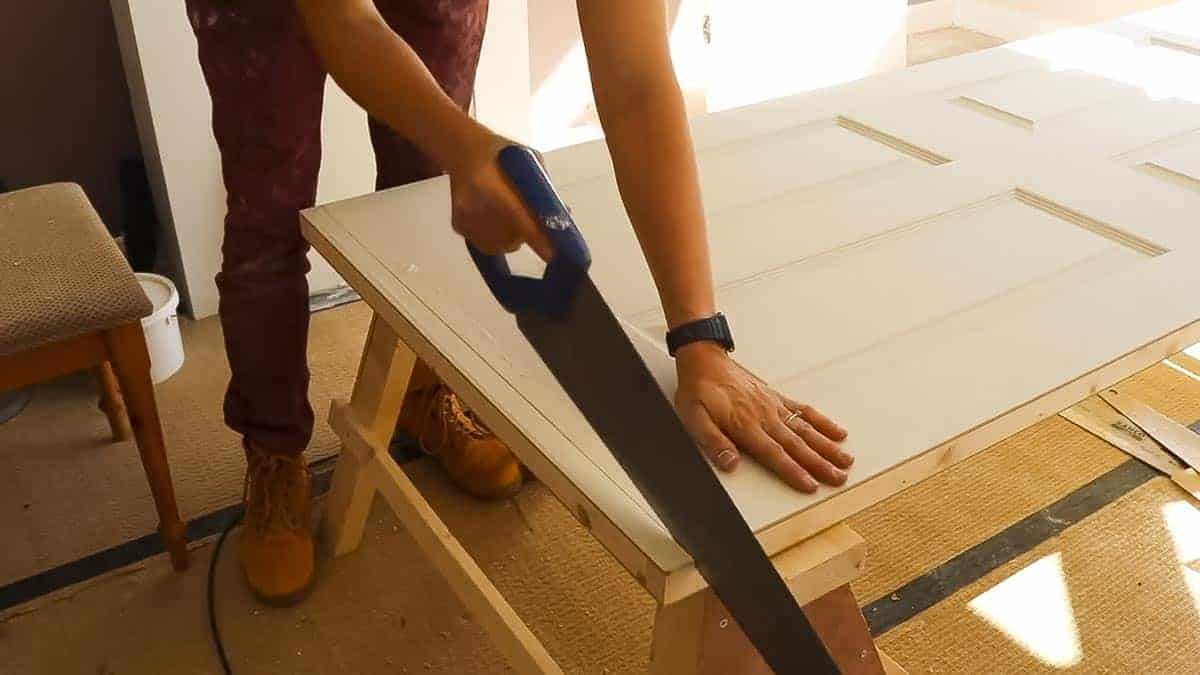
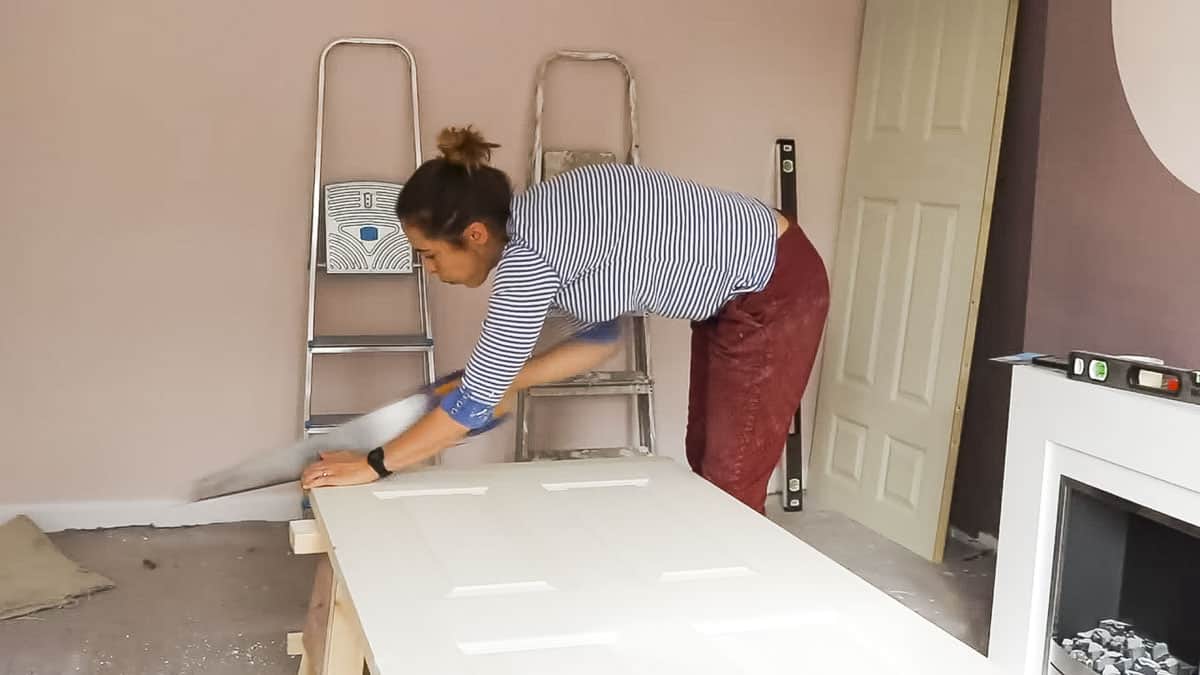
I feel the safest way to shrink a door height is to use a fine-tooth hand saw after masking taping it and drawing your straight pencil line.
You'll have more control, it's safer for novices and you can hand sand to smooth and prevent catching on the carpet. And it doesn't matter if it's not pristine straight as it's not going to be at eye level.
Other tools you can use:
- Some use a circular saw, but it will give you a cleaner cut at the bottom than the top.
- You can plane, but you must be careful in the corners as the grain will run in the opposite direction and can tear chunks out (which is why I recommend sanding the last mm or two instead).
How to Trim a Door Without Taking it Off
As annoying as it is to take a door off, it is possible, but slower, to shave a door while it's still hanging. And that is to trap sandpaper underneath, with the grit aiming upwards to the bottom of the door. Then run along with it, but you may need a spare pair of hands as you get closer to the hinges.
🪚How Much Can I Cut Off a Door?
On many engineered veneer doors, you'll find a maximum length you can cut of. And that usually means it is hollow inside and filled with a cardboard honeycomb centre.
But if you need to cut more off than it states, my Dad gave me a tip that worked great. Note, this will not work if the cut ends up in the middle of a moulded panel.
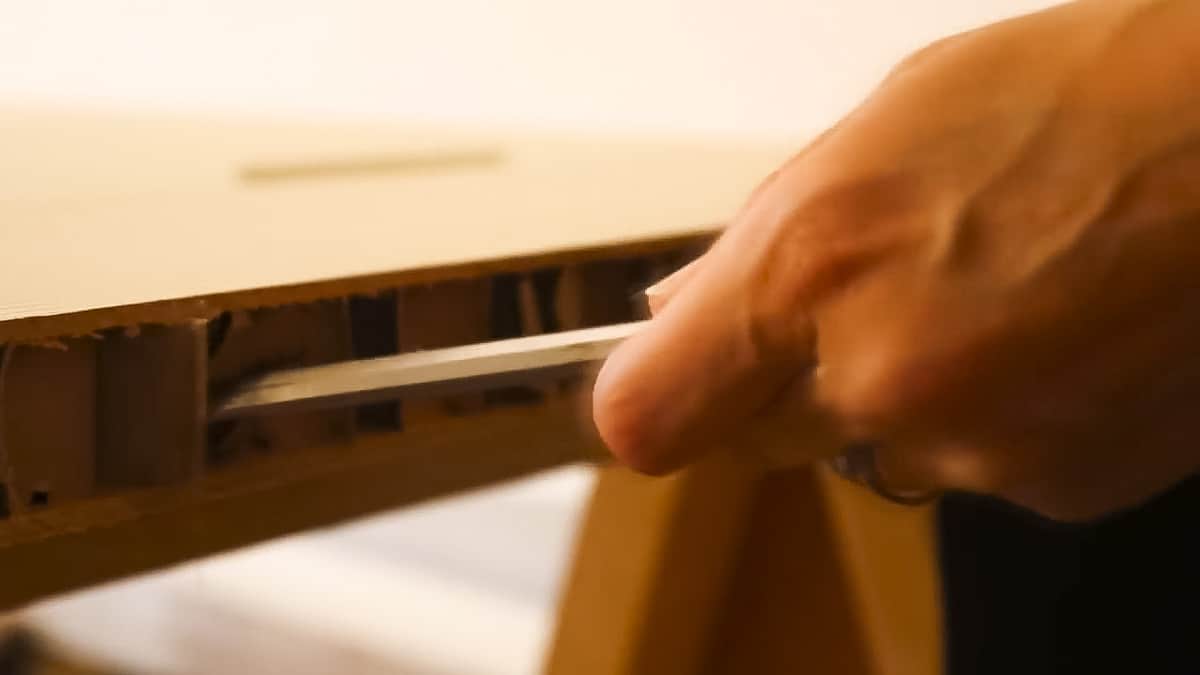
First, once you've carefully cut a door down with a hand saw, set the excess aside. You'll then need to push the internal cardboard back with a chisel and key the inside with sandpaper.

Now carefully shave off the veneer part of the door off the excess you cut off. And test to see if you can slot it back in the bottom of the door. Once you know it fits, add a screw in the bottom for easy manoeuvring if you find you've pushed it in too far.
Then add PVA glue along both sides, slot it in and clamp shut, but sandwiched between some scrap wood, cardboard and newspaper to prevent mess. And leave overnight.
Then remove the screw and sand down or shave as you need to. However, I have some important tips below.

Tips on Positioning Your Door and How to Hang a Door in a Crooked Frame
One tip I like is to trap pennies or two pence coins along the top of the door while it's in the frame while pushing your door to one side and prop up the door with wedges. If your door frame isn't square at the top, then I'd suggest watching how I did it from this section of my video.
So, in other words, while your door is straight as it's pushed against a straight edge and upwards with wedges and a 2p coin, you'll have a bigger gap on the opposite side. You'll need to take this measurement and mark it on the side with 2p.
Then, to scribe it, draw a straight line from the pencil marked side to the top corner on the opposite and cut off. OR, an easier way, is set up a compass and draw along the top of your door while it's running along the door frame, but set it to the largest gap of where the door starts. Then cut off.
Of course, you will lose a little bit off the bottom, so it's best to work on this before cutting any off for carpets.

🚪Installing Door Hinges
If you're installing door hinges to fit in an old frame, you'll likely have butt hinges and have sections chopped out as above. You may consider it easier to replace like for like.
Note, if you do want to install flush hinges, you'll need to fill these areas with wood filler. And from experience, getting it to blend in is difficult. But they'll be nicely hidden if you place your flush hinges to also cover it up. If your doorframe is new, then you won't need to worry.
Once you've propped up the door with 2 pence coins and wedges up, mark the top and bottom of where the hinge cut-outs are on the door. This is where you need to add your hinges. Note, if you have lightweight doors, 2 hinges are often fine.
Putting Hinges on a Door in a New Frame
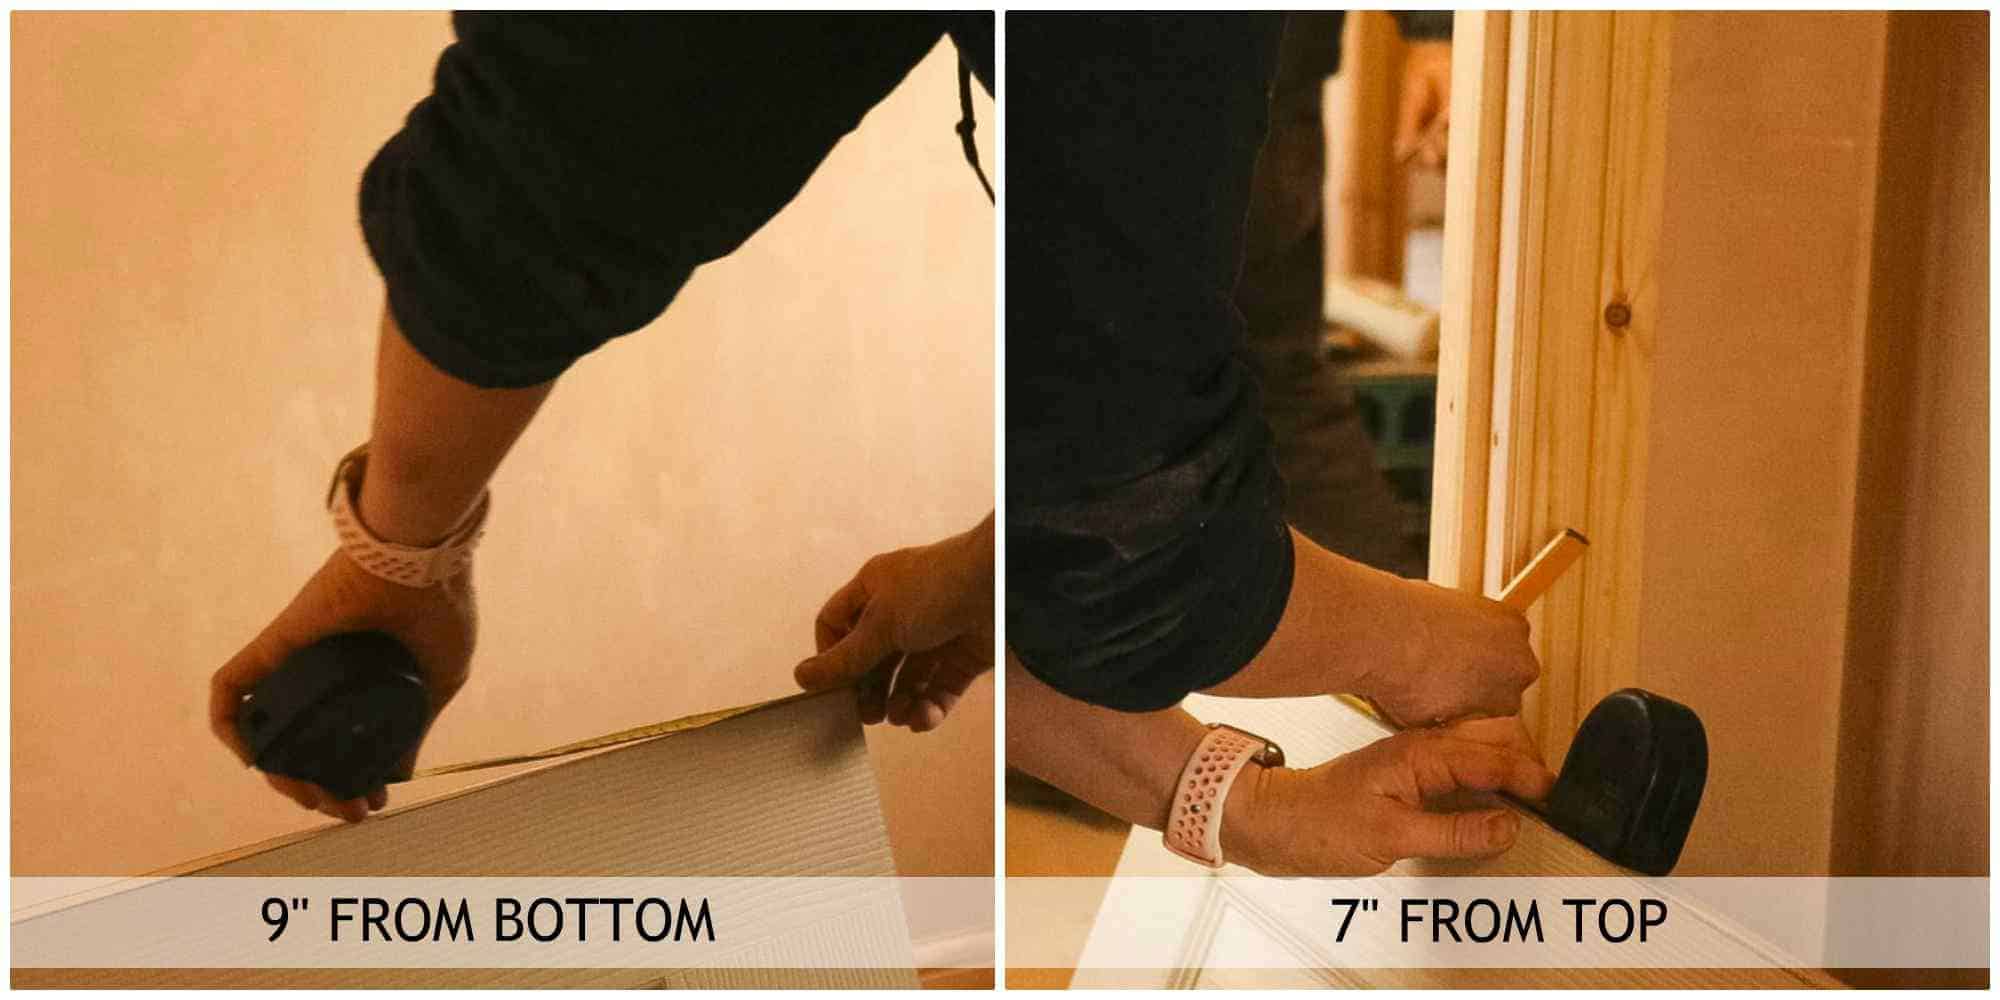
If you're hanging doors in a new frame, then you'll need to know where to position your first ever hinges. Some say 9" from the bottom and 6" from the top.
My Dad fits hinges with the 9" from the bottom and 7" from the top rule. It's also going to be much quicker for you with flush hinges. (See how to install butt hinges further down).
You'll need to transfer these measurements on the edge of the door. DO NOT DO THIS ON THE LOCK SIDE! If I've bewildered you, please scroll up to "Determine Which Side is For Installing Hinges And The Lock Side" before it's too late.

How to Hang a Door With Flush Hinges
Once you've worked out which way you've like your door to open, this will tell you which way to face your hinge. Then place your flush hinge on and push to the end of the door.
Remember, there's protruding lugs on a flush hinge so it stops in place when you push the hinges against the door.
Then, it is best to pre-drill your screw holes in the middle section of the flush hinge on the edge of the door. This prevents the wood from splitting, but admittedly, I don't always bother. And screw the entire middle piece on. Repeat for the 2nd hinge. And 3rd if you want to use an extra one.

To screw your flush hinges to the door, it will help if you wedge a 2p coin or packer between the top of the door and frame while it's in an open position. I'm propping it up using a chisel over a hammer which I'll step on to lift up while my Dad's also holding the door steady.
Or you can use wedges as I did when I was on my own (below). Then push the flush hinge against the frame until it stops due to the lugs and pop one screw in the top and bottom.
Test to see if it fits OK, then finish off with the rest of the screws. PRO TIP: if you screw them all in too soon, you may only need to drop the door one mm or two, meaning you'll have less purchase.

How to Hang a Door With Butt Hinges
I must admit, I was very proud of myself for hanging a door with butt hinges. They are more satisfying than flush hinges as they require more patience and a little bit of skill.
Note, I didn't have any skill as such either. I just watched people on YouTube very closely and copied. You can follow along with me in this section of video on how to chisel for butt hinges.
Or, for an easy guide on how to fit a door with butt hinges, I've put this collage together below.

Steps on How to Fit Butt Hinges
- Once you've pencilled on your door where the butt hinges laid while in the door frame, hold your butt hinge on the door and drawer around it.
- Score with a sharp knife or stanley knife. Note, I used a straight edge as a guide.
- Go along the pencil lines with a large chisel and wooden mallet. Note you need to tap down the same thickness one section of the hinge.
- Then in 5mm intervals to make relief cuts, hammer and chisel at an angle.
- Using the flat side of a chisel and remove your relief cuts. As I purposely made the wood weak, I didn't need a mallet for this.
- Pre-drill and screw your hinges in place.
- Repeat for the opposite hinge.
- Line up the hinge with the old door frame.
- Prop up with wedges if on your own and screw to the frame.
What If Your Door Doesn't Close Properly?
If you've hanged up your door and it doesn't close properly, it's possible you haven't chiselled out enough in the door.
Also, I suggest checking that your screws are countersunk ones so they're flush with the butt hinge.

🪛How to Install a Door Knob or Handle and Latch
There are so many types of door knobs and internal door handles on the market. Above, you can see the ones that were gifted to me by Handle King. They have a huge range available, such as interior door knobs, chrome door handles, brass door handles and much more! Oh and not forgetting door handles with locks.
We picked handles with an LED light and sensor that light up when you walk up to them. These illuminated door handles have a screw cap on the ends of the handles where you pop in an AA battery so they're easily accessible.
I was immediately sold on this concept for, if you're anything like me, I often nip to the toilet in the middle of the night. I also think they'd be great for elderly and children. But, if you're replacing a door handle, you'll may want to look at the handle type where it covers old screw holes.
However, if you're here to learn how to change a doorknob, I'd recommend looking for one that can hide old screw holes. Or you may want to fill and paint over them.
For Door Handle Replacements
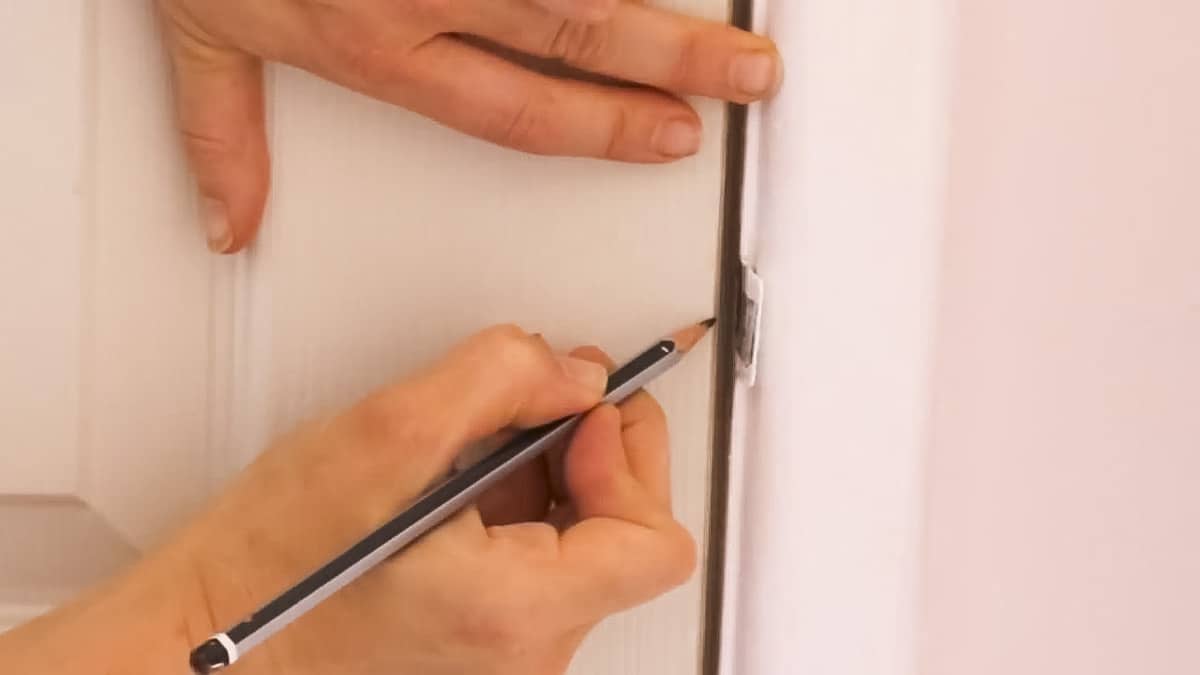
If you need a simple door handle replacement on a new door, then simply close your door.
Then mark the centre of the door latch catch. And this is where you need the centre of a new latch to be.
However, below you can find a step-by-step if you're installing a door knob or handle in a door for a new frame.

Fitting Door Handles to Hollow Doors
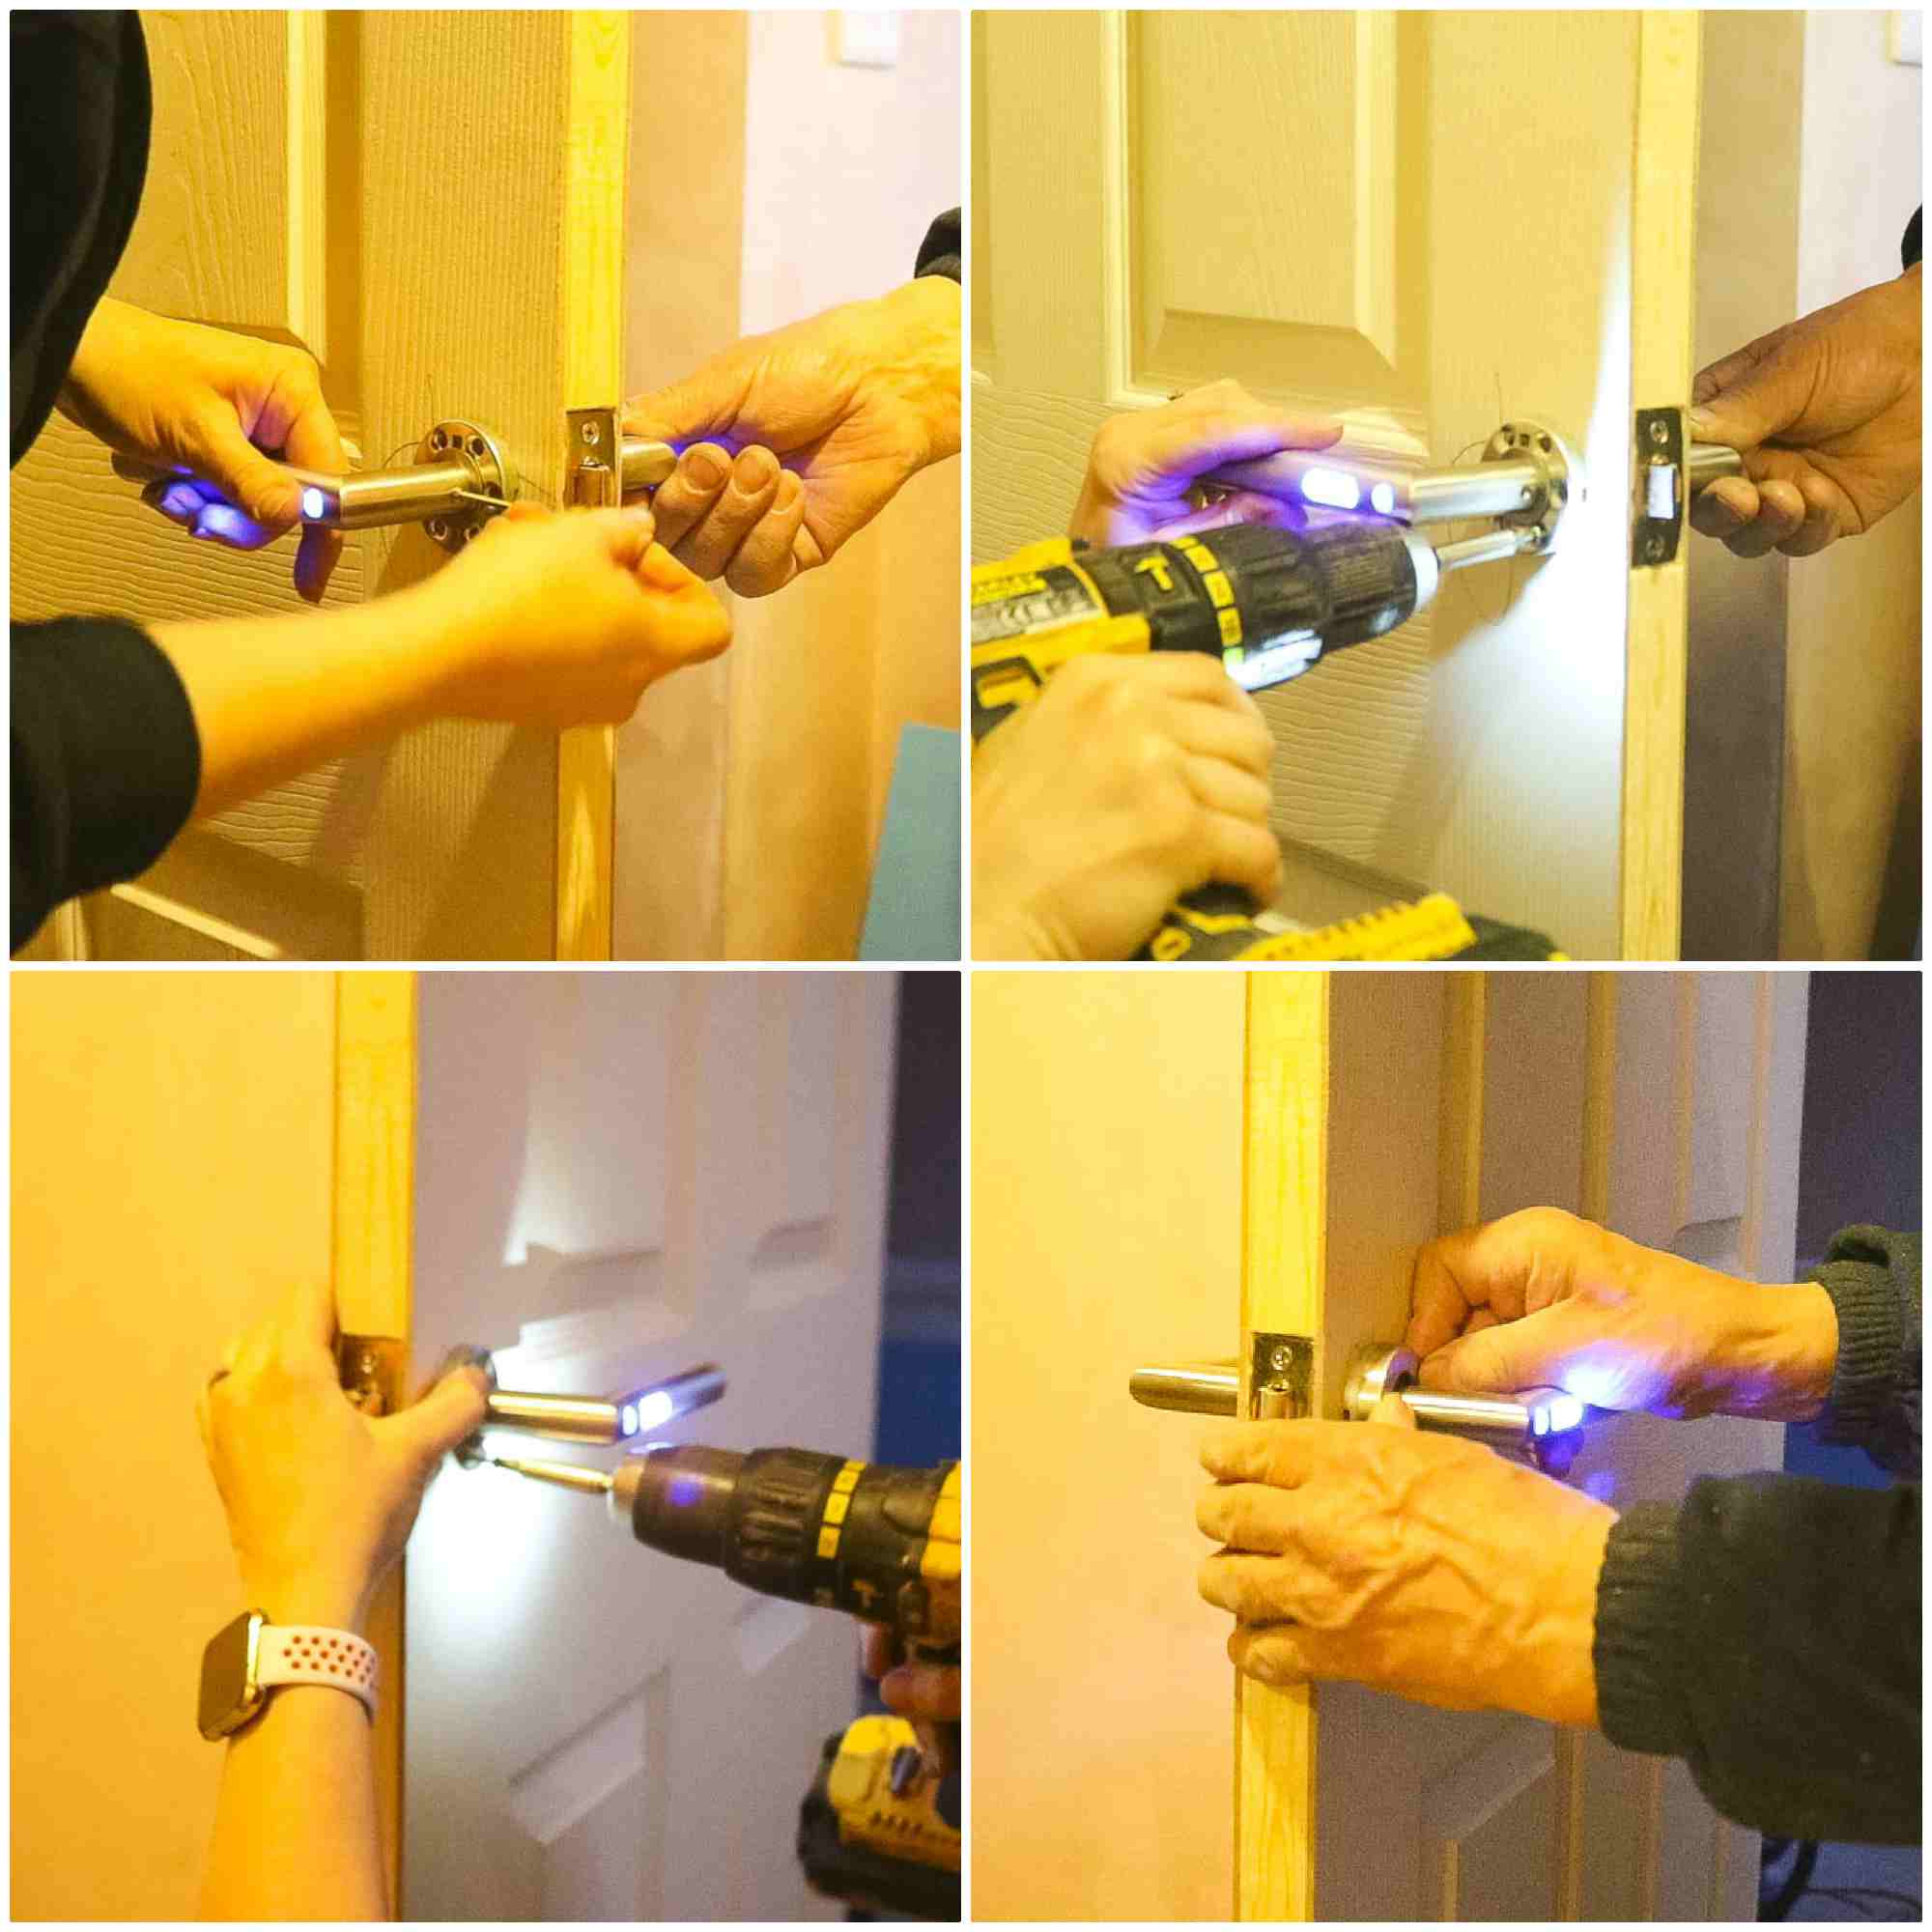
Above, here's my step by step in image on how we fitted door handles and latches to new interior doors, but for new door frames and jambs. These are where we'll need to cut out section of the latch to go. You may want to look into buying a door handle jig set, however, some are pretty pricey.
- You need to mark where you want your handles. We positioned ours inline with one of the moulded panels.
- Hold a door handle latch inline on the door end and draw around it.
- Make a centre pencil line and find the exact centre point of that same line.
- Using a combi drill and a 25mm flat wood drill bit, drill a hole.
- Keep drilling, but as far as the length of the door latch.
- Slot the door latch in.
- Draw around it with a very sharp pencil or Stanley knife and take back out.
- Hold the latch inline with the edge of the door (the front of the latch shouldn't protrude) and pencil inside the latch hole.
- Cut with a flatwood drill bit again and only go as far as the sharp edge is poking out on the opposite side.
- Go to the opposite side of the door and continue drilling from that side.
- Kick a wedge under the door to make it secure for chiselling.
- Start hammering a chisel along the pencil line at the front edge of the door *note a larger chisel than this is better.
- Chisel inside the pencil lines and only remove the thickness of the latch plate.
- Slot the latch back in and hammer to set back.
- If not flush with the edge of the door, remove the latch and chisel out any high areas.
- Pop the latch back in and screw to the door. You may want to pre-drill. And then you can pop your lever for your door handles.
🚪How to Install a Door Handle
Once we popped the lever in the hole, we slotted the round door handles on. Then below, we made sure the handles were level and tightened with an allen key that came with the set.
And to make the handles secure, I used a combi drill to screw through the round handle base plate.
Once I repeated for both sides, we then covered with the round door handle screw cover plates provided.
Are Door Handle Screws into Hollow Doors Secure?
Note, screwing into hollow doors won't be weak, providing you've correctly fitted to the lock side. So this section isn't actually hollow.
Once you've had plenty of practice, I'm sure you'll feel confident on how to fit a door handle in the future.

How to Drill a Hole for a Strike Plate
For the final job, we needed to fix the strike plate to the door jamb. This is the metal section screwed to the door frame that keeps the door in a closed position.
As we are installing handles to new door frames, my Dad showed us a couple of tricks to speed up the job.
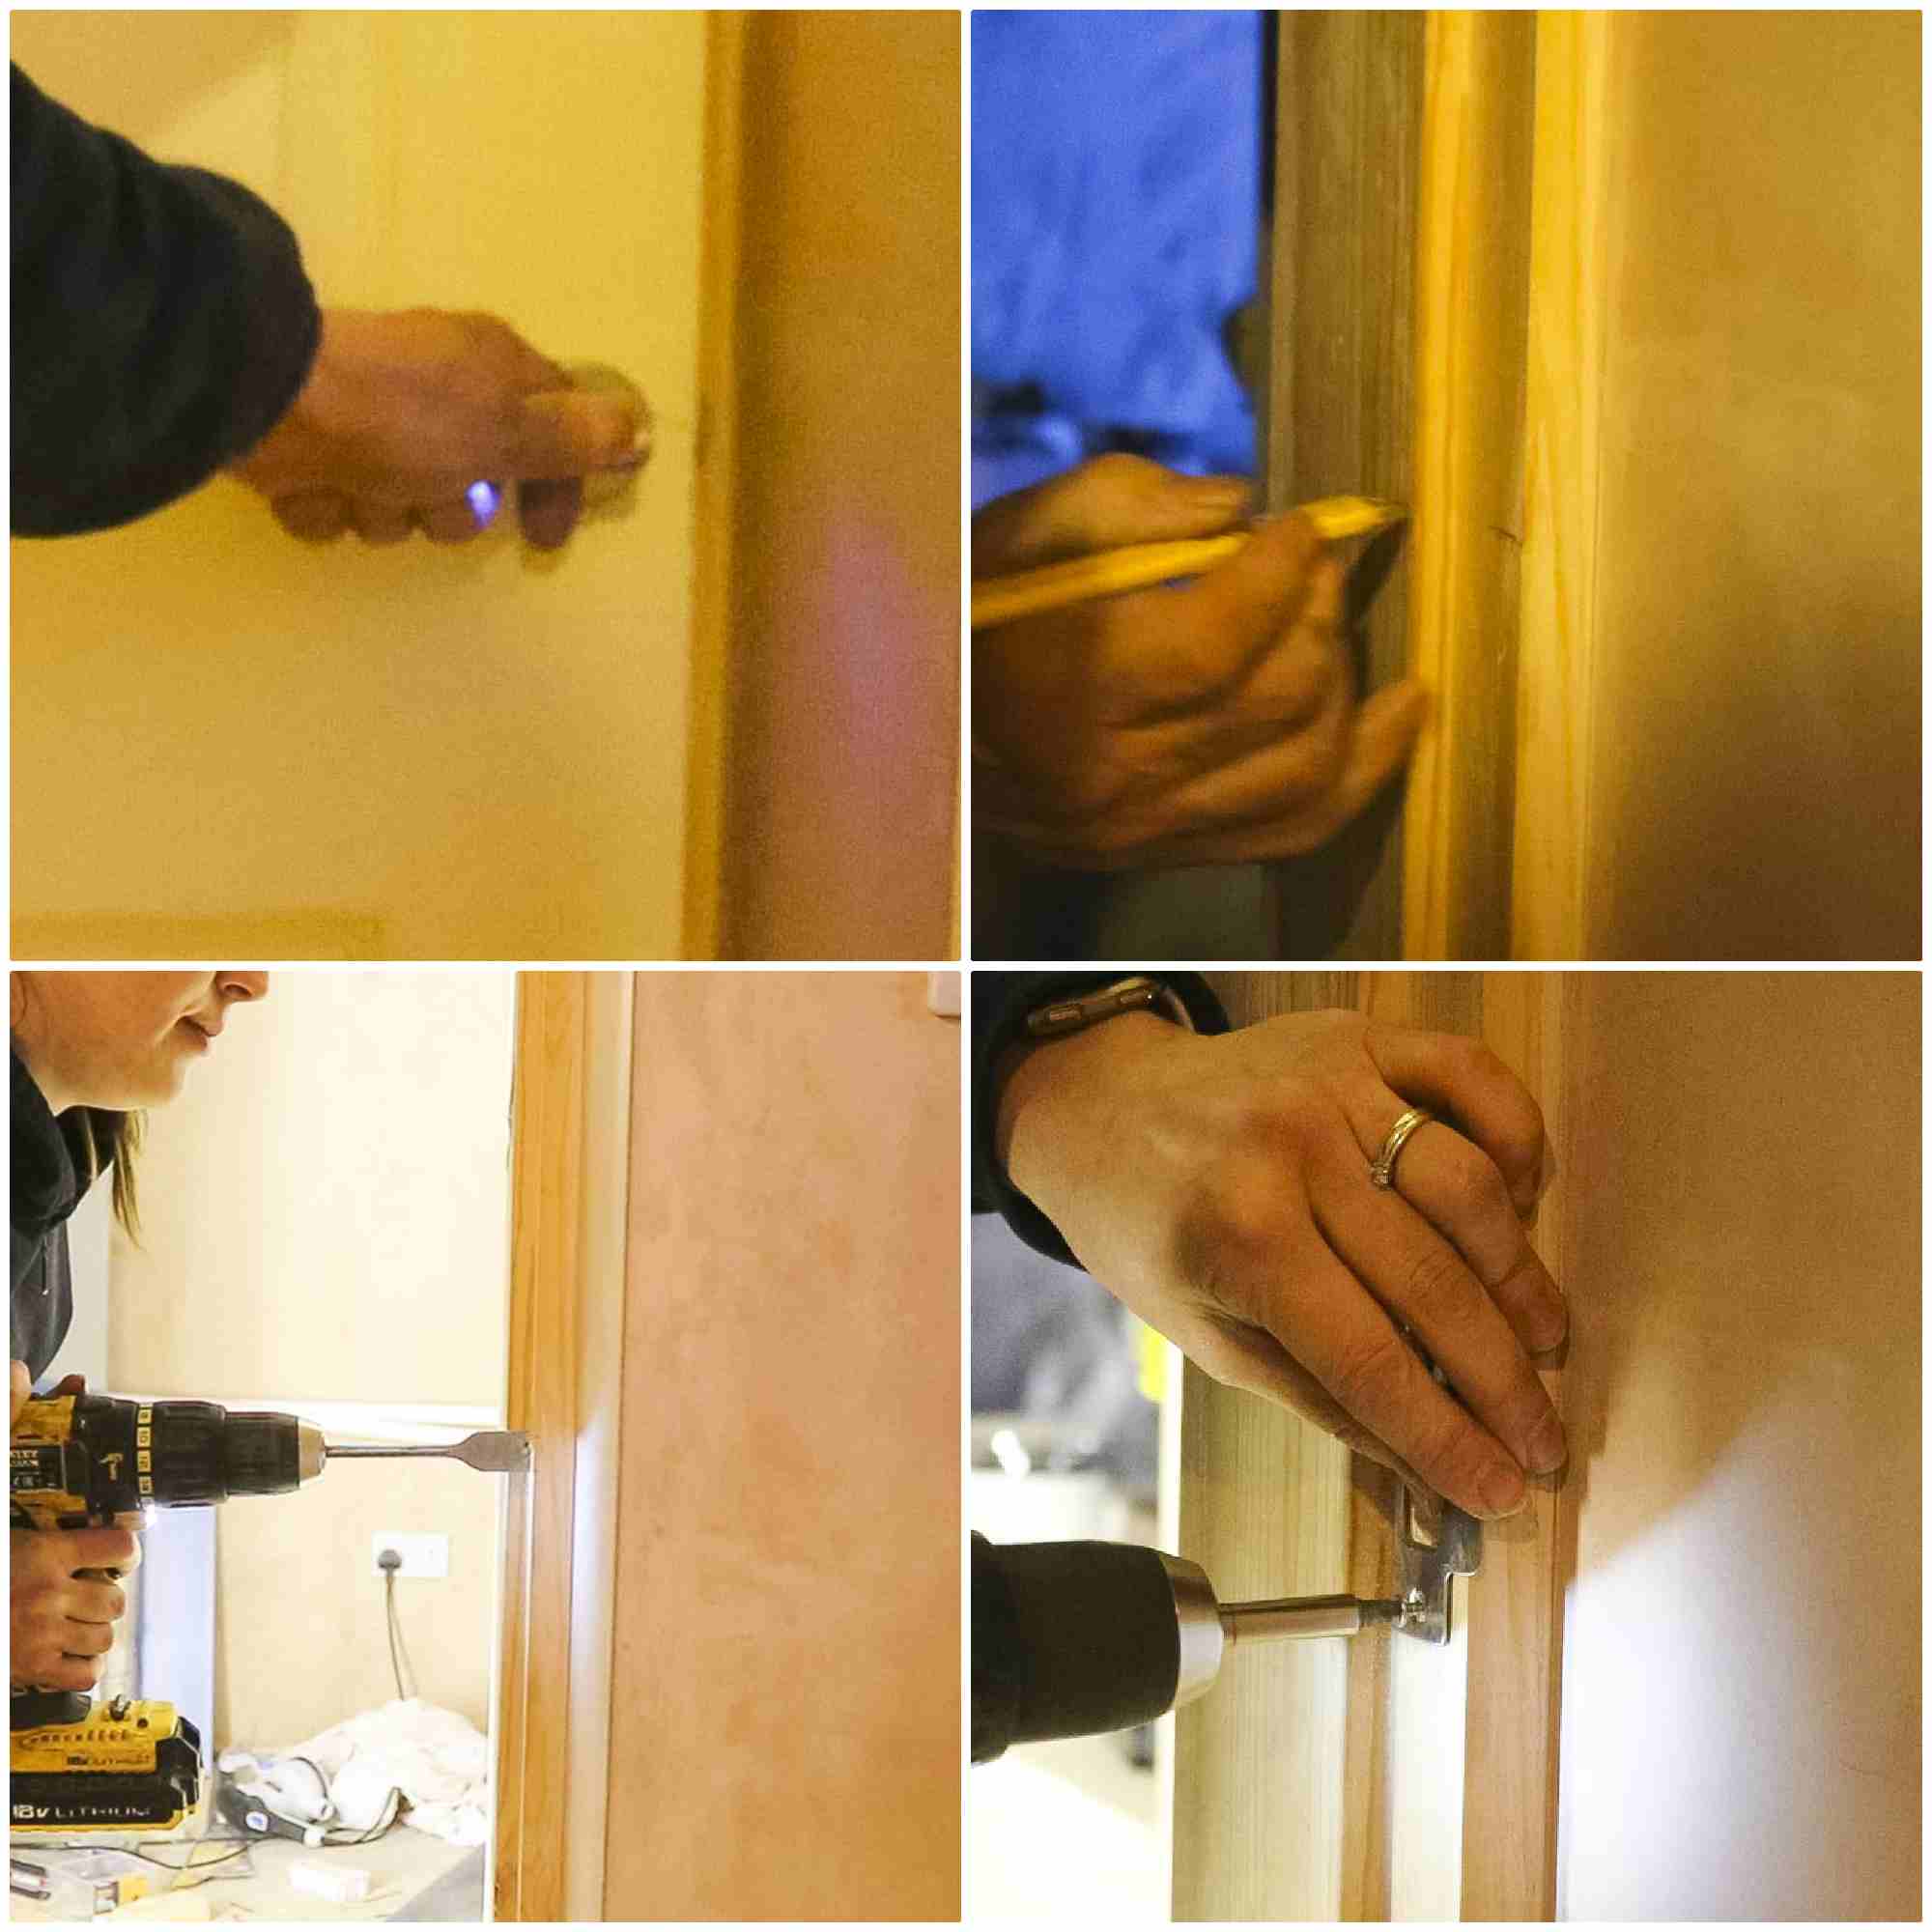
- First, he rubbed over the latch with a pencil.
- Opened and closed the door several times to leave a pencil mar.
- Drew the centre point.
- Then I stepped in to drill a hole with the flatwood drill bit.
- And finally, screwed the strike plate on.

And the final stage, was the hammer the lip back so it also set into the wood.

🎨Painting Interior Doors
There are many ways on how to paint interior doors. However, my favourite method is painting doors with a roller. And only a mini foam roller so you can paint without brush marks. The paint I used to use is two coats of Dulux's Trade Satinwood in Pure Brilliant White, however, it has a tendency to yellow with UV light.
Yes, it's oily, sticky paint and difficult to clean brushes and needs to be left overnight. But it dries to perfection without any unwanted texture. You won't need to prime doors these hollow interior doors either as they're already primed.
Some say they prefer to use Johnson's water-based satinwood. And yes, clean up is much easier, but I personally think it gives an unwanted texture.
Tips
- Avoid painting outside as bugs will be attracted to it, messing up your paintwork
- Make sure you put rags down
- Store your paint can in a bucket to prevent mess
- Line your foam roller with a carrier bag that you can turn inside out and discard when you're finished.
➕Other Projects You Might Like
- Architrave for Doors DIY Guide
- Change a UPVC Lock in a Minute
- Knocking a Wall Through For a Doorway
- Wrap a Kitchen Door with Fablon
- How to Fit or Replace Kitchen Door Hinges
- Changing Door Mortise Sash Lock
- Applying Silicone Sealant Around a UPVC Door
- How to Fit an Integrated Fridge Freezer Door Slider
- Easy DIY Kitchen Cupboard Door Hinge Fix
- How to Fit Skirting Board
- Replace a uPVC door handle
How To Hang a Door

Here's my comprehensive guide on how to hang a door with lots of tips and tricks. I'll also walk you through how to hang a door in a new frame (and old). What to do if your frame is shorter than recommended for cutting and how to fit flush hinges as well as butt hinges.
Note, this guide is a nutshell only. Please ensure you read the full post above regarding the different hinges and work arounds.
Materials
- Butt hinges or flush hinges
- Door handle *gifted by Handle King
- Door latch *gifted by Handle King
- Masking tape
Tools
- Tape measure
- Combi drill
- Electric plane
- 1m Spirit level
- 25mm flatwood drill bit from a set
- Pencil
- Sandpaper after trimming a door down
- Wooden wedges for propping up (or see a hammer and chisel technique below OR some swear by these pump wedges)
- Pennies or two pence coins
- Hand saw
- Set of chisels
- Sawhorses or a workbench
Instructions
- Assuming you have architrave and door jambs already attached, measure the width of your door opening to find out which sized door you need to buy.
- Store your door in the room you wish for upto week if you can for it to acclimatise.
- Determine which size of the door is the lock side or hinge side. *Note, it's usually printed on top of the door and mark with an X which its the lock side.
- If you have the old door still, you could place it on top of the new one and drawer around it.
- Put masking tape on the side of the door you plan to trim. If the new door is significantly bigger, you'll need to plane off an even amount on either side.
- Then secure the door on sawhorses and plane off.
- As for the height of the door, masking tape and hand saw off.
- Hold the door up to the frame with pennies traped along the top and side including wedges at the bottom to see where needs trimming off. See video and posts for full help.
- For screwing on flush hinges, or marking and chiseling out for butt hinges (again- see post above) and screw to the door frame.
- Also, follow the rest of the post on how to fit the handles and latches.

Richard
Just watched your video about hanging doors. To avoid damage when drilling for the door handle I have always drilled in from each side and not all the way through. This method also ensures that the handle is in the correct position on each side.