
Recently, I installed an arch doorway that my Dad made using offcuts for free which I'd like to share. This is a much cheaper alternative to buying an arch form kit, normally priced £30-ish each. This will be then plasterboarded up at a later date.

After making the kitchen doorway larger in my parents' bungalow renovation project, we wanted to add an arch form.
Normally you can buy them in galvanised metal. However, I hadn't realised other ways, such as this design.
I've since seen others after installing it, but not this one in particular. So I felt it needed its place on the internet.

I'm not going to show you to full how to make one as I didn't do it myself.
However, I can give you suggestions about how you could as they're very simple.
But, I will show you shortly how to install them.

MATERIALS NEEDED FOR AN ARCH DOORWAY FORM
To make a matching pair, you'll need some 12mm plywood. This looks like softwood plywood, but you could use hardwood too. You can also see some structural timber, glue and nails.
The thickness of the plywood and structural timber matches the same thickness to the brick wall.
Then, at a later date, it will be plasterboarded up. In our case, it will be dot and dabbed. This means the plasterboard will be stuck on.
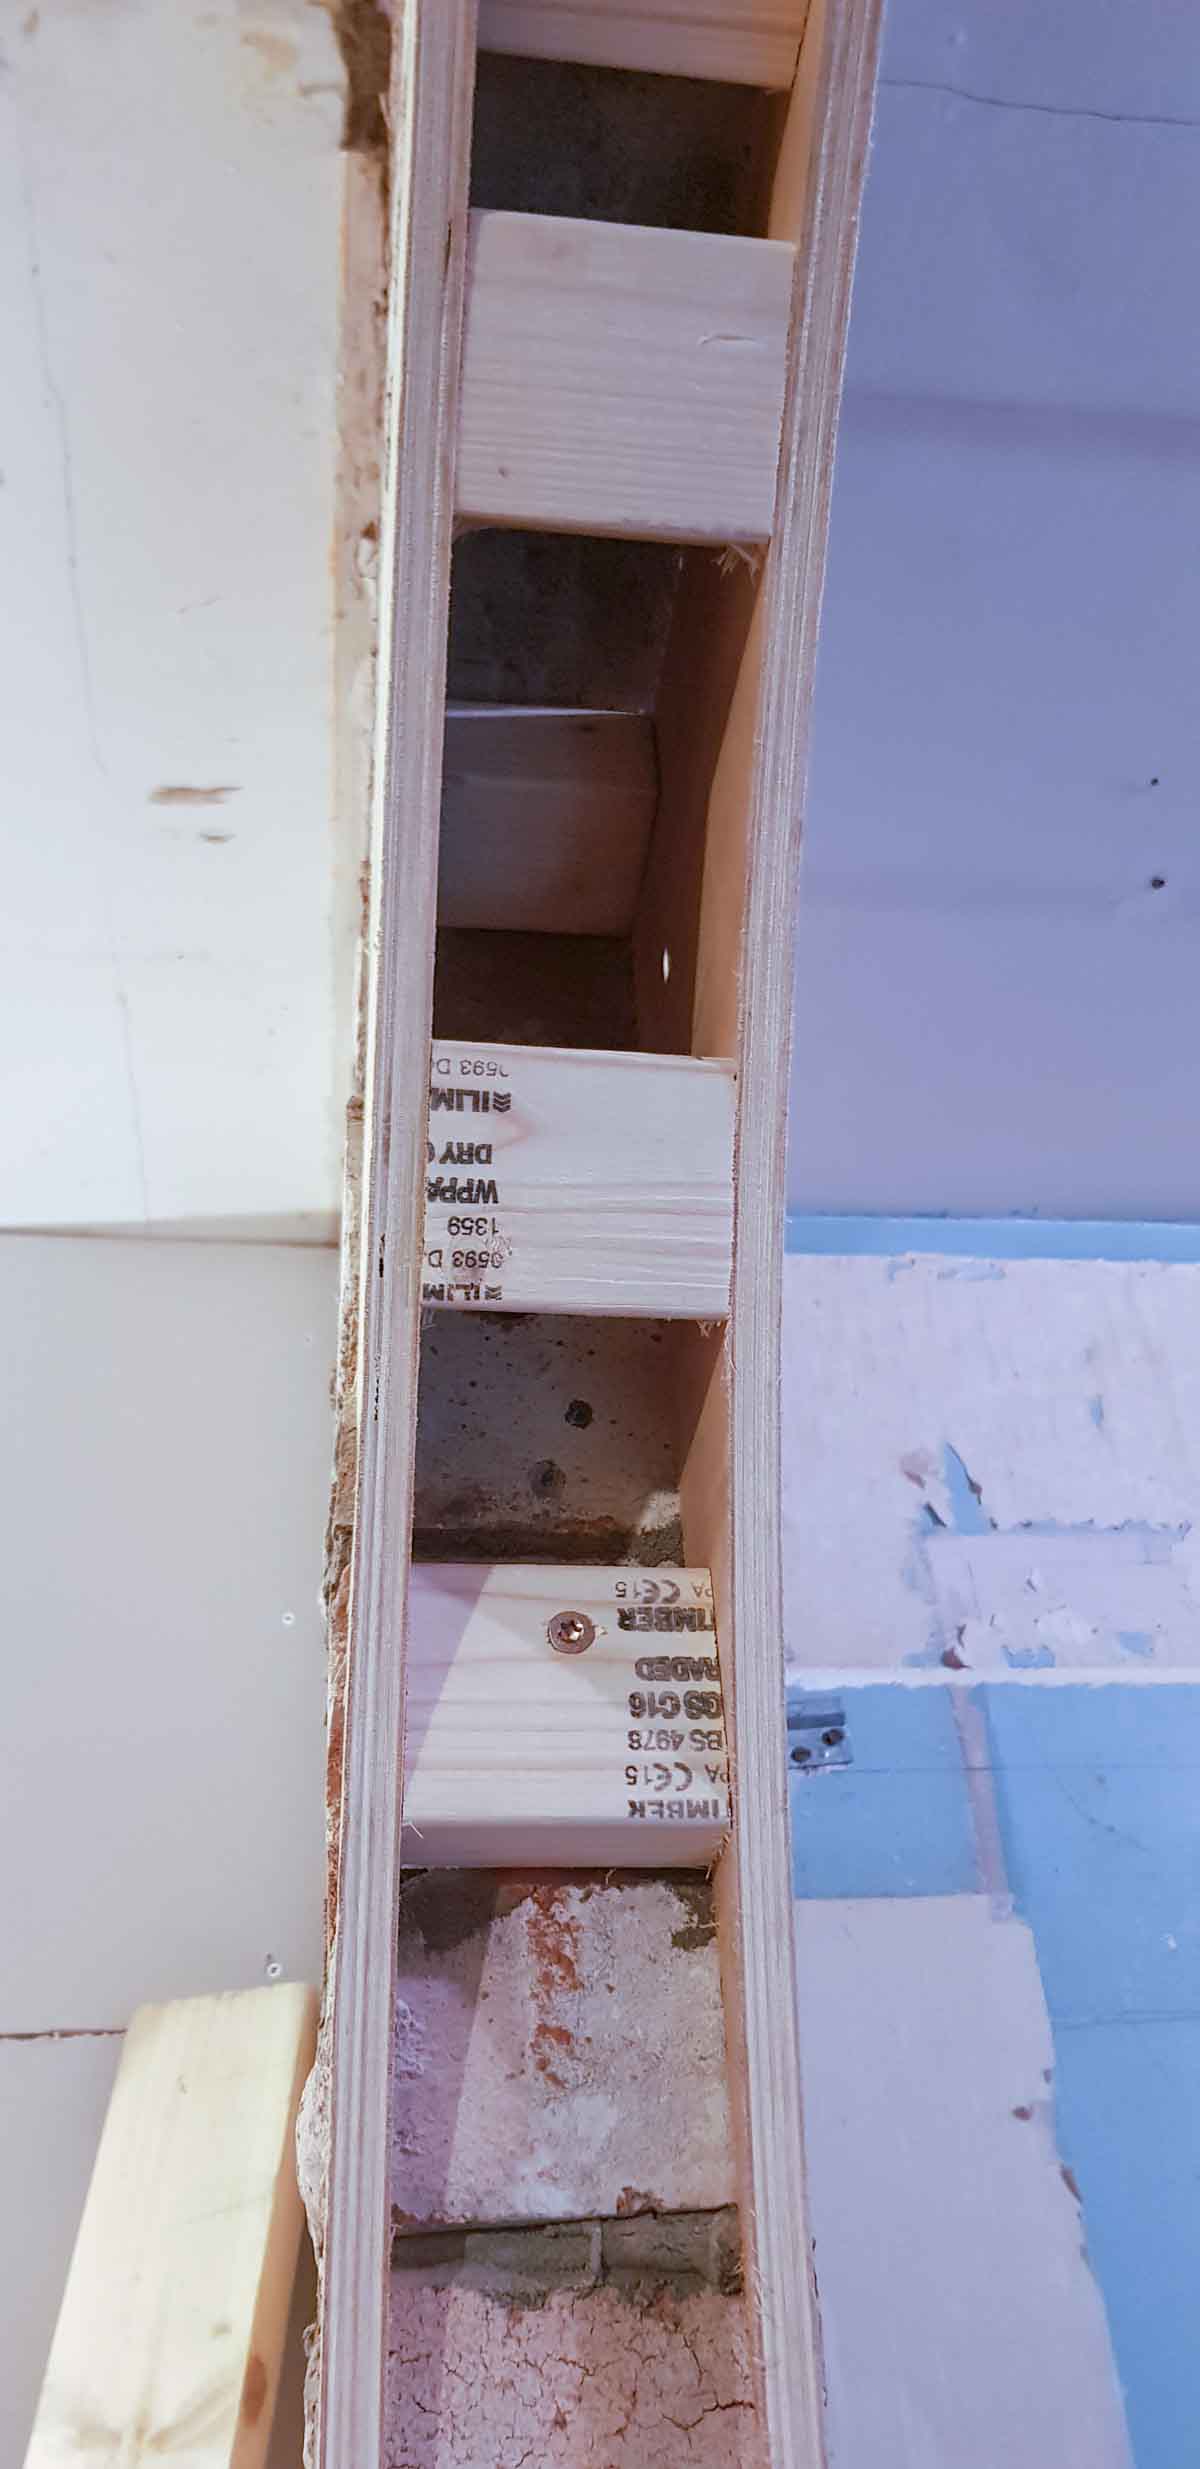
HOW YOU COULD MAKE THIS ARCH DOORWAY FORM
You can cut the plywood with a jigsaw.
Or you can use a flush router trim bit to match.
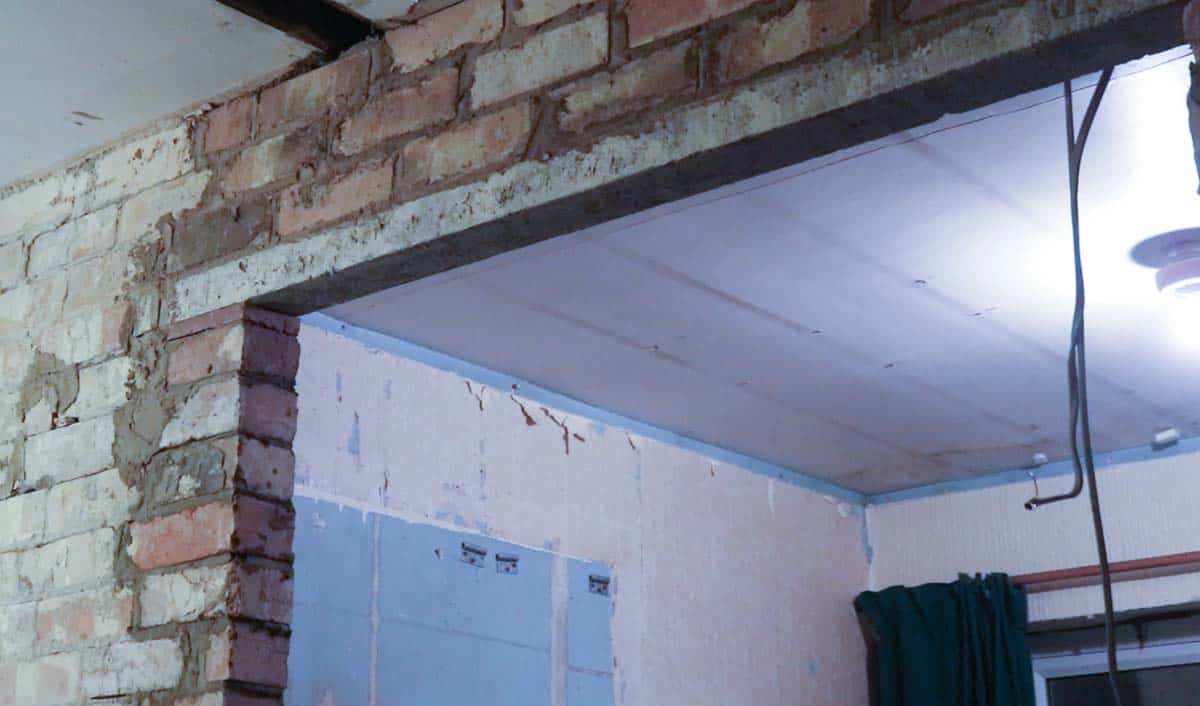
INSTALLING YOUR ARCH DOORWAY FORM
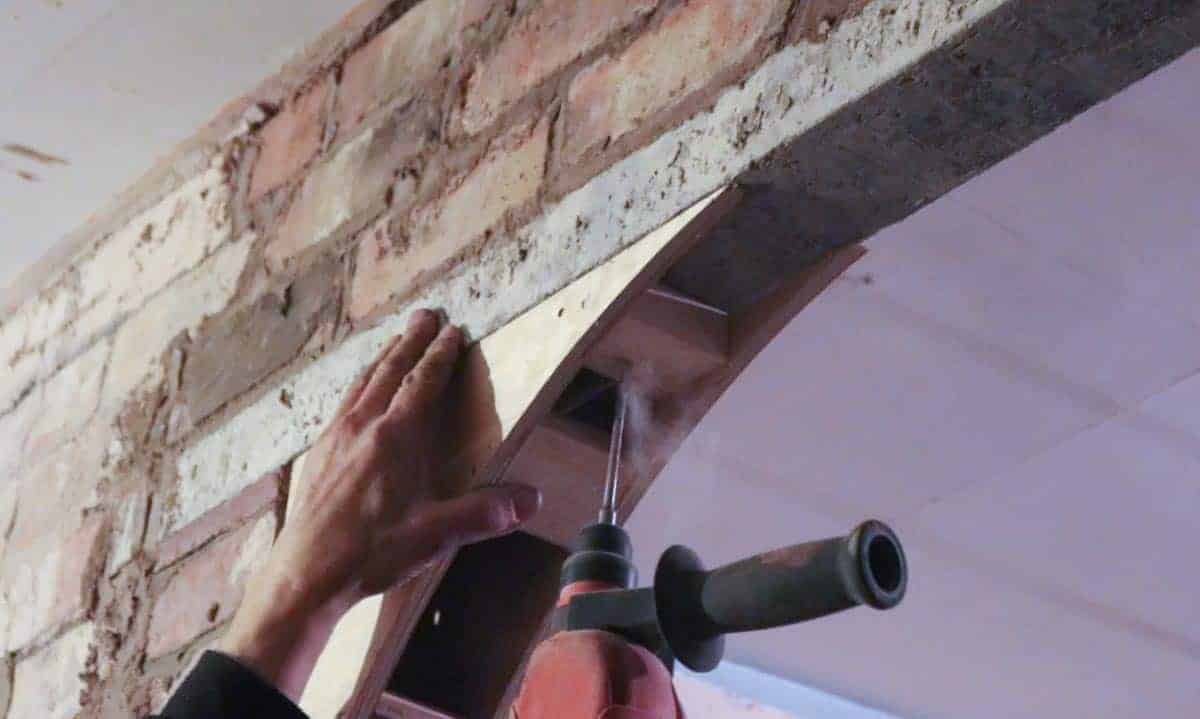
First, my Dad held one of the arch doorway forms in to place.
Meanwhile, I drilled a hole through one of the structural timber's arch dooway form with an SDS hammer drill and masonry drill bit.
I drilled deep enough to fit a spax screw in there. Spax screws don't need rawl plugs.

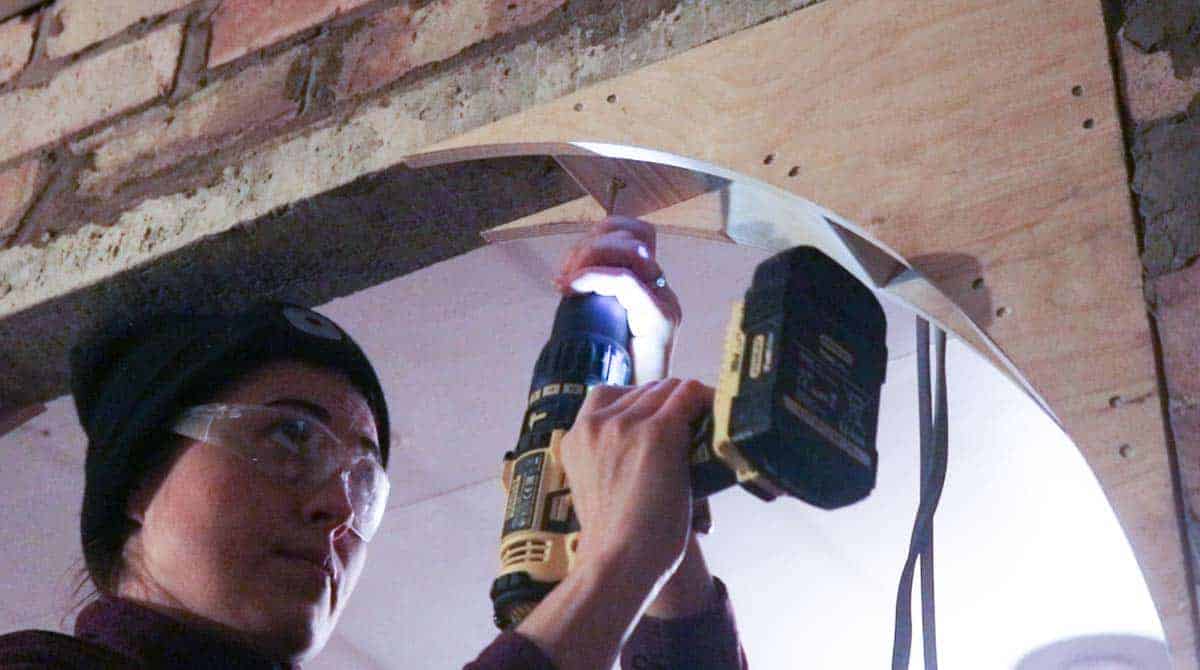
For the upper section, we didn't have shorter Spax screws with us, so my Dad drilled a shallower drill hole.
Then added a wooden splint and screwed with a normal 2" screw.
Note, this is necessary as the lintel has the rebar in the middle you can't drill through.
If this wasn't possible, then we'd have to consider liquid nails. Ie, no more nails kind of adhesive.
Then, at a later date, the plasterboard will give it a bit more structure too, to hold it in place.
Hopefully, I'll update you when that happens and that this budget arch doorway idea is useful for you.
MORE PROJECTS YOU MIGHT LIKE
- Knocking a doorway through
- Bricking up an old fireplace
- How to Build a Partition Wall
- How to Use a Wallpaper Stripper
- Bungalow Update Video
- Removing a Chimney Breast
- Plasterboarding a wall with studding to brick wall
- The start of this bungalow renovation
Arch Doorway DIY Before Plastering

Recently, I installed an arch doorway that my Dad made using offcuts for free which I'd like to share. This is a much cheaper alternative to buying an arch form kit, normally priced £30-ish each. This will be then plasterboarded up at a later date.
Materials
- Plywood
- Structural timber
- Glue
- Nails
- Spax screws
- Wooden splint
Tools
- Jigsaw
- Router
- Hand Saw
- Combi drill
- Masonry drill bit
Instructions
- Either draw around something curved on to the plywood or you could screw a long piece of wood to it with a hole for a pencil and draw a curve.
- Cut plywood in to 4 matching curves for arch. You could use a router with a flush trim bit to match them if preferred.
- Cut around 5 pieces of the structural timber and ensure the depth of these and the plywood work out to the same depth of your brickwork to allow plasterboard after. You may need to cut more or less structural pieces, depending on the size of your arch.
- Glue and nail together.
- Hold one of the arches in place and drill, then screw with a spax screw (this avoids the need for a rawl plug.
- Repeat for the upper section in to the lintel with a shorter spax screw. Or, use a wooden splint and a normal shorter screw.
- Again, repeat for the opposite matching arch form.
- Plasterboard as you normally would.

Brittany
This is a brilliant way to create an arch! What kind of plywood did you use? The lumber looks beautiful, I can’t wait to see how it turns out when it’s finished. Thank you for sharing!