
How to make easy DIY boat fender holders (AKA hooks) from wood to hang from the top of your narrowboat to protect your blacking and hull. I'll also explore a variety of tools you can use and how to create your own bespoke fender hangers. If you have a printer on board, you can instead also download my free templates to print.
You can also follow along with my how-to make a boat fender hook video here.

Before I get down my boat fender hanger project, let's just discuss our news. YES! We're now the new owners of a 57ft narrowboat! We aren't liveaboard narrowboat folk just yet.
But, we have now sold our house, bought one up North (where you can see me knocking a wall through for a doorway) and guess what? Properties are typically cheaper in the North, meaning we could also start looking for narrowboats for sale instead of hiring them for holidays.
However, we are future-proofing it for when the time comes to live on it as much as possible. That's the plan, anyway.

What Are Boat Fenders For?
With a new narrowboat, comes new responsibilities. Which is why I'm going to show you how to make some boat bumper holders. Our boat is currently at a secure marina, but currently needs more boat fenders to stop rubbing on the jetty, which could damage our newly black hull.
A boat fender is usually made of rope, rubbery tyres or sponge to soften any blows when touching walls, other boats, etc. I personally think and well tied one is a good idea, but my marine fender holders are perfect in marinas where you can quickly unhook them.
It's also been recommended to us by several people to remove them while in a lock, otherwise you can lose them and can get caught on lock walls or gates. (I've really just made pontoon boat fender hangers).
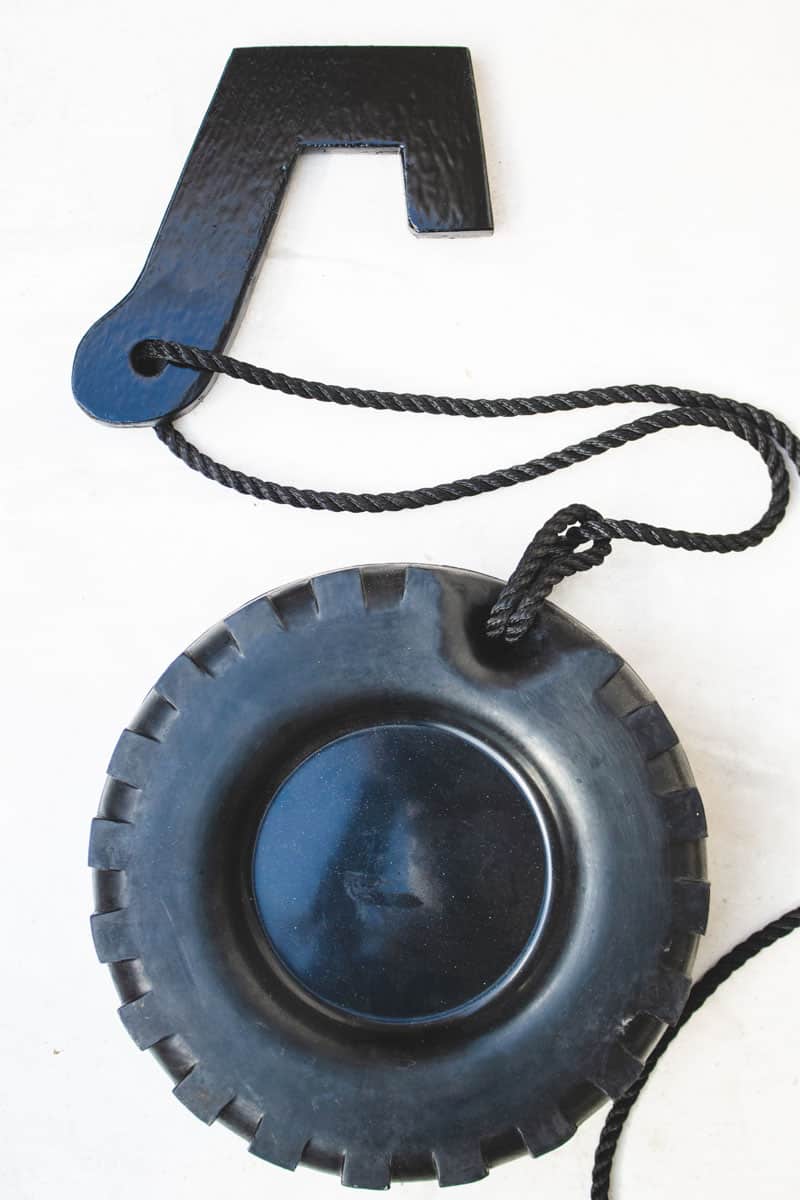
Why I Didn't Buy Boat Fender Hooks
You might have noticed that buying a boat fender holder can be pricey depending on the material. In fact, all boat fender accessories seem expensive! A plastic one starts around £6 each, yet untreated wooden ones are around £12.
And with me always being inundated with wooden offcuts in my workshop, it made sense to create some while reducing the use of plastic, too. Also, it's fun to be resourceful and learn new woodworking skills.
I also noticed the side rail of our neighbour's narrowboat is tapered differently, so you can see they fit differently above. So I decided to make a bespoke boat fender holder for a better fit and personalise it to compliment our barge.
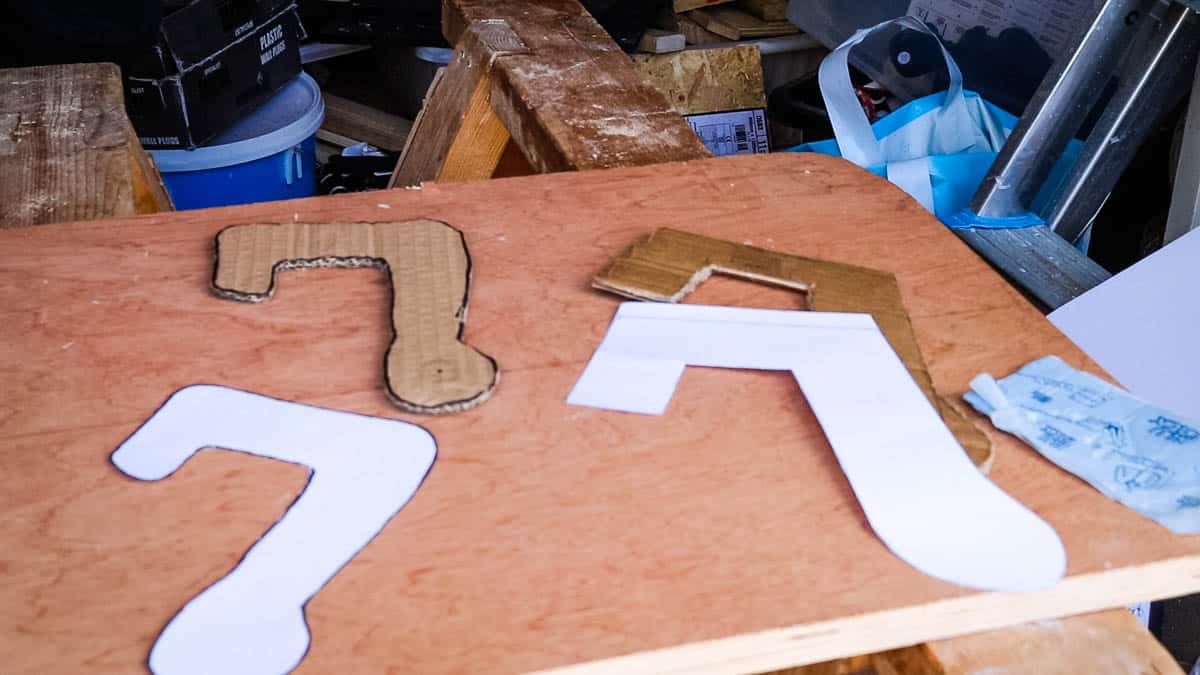
Free Boat Fender Templates
If you have a printer on board, then you can save yourself some time and download two free templates for pontoon boat fender clips here. I recommend printing under "100% scale" and checking the 1 inch or 2cm square reference to see if it's sized accurately.
Once printed, you can cut out and test fit it on your boat to see which one is best. For a more robust test fit, I recommend drawing around cardboard, cut with a knife, then test again and crack on with hanging your boat fender lines.
If you need boat rail clamp rod holders, personally, I'd try designing something like an S hook by drilling in wood with a holesaw slighly bigger than the diameter.

How to Make Your Own Template Without a Printer
Note that the first question mark style hook template was created by drawing around my neighbour's existing one. I simply drew around it directly onto cardboard and sawed it with a steak knife(!) Just use what you have!
But, for a better fit, I held some cardboard packaging above the boat's rail and marked where it protruded and again, cut with a knife. Luckily we get free cardboard from Amazon, so if you make a mistake, it's cheap. Also, it bends easily to mould around a boat.
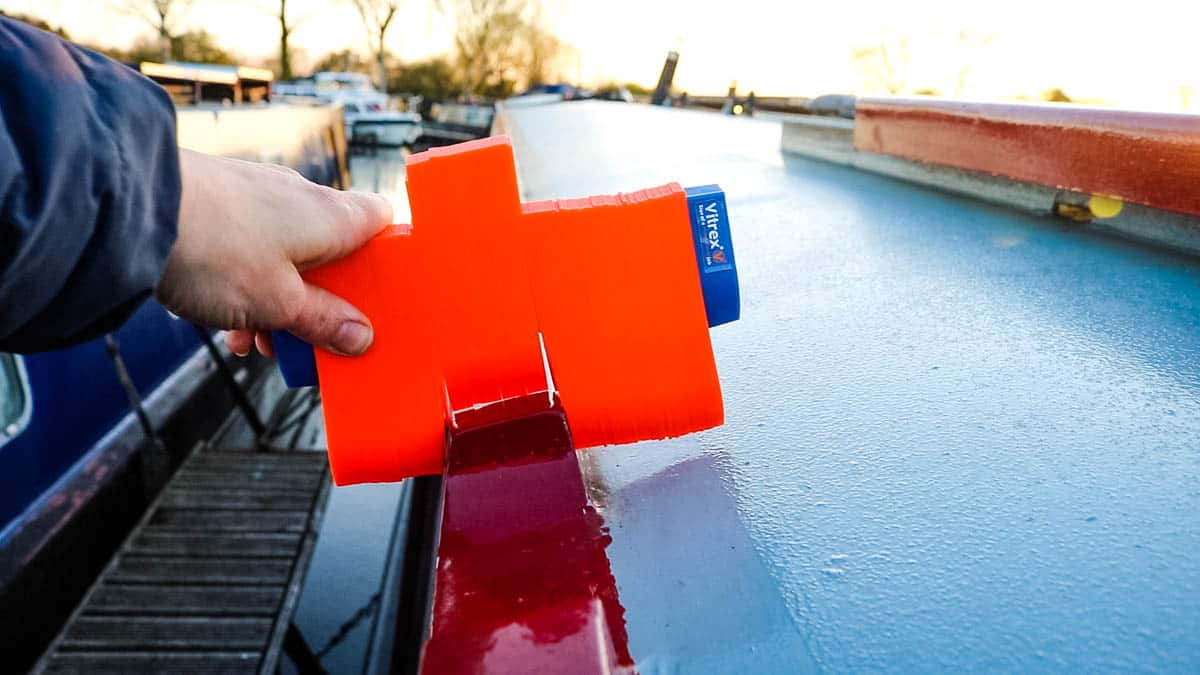
Alternatively, you could use a Vitrex profile gauge (below), or similar, which you can push against a protrusion and draw the shape onto cardboard and continue. (I didn't use mine as I'd left it at home!)
Make Room For Expansion
To prevent fitting problems later, I left a 5mm allowance on either side of the notch to allow for paint and future heat expansion when the weather changes.
What Wood Can I Use?
You'll need a wood that is strong under pressure, so avoid a softwood. For mine, I used an 18mm hardwood ply offcut from my DIY dog house project 2 years ago.
How to Make Boat Fender Clips
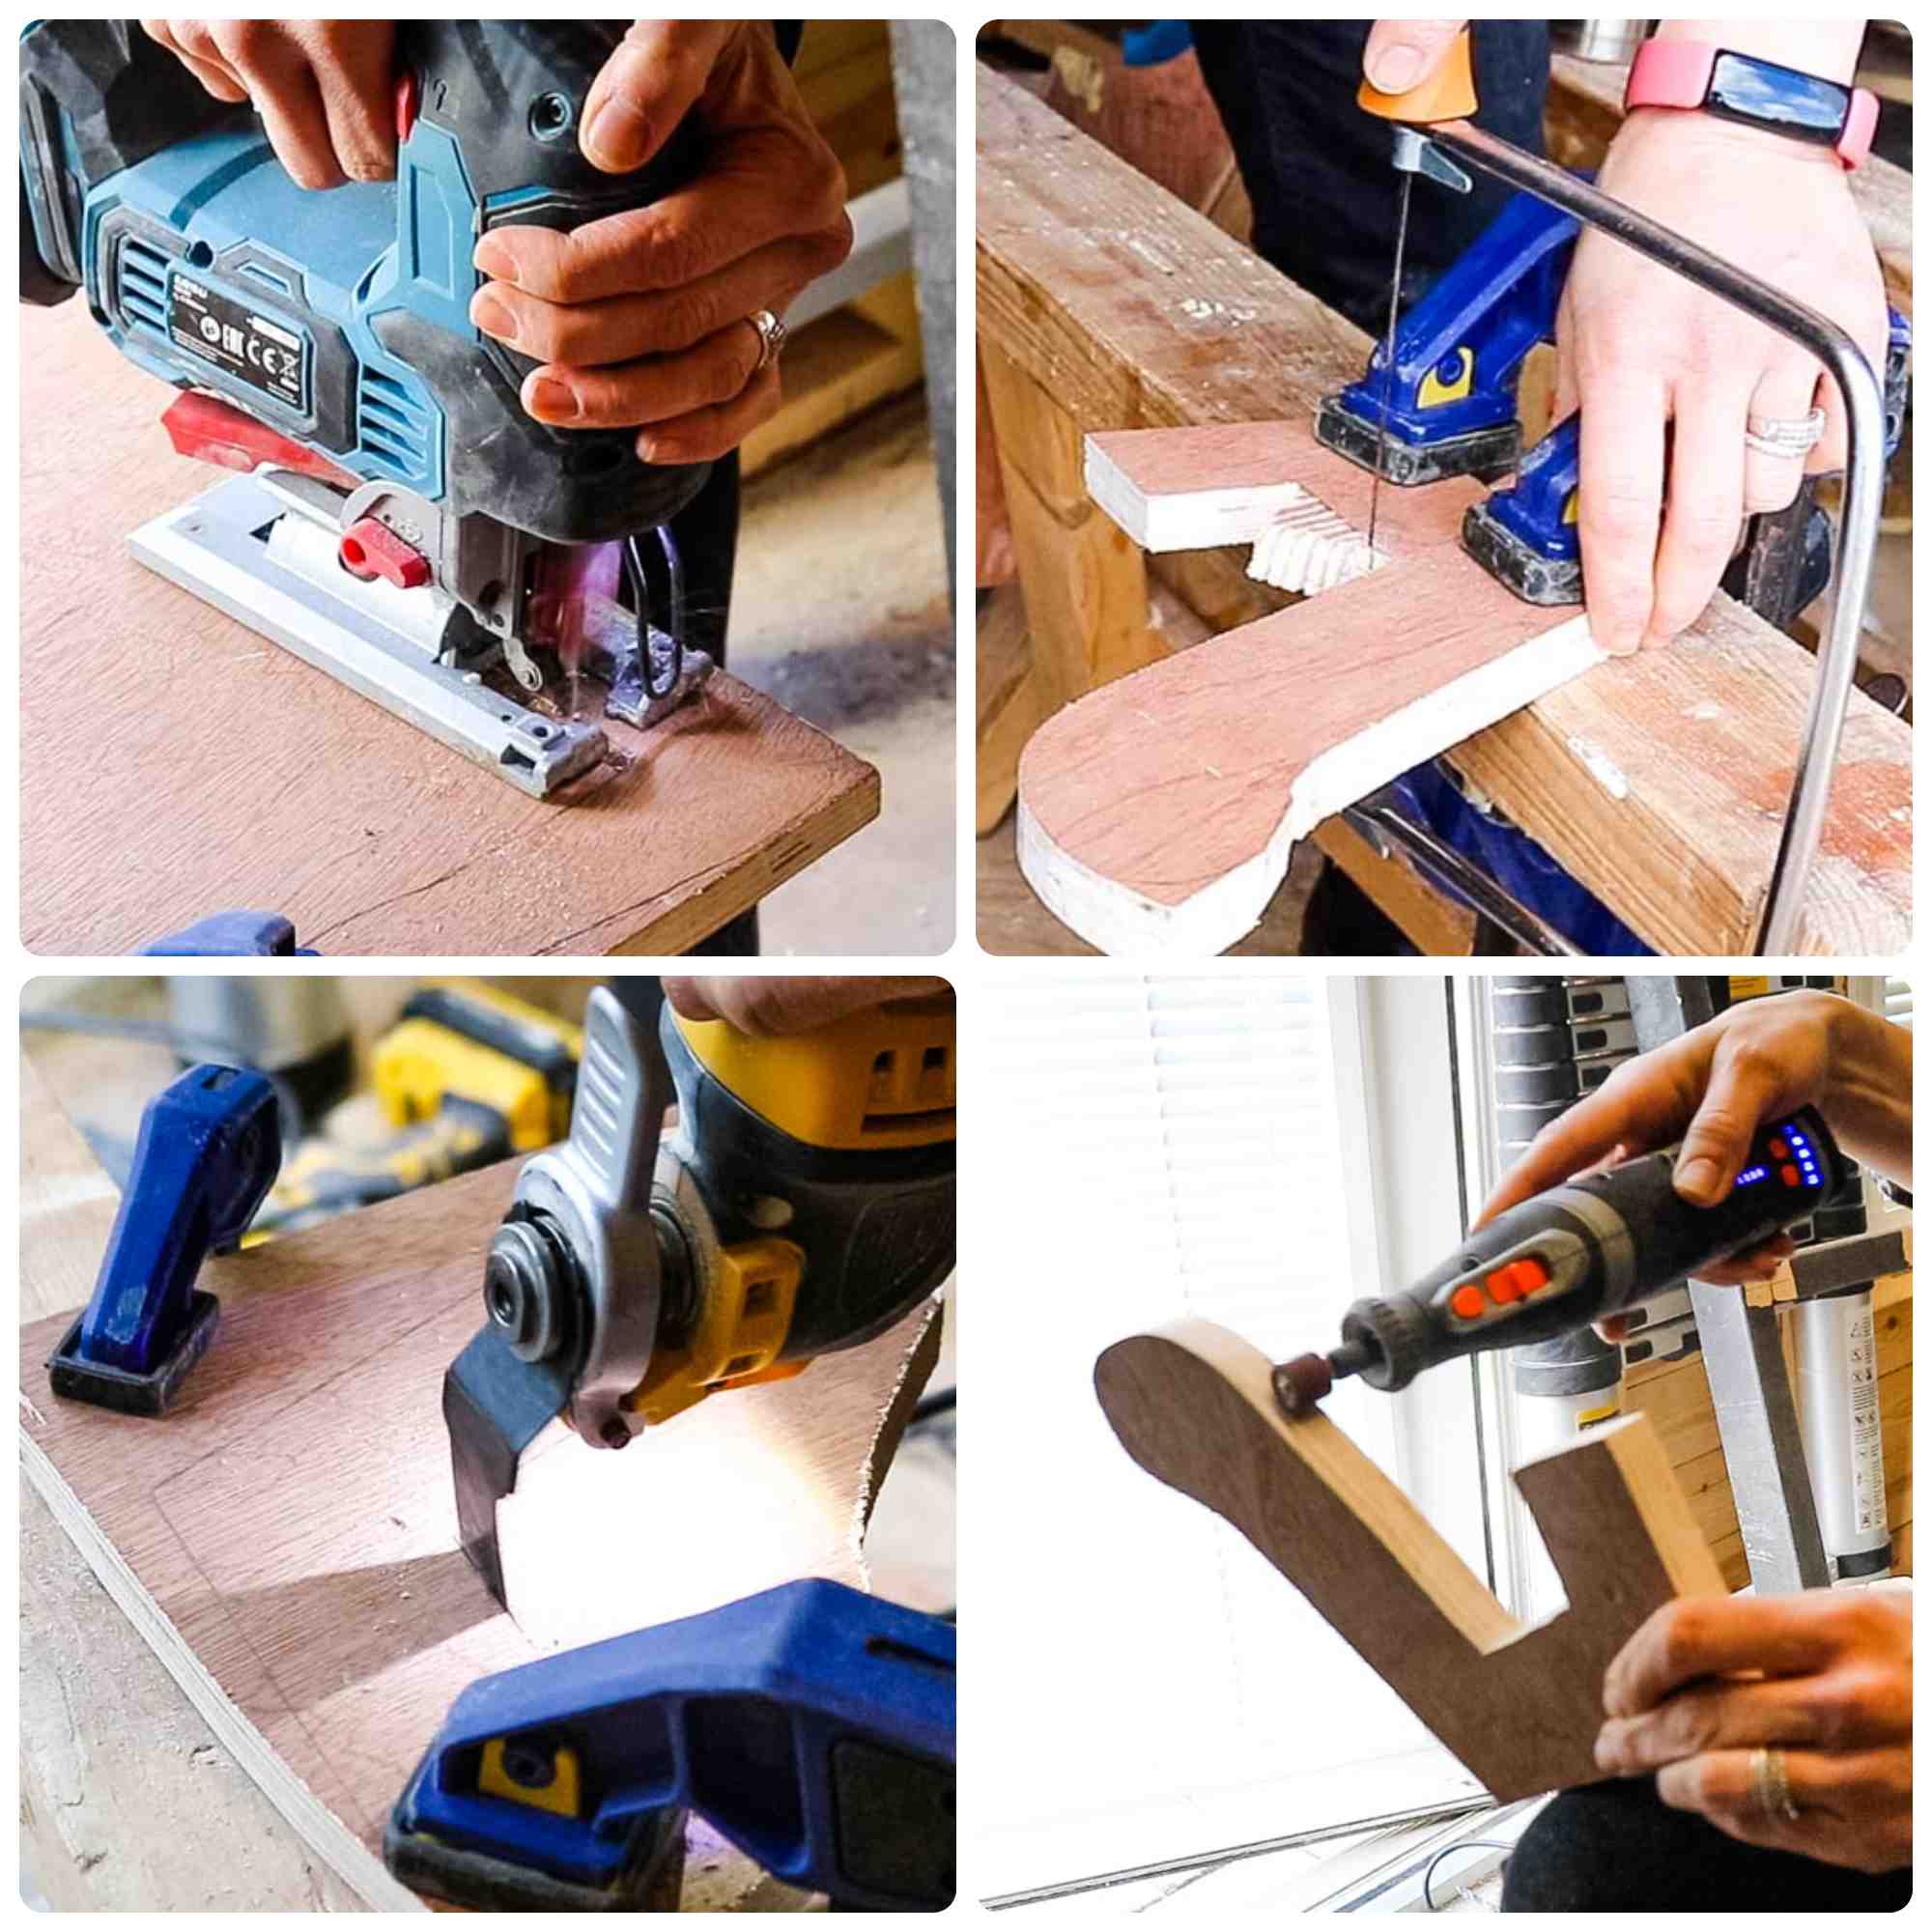
Before you start making removable boat fender holders, let's talk about the many tool options you can use, because narrowboaters don't have a lot of tool storage space. And, you might be surprised which tool I find best.
Note, I have tried all of these, apart from a band saw or scroll saw as it's not in my workshop.
Band saw / Scroll Saw
For a more professional finish, then I would recommend a band saw or scroll saw as I know it's easier to cut small projects. However, for the power usage and storage needed, I think this would be more suited for businesses making fender boat hooks to sell. But, understandably, not many boaters will have this at hand!
Jigsaw
You can definitely use a jigsaw, but it's not ideal because it can jump about during small projects and the base plate gets in the way of the clamps. This means constantly having to move clamps, which takes thought and time. It also has a tendency to chip exterior plywood, meaning the need for filler. If this is your preferred method, I recommend alternating with a hand saw for straight edges. You'll also need to drill some holes to let the blade in.
Coping Saw With a Hand Saw (favourite)
Although it may sound basic, using a coping saw with a hand saw is my favourite method because it's much easier and quicker to cut without moving clamps and work around awkward angles. Although, note it will require more sanding if using a coping saw alone. Also, these tools take up little space on a boat, they're safer, cheaper and doesn't require wearing PPE unless using MDF. For the notch, you'll need to make relief cuts, but can be sanded with a rasp or file. See notch cutting below for my favourite method.
Multi Tool (favourite)
Sometimes we "go around the houses" the realise which tool would do a better job as I did with my multi tool. Note, there are battery-powered ones too and the flat wood notch cutting attachment gives a much cleaner cut that drastically reduces sanding time from usual relief cuts.
Cordless Rotary Tool
I don't often treat myself to new tools, but to sand tricky angles, I bought a cordless TACKlife rotary multi-tool with various grinding attachments. However, despite being a useful tool for maintenance while living on a narrowboat, I found a set of rasps to get into the angles gave a more even finish. Note, be careful on the angle with rasps filing plywood as you can chip it, requiring more filler.
Workbench or surface and clamps
While cutting with any tool, I wouldn't do this without good clamps and some form or surface. I tend to use my sawhorses, but a fold-away workmate would be useful. I'd even be tempted to be resourceful and screw a section that later needs to be cut away, to a tree stump to secure while working.

Cutting Easy Boat Fender Hangers
If you've read the tool options above, I preferred using a coping saw because it was quicker to use a coping saw because the blade holder doesn't get in the way.
I suggest cutting on an angle initially to get going, then angle it vertically once you're on track. To twist the blade, twist the handle and the opposite end's lever to work around curves. You can also use a hand saw for straight lines if preferred.
Making a Cleaner Notch With a Multi Tool
For any inward awkward angles, you can make several relief cuts to chop out the excess, but it will need rasping or sanding more than using a multi tool.
The multi tool needs a steady hand to get started, then kind of chisel out to cut a perfect line, then hand saw the remaining excess.
Sanding The Edges
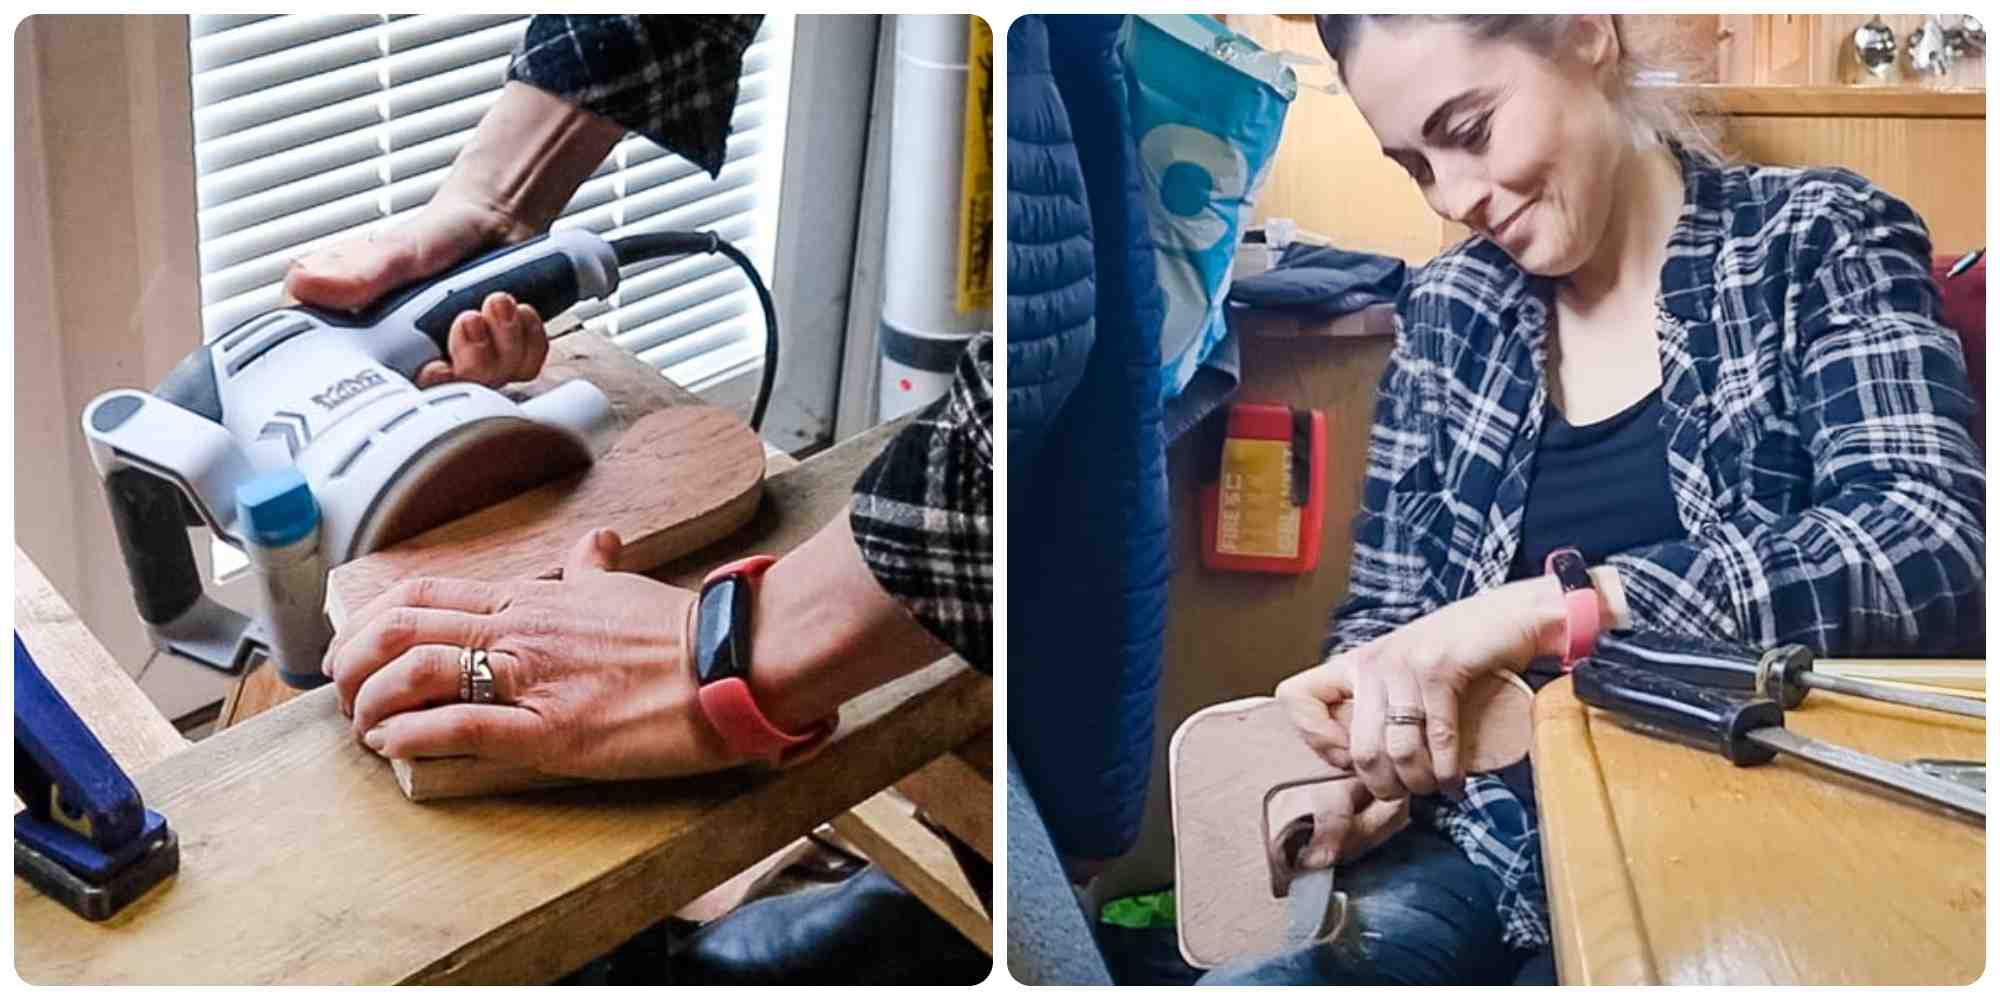
For straight edges, I sanded smooth with my orbital sander as it's quick. (You can also buy battery-powered ones these days). For the external curves, I simply hand-sanded, which I find rather therapeutic.
For the internal corners, a rotary multi tool is perfect for this as hand sanding can be a struggle and time consuming!
Filling Any Chips
If you have been unfortunate to chip your project, or you're using imperfect offcuts like me, I used my favourite wood filler with a quick set catalyst.
Once set, which takes about half an hour, I then sand smooth and jumped to my next step of drilling a boat fender rope hole.

Drilling a Rope Boat Fender Hole
Before even painting and making them stainless fender holders, I drilled a hole using a 16mm flat wood drill bit. You could also use an auger drill bit for this.
But to prevent possible damage on the opposite side, only drill until the hole saw's tip just pokes through.
Then flip over to continue drilling from the other side.

Can I Use Metal Paint on Wood?
Before tying a boat fender rope knot, you'll need to treat it as we used wood. For cheapness, I wondered whether I could use hammerite for wood because I had it in my workshop and would match our narrowboat chimney.
It appears to do the job well, with it being thick and hardwearing. But, depending on your chosen material, I highly recommend checking these hammerite paint on wood results.
Alternatively, you could use a fence stain, preferably with "preservative" on the label, but avoid water based ones that don't say it. My Dad (a carpenter, duh!) said it's just coloured water.
For a natural look, you can use a clear preserve (my favourite) or Danish oil as demonstrated here. But any filler you use would be best in the same colour as the wood, otherwise, I recommend painting it or staining in a dark colour overall.

Do you have any other boat fender storage ideas? Let me know in the comments below!
More Boat Projects You Might Like
- Our first narrowboat hire experience (on our honeymoon)
- Touring the North Coast 500 by camper van
- How to convert a camper van
- Cooking on a narrowboat: lamb and mint stew with dumplings recipe
- Our buying a narrowboat experience

How to Make Boat Fender Brackets
DIY Boat Fender Holders/Hooks (Free Template)

How to make easy DIY boat fender holders (AKA hooks) from wood to hang from the top of your narrowboat to protect your blacking and hull. I'll also explore a variety of tools you can use and how to create your own bespoke fender hangers. If you have a printer on board, you can instead also download my free templates to print.
Materials
- 18mm thick exterior hardwood ply
- Paint
Tools
- Coping saw
- Hand saw
- Sand paper
- Rasps
- Paint brush
- Filling knife
- 16mm flat wood drill bit
- Sander
- Multi tool
- Clamps
Instructions
- Print my free downloadable template, or making one with cardboard as seen in my notes above.
- Draw onto thick exterior wood.
- Clamp to a workbench of some sort and alternate with the tools of your choice (see post above for tips and tricks).
(I prefer a hand saw, coping saw and a multi tool). - Drill a 16mm hole for the fender rope.
- Fill any chips or dints and leave to dry.
- Sand everywhere with the tool of your choice and remove the dust.
- Paint with waterproof paint of your choice and leave to dry and cure before attaching your rope and fender lines.
Pin This Pontoon Fender Holders Tutorial


Comments
No Comments