
Making this robust, personalised DIY dog house without an internal frame is so simple using 18mm thick plywood. It has a removable felt roof to keep your dog dry and is a fun way to also style your garden. You can follow my written tutorial below, and/or scroll to the bottom for the video!
THIS PROJECT IS A PAID ADVERTORIAL FOR ERBAUER TOOLS, WHICH ARE NOW AVAILABLE IN B&Q STORES.

While you're here, you may also like my How to Build a Chicken Coop tutorial and DIY chicken pen with free plans.

As probably with every dog owner, we have a few secret words that only us humans know to avoid getting our collie, Hans excited. There's certain things, such as:
- Walkies is now "W"
- Din dins = "Double d's"
- Bath is spelt "B-A-T-H"
- And garden is said as "G"
In fact, I waste a lot of time letting Hans out in to the garden because he's obsessed with going out. Perhaps once an hour and it can be so distracting. And he'll spend most of the time laying on a cold doorstep.


IMPROVING MY GARDEN WITH ERBAURER TOOLS
So, because B&Q have recently become stockists of Erbauer's latest one interchangeable battery power tool range, I thought teaming up on this DIY dog house for Hans was my solution.
It was also a great project to put them through their paces and try them outdoors as well as in. Just like the Erbauer hedge trimmer above. And I was able to push my limits and try new techniques that have inspired me along my journey. And if all went well, I could keep adding to the collection of this one-battery-fits-all system.
Also, with them being cordless, I loved how I didn't have to worry about accidentally cutting through cables. The fast charger only took at most an hour, which I never once ran out of power. The brushless motors mean they last up to 25% longer with each use. And more importantly, I was able to achieve a more professional finish.

CAN YOU USE PLYWOOD OUTSIDE?
So to find out whether I could use plywood outside, I turned to my carpenter Dad as I was worried it would warp in wet weather. He informed me that you can use plywood for outside, providing you treat it with a preserver.
In this project, I opted for 18mm thick hardwood ply as it is stronger and more hard wearing than soft wood. However, either are fine for outdoor use, providing you preserve the wood first, paying more attention to the cuts.
As this isn't tantalised timber (except the trim and base which I'll mention shortly), I'll also need to treat it more frequently. But I know that because I took the time to make it myself, I'll look after it even more.

THINGS I USED TO MAKE MY PLYWOOD DOG HOUSE
To make my plywood dog housefor my medium 13kg dog, I used the following tools and materials. *Please note than when using any thinner than 18mm ply, you will need to make an internal frame and no just a base:
- Erbauer Cordless Circular Saw *comes with blade already set up
- Cordless Erbauer Jigsaw *comes with a selection of blades
- Erbauer Cordless Multi Tool *to sand and cut wood
- Screwdriver/combi drill
- Drill bits *mostly 2.5mm & 3mm, ensuring they are thinner than screws you use
- Erbauer Palm Router
- Fast Charger by Erbauer
- Erbauer 18V 5Ah battery & 4Ah battery
- ¼" Corner Router Bit *for the dog house opening
- ¼" Straight imperial router bit *for carving fonts
- Printer and glue *to print and stick a font to wood before routing
- Roofing square
- Countersunk bit
- 2 x sheets of 18mm hardwood plywood (2440 x 1220) - *I took advantage of B&Q's free cutting service and reduced width to 900mm so I could fit in my van
- 3 x C16 CLS treated timber (38mm x 63mm) for the base frame *if buying untreated, you'll need a preserver.
- 3 x CLS 38mm x 38mm treated structural timber *for removable lid's frame
- OSB 3 Board (9mm thick) for the floor *I used leftover strips I had, butted together.
- 11 lengths of 1.8m x 70mm wide round picket fence or similar to use as trim
- Off cut of wood for personalised plaque
- Ear defenders, face mask and protective eye goggles
- Pair of sawhorses
- Waterproof wood glue
- External wood screws
- A straight edge to draw lines (I used a 1m spirit level)
- Tape measure
- Grip gloves
- 4 to 6 Clamps if building alone
- Sliding bevel gauge like this
- Roof felt *just over a metre in my case
- Roofing adhesive
- Sharp stanley knife or cutting knife
- Clout nails (12 or 20mm long)
- Hammer
- Wood preserver and paint brush *to ensure it doesn't rot when exposed to the elements.
- Exterior wood paint of your choice and disposable gloves

MEASURING MY POOCH FOR HIS DOG HOUSE
It was important to me that Hans was comfortable in his dog house. And although he's technically a medium Border Collie, it does surprise me how tiny can curl up. And perhaps I could have gone smaller. But we are also using it to store his toys too.
However, it was very difficult to get Hans to stand still for measuring. So my tip is to try measuring while he/she is laid flat from his/her nose to tail. And also include shoulder width and from paw to the top of their head. Then once you have these measurements, you'll need to ensure there's enough wood surrounding the opening for integrity.
But as 18mm plywood is rather thick and sturdy, you probably won't have to worry as much.


STEP BY STEP GUIDE TO MAKING A PLYWOOD DOG HOUSE
While in B&Q to buy my wood, I asked their experts to reduce the width of my 18mm hardwood ply (W1220mm x L2440) to W900mm x L2440). That way, I could transport it easier in our camper van.
However, they do offer a delivery service if preferred at an additional fee.

CUTTING THE SIDES OF MY PLYWOOD DOG HOUSE
The first thing I did was take my first plywood sheet out in to our garden and place on top of my sawhorses for cutting.
I'd originally decided that the depth of the lean-to (sloping) dog housewas going to be exactly half the length of the plywood. So I made markings dead centre in the pic above and drew a straight line with my spirit level.

CLAMPING STRAIGHT EDGES
It was also important that I clamped the wood down to my sawhorses to avoid any slipping while cutting.
I then measured the distance from the blade to the shortest edge of the circular saw and clamped my straight edge again on to the wood as a guide. The distance I measured and clamped from my cutting line was 36mm.
However, later, I'll show you an easier method for the times you only need to trim a little bit off the end.

CUTTING WITH ERBAUER'S CORDLESS CIRCULAR SAW
To make my first straight cut, I didn't have to adjust the blade as everything was set up for me at 90 degrees. I'd already created a "fence" (straight edge) to keep me on track. And then I attached the battery, got the circular saw up to cutting speed, then made my cross cut.
Please note I am not professionally trained and ensured that I held the handle and knob with both hands and kept them away from the blade. I also kept my dog away when I was ready to cut.
As I was outdoors cutting ply, I didn't feel the need to wear a respiratory mask. But I did wear ear defenders and goggles. Also, if indoors, there is a black tubular section (which lies in front of the battery) to attach to a hoover.

CUTTING A SLOPING ROOF
I find a sloping roof, (also known as a lean-to), is a much easier alternative to an apex roof (AKA a pitched roof). Although, either style you choose is perfect to encourage rain to run straight off.
But, if the dog house is to be sat somewhere under shelter, then a flat roof would be sufficient. My Dad also informed me recently that a sloping roof can be as steep as you like. But as it was important that Hans had plenty of shoulder space, I set my sliding bevel to 5 degree and initially marked with a pencil. See 1st pic in collage above.
I then continued the angle with a straight edge and pencil until I got to the other side of my panel. Also note that the rain runs off towards the back and not on the opening to keep my dog dry.

USING THE JIGSAW
As the slope I drew meant cutting at a slight angle against the grain (and this was very thick ply), I turned to my jigsaw for quicker cutting.
If you see above, you can also clamp a straight edge as a cutting guide, but I preferred just following my pencil line. But however you do your cut, we'll be tracing around it below to match.

MIRRORING THE OPPOSITE SIDE
To create the exact same cut on the opposite side, it is very easy. All I did was place my newly sloping panel on top of my un-cut one and drew along with a pencil line.
I then cut the new pencil line with the jigsaw again and then lined up the square edges and clamped the now both cut pieces together.
To ensure both slopes matched each other accurately, I put the battery pack on to my Erbauer multi tool and sanded both together. NOTE: As these slopes will be hidden by a removable lid, you don't need to spend ages on this if you don't want to.

CUTTING A BEVELED EDGE WITH A CIRCULAR SAW
One of my favourite benefits of the Erbauer circular saw was being able to cut a bevel edge. This is actually incredibly hard without power tools unless you would prefer to sand.
I did this by setting my sliding bevel gauge against the shortest part of my dog house's slope. I also ensured I'd removed the battery pack from circular saw before pushing the red lever to adjust the plate. My sloping angle according to my roofing square was 5 degrees.

CUT YOUR BEVEL EDGE FIRST TO PRVENT MISTAKES
So above, you can see me making a bevel cut first for the front section of Hans' dog house. I later remembered I could have used the additional track instead of clamping a straight edge.
I purposely cut the bevel edge before cutting down the panel to size because if I made a mistake, I could start again. Thankfully my first attempt was perfect.
Once cut, I had a panel that sloped in the same direction as either of the side panels.

CUTTING TIP WITH A CIRCULAR SAW
As with most circular saw projects I've seen, it's recommended that you make your cuts from the wrong side of the wood.
So I always cut my wood upside down. Or another way to look at it is that I ensured the best face of the ply was facing down while I cut.
And I tidied up any cut edges with some sanding using the sand paper attachment on my Erbauer multi tool. This is a particularly handy tool as it comes with other attachments, such as cutters.

CUT THE WOOD DOWN AFTER YOUR BEVEL CUT
As mentioned before, it's best to make your bevel cut first before cutting the front panel down to size.
As seen in the collage above, I then measured the height of the front of my dog house. Followed by then transferring the measurement to the back of my newly beveled panel.
Note: this is important so the beveled cuts go in the same direction as the outer face needs to be a fraction taller.

IT'S BEST TO MAKE IT TOO BIG THAN TOO SMALL
If you're a visual learner like me and only draw my projects on paper, I find it's best to start making something too big, rather than too small. It's more difficult to add than take away.
In fact, my husband and I initially disagreed on the kennel size. So to get a visual, I asked Hans to sit in his dog house while I crudely held it part of it up. It was here when I realised I wanted to reduce the depth down to 1100mm and the front width to 800mm.
To reduce, this is when I used the guide attachment instead of clamping. But bare in mind that the depth will appear longer later as I'll be adding the front and back panels to hide the end grain. Once this was done, I repeated exactly the same method for the shorter back and set the bevel gauge in reverse.

BUILDING THE BASE FRAME
If you're confident you know the size of your dog house, then my Dad, for example, always recommends making the base first. However, I wasn't sure yet so made this after. To ensure the kennel was robust and would last longer, I used 3 lengths of already treated structural timber (C16 CLS 38mm x 63mm).
I usually find tantalized structural timber in the garden or outdoor areas of B&Q. I prefer this as it's treated to last longer in the elements.
Then to make cross cuts with my circular saw, I clamped two lengths together, followed by clamping them to my saw horses. But to ensure I got the right cuts, for the longest sides, I clamped and measured the structural timber's ends and deducted them from the length before cutting. See top 3rd pic.
Important note: the shortest front and back panels were the same width as the structural timber, minus 2 x 18mm ply thickness.

TESTNG THE MULTI TOOL CUTTER
If you miss a bit of wood for the final cut, I found a few seconds with the multi tool cutting attachment was perfect for the job.
I also treated the cuts for extra measure. Although my Dad has told me this isn't really needed as it's already treated. I just can't help myself!

SCREWING THE BASE FRAME TOGETHER
To build the frame without corner clamps, I placed an off cut of ply on to my sawhorses to work on a flat level surface.
Then I used clamps and a roofing square to ensure all my corners were square before pre-drilling holes. You'll also need to make sure you use a countersunk bit to bury the screw heads to avoid getting in the way of the ply later.
I gave each 4 corners two screws, in zig zag form for extra strength. See 3rd and 4th pic above).

ADDING FEET ON TO THE BASE
Depending on the type of floor your dog house will sit on, it's a good idea to prop it up to void rotting.
To do this, I added another structural piece along the centre, then cut up 9 x 6" pieces of the same CLS timber.
Then, ensuring the base was still sat on a flat, level surface, I clamped and screwed my feet in all corners and in the middle.

ADDING FLOORING TO THE BASE
Before I added a flooring, I flipped the base the right way and stood on it to see if it held my weight. And it did with no problems.
Then because I wanted to use up some OSB off cuts (which are great in damp conditions), I butted them together (above) and screwed with self tapping screws. That way I didn't need to pre-drill more holes.
Then to remove any overhang, I cut the excess off in situ with a jigsaw. But make sure nothing is protruding as again, it will get in the way of the ply body.

CLAMPING A TEMPORARY PROPPING SHELF
As I didn't have a spare pair of hands to hold panels up for me, I got creative with clamps instead. To start with, I placed the dog house base on top of my strong sawhorses.
I then temporarily clamped a shelf (or lip if you like) directly underneath either of the sides' corners. This allowed me to rest and clamp the side panels to work with ease.
I then drilled and screwed from the bottom, making sure everything was lined up. Then added waterproof glue along the cut edge before screwing together. Note: as you go along, you'll also need to temporarily screw some underneath instead.
Making a Homemade Insulated Dog House
If you wanted to make it a homemade insulted dog house, what you can do before screwing everything together is add some battens. I would cut some to sit on the base, but the same height as the top without the roof.
Then screw from the outside and add blocks of insulation, which you could then ply line on the inside with thinner wood.
You'll sacrifice a few an inch or two of your internal space, but it could help your dog stay cool or warm.

TIPS FOR ENSURE YOU ARE SCREWING STRAIGHT
If you see above in the 3rd photo, I also clamped a longer piece of wood against the corner. This was to use as a stop piece for the front panel not to overlap while screwing together.
Another tip (see first pic below), I hold an offcut along the side of each front and back panel and drew along it.
I then had a guide to follow of where I needed to screw. I repeated this until I got to the front of my kennel, but didn't glue and screw until after I cut my opening.

MARKING AND MEASURING THE DOG HOUSE OPENING
Below, you can see me drawing a centre line on the front of Hans' dog house.
As I wanted the opening 40cm wide, I marked 20cm from either side of the edge and drew two extra straight lines.
I also knew the depth of the base from behind, so marked those out too for now. However, I later decided to get inside and draw where the base's floor lied for absolute accuracy. And finally, I drew a line of how high I wanted the opening. In my case, it was 21.5cm, leaving the opening roughly 60cm tall.

MARKING A CURVED TOP
You could either cut a box style opening or a curved one. But I opted for a curve for a smoother, more stylish finish.
For this, I drilled a pencil sized hole in an off cut and lined and clamped it up dead centre, but lining the the pencil with the top line.
Then once temporarily stuck in position, I screwed the strip to the centre of the kennel anywhere further down. This would allow me to swing from side to side and draw a perfect curve along the top. So cool!

CUTTING THE OPENING
The cordless jigsaw was handy when I needed to cut my opening away from the kennel. And as my sawhorses were being used to prop up Hans' dog house, I rested the panel on two garden sleepers in front of my garage.
I first drilled a large hole within the entrance area, then slotted the jigsaw blade inside and cut around my opening's pencil lines. Once cut, I glued and screwed it to the kennel like I did the rest.
However, we had really bad rain the next day, so I took it in to the conservatory to sand and router the edges with the corded palm router.

MAKING THE REMOVABLE LID
I really wanted to create a detachable lid for easy cleaning. Although it wasn't entirely necessary as I can get through the door myself. However, it does make it lighter to move about when dismantling.
To make the lid, I clamped lengths of the CLS 38mm x 38mm against the top of the dog house. And to allow easy removal, I cuts the lengths 5mm longer than the actual sides.
This method is very much like making the base. But I'd hold the wood against the top and draw my cut lines as I went. But with it being a sloping roof, I needed to a couple of mitred cuts and tried the bevel function on the jigsaw which I'd never seen before. Pretty cool!

SCREWING THE CORNERS
I clamped and screwed one corner of the frame at a time.
TIP: If you want to screw this lid to the dog house, then don't make your lengths 5mm longer as I did. I wanted some wiggle room as wood can change in thickness through the seasons.

MAKING THE DOG HOUSE LEAN TO ROOF
Remember when I asked B&Q to cut my ply sheets to 900mm wide? Well, I used the two long off cuts to line to roof lid.
I placed and marked where they finished while sat under my frame, then screwed the top panels down. I then used more structural off cuts underneath.
To fix these battens in place, firstly, I left a gap either end so it could slot on to the dog house. And to fix in place, I temporarily screwed them from this side, then flipped over, marked and screwed properly from the top.

MAKING THE LID WATERPROOF WITH FELT
I'm rather fond of a felt roof as it's so easy and smart. And what I hadn't mentioned earlier is that I purposely designed my kennel so it was narrower than the width the felt on a roll. The felt is 1m wide.
I unrolled, marked and cut a long enough piece for my kennel, leaving at least a 5cm overhang all the way around. However, it's best to do this on a flat surface, because Hans sadly walked on it and put holes through with his paws. This meant I had to throw it way and start again!
And Hans' dog house was fairly big, I brushed over the top of my bare wooden lid with felt adhesive. Particularly over the screw holes, joins etc to smooth out. Then I laid the felt on top evenly. Don't worry, you can always take off and line up again if you don't get it right first time.

PINNING DOWN THE ROOF FELT
To ensure the felt was smooth, I applied pressure with a clean paint roller, then hammered the edges down with clout nails. However, make sure you avoid the screws underneath. Then, for my favourite part: tidying the corners.
Make a crease your hand on one of the corners (see pic 6 above). Then using a scalpel or stanley knife, cut along the excess on the fold. Now tuck the flap under and fold the upper section over and secure with a clout nail.
If you have any excess, slice it off carefully with the knife again. It's best to wear thick gloves for this to avoid scuffing your knuckles which is easily done.

PERSONALISING YOUR DOG HOUSE
During the rain, Hans walked on a sheet of plywood leaving a wet paw print which inspired me to use it to personalise his dog house. I took a photo with my phone, cropped it in Microsoft Paint, then pasted and resized in Microsoft Word along side his name.
I also coloured in his paw with black, making it more prominent and printed then glued it to some old pine I had in my garage. This then gave me a cool template to carve out with the Erbauer palm router using my fine straight imperial bit.
Note, if you're free styling it like me, it's best to chose an italic or handwritten font to avoid disappointment. The more formal the font, the more I usually notice flaws. And once done, I sanded the template down to bare wood, sprayed the font with black paint, then sanded again once dry.

CUTTING A BONE DESIGN
After drawing my own bone shape around the font, I cut it out with a jigsaw and sanded over the edges. Next I brushed over with an orange waterproof stain, but lightly dabbed around the font to avoid drips.
Once dried, I flipped the bone upside down on some scrap wood and sprayed the exposed edges with more black spray paint. You can see the 2nd pic above of how it turned out.
I particularly like how these colours match my tri Border Collie's markings. However, I still need to think of how I can incorporate some of his white fur.

How to Paint a Dog House
Before painting with a waterproof stain, I had already treated the outer plywood with a clear preserver. Ideally I would have used a coloured preserver, but used what I already had.
So after a day to dry, I painted everywhere in an orange waterproof shed and fencing colour that matches our shed and wooden garage door.
However, I didn't preserve the inside because the fumes are toxic. And I gave the kennel 3 coats of colour, then attached Hans' plaque with screws to the front.

ADDING THE FINAL TRIM
To add some interest to the overall look and protect any end grains, I stained 11 strips of picket fence to contrast.
I then cut to size and first screwed on the lid trim with screws and washers for detail. Of course, any more raw edges would be stained again. However, to avoid clashing the the clout nails, I find marking where they are on the felt really useful.
Then while adding trim around the body of the kennel, I applied construction adhesive before screwing. But I left a slight gap between the top and the lid for any expansion and it wouldn't be seen.
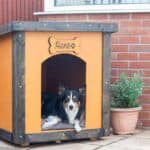
DIY DOG HOUSE KENNEL BUILD
Equipment
- Erbauer Cordless Circular Saw
- Cordless Erbauer Jigsaw
- Erbauer Cordless Multi Tool
- Screwdriver/combi drill
- Drill bits: 2.5mm & 3mm
- Erbauer Palm Router
- Fast Charger by ErbauerErbauer 18V 5Ah battery & 4Ah battery
- ¼″ Corner Router Bit
- ¼″ Straight imperial router bit
- Printer and glue
- Roofing square
- Countersunk bit
- Tape measure
- A straight edge to draw lines (I used a 1m spirit level)
- Ear defenders, face mask and protective eye goggles
- 4 to 6 Clamps
- Sliding bevel gauge
- Pair of sawhorses
- Grip gloves
- Sharp stanley knife or cutting knife
- Hammer
- Disposable gloves
Ingredients
- 3 sheets 18mm hardwood plywood (2440 x 1220) - *I took advantage of B&Q's free cutting service and reduced width to 900mm so I could fit in my van
- 3 sheets C16 CLS treated timber (38mm x 63mm) for the base frame *if buying untreated, you'll need a preserver.
- 3 lengths CLS 38mm x 38mm treated structural timber *for removable lid's frame
- OSB 3 Board (9mm thick) for the floor *I used leftover strips I had, butted together.
- 11 lengths 1.8m x 70mm wide round picket fence or similar to use as trim
- Off cut of wood for personalised plaque
- Waterproof wood glue
- External wood screws
- Roof felt *just over a metre in my caseRoofing adhesive
- Clout nails (12 or 20mm long)
- Wood preserver and paint brush *to ensure it doesn't rot when exposed to the elements.
- Exterior wood paint of your choice
Instructions
- While in B&Q to buy my wood, I asked their experts to reduce the width of my 18mm hardwood ply (W1220mm x L2440) to W900mm x L2440). That way, I could transport it easier in our camper van.However, they do offer a delivery service if preferred at an additional fee.
- CUTTING THE SIDES OF MY PLYWOOD DOG HOUSEThe first thing I did was take my first plywood sheet out in to our garden and place on top of my sawhorses for cutting.I'd originally decided that the depth of the lean-to (sloping) dog house was going to be exactly half the length of the plywood. So I made markings dead centre in the pic above and drew a straight line with my spirit level.
- CLAMPING STRAIGHT EDGESIt was also important that I clamped the wood down to my sawhorses to avoid any slipping while cutting.I then measured the distance from the blade to the shortest edge of the circular saw and clamped my straight edge again on to the wood as a guide. The distance I measured and clamped from my cutting line was 36mm.However, later, I'll show you an easier method for the times you only need to trim a little bit off the end.
- CUTTING WITH ERBAUER'S CORDLESS CIRCULAR SAWTo make my first straight cut, I didn't have to adjust the blade as everything was set up for me at 90 degrees. I'd already created a "fence" (straight edge) to keep me on track. And then I attached the battery, got the circular saw up to cutting speed, then made my cross cut.Please note I am not professionally trained and ensured that I held the handle and knob with both hands and kept them away from the blade. I also kept my dog away when I was ready to cut.As I was outdoors cutting ply, I didn't feel the need to wear a respiratory mask. But I did wear ear defenders and goggles. Also, if indoors, there is a black tubular section (which lies in front of the battery) to attach to a hoover.
- CUTTING A SLOPING ROOFI find a sloping roof, (also known as a lean-to), is a much easier alternative to an apex roof (AKA a pitched roof). Although, either style you choose is perfect to encourage rain to run straight off.But, if the dog house is to be sat somewhere under shelter, then a flat roof would be sufficient. My Dad also informed me recently that a sloping roof can be as steep as you like. But as it was important that Hans had plenty of shoulder space, I set my sliding bevel to 5 degree and initially marked with a pencil. See 1st pic in collage above.I then continued the angle with a straight edge and pencil until I got to the other side of my panel. Also note that the rain runs off towards the back and not on the opening to keep my dog dry.
- USING THE JIGSAWAs the slope I drew meant cutting at a slight angle against the grain (and this was very thick ply), I turned to my jigsaw for quicker cutting.If you see above, you can also clamp a straight edge as a cutting guide, but I preferred just following my pencil line. But however you do your cut, we'll be tracing around it below to match.
- MIRRORING THE OPPOSITE SIDETo create the exact same cut on the opposite side, it is very easy. All I did was place my newly sloping panel on top of my un-cut one and drew along with a pencil line.I then cut the new pencil line with the jigsaw again and then lined up the square edges and clamped the now both cut pieces together.To ensure both slopes matched each other accurately, I put the battery pack on to my Erbauer multi tool and sanded both together. NOTE: As these slopes will be hidden by a removable lid, you don't need to spend ages on this if you don't want to.
- CUTTING A BEVELED EDGE WITH A CIRCULAR SAWOne of my favourite benefits of the Erbauer circular saw was being able to cut a bevel edge. This is actually incredibly hard without power tools unless you would prefer to sand.I did this by setting my sliding bevel gauge against the shortest part of my dog house's slope. I also ensured I'd removed the battery pack from circular saw before pushing the red lever to adjust the plate. My sloping angle according to my roofing square was 5 degrees.
- CUT YOUR BEVEL EDGE FIRST TO PRVENT MISTAKESSo above, you can see me making a bevel cut first for the front section of Hans' dog house. I later remembered I could have used the additional track instead of clamping a straight edge.I purposely cut the bevel edge before cutting down the panel to size because if I made a mistake, I could start again. Thankfully my first attempt was perfect.Once cut, I had a panel that sloped in the same direction as either of the side panels.
- CUTTING TIP WITH A CIRCULAR SAWAs with most circular saw projects I've seen, it's recommended that you make your cuts from the wrong side of the wood.So I always cut my wood upside down. Or another way to look at it is that I ensured the best face of the ply was facing down while I cut.And I tidied up any cut edges with some sanding using the sand paper attachment on my Erbauer multi tool. This is a particularly handy tool as it comes with other attachments, such as cutters.
- CUT THE WOOD DOWN AFTER YOUR BEVEL CUTAs mentioned before, it's best to make your bevel cut first before cutting the front panel down to size.As seen in the collage above, I then measured the height of the front of my dog house. Followed by then transferring the measurement to the back of my newly beveled panel.Note: this is important so the beveled cuts go in the same direction as the outer face needs to be a fraction taller.
- IT'S BEST TO MAKE IT TOO BIG THAN TOO SMALLTo get a visual, I asked Hans to sit his dog house corner while I propped up a corner. It was here when I realised I wanted to reduce the depth down to 1100mm and the front width to 800mm.To reduce, this is when I used the guide attachment instead of clamping. But bare in mind that the depth will appear longer later as I'll be adding the front and back panels to hide the end grain. Once this was done, I repeated exactly the same method for the shorter back and set the bevel gauge in reverse.
- BUILDING THE BASE FRAMEIf you're confident you know the size of your dog house, then my Dad, for example, always recommends making the base first. However, I wasn't sure yet so made this after. To ensure the kennel was robust and would last longer, I used 3 lengths of already treated structural timber (C16 CLS 38mm x 63mm).I usually find tantalized structural timber in the garden or outdoor areas of B&Q. I prefer this as it's treated to last longer in the elements.Then to make cross cuts with my circular saw, I clamped two lengths together, followed by clamping them to my saw horses. But to ensure I got the right cuts, for the longest sides, I clamped and measured the structural timber's ends and deducted them from the length before cutting. See top 3rd pic.Important note: the shortest front and back panels were the same width as the structural timber, minus 2 x 18mm ply thickness.
- SCREWING THE BASE FRAME TOGETHERTo build the frame without corner clamps, I placed an off cut of ply on to my sawhorses to work on a flat level surface.Then I used clamps and a roofing square to ensure all my corners were square before pre-drilling holes. You'll also need to make sure you use a countersunk bit to bury the screw heads to avoid getting in the way of the ply later.I gave each 4 corners two screws, in zig zag form for extra strength. See 3rd and 4th pic above).
- ADDING FEET ON TO THE BASEDepending on the type of floor your dog house will sit on, it's a good idea to prop it up to void rotting.To do this, I added another structural piece along the centre, then cut up 9 x 6″ pieces of the same CLS timber.Then, ensuring the base was still sat on a flat, level surface, I clamped and screwed my feet in all corners and in the middle.
- ADDING FLOORING TO THE BASEBefore I added a flooring, I flipped the base the right way and stood on it to see if it held my weight. And it did with no problems.Then because I wanted to use up some OSB off cuts (which are great in damp conditions), I butted them together (above) and screwed with self tapping screws. That way I didn't need to pre-drill more holes.Then to remove any overhang, I cut the excess off in situ with a jigsaw. But make sure nothing is protruding as again, it will get in the way of the ply body.
- CLAMPING A TEMPORARY PROPPING SHELFAs I didn't have a spare pair of hands to hold panels up for me, I got creative with clamps instead. To start with, I placed the dog house base on top of my strong sawhorses.I then temporarily clamped a shelf (or lip if you like) directly underneath either of the sides' corners. This allowed me to rest and clamp the side panels to work with ease.I then drilled and screwed from the bottom, making sure everything was lined up. Then added waterproof glue along the cut edge before screwing together. Note: as you go along, you'll also need to temporarily screw some underneath instead.
- TIPS FOR ENSURE YOU ARE SCREWING STRAIGHTIf you see above in the 3rd photo, I also clamped a longer piece of wood against the corner. This was to use as a stop piece for the front panel not to overlap while screwing together.Another tip (see first pic below), I hold an offcut along the side of each front and back panel and drew along it.I then had a guide to follow of where I needed to screw. I repeated this until I got to the front of my kennel, but didn't glue and screw until after I cut my opening.
- MARKING AND MEASURING THE DOG HOUSE OPENINGBelow, you can see me drawing a centre line on the front of Hans' dog house.As I wanted the opening 40cm wide, I marked 20cm from either side of the edge and drew two extra straight lines.I also knew the depth of the base from behind, so marked those out too for now. However, I later decided to get inside and draw where the base's floor lied for absolute accuracy. And finally, I drew a line of how high I wanted the opening. In my case, it was 21.5cm, leaving the opening roughly 60cm tall.
- MARKING A CURVED TOPYou could either cut a box style opening or a curved one. But I opted for a curve for a smoother, more stylish finish.For this, I drilled a pencil sized hole in an off cut and lined and clamped it up dead centre, but lining the the pencil with the top line.Then once temporarily stuck in position, I screwed the strip to the centre of the kennel anywhere further down. This would allow me to swing from side to side and draw a perfect curve along the top. So cool!
- CUTTING THE OPENINGThe cordless jigsaw was handy when I needed to cut my opening away from the kennel. And as my sawhorses were being used to prop up Hans' dog house , I rested the panel on two garden sleepers in front of my garage.I first drilled a large hole within the entrance area, then slotted the jigsaw blade inside and cut around my opening's pencil lines. Once cut, I glued and screwed it to the kennel like I did the rest.However, we had really bad rain the next day, so I took it in to the conservatory to sand and router the edges with the corded palm router.
- MAKING THE REMOVABLE LIDI really wanted to create a detachable lid for easy cleaning. Although it wasn't entirely necessary as I can get through the door myself. However, it does make it lighter to move about when dismantling.To make the lid, I clamped lengths of the CLS 38mm x 38mm against the top of the kennel. And to allow easy removal, I cuts the lenghts 5mm longer than the actual sides.This method is very much like making the base. But I'd hold the wood against the top and draw my cut lines as I went. But with it being a sloping roof, I needed to a couple of mitred cuts and tried the bevel function on the jigsaw which I'd never seen before. Pretty cool!
- SCREWING THE CORNERSI clamped and screwed one corner of the frame at a time.TIP: If you want to screw this lid to the kennel, then don't make your lengths 5mm longer as I did. I wanted some wiggle room as wood can change in thickness through the seasons.
- MAKING THE DOG HOUSE LEAN TO ROOFRemember when I asked B&Q to cut my ply sheets to 900mm wide? Well, I used the two long off cuts to line to roof lid.I placed and marked where they finished while sat under my frame, then screwed the top panels down. I then used more structural off cuts underneath.To fix these battens in place, firstly, I left a gap either end so it could slot on to the kennel. And to fix in place, I temporarily screwed them from this side, then flipped over, marked and screwed properly from the top.
- MAKING THE LID WATERPROOF WITH FELTI'm rather fond of a felt roof as it's so easy and smart. And what I hadn't mentioned earlier is that I purposely designed my kennel so it was narrower than the width the felt on a roll. The felt is 1m wide.I unrolled, marked and cut a long enough piece for my kennel, leaving at least a 5cm overhang all the way around. However, it's best to do this on a flat surface, because Hans sadly walked on it and put holes through with his paws. This meant I had to throw it way and start again!And as my kennel was fairly big, I brushed over the top of my bare wooden lid with felt adhesive. Particularly over the screw holes, joins etc to smooth out. Then I laid the felt on top evenly. Don't worry, you can always take off and line up again if you don't get it right first time.
- PINNING DOWN THE ROOF FELTTo ensure the felt was smooth, I applied pressure with a clean paint roller, then hammered the edges down with clout nails. However, make sure you avoid the screws underneath. Then, for my favourite part: tidying the corners.Make a crease your hand on one of the corners (see pic 6 above). Then using a scalpel or stanley knife, cut along the excess on the fold. Now tuck the flap under and fold the upper section over and secure with a clout nail.If you have any excess, slice it off carefully with the knife again. It's best to wear thick gloves for this to avoid scuffing your knuckles which is easily done.
- PERSONALISING YOUR DOG HOUSEDuring the rain, Hans walked on a sheet of plywood leaving a wet paw print which inspired me to use it to personalise his kennel. I took a photo with my phone, cropped it in Microsoft Paint, then pasted and resized in Microsoft Word along side his name.I also coloured in his paw with black, making it more prominent and printed then glued it to some old pine I had in my garage. This then gave me a cool template to carve out with the Erbauer palm router using my fine straight imperial bit.Note, if you're free styling it like me, it's best to chose an italic or handwritten font to avoid disappointment. The more formal the font, the more I usually notice flaws. And once done, I sanded the template down to bare wood, sprayed the font with black paint, then sanded again once dry.
- CUTTING A BONE DESIGNAfter drawing my own bone shape around the font, I cut it out with a jigsaw and sanded over the edges. Next I brushed over with an orange waterproof stain, but lightly dabbed around the font to avoid drips.Once dried, I flipped the bone upside down on some scrap wood and sprayed the exposed edges with more black spray paint. You can see the 2nd pic above of how it turned out.I particularly like how these colours match my tri Border Collie's markings. However, I still need to think of how I can incorporate some of his white fur.
- TREATING AND STAINING YOUR DOG HOUSEBefore painting with a waterproof stain, I had already treated the outer plywood with a clear preserver. Ideally I would have used a coloured preserver, but used what I already had.So after a day to dry, I painted everywhere in an orange waterproof shed and fencing colour that matches our shed and wooden garage door.However, I didn't preserve the inside because the fumes are toxic. And I gave the kennel 3 coats of colour, then attached Hans' plaque with screws to the front.
- ADDING THE FINAL TRIMTo add some interest to the overall look and protect any end grains, I stained 11 strips of picket fence to contrast.I then cut to size and first screwed on the lid trim with screws and washers for detail. Of course, any more raw edges would be stained again. However, to avoid clashing the the clout nails, I find marking where they are on the felt really useful.Then while adding trim around the body of the kennel, I applied construction adhesive before screwing. But I left a slight gap between the top and the lid for any expansion and it wouldn't be seen.
Video
PIN MY DOG KENNEL DESIGN FOR LATER...


boxer
Very good looking final product. I hope your dog enjoys it, many dogs hate their outside dog houses.