
Here's a step by step on how to felt a shed roof after building the frame on our latest Summer house. It's made up of two parts, then felted with trim added. This is also useful to learn how to do your own shed roof repair job if your existing one is leaking.

Recently, I showed you how my Dad and I built a shed frame, how to build a roof for a shed, followed by cladding a Summer house.
I've found the whole process fascinating as he's been building bespoke sheds for over 50 years and still does. And, apparently, there aren't many people that still do them today.
Sure, there are flat packed sheds available, but they tend to be flimsy and can lean with the push of a hand. Next time you're in a DIY store, go and push one!

Anyway, today we're focusing on the shed roof and how we installed it in two parts due to its size and that it's a pitched roof shed.
If you are wanting a roof felt shed, then keep reading and I'll show you how we did it along with some tips and tricks I learned.
I've installed shed roof felt on a number of projects, such as a DIY dog house, bee hotel (coming soon) and how to make a wooden garden storage box.

Shed Roofing Materials and Tools We Used
- OSB sheets of wood
- Structural timber
- Roofing felt for shed
- Felt Bitumin in a caulking gun tube
- Caulking gun
- Stanley knife
- Clout nails
- Hammer
- Spare cladding for trim
- Hand saw
- Combi drill
- Wood screws
- Compact saw

Before Felting a Shed Roof
Firstly thinking of your shed felt roof, we need to frame a shed roof. Here, you'll see us building a shed roof in two parts that will sit on a pitched roof. We created notches for in the centre, but screwing some offset battens at the same thickness as the structural timber use.
Once we'd screwed them on the top of each front and back shed panel, we created a place for the shed to rest on and not move.
In the same post, we showed you our method of building a shed roof with a overhang. And once this was complete, we started laying our OSB sheets on top.

We cut the OSB sheets with a mini circular saw to cover the entire roof framework.
Then I nailed it for quickness, through to the studwork throughout.

How to Felt a Shed Roof
To roof a shed with felt, if you're dealing with a large area, you'll need to add it in strips as we are above.
First, we cut them down, roughly to the length, leaving plenty of space to overlap on our shed felt roof.

The Order of Your Felt
When felting a shed roof, you need to apply it in a way that any rain drips off. Above, I've put a diagram to show the positions. Let me explain.
The lowest side of your roof will be the first felt you fit. Then, as you work your way up, each next piece goes on top.
This allows rain to drip off without seeping underneath the overlaps, which would eventually rot the wood underneath.
What Felt For Shed Roof Should I Use?
Firstly, shed roofing felt can be expensive as you'll often only need a bit from a roll. But I do recommend trying to buy a good quality one that is thick.
Note: when making Hans' DIY dog kennel, I used the cheapest I could find. I laid it on the grass, to which he walked over it, and put holes through with his paws.
Also, you want something a roof felt for shed to be thick enough to last. What you don't want to have to do is come back here for re felt shed roof know-how.

Clout Nailing Shed Felt Roofing
The next thing my Dad does to felt a shed roof is, line up the straight edge along the start of the felt off a roll. Then fold over and hammer the felt to the framework using 13mm clout nails.
Remember, we're using patterned felt for roof sheds, so we have the tile effect going downwards towards the pitch's slope.
We nailed these, roughly every 10cm.

Nailing Roofing Felt For Sheds on Corners
When it came to the corners of the shed roof framing, here's where I learnt that I'd been felting shed roofs wrong for two years.
Normally, I'd make a slice in the corner. HOWEVER, I was informed by my Dad this was incorrect. Instead, he said the fold should be a blanket fold, meaning fold one section underneath and push the top piece down.
Basically, fold inwards and downwards to tuck the excess in without cutting and clout nail down. Note, this applies to all roof designs for sheds, such as a lean to roof, shed pent and flat roof shed.
Note: we don't recommend a flat roof shed as a slope allows the rain to drip away.

After nailing the first strip of felt, I then made marks with a hammer on the middle piece where the first one overlapped for reference. This is roughly where we'd be adding bitumen adhesive.
Then lined up the other piece of felt with the opposite edge and nailed in. Now go to the edge of the newly nailed flap and run along the end with a hammer to mark it.
This is where the adhesive can't go over.

Sticking Roof Felt Down With Bitumen
To securely overlap the roof felt, once the middle section has been nailed and marked, I then applied a long bead of bitumen. Then created a zig zag.
Note, bitumen for felt roofing is usually bought in a tin and applied with a brush of roller. However, this was in a glue gun.

We then overlapped them again and applied pressure by pressing down with our feet.
After repeating this with the other sheet, we nailed it down, all the way around with clout nails.
Then, for more covering shed roof antics, we repeated on the other section for our pitched roof. However, we left the final piece on top of the summer house shed, so we could overlap and cover the middle.
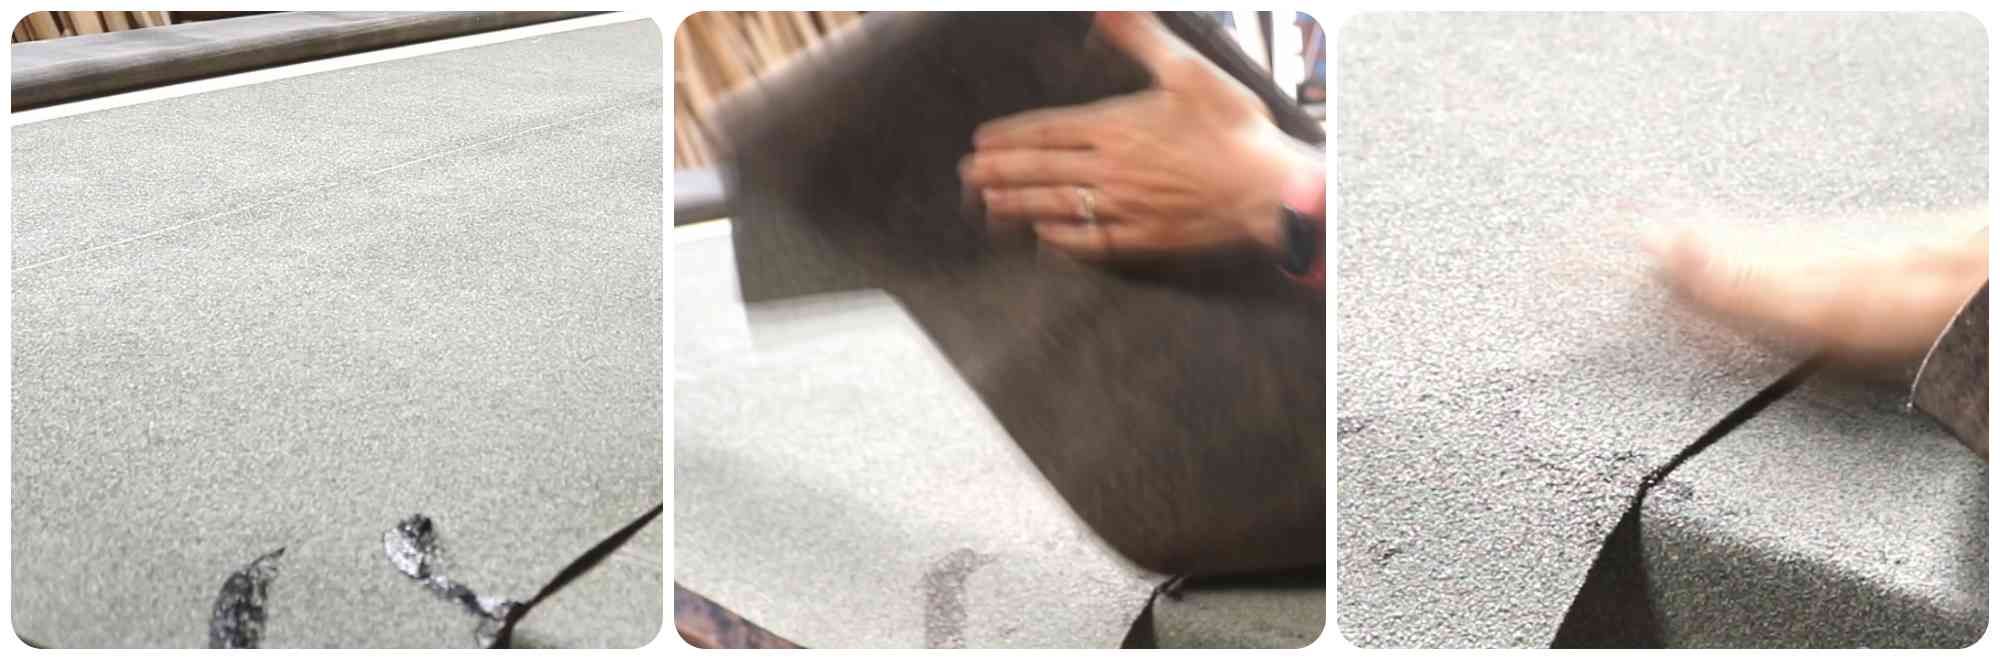
How to Do You Clean Bitumen Mess?
If you accidentally get bitumen on the good side of your felt, then I have a handy trick you can do!
First, very gently try to scrape off the excess. This doesn't mean trying to rub it all off and you don't want to remove the existing shingles there.
Then, grab a scrap of the same felt and fold in half and rub together, so it sheds the shingles and adds sprinkles on top of your messy patch. And feel free to flick the sprinkles on top of the mess if needed and leave.

How to Felt a Large Apex Shed Roof
Once the two sections of shed roofing were in position on top of the shed, above, my Dad is gluing and nailing down the last section.
But, you may be wondering, should you add all of the felt on the roof while it's in situ? Well, you can if you want to, providing you can reach everything ok.
However, the issue is, when dealing with a very big shed roofing, once the felt is on, it can add a lot more weight. So it may be very heavy to lift a felted roof on to the shed. But with there being two men on the job and me as some help, we felted it first, then lifted.
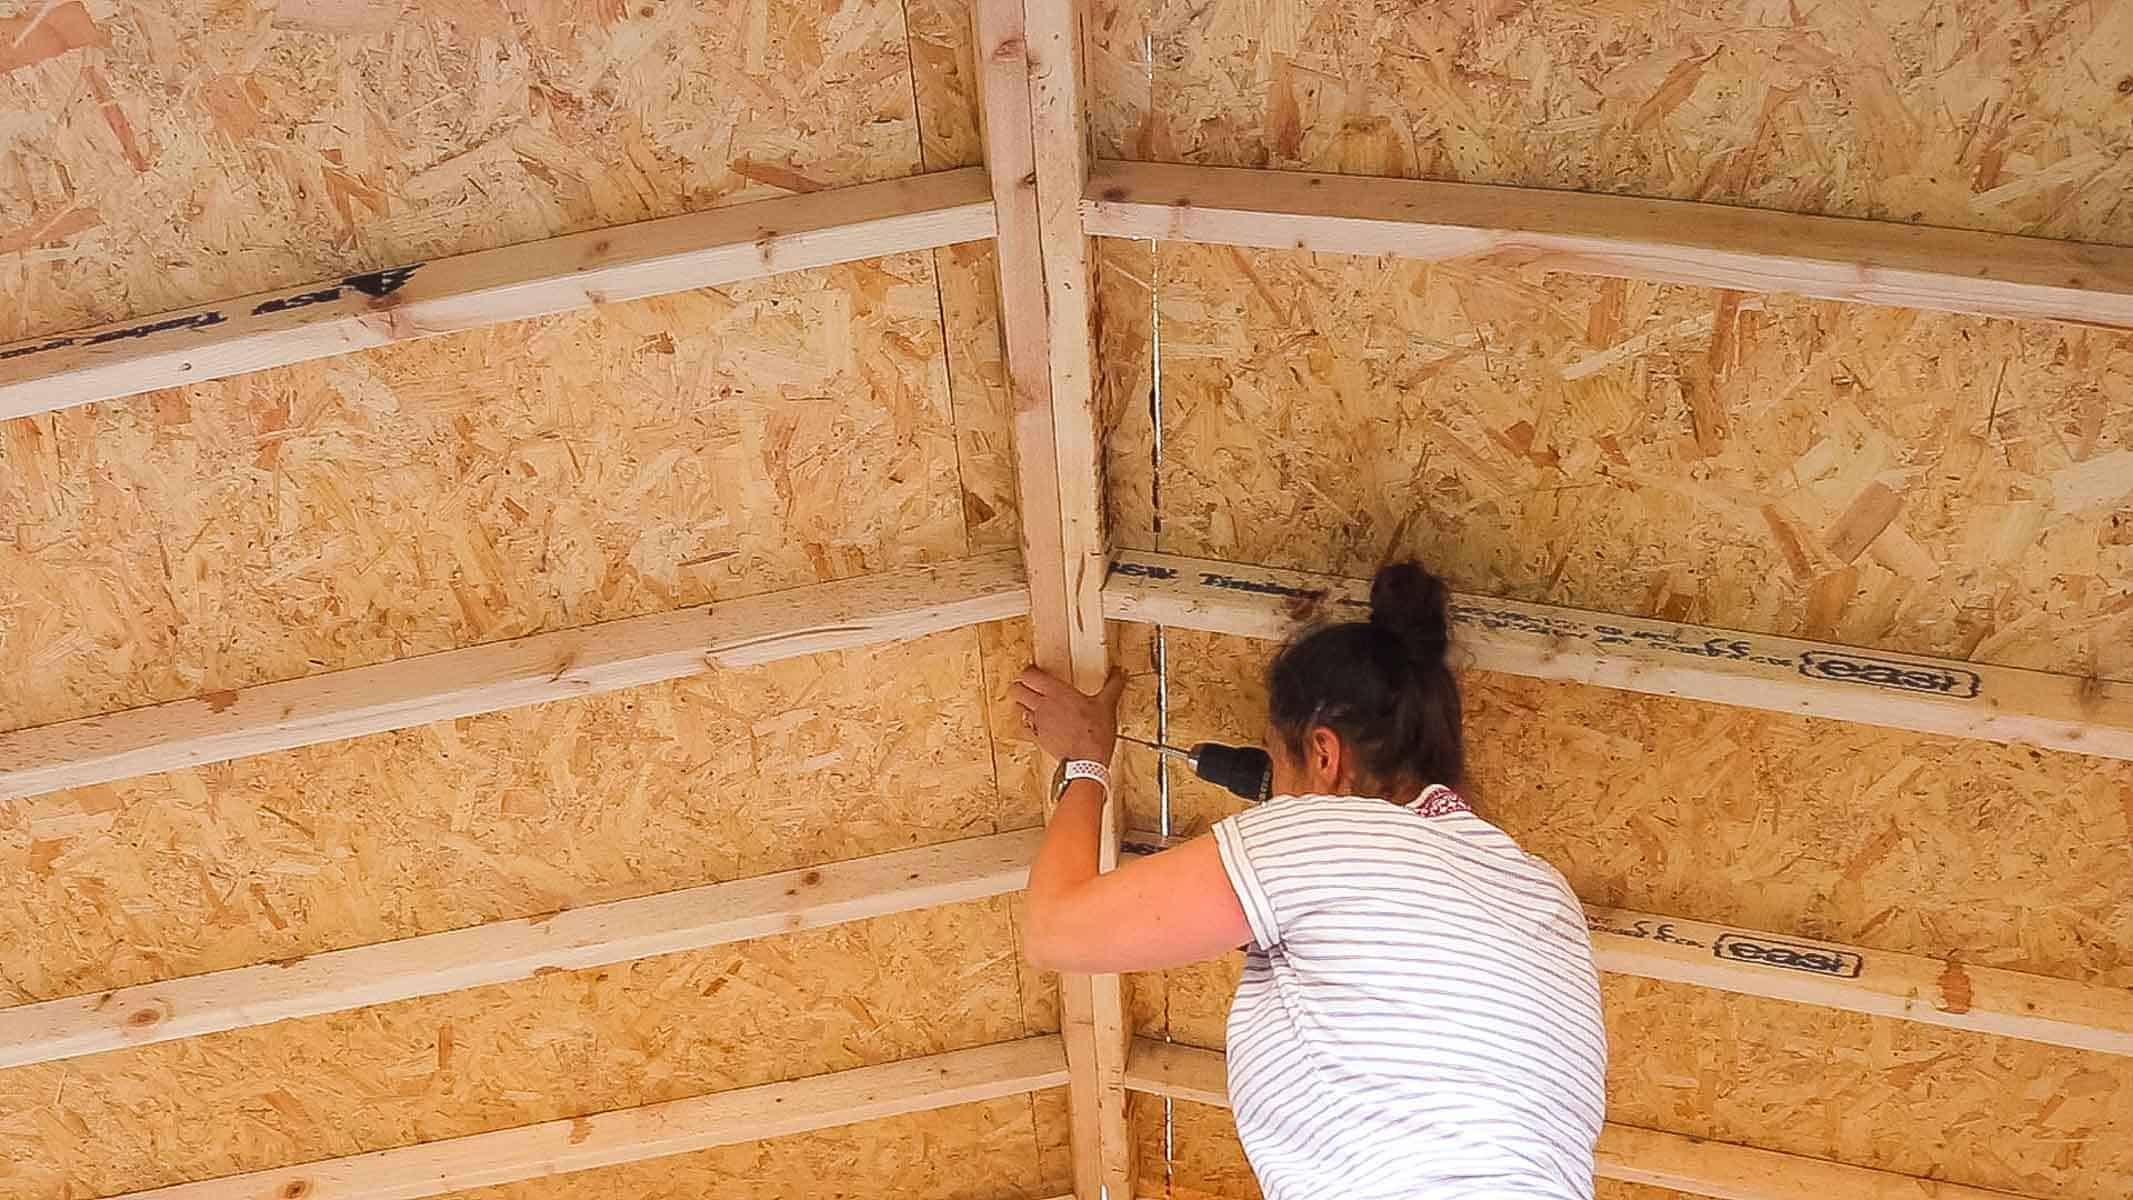
Screwing The Felted Roof Panels Together
While my Dad was on the roof adding the final piece of felt, I worked on screwing the shed roof together.
I added several where they joined in the middle. And through the top of the shed wall panels to the roof battens.

Adding Shed Roof Trim
Once the felt had been completely nailed down and trimmed with a Stanley knife, it was time to add shed roof trim.
Above, I'm using spare cladding and cutting 4 pieces down to length with a hand saw. These will join in the middle on the front and back to tidy the roofing felt.
But first, I needed to treat it with wood preserve.

Before you climb up your ladders, a big tip is to add your screws in first into your shed roof edge trim. And then take it up to your shed.
That way, you're not fumbling about and juggling with screws. And once you're up there, you can screw in efficiently and add a decorative diamond piece in the middle to hide a join.
You can watch my how-to felt shed roof tutorial here and I hope you found roofing felt sheds less daunting than you may have thought. Remember, if you haven't seen it yet, you can see how to build a roof for a shed in my framework post here.
Similar Projects
How to Felt a Shed Roof
How to Felt a Shed Roof + Tips & Tricks

Here's a step by step on how to felt a shed roof after building the frame on our latest Summer house. It's made up of two parts, then felted with trim added. This is also useful to learn how to do your own shed roof repair job if your existing one is leaking.
Materials
- Roof felt
- Clout Nails
- Bitumen
Tools
- Hammer
- Stanley knife
Instructions
- Unroll the felt on top of your roof.
- Allow overhang on both sides, but with excess.
- Cut with a Stanley knife.
- Repeat with more felt until you have enough to overlap.
- Line up the felt on what will be the shortest section of your roof and clout nail.
- Make reference marks on it with the hammer where you know the position of the spars are.
- Go to the highest side, line up the felt and nail along the top edge, but NOT the sides yet.
- Pull back the felt and slot in the middle section of felt.
- Place the top piece back and now play around with what is evenly laid out.
- Mark with a hammer now where the overlaps fall.
- Keeping the middle bit still, and clout nail the top section.
- Pull the middle section back and apply bitumen inside of the hammer marks (see images above) and overlap again.
- Press the felt down and nail just above the overlaps (again see pic).
- Repeat for the top piece
- NOW create blanket folds on the corners and nail down and nail all the way around.
- Nail wooden stained trim around the sides of the felt roof and trim the excess with a Stanley knife.
- Note, if you are felting an apex roof, then you'll be felting two panels like this. So once in situ, you'll need to nail one more section to overlap the middle where both panels meet up.

Chris
Good advice and no nonsense explanation.