
This repurposed bathtub is the perfect cheap raised garden bed for a vegetable garden on a budget. Saving a waste product from going into landfill, I show you how you can grow food in these large containers successfully.

Since moving to our new auction farmhouse property, we discovered several old bathtubs hiding in the brambles. These were previously used as pony and horse troughs.
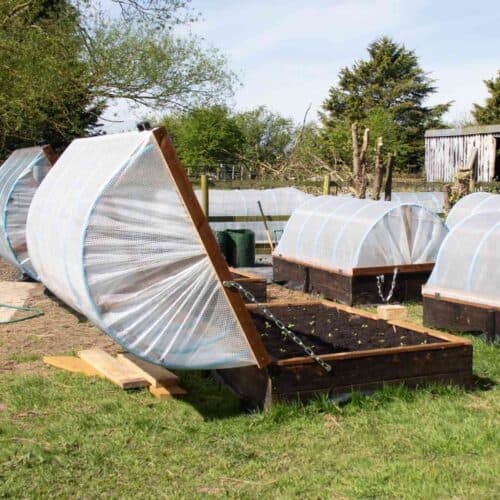
After making raised beds with roadrail ties and hinged hoop houses, I realised these old baths could be upcycled into a large raised planter. They're deep enough for lots of garden soil and already come with drainage holes.
They've been a great way to grow carrots, parsnips, beetroot, spring onions, radishes, beans and swede. And after many requests on my Facebook and Instagram, let me show you how I set them up.
Jump to:

✔️ Why You'll Love This Project
Here are just a handful of reasons why we think you'll love making this cheap DIY raised bed garden idea for the growing season!
- Prevents waste going into landfill
- Doesn't require a of of time to build
- It's more fun than a traditional garden
- This easy DIY project requires no skills
- No need for garden bed plans or power tools
- They can fit in any garden area or small space
- It's easy to expand with baths in a row together
- It's a low cost option for growing your own food
- Reduces garden pests (I've rarely had snails and slugs in them)
⚒️Tools and Material Notes
You can refer to my shorter printable guide in the how-to card at the bottom of this post. However, I recommend reading the entire post as I have more detailed tips, tricks, and step-by-step images.

Please note that as an Amazon Associate, I earn a small commission from qualifying purchases made through affiliate links.
Old baths - a good idea is to ask in local Facebook groups to see if anyone is remodelling their bathroom and needs to throw one out. Or speak to your local recycling centre
Steel mesh or insect netting - this could be repurposed materials like folded chicken wire, or a scrap of insect netting to place over the bath's plug hole/drain
Pressure-treated wood - this is rot-resistant wood as chocks to rest on the ground first - we needed to do this as our grass was uneven
Cinder blocks (concrete blocks) - or any old bricks to prop up the baths to lift off the ground so you can place buckets under to capture drained water
Gravel - this is for drainage at the bottom of the baths so your organic matter doesn't turn stagnant. Alternatively, you could use large stones
Containers - these are to be positioned under the bath drain to capture excess water, which becomes liquid fertiliser that can be fed back into the soil
Optional cladding material - you may want to hide the bath beds. I built a basic wood frame around mine, then stapled landscape fabric to it. I also added hinges and a handle to open and access drained water
📋 Step by Step Instructions

1. First, find the position of your old bath or baths, and make sure you have enough space to walk around them.
Then stack up old breeze blocks on pressure-treated lumber to prop up your bath and make sure it isn't wobbly.
Note: I propped up the end without a drain to create more of a slope, and also tall enough to position a bucket under the drain.

2. Next,place a scrap piece of insect netting or chicken wire or mesh over the plug hole.
This is to prevent gravel and soil from falling through the drain and clogging it.
Note: I folded chicken wire 2-3 times as the holes were larger than I would like.

3. Now carefully place a handful of gravel on top of the mesh to keep it in place.
Then fill the rest of the base with gravel until you have around 5cm depth for drainage.

4. For shallow root crops that don't require much soil, you can fill the baths up to ½ of the way up with branches and twigs to save money. This is called Hügelkultur.
For deep root system vegetables, such as carrots and parsnips, I solely filled with compost or good soil on top of the gravel.

5. Next, if you have any great soil that may have weeds, you can place on top of the twigs and branches.
Then add a double layer of cardboard on top to suppress them following the no dig gardening method, then wet it with a bucket or 2 of water.

6. For the final top layer, spread and rake 2 bags of compost evenly.
Then transplant your seedlings, or you can sow directly.
Note: I built basic square propagating lids to position on top, stapled with clear plastic.
Tip: If you are positioning several baths, take your time to get them level in your outdoor space. This is the only bit of hard work during what I think is one of the best inexpensive raised garden bed ideas.

⚖️ Project Variations
Here are some different ways you can enhance and truly personalise this project:
- Cladded - although extra cost, you could clad a frame around the bath with tongue and groove, old pallet wood, cedar fence pickets or long deck board material
- Privet decoration - you could add some in-ground garden stakes around the baths, then tie some faux privacy privet trellis to them
- Painted - another garden bed cost feature could be to paint the outside of the baths instead of cladding. Don't paint the inside as you don't want toxins to leach into the soil
- Cold frame top - you could design a wooden frame to sit on top, with a glass shower screen window to keep plants warm in the cooler months
See this wooden raised bed using offcuts which may also be suitable for small plants.
🦺 Safety Tips
- Ensure you work with a friend during heavy lifting
- Note that cast iron baths may be too heavy to manover
- Make sure you wear gloves and safety steel toe cap boots while handling breeze blocks
🧽 Care and Maintenance
- Water your plants daily, ensuring the soil stays wet but not waterlogged
- Reuse the drained water which now contains fertilizer to healthy, productive plants
💡Pro Tips
- Ensure your bath has drainage. You may want to drill extra holes, but instead, I added more of a slope with a bottom layer of gravel
- For deeper root vegetables, solely fill with 5cm gravel for the base to prevent waterlogging, then compost
- For shallow root vegetables like lettuce, spring onions and radishes, filling half of the tubs with twigs and branches works a treat
- Position them in the correct location, partial shade for cool crops, or sunny locations where required
- Clean the tubs thoroughly before filling - ie, with a pressure washer
- Position in an accessible position - you can add in rows, lengthways or opposite
- Avoid filling soil right up to the top, to allow space for watering
- For a vertical garden, place a pea trellis structure on top
- Add mulch from straw bales to retain moisture and suppress weeds
❓ FAQ
You can grow almost any vegetable in a bathtub bed. So far, we have successfully grown peas, carrots, swede, radishes, spring onions and beans.
It's not vital to prop up baths, but it helps to avoid garden pests such as slugs, carrot fly and also, you can capture excess water.
➕ More Related Projects
Looking for more projects for home gardens? Try these:




Why not subscribe to my newsletter to hear about more easy tutorials and exclusive news from The Carpenter's Daughter? You can also connect with me on social media at Facebook, TikTok, Twitter, and Instagram!
Cheap Bathtub DIY Raised Garden Bed Upcycle

This repurposed bathtub is the perfect cheap raised garden bed for a vegetable garden on a budget. Saving a waste product from going into landfill, I show you how you can grow food in these large containers successfully.
Materials
- Old bath
- Steel mesh or insect netting
- Pressure treated wood
- Cinder blocks
- Gravel
- Containers
- Cladding materials (optional)
Tools
- Shovel
- Wheelbarrow
Instructions
- First, find the position of your old bath or baths, and make sure you have enough space to walk around them. Then stack up old breeze blocks on pressure-treated lumber to prop up your bath and make sure it isn't wobbly. Note: I propped up the end without a drain to create more of a slope, and also tall enough to position a bucket under the drain.
- Next,place a scrap piece of insect netting or chicken wire or mesh over the plug hole. This is to prevent gravel and soil from falling through the drain and clogging it. Note: I folded chicken wire 2-3 times as the holes were larger than I would like.
- Now carefully place a handful of gravel on top of the mesh to keep it in place. Then fill the rest of the base with gravel until you have around 5cm depth for drainage.
- For shallow root crops that don't require much soil, you can fill the baths up to ½ of the way up with branches and twigs to save money. This is called Hügelkultur. For deep root system vegetables, such as carrots and parsnips, I solely filled with compost or good soil on top of the gravel.
- Next, if you have any great soil that may have weeds, you can place on top of the twigs and branches. Then add a double layer of cardboard on top to suppress them following the no dig gardening method, then wet it with a bucket or 2 of water.
- For the final top layer, spread and rake 2 bags of compost evenly. Then transplant your seedlings, or you can sow directly. Note: I built basic square propagating lids to position on top, stapled with clear plastic.

Comments
No Comments