
Ready to make an easy peasy indoor or outdoor potting bench with a sink and riddle option? Then here's my detailed instructions on how I created a treated potting table on a budget that I use daily.
You can sign up to my free mailing list here to instantly download my free potting bench plans. Then follow my step-by-step tutorial video on how I built it.
During my first year of growing my own veg in hoop houses, as a newly avid gardener, I found myself stooping over any work surface I could.
As much as I love delving into gardening projects, my back didn't! Also, I realised I needed plenty of room to sow, pot up plants and tool storage.
But as we are currently in the middle of major house renovations, like plasterboarding ceilings, installing loft insulation etc, I made this with the cheapest materials you can buy.
Jump to:
✔️ Why You'll Love This Project
Here are a handful of reasons why we think you'll love making your own potting bench!
- My free plan with optimised cutting list will help you save money - have you seen the prices of a new potting bench?!
- You can swap my materials list for wood pallets, etc
- Using your DIY projects is more satisfying than buying
- You'll be more organised and efficient with gardening tasks
- It's a great design that's quick and easy for all skill levels
- Adding a sink gives you a great advantage in sorting compost or washing plant pots
- My design can be adjusted for height comfort, any outdoor spaces and specific needs
⚒️Tools and Materials List
You can refer to my shorter printable guide in the how-to card at the bottom of this post. However, I recommend reading the entire post as I have more detailed tips, tricks, and step-by-step images.
Please note that as an Amazon Associate, I earn from qualifying purchases made through affiliate links.
Tools You Need
Mitre saw on a stand - for quick, accurate batch cuts. Or use a hand saw, which is fine, just slower.
Impact driver and combi drill - these are for predrilling screw holes to avoid wood splitting before screwing.
Speed square - this is important to mark your cuts accurately while also lining up the same pencil marks in a row a bottom shelf and upper shelf if desired
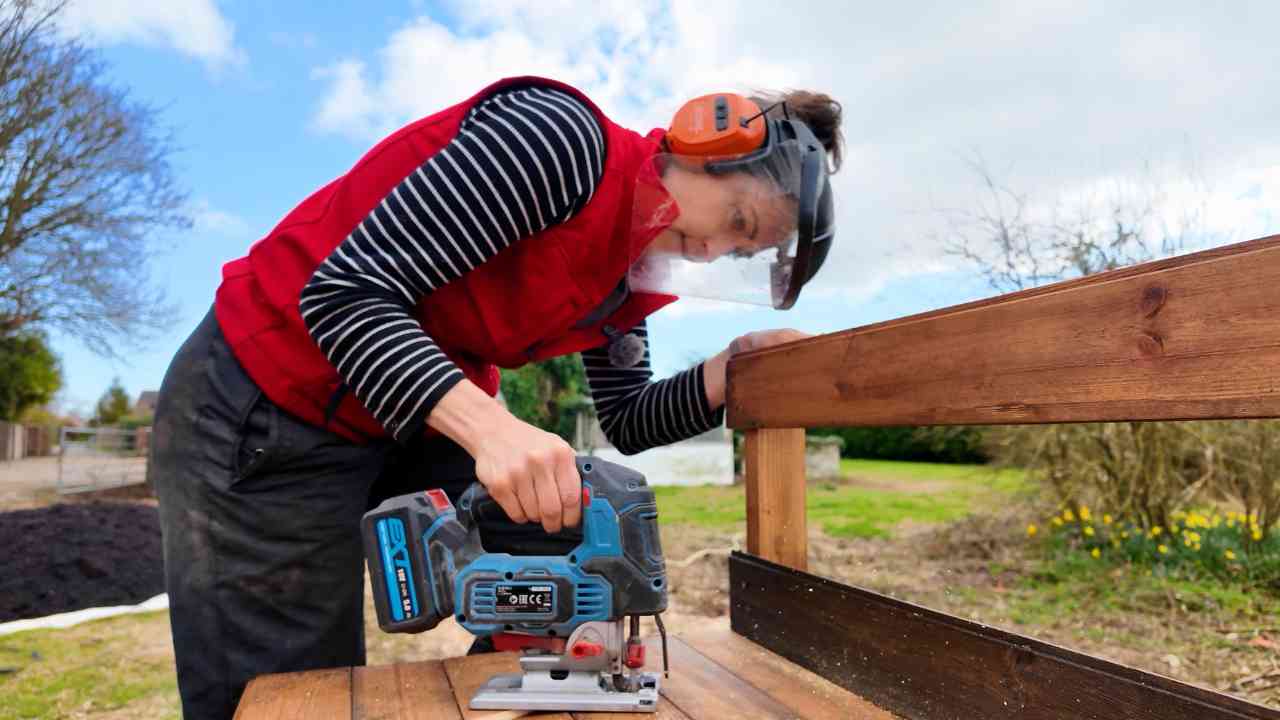
Jigsaw - to cut a sink hole if installing one
Materials
Framework (38x63mm CLS C16 grade structural timber) - most DIY stores sell this, which is usually for studding. If you buy pressure-treated, you can skip the wood preservative
Tongue and groove - these are wood planks to clad the top, middle and bottom shelf. Alternatively, you could use cedar boards, fence pickets, pallet wood, or cut a sheet of plywood with a circular saw.
Wood screws - I recommend a selection of wood screw lengths. To use in outdoor spaces, ideally, it would be best to use stainless steel or deck screws to prevent rusting, but they are a lot more expensive.
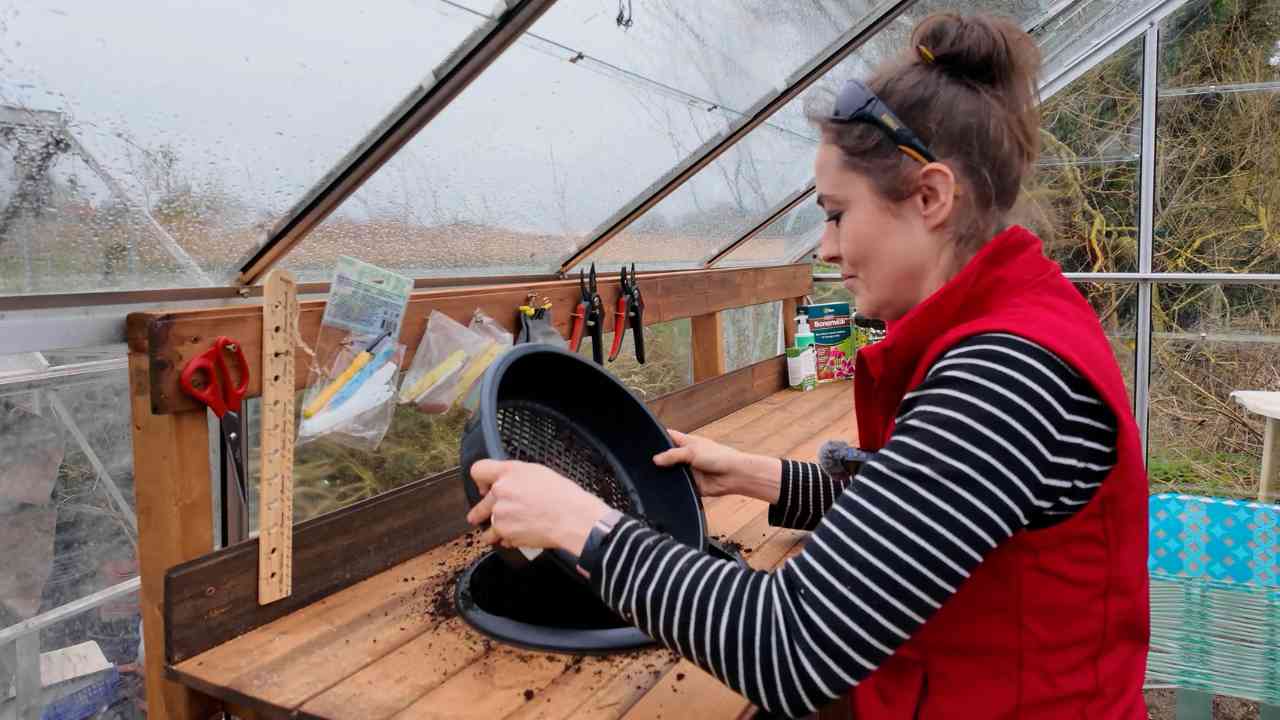
Washing up bowl and riddle - I chose a round washing up bowl so I could use it with a riddle to sieve compost, or you could use a square bowl
Wood preservative - colour of your choice
Optional screws or coat hooks - for hanging small garden tools like trowels, etc
📋 Step-By-Step Instructions
You can follow along with my DIY video here.

1. Once you have downloaded my free cut list, cut all of your wood using a mitre saw or hand saw.
Then line up all of the frame pieces to mark your shelf positions with a pencil.

2. Now line up all of the frame pieces with your pencil marks and predrill pilot holes and screw the frame pieces together.
Note the shorter front are the front legs, the taller back will act as the back legs.
Note, my bench is 2.4m long, so I built 4 frame supports. For smaller designs use less, ie, spaced 400-500mm apart.

3. Now ask a friend to help you prop up first and fourth leg to your chosen top cladding. Then screw the first board down top down to the frame, right at the back.
Then slot the remaining tongue and groove together on top. *I made the outside edges of the planks overhang by about 20mm.
Then evenly positioned and screwed the middle frames in place.

4. Now thread the planks through the middle of the frame and the lower shelf boards and repeat screwing down.
For the easiest way to mount, I spaced these ones apart before screwing, which should also allow drainage.

5. For extra support, I drilled and screwed a long top piece down to tie all the 4 frames together.
Then screwed 2 pieces of tongue and groove to the back:
- The top is for mounting small hand tools and potting bench accessories
- The bottom is to prevent things from rolling off

6. If using as outdoor potting bench, you now need to brush on 2 coats of a wood preservative to withstand all weathers.
I recommend doing this once a year minimum, or as per the manufacturer's instructions.

7. For an optional sink and riddle: draw around a washing-up bowl where you want it (careful not to clash with the frames).

8. Now drill a hole inside the inner pencil mark to allow a jigsaw blade to slot through.
Then cut the hole for the washing-up bowl and riddle with a jigsaw.
Slot the bowl inside the hole.
Tip: if the bowl slot is too tight, I recommend sanding it or using a file or rasp until wider. If too wide, you could screw pieces of wood underneath, while pushed against the bowl to make it more snug.

⚖️ Project Variations
Here are some different ways you can enhance and truly personalise this project:
- Adding a tap - you could mount a camping sink with hand pump tap to wash your hands or plant pots, while dipped into a water storage container - or a good idea would to be make use of a garden hose
- Rustic look - you could paint it and lightly sand around the edges for a pretty, vibrant, shabby chic look
- Upcycled old dressers - this is a great idea if you can find one cheap like I did for this DIY mud kitchen. Note, you can also repurpose the drawers for an insect hotel and plant stand
- Cabinet style - if you want to hide all of the plant pots on the entire bench, you could mount some cupboard doors on the front using hinges
See my DIY mud kitchen version here if your are looking for more bench ideas which I shared as the TV carpenter on Love Your Weekend with Alan Titchmarsh, series 1.

🦺 Safety Tips
- Wear safety goggles and a dust mask while cutting with a mitre saw
- Don't wear gloves while working with power tools, as they can get caught, making it dangerous
- Avoid using power tools if you are not comfortable - there's nothing wrong with hand tools and they're more peaceful to use!
- When treating, treat in a well ventilated area - ideally outside
- If using machinery, tell people not to disturb you
- While using a mitre saw, ensure your hands are not in the danger zone - this is usually around 8" away from the blade
🧽 Care and Maintenance
Here are a few care tips I recommend:
- Treat your homemade potting bench with 2 coats once a year, or according to the manufacturer's instructions
- Clean spills immediately where possible to avoid tongue and groove swelling
- Fix loose screws if and when you spot them
💡Pro Tips
- Avoid the tongue and groove from warping by not gluing the tongue and groove's top down as it will expand and contract in extreme weather
- If using reclaimed wood, make sure you know its origin and that it is not contaminated
- Ensure you drill holes for your screws first to avoid the wood from splitting. See this beginner's pilot hole guide here.
- If using outdoor, always treat with a wood preservative, and make sure it states "preservative" as it may only be coloured water
- For extra storage, you can add more shelves
- If your potting bench's frame feels wobbly, mount another plank on the back of the frames as a cross-brace, diagonally
- Sand your potting bench before use to avoid splinters if concerned
- Use good quality screws to avoid snapping
❓ FAQ
It doesn't hurt to use exterior wood glue, but it is not needed for light use. If you are storing very heavy plants and objects, then I recommend using wood glue.
Potting bench sinks are ideal as a soil bin to pot up plants, and also washing plant pots and your hands after working with compost.
➕ More Garden Projects
Looking for more DIY outdoor projects around the garden? Try these:


Why not subscribe to my newsletter to hear about the latest projects and exclusive news from The Carpenter's Daughter? You can also connect with me on social media at Facebook, TikTok, Twitter, and Instagram!
DIY Wooden Outdoor Potting Bench with Sink + FREE PLANS

Ready to make an easy peasy indoor or outdoor potting bench with a sink and riddle option? Then here's my detailed instructions on how I created a treated potting table on a budget that I use daily.
You can sign up to my free mailing list here to instantly download my free potting bench plans. Then follow my step-by-step tutorial video on how I built it.
Materials
- 38x63mm CLS C16 grade structural timber
- Tongue and groove
- Wood screws or deck screws
- Washing up bowl
- Riddle to match bowl
- Wood preservative
- Hooks (optional) for hanging hand gardening tools
Tools
- Mitre saw or hand saw
- Impact driver
- Combi drill
Instructions
- Once you have downloaded my free cut list, cut all of your wood using a mitre saw or hand saw. Then line up all of the frame pieces to mark your shelf positions with a pencil.
- Now line up all of the frame pieces with your pencil marks and predrill pilot holes and screw the frame pieces together. Note the shorter front are the front legs, the taller back will act as the back legs. Note, my bench is 2.4m long, so I built 4 frame supports. For smaller designs use less, ie, spaced 400-500mm apart.
- Now ask a friend to help you prop up first and fourth leg to your chosen top cladding. Then screw the first board down top down to the frame, right at the back. Then slot the remaining tongue and groove together on top. *I made the outside edges of the planks overhang by about 20mm. Then evenly positioned and screwed the middle frames in place.
- Now thread the planks through the middle of the frame and the lower shelf boards and repeat screwing down. For the easiest way to mount, I spaced these ones apart before screwing, which should also allow drainage.
- For extra support, I drilled and screwed a long top piece down to tie all the 4 frames together. Then screwed 2 pieces of tongue and groove to the back: the top is for mounting small hand tools and potting bench accessories and the bottom is to prevent things from rolling off.
- If using as outdoor potting bench, you now need to brush on 2 coats of a wood preservative to withstand all weathers. I recommend doing this once a year minimum, or as per the manufacturer's instructions.
- For an optional sink and riddle: draw around a washing-up bowl where you want it (careful not to clash with the frames). Next, measure the depth of the overhanging lip, then draw another circle or square on the inside of that using scrap wood.
- Now drill a hole inside the inner pencil mark to allow a jigsaw blade to slot through. Then cut the hole for the washing-up bowl and riddle with a jigsaw. Slot the bowl inside the hole.

Comments
No Comments