
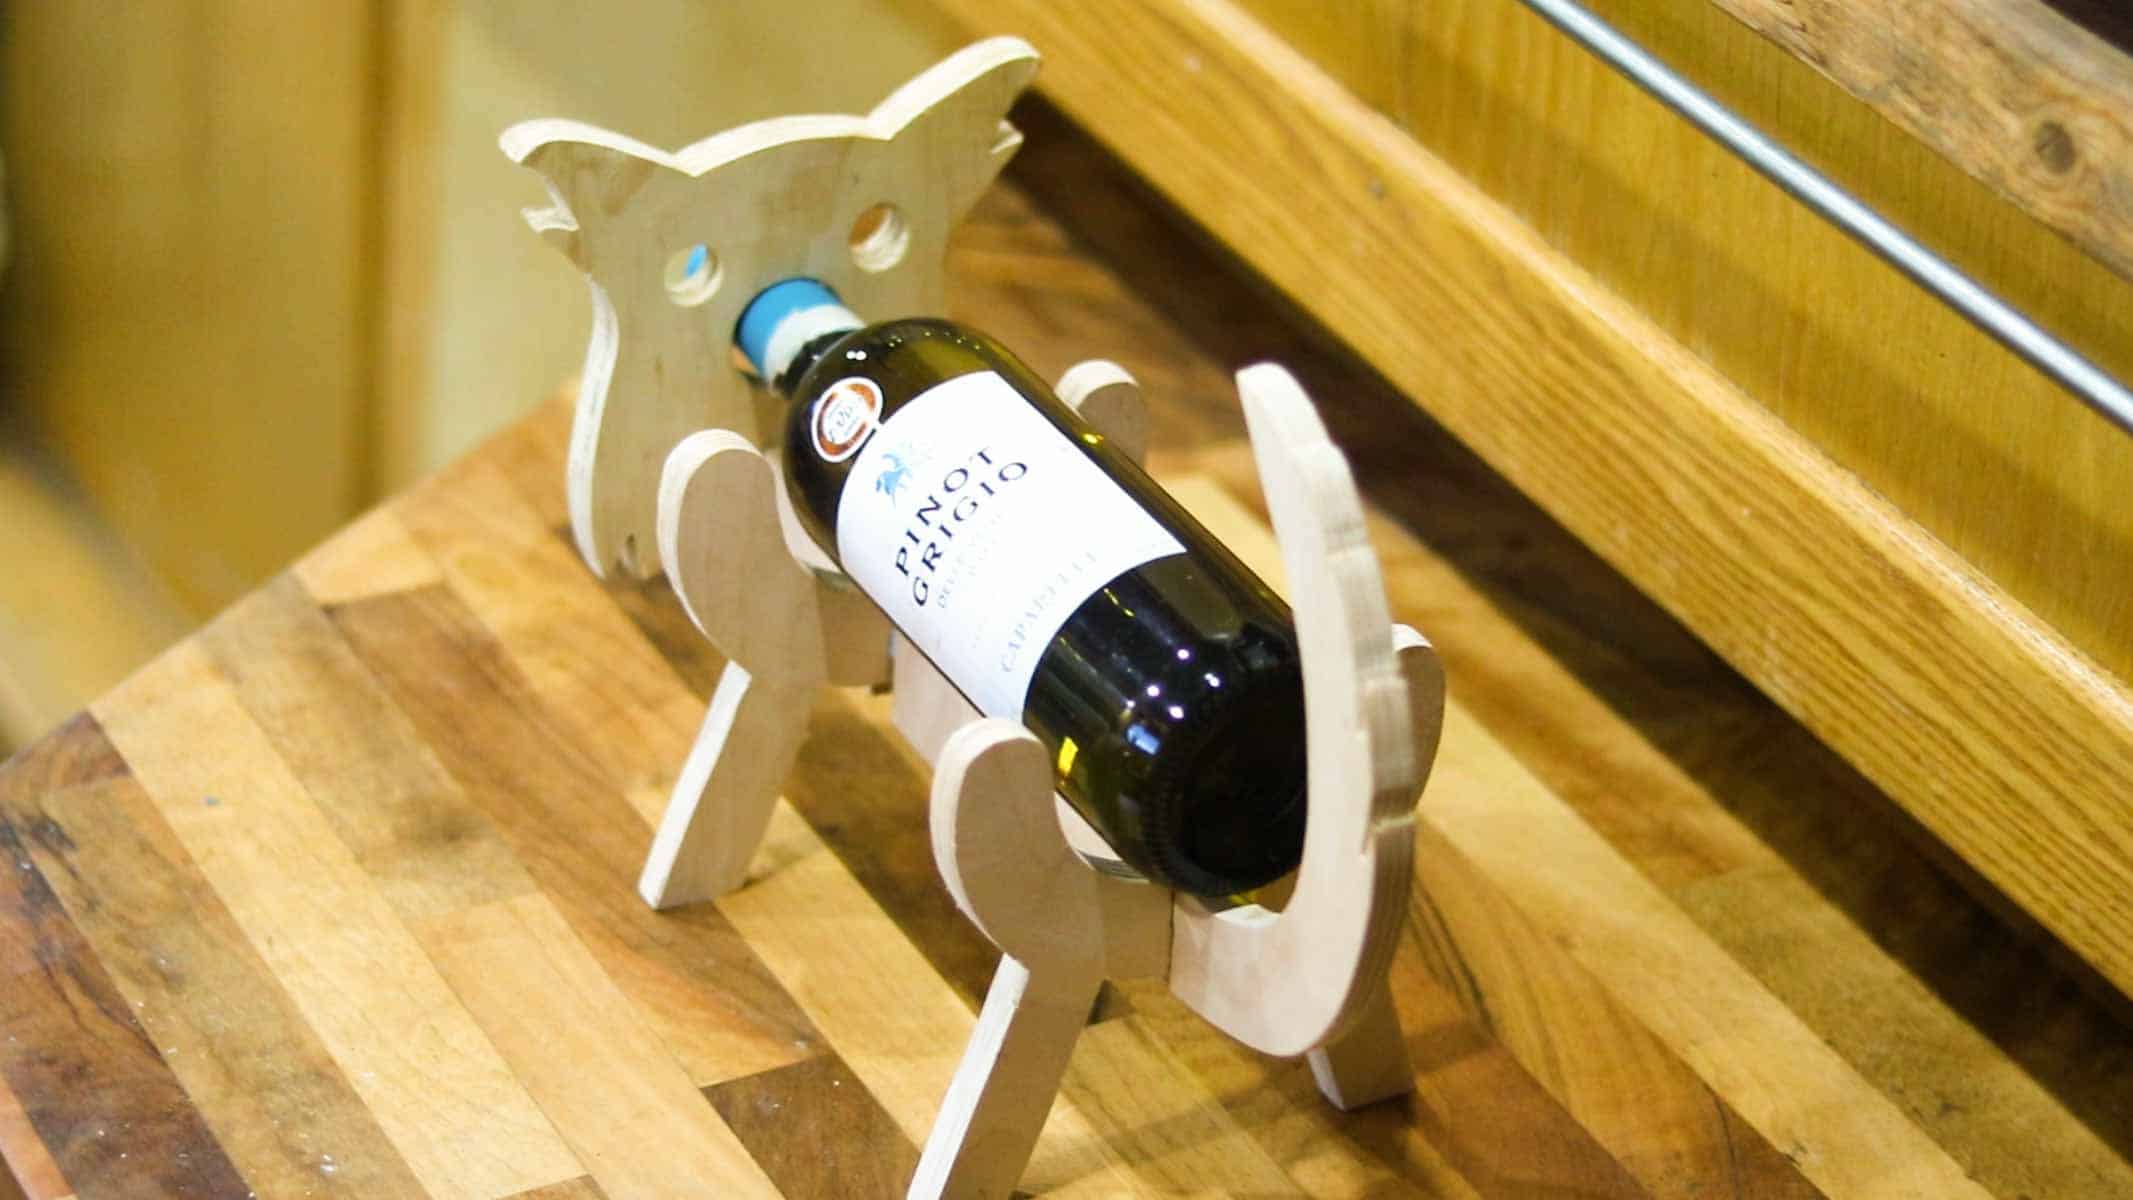
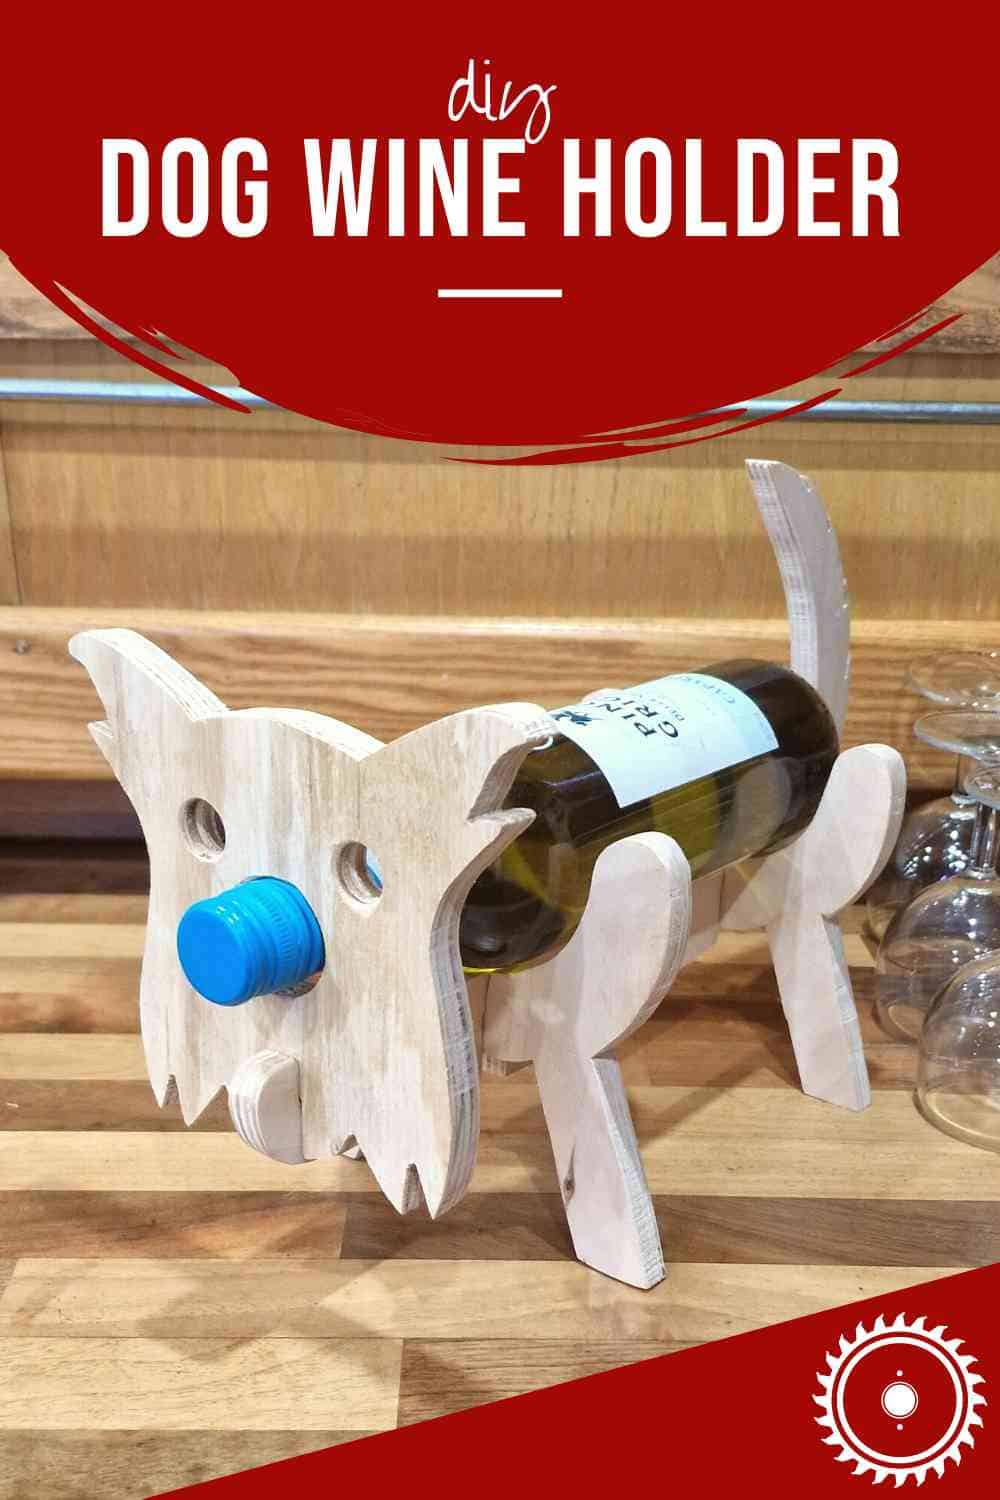
If you're looking to make gifts for wine and dog lovers, then this simple dog wine holder for bottles is for you! It's cheap and easy to personalise using a scrap of plywood and I'll show you how you can make your own template (or download mine here).
This project was created as part of my 12 Days of Giftmas series and includes a how-to video you can follow along.

Say hello to my little wine buddy. I had so much fun making him. But did you know he was meant to resemble my Tri-Border Collie? 😂
I've had so many people say he looks more like a Yorkshire Terrier instead. But I grew up with them, so maybe that's why?
Anyway, with that in mind, if you're looking to make a handmade gift for someone who loves dogs and a glass of wine, then you could easily personalise it for them. Or even for a cat. Let me show you how!

🪚Tools & Materials
12mm Plywood offcut - you only need a small bit of plywood to cut out the components. Also, as there won't be much weight, other than a wine bottle on your dog's back, you should be able to get away 8mm minimum. Alternatively, you could try pine, but it wouldn't be as strong.
Sheet of paper, pencil and scissors - if you're designing your dog wine bottle holder from scratch, then folding a piece of paper in half to draw your legs and face is easy. However, if you want to save yourself some time, you're more than welcome to purchase my print out through my Etsy shop.
Bandsaw - this has a narrow blade to cut out curvy shapes in wood and notches in the design. If you don't have one, you could use a jigsaw, provided you've clamped it well, or even better, use a scroll saw.
Combi drill or drill press - I used a combi drill to create my dog's nose hole for the wine bottle and eyes. Or, you could use a drill press.
35mm Forstner bit - for a cleaner nose hole, I used a Forstner drill bit. If you don't have one (as they're not cheap), you could use a flat wood drill bit as I did for the eyes (which were 16mm (⅝").
Bench sander or heavy belt sander upside down - To tidy your cuts, you'll need to do a lot of sanding. If you don't have one, there's no harm in hand sanding while watching TV 😂
Safety goggles & ear defenders - if you're using power tools, then wear your PPE! Also, if you're sanding lots, I recommend a dust mask to protect your lungs!
📋Instructions
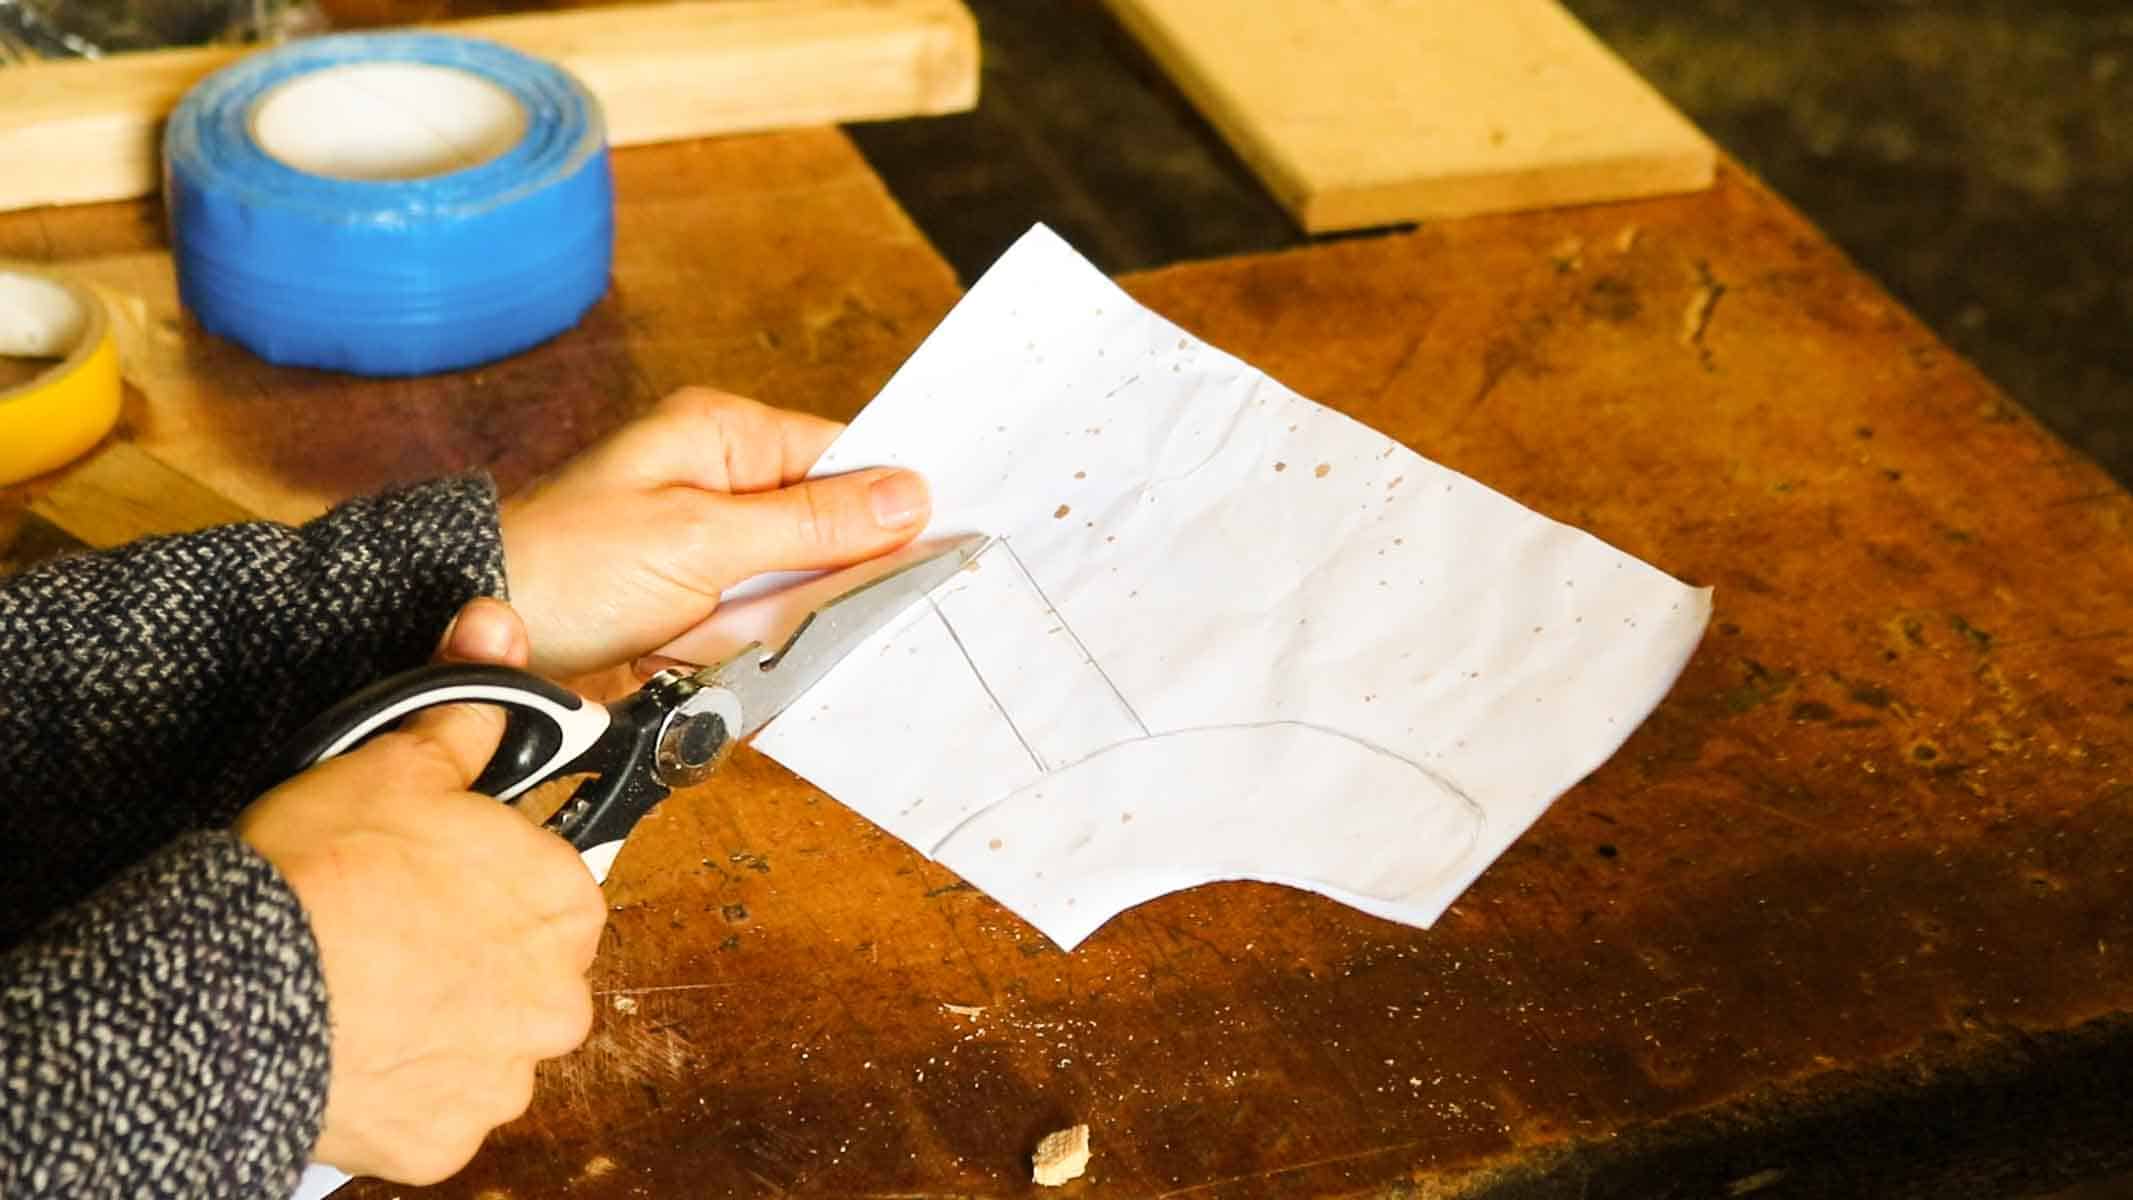
To create your own free plans for this dog wine bottle stand, this is how quick and easy it is!
- Fold a piece of paper in half
- Draw two half circles to allow for a bottle of wine
- Then a leg on an angle, approximately 1" wide (see below)
- Using scissors, cut out your design and open it out. You should have two legs now that you can use as a stencil.
Or, you can purchase my plans, print and cut them out and skip to the next step.
Using Your Paper Template to Cut Dog Legs
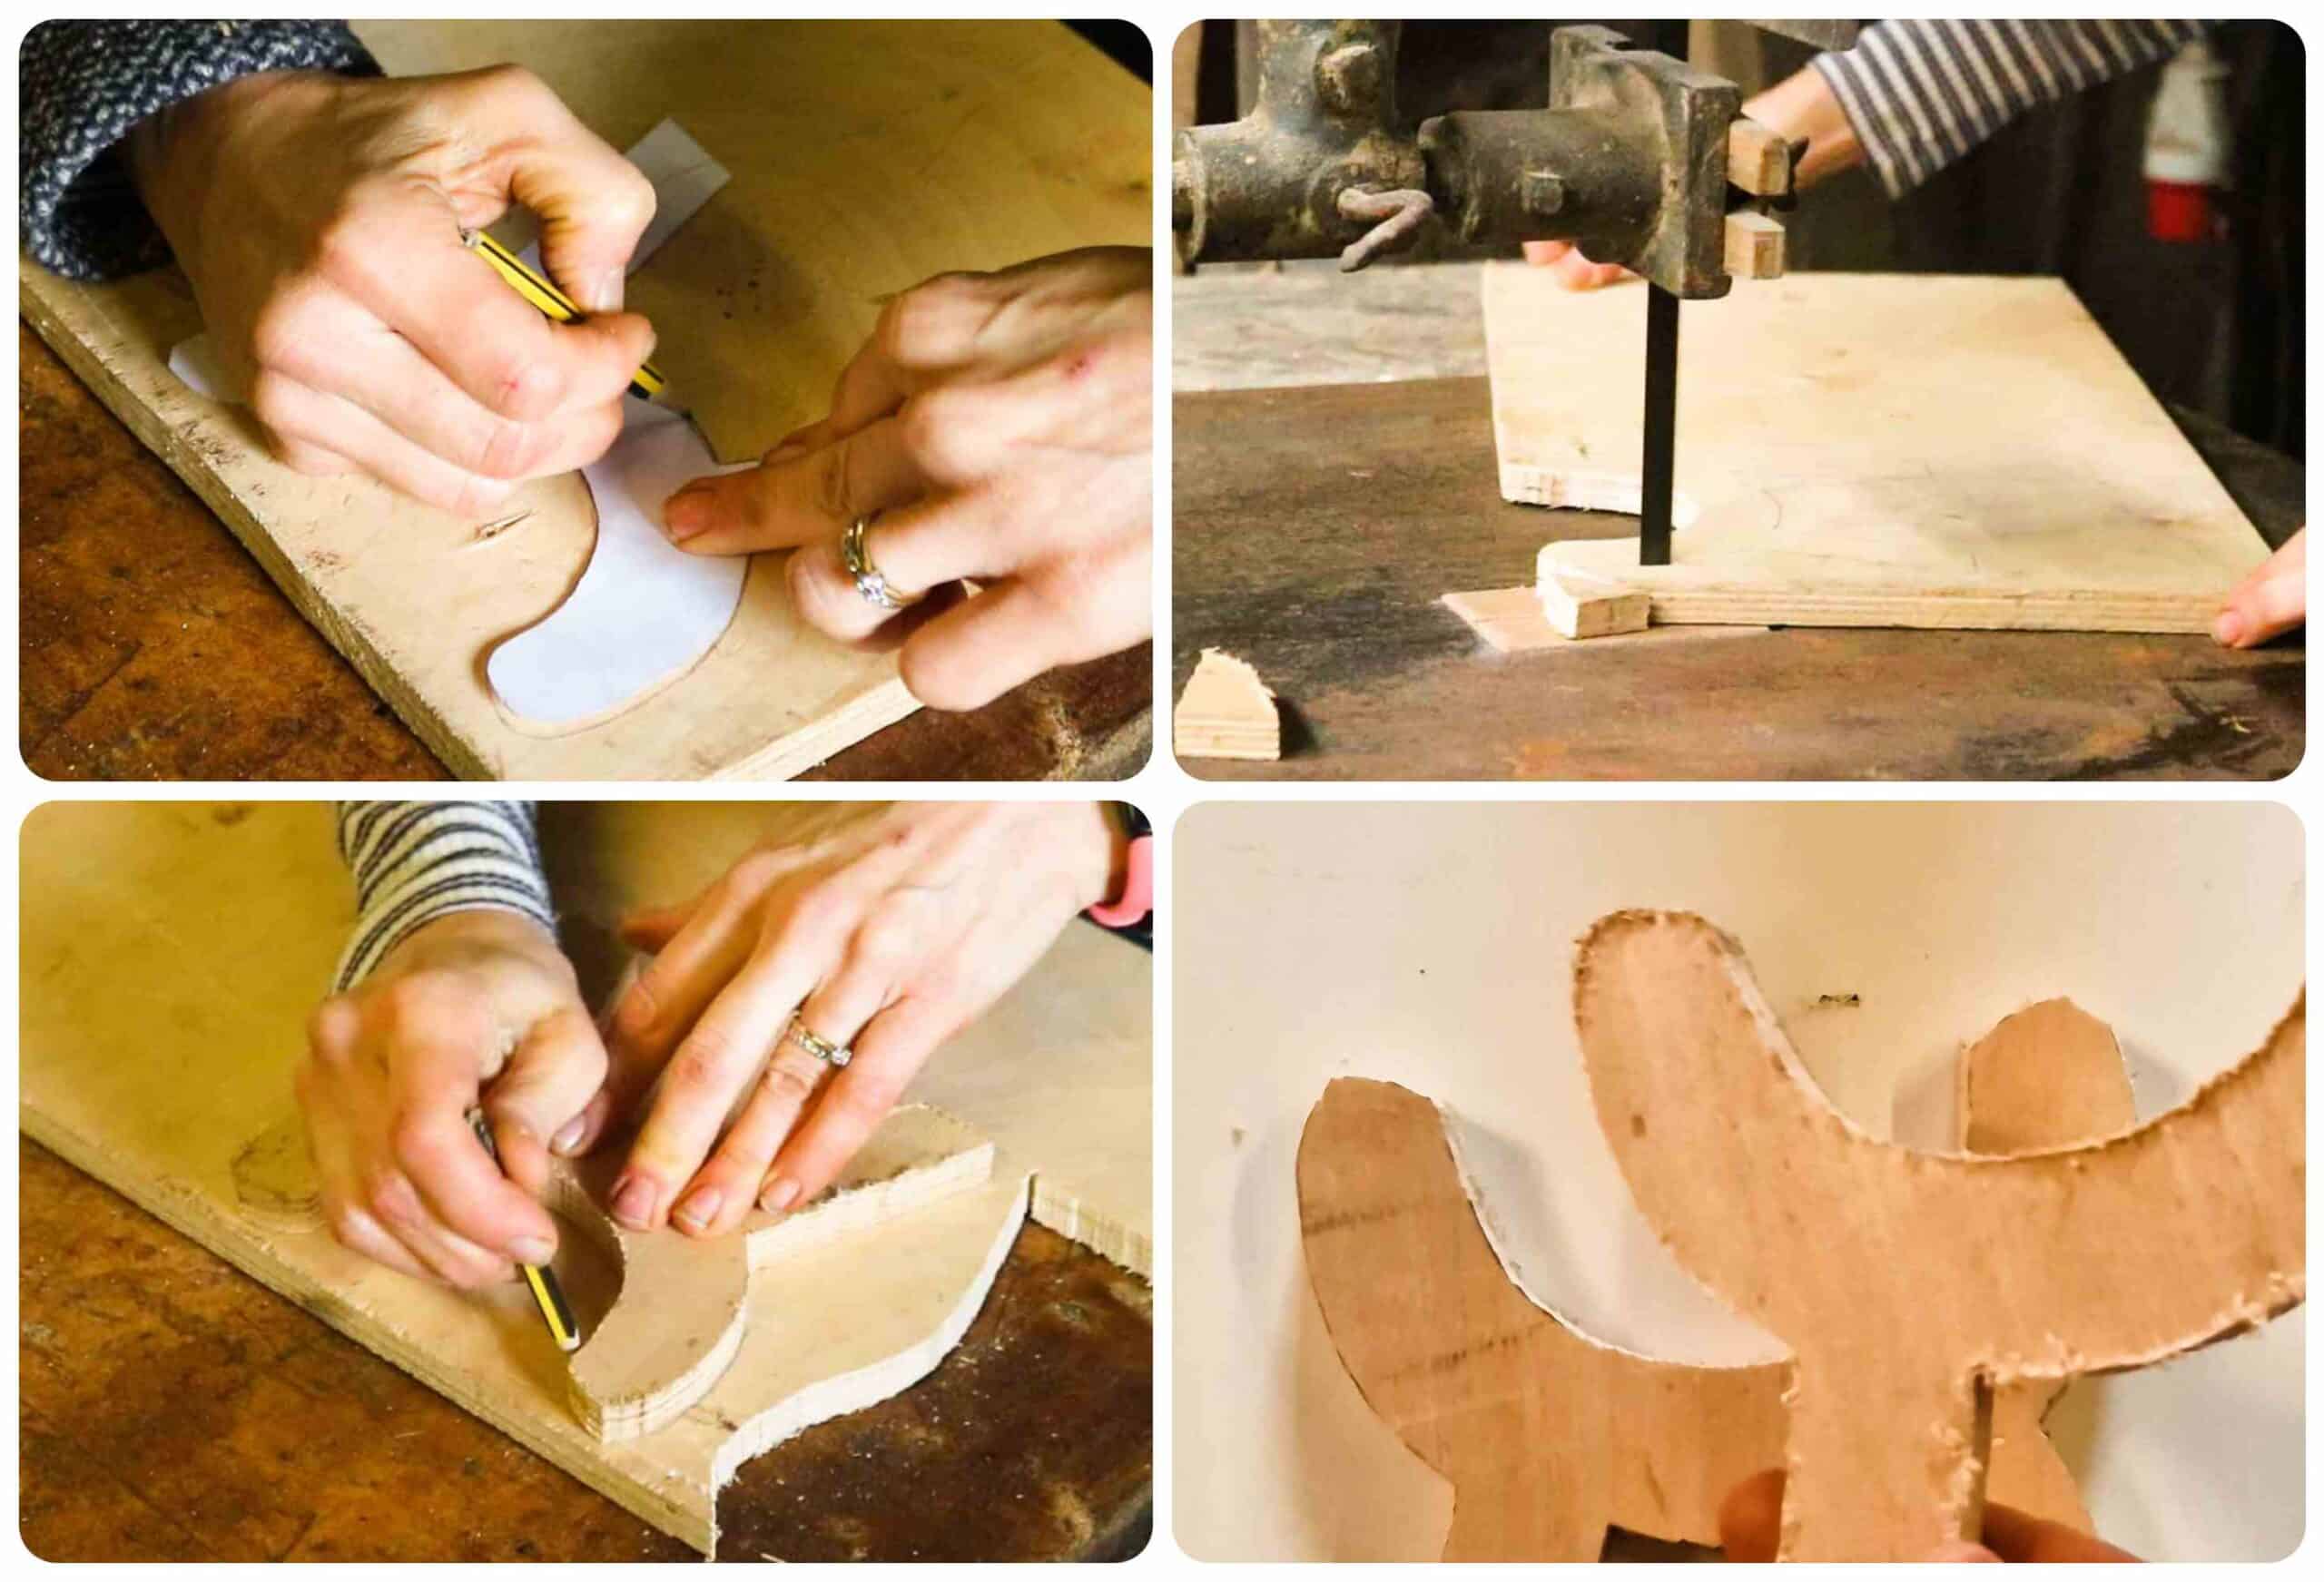
Once you've got your dog leg template, you can stick it to your wood with spray glue, or drawer around it directly on your plywood. Then:
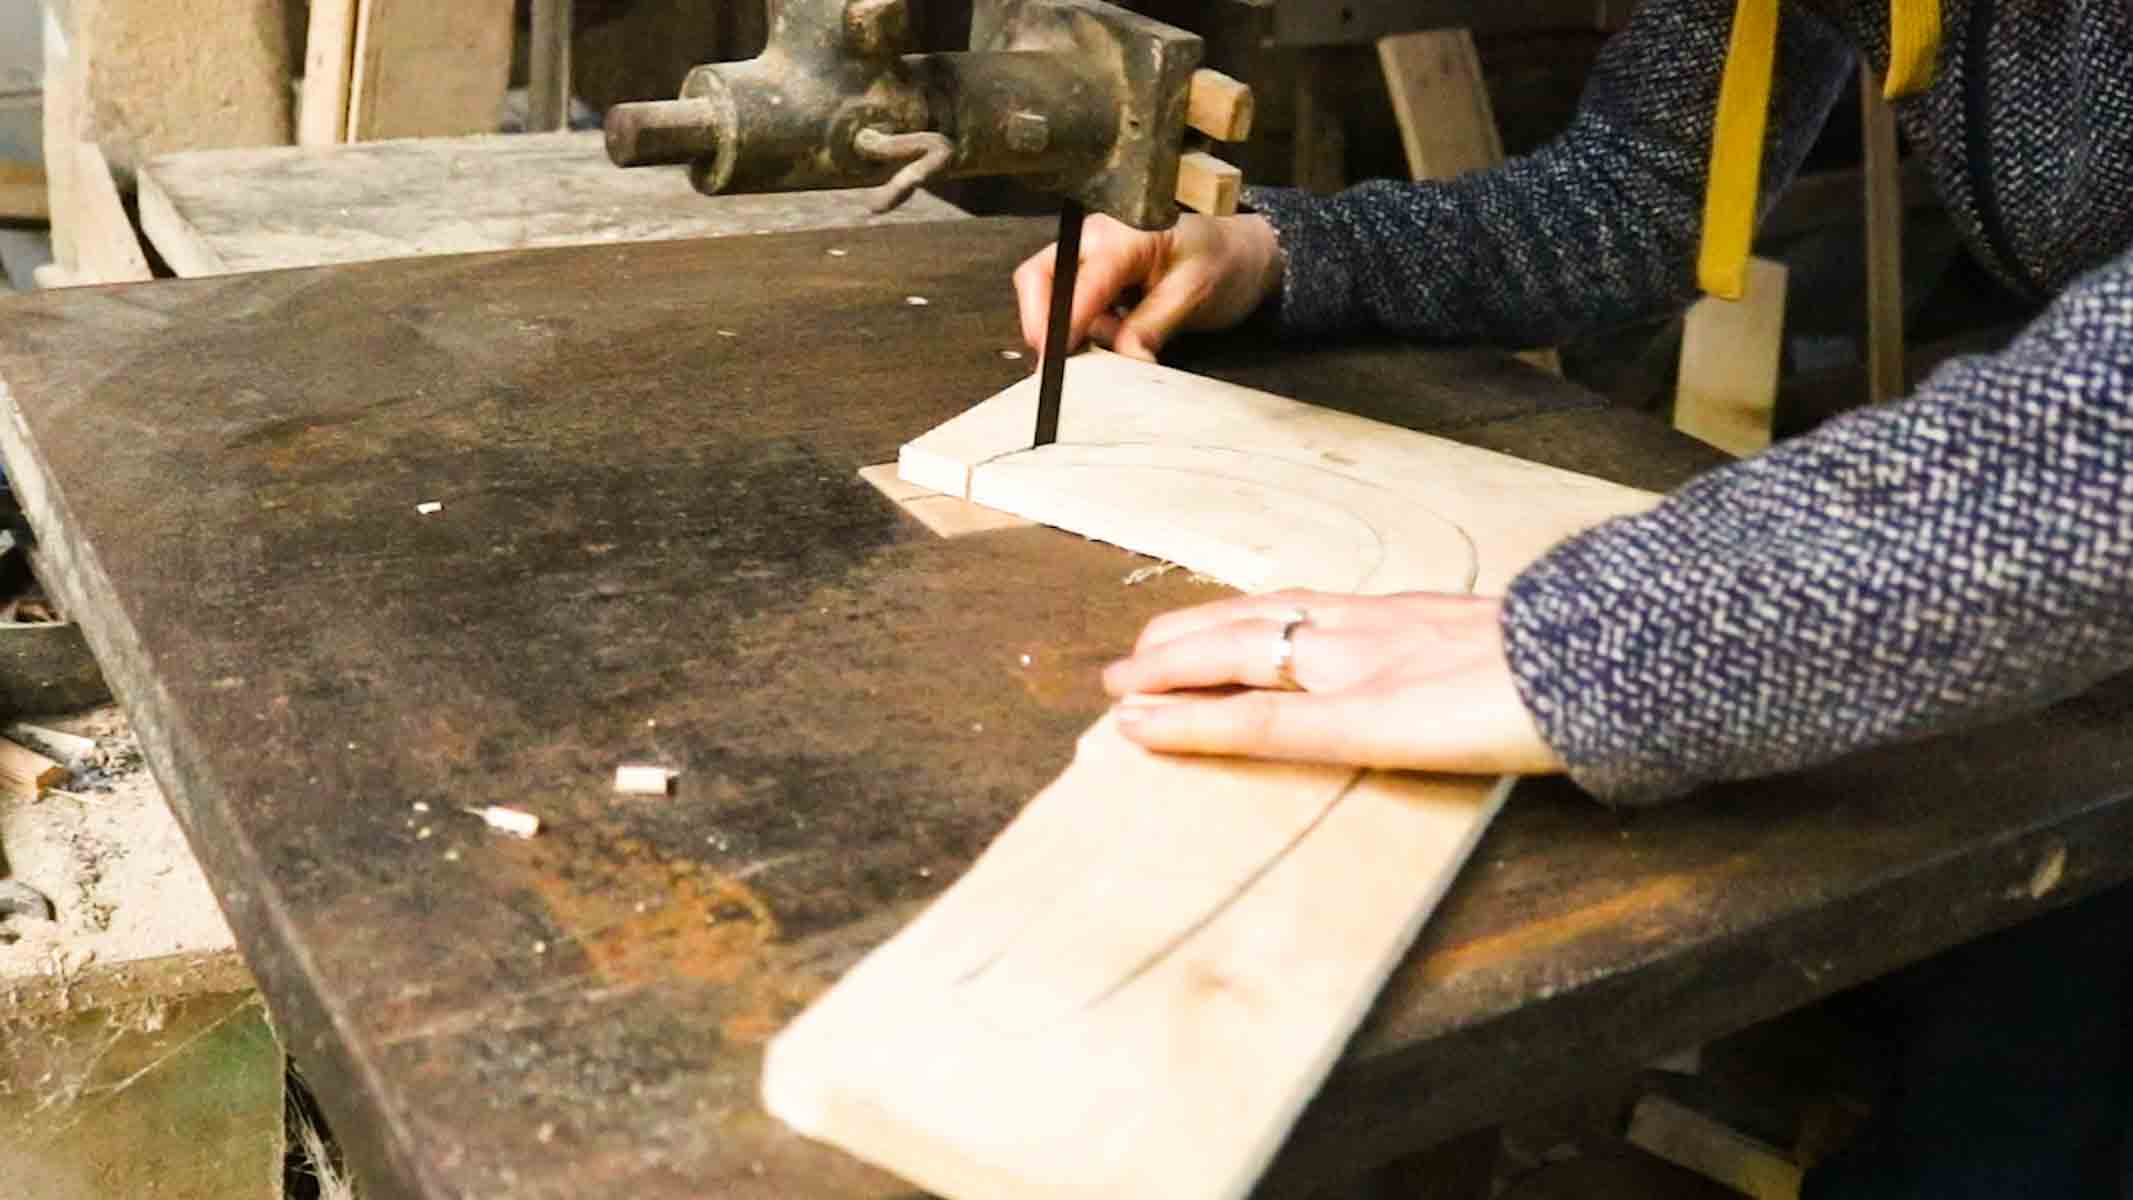
- Take it to the bandsaw to cut out
- Place the clean cut side down on more plywood and draw around
- Cut your last pair of legs.
Making the Dog Belly and Tail
The next step is to draw your dog (or cat's belly and tail) directly onto more plywood - or use my template.
I enjoyed this as a dog's tail is a form of expression. Our Border Collie is often alert, so I drew his usual arched bushy tail. If you have a dog with a short tail, then you can draw yours differently
But before cutting with a bandsaw, make sure the body will be long enough for a bottle of wine, including a face attached with a nose hole for the wine.
Sanding
Now, I don't want to confuse you (you can see I've already cut notches out in my next photo), but I recommend sanding all your pieces BEFORE you cut your notches.
Why? Because sanding will thin out your wood, making your joints looser.
It's nothing glue wouldn't sort, but just bear this in mind.

Making your Dog's Face
You know, it's harder to draw a 2D dog face than it looks!! But I used the same technique: folded a sheet of paper in half and drew one side of my dog's face.
If you're not confident at drawing, you might like to print an image off Canva instead. Or just practice drawing before cutting it out.
The good news is, it's an entirely separate component, so you can easily change it at a later date if you're not happy with it.
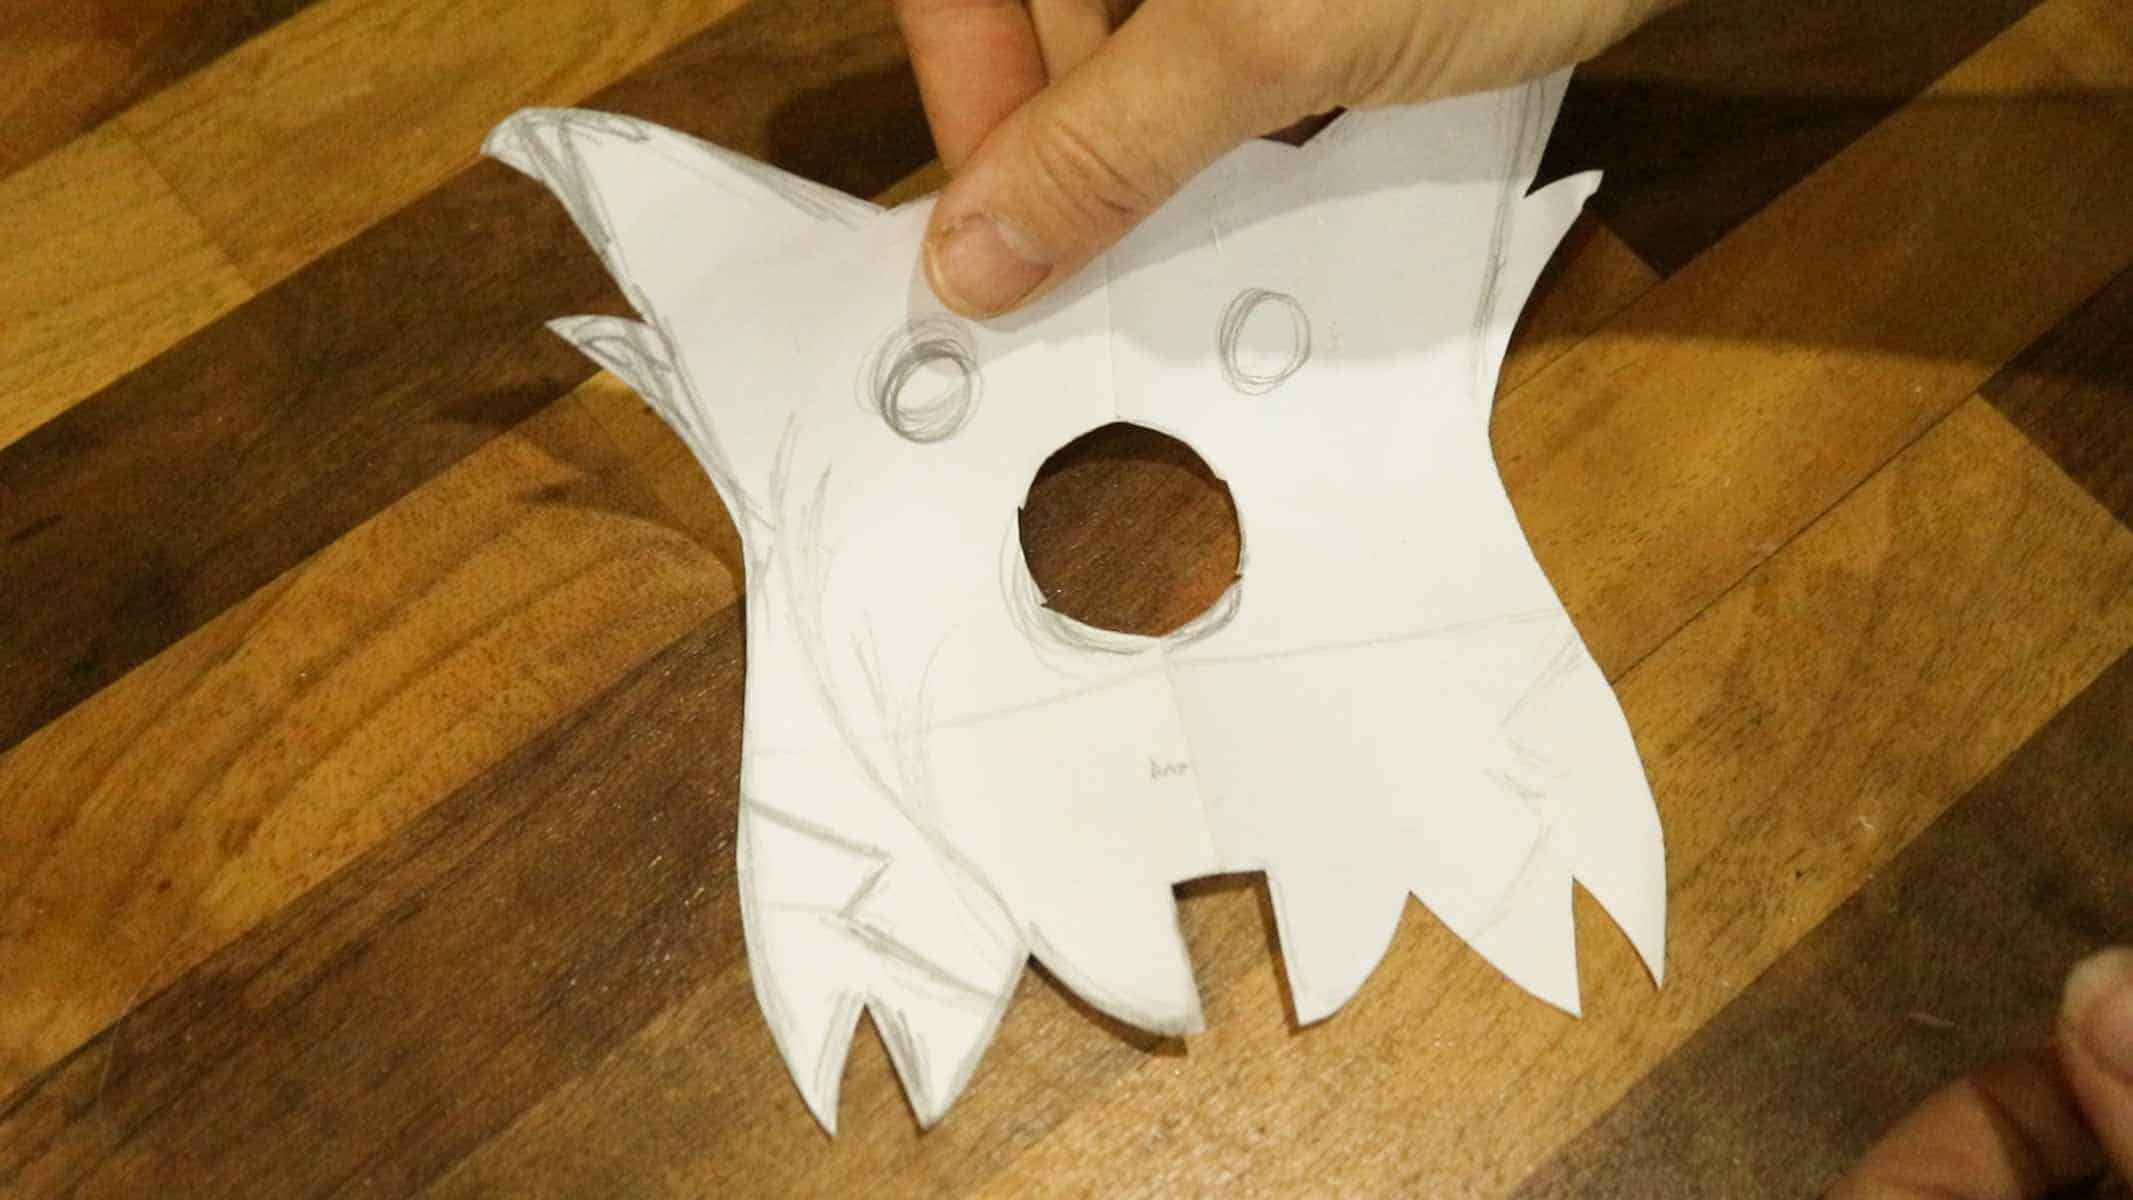
Cutting Notches
Notches, or slots. Call them what you will. The rule of thumb is that the notches need to be the same thickness as the wood you are using.
For the legs, I cut a notch in the middle, dead centre and keep test fitting.
You'll also need to cut them deep enough in the main body, to ensure the long section doesn't protrude in the cradle. If it does, the wine bottle will hang towards one side.
Then make a notch for the dog face/neck to slot on.
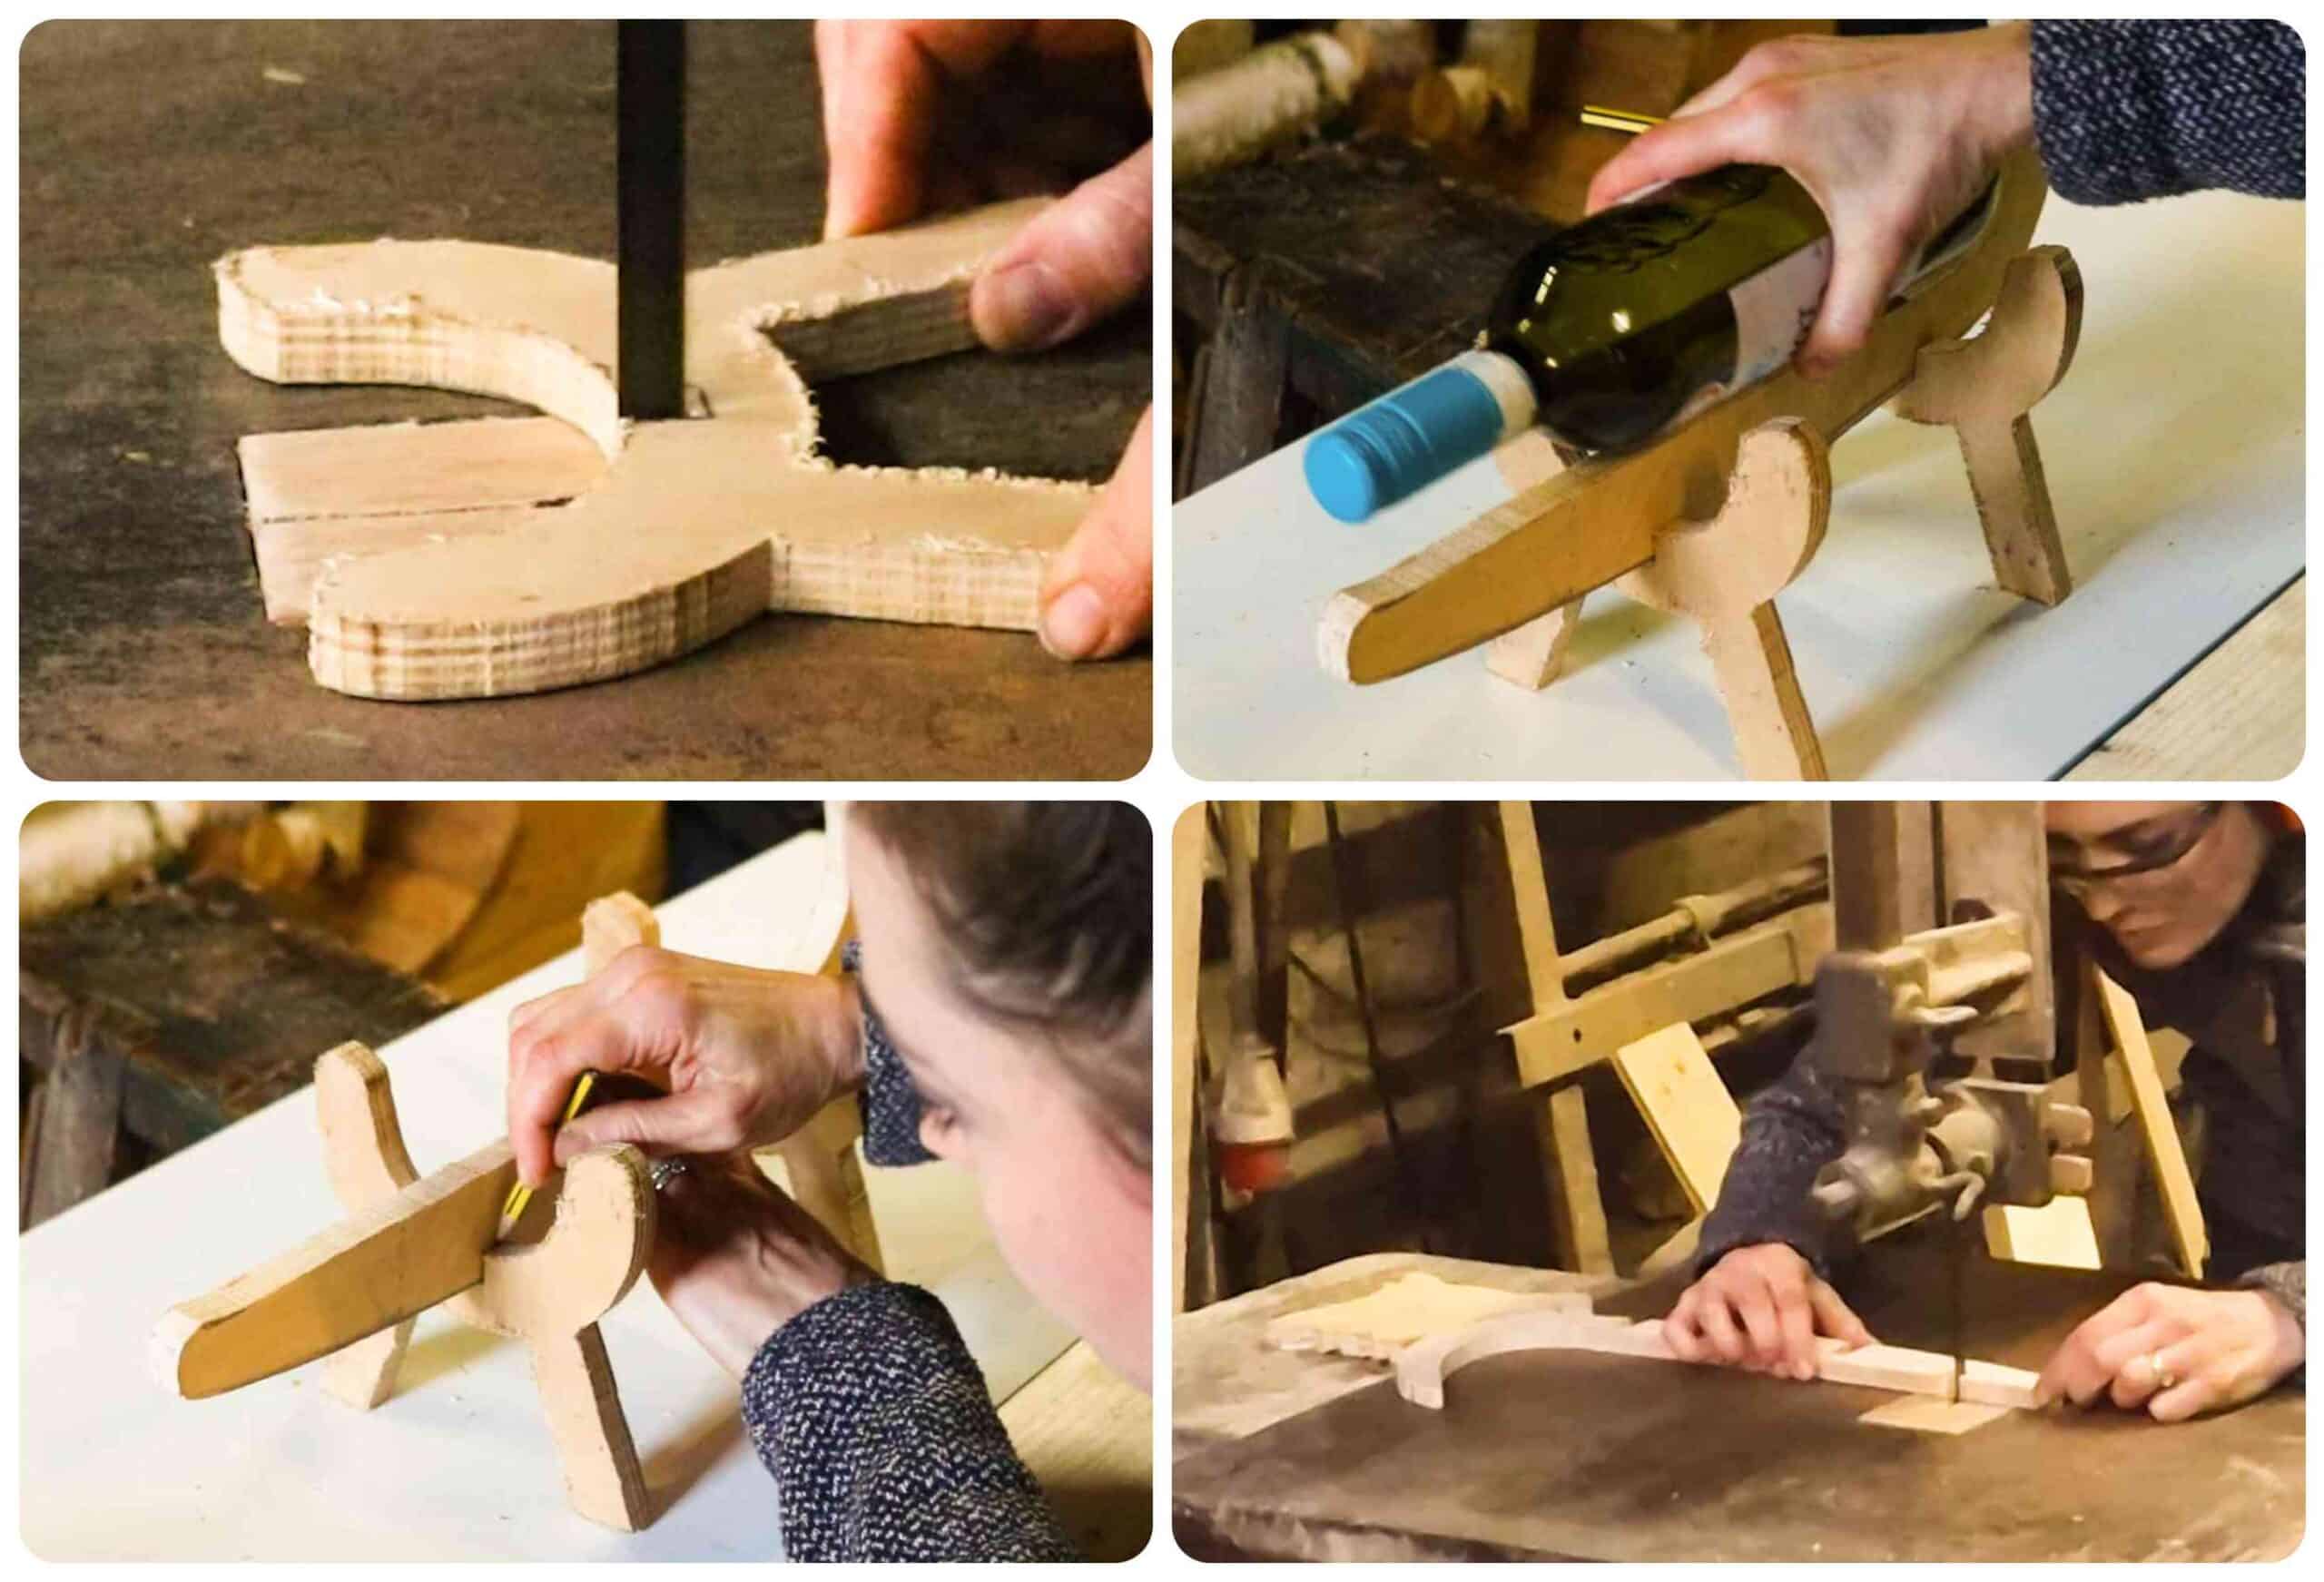
Marking the Dog's Nose Position
To mark the bottle top's position at the back of the face for the wine bottle to poke through:
- Lay the bottle flat on a table
- Hold a scrap piece of wood upright against it
- Draw the height of the bottle on the offcut
- Slot the dog face in position on the sausage dog wine holder
- Transfer the mark over on the back of the face from the offcut
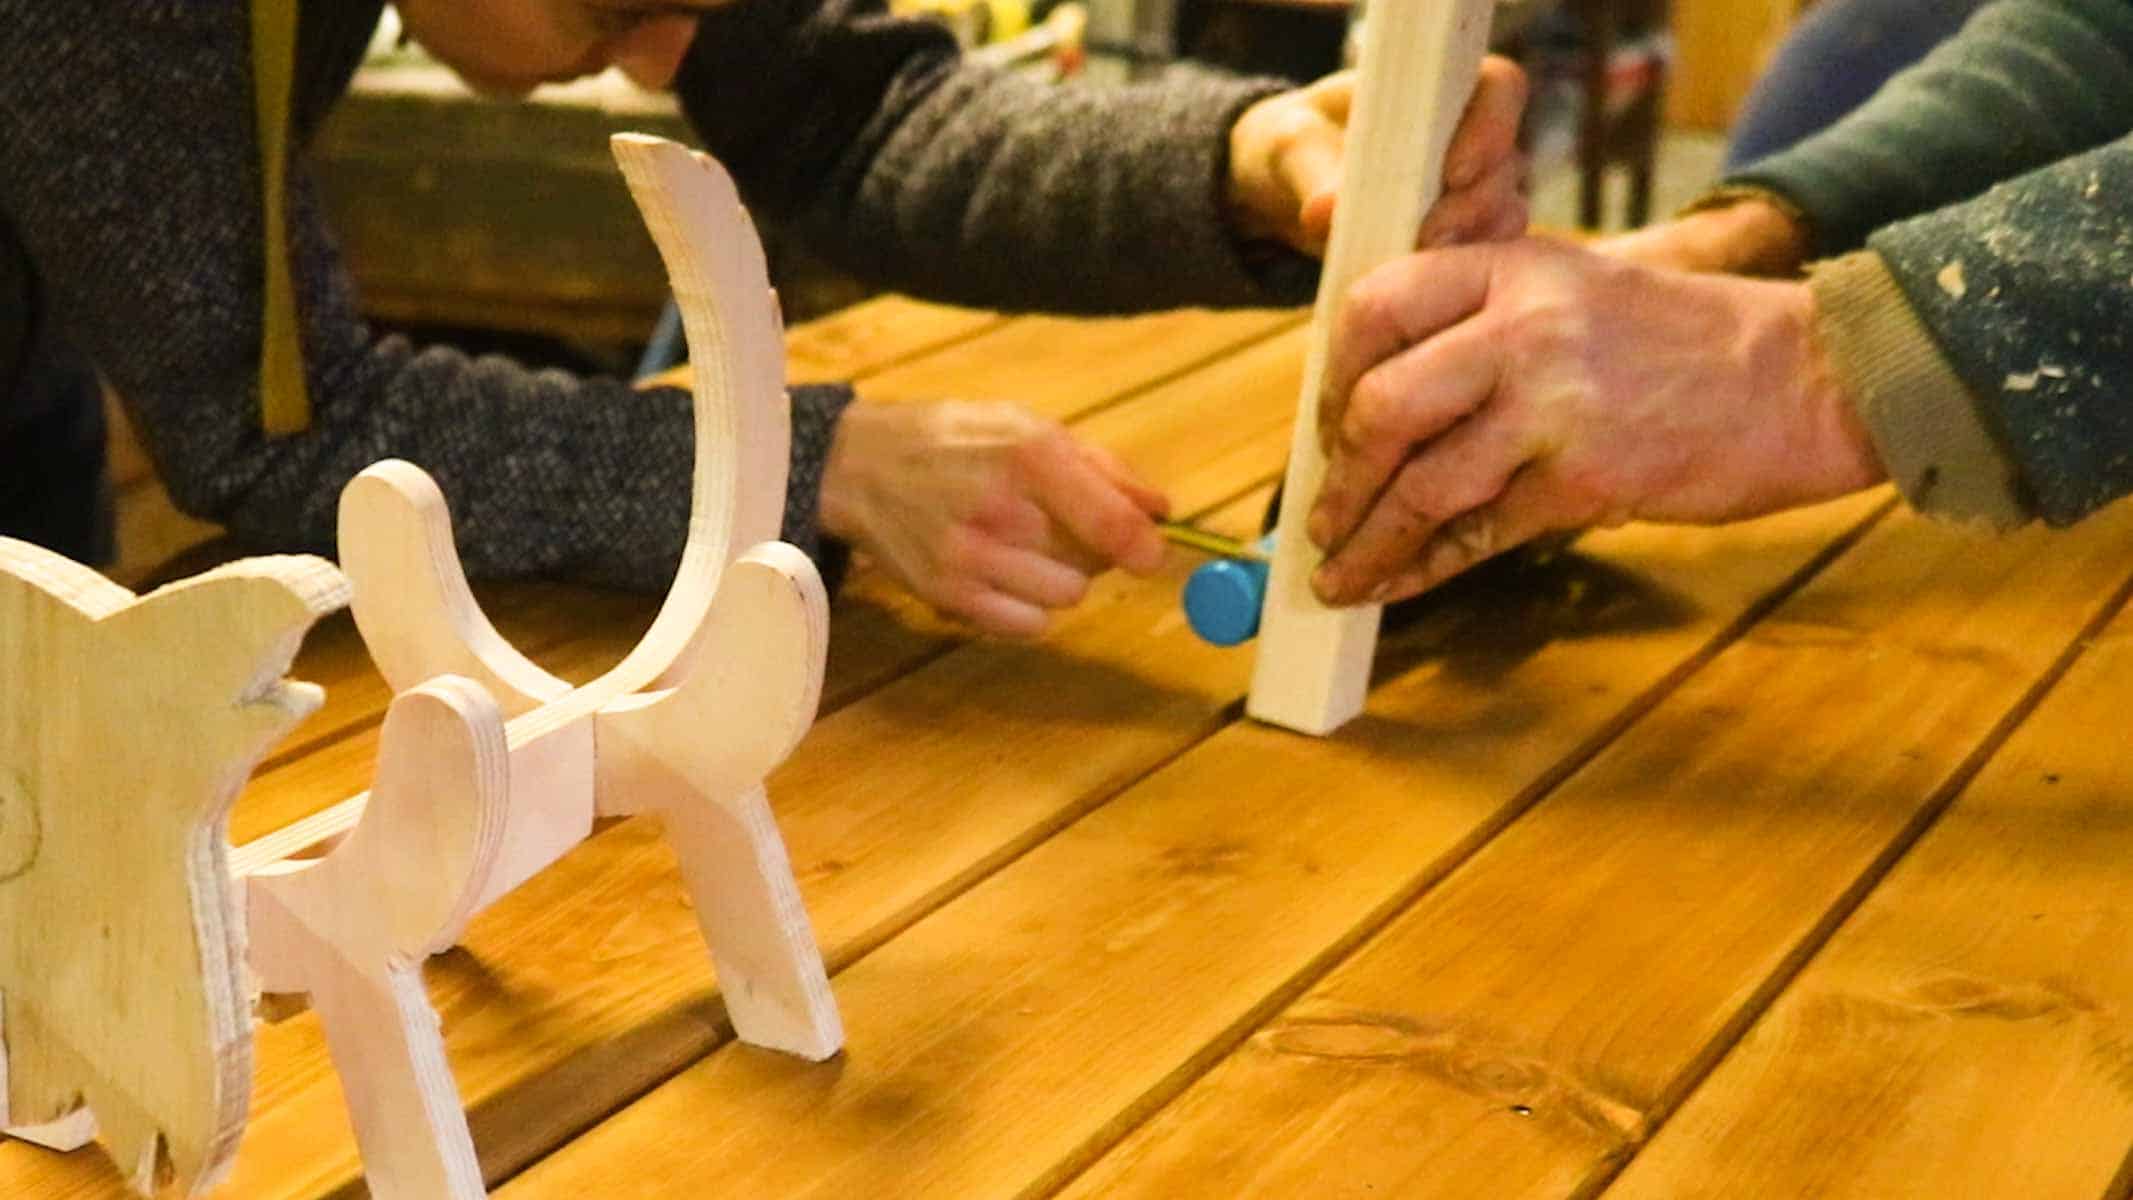
Animal Eyes and Nose
Now I had to work out the centre point for the nose and drill with a Forstner drill bit. For the eyes, I used a flatwood drill bit as it was all I had available.
Whichever you use, stop halfway when you know the pointy bit is poking through, then continue drilling from the other side to minimize chances of tear out.
Then sand the holes smooth, or use a grinder attachment in your combi drill, slot them together and use!

💡Tips
- While making your design, try to draw on paper first - it's cheaper to waste paper than wood.
- I recommend working around a few bottles of wine in case they are different sizes.
- Sand all of your pieces first before marking and cutting your notches. Sanding will thin out the wood and end up resulting in loose joins (but wood glue will fix that!)
- If you want to glue all of your pieces together, make sure the dog tail won't stop you from getting the wine bottle in and out. My tail was curved, so for ease, I didn't glue the face to the body.
- When cutting notches, stay within your pencil lines and keep test fitting.
- While drilling holes for the eyes and nose, stop halfway when your nose the bit is poking through, the drill from the reverse. This should minimize tear-out.
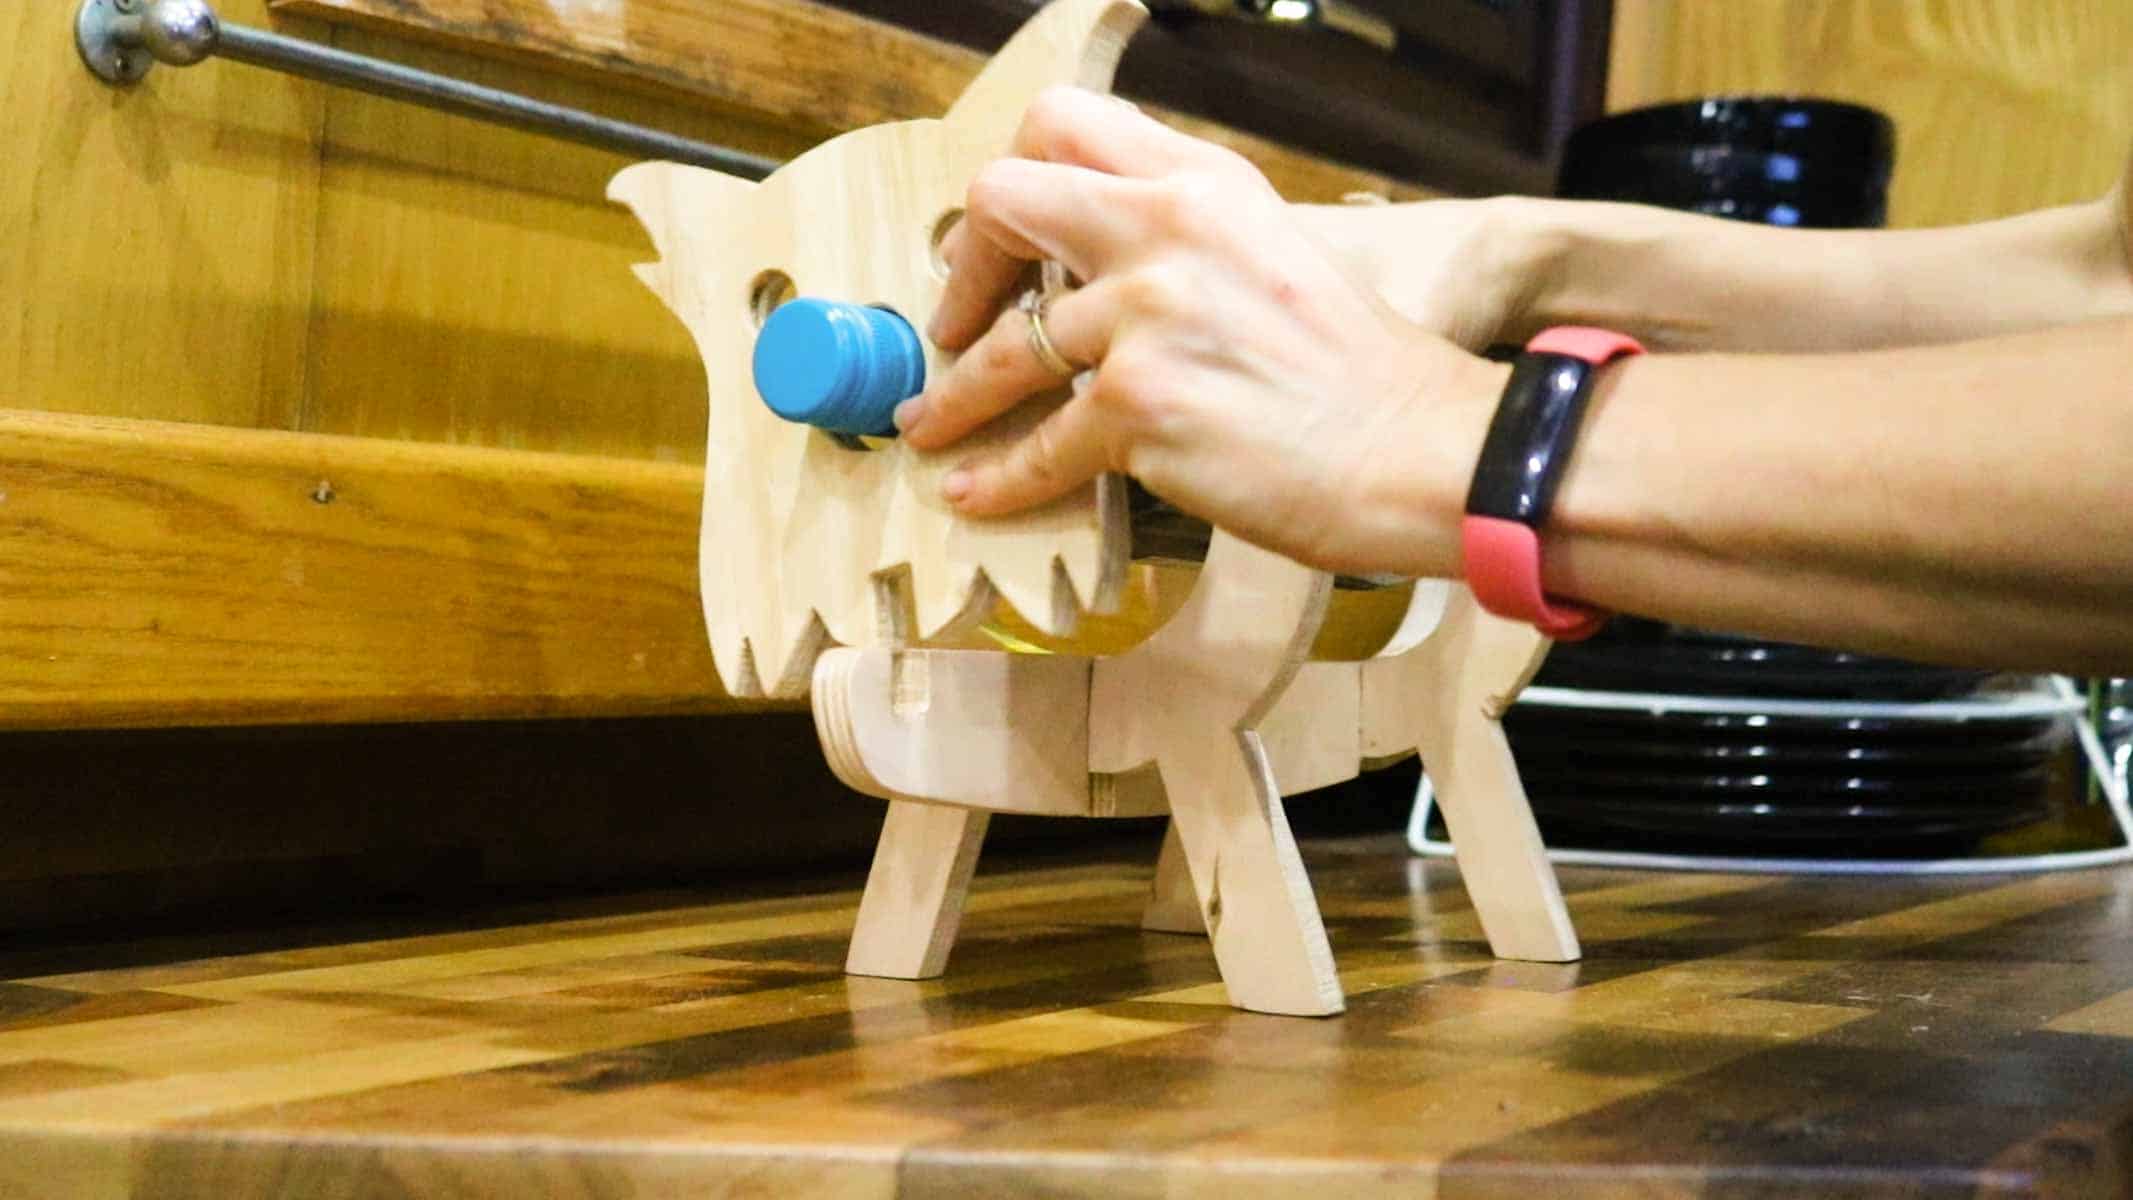
It's just missing a bottle of wine with a dog on the label 😂
➕More Handmade Gifts
- Thumb page book holder
- DIY Sharpie personalised mugs
- Wooden sycamore/maple leaf trivet
- Upcycled DIY mud kitchen for kids
- DIY lap desk with removable cushion
- Homemade knife block
- Tea towel ladder
- DIY chopping board with spaghetti measures
DIY Dog Wine Bottle Holder

If you're looking to make gifts for wine and dog lovers, then this simple dog wine holder for bottles is for you! It's cheap and easy to personalise using a scrap of plywood and I'll show you how you can make your own template (or download mine here).
This project was created as part of my 12 Days of Giftmas series and includes a how-to video you can follow along.
Materials
- 12mm plywood
- Paper
Tools
- Pencil
- Scissors
- Bandsaw
- Combi drill
- Forstner bit
- Flat wood drill bit
- Bench sander
- Safety goggles
- Ear defenders
Instructions
- Draw and cut your own template following my tips above or print off mine available in my etsy store.
- Place your template on some 12mm plywood and draw around it before cutting all the pieces on a bandsaw or scroll saw.
- Sand all the pieces
- Line them up as to where you want your notches and draw and cut your notches. Read my tips above on how to do this.
- Slot all the pieces together.
- Lay your bottle of wine flat and measure the height from the table to the top of the bottle's screw top.
- Transfer the mark to the back of the dog face (while it's slotted in) and drill a 35mm/1&¼" nose hole where the top of the drill bit is in line with the same height.
- Now drill 16mm holes for the eyes (⅝").
- Glue and slot it all together except the head.
- Feel free to stain or paint to match your dog or cat's colours!
Pin for Later

Comments
No Comments