
Here's my quick and easy DIY TV stand which was also a scrap wood project. It takes about an hour to make and is a perfect beginner's woodworking project.

Recently I really wanted to get our flat screen TV off the floor. But as we've been in lockdown and needed to stay at home, it meant trying to be creative with offcuts.
Thankfully I don't chuck much scrap wood away and had quite a few leftover from my recent DIY treadmill desk behind the camera here. It also allowed me to make a black TV stand to match it. It's kind of like a TV bench and could be later turned into a seat with shoe rack.
This certainly isn't my finest project, but it serves a purpose and cost me nothing in a time of uncertainty. I just hope that it inspires anyone else with limited tools, wood and money. But I'll also talk you through any tool and method alternatives.

How Is This a Simple TV Stand to Make?
- It can be made using a handsaw
- It's put together with a pocket hole jig that is SO quick and easy to use
- If you don't have one, just use a combi drill and screws
- It's uncomplicated and can be made alone in an hour or two
- There's no need for lots of tools
- It's a perfect beginner's woodworking project
- You could turn it into a small TV stand if desired
- And it's adaptable for when you CAN buy more materials

Equipment I Used to Make a Slim TV Stand
If you don't have any of these, then read the notes further down for alternative methods. Mine is for an LED TV, but if you want it for a plasma TV stand, I suggest also gluing and clamping before screwing.
Free DIY TV Stand Plans


Instructions on How To Make a Homemade TV stand
First, I found some random off cuts out of my garage and picked 4 of the best pieces for the legs.
However, note, the shortest leg dictated the length of the others. So I'm marking them all to the same length before cutting.
This one will be a low TV stand, but you could obviously make it taller if desired.

Cutting Timber For My DIY TV Stand
For quickness, I used my mitre saw. However, I want to stress that if you don't have power tools, then fear not.
You could clamp your pieces for a work surface or ask someone to hold it still and:
- Cut with a handsaw
- Jigsaw

I also measured the length of my TV and cut another longer piece. Again, this was using offcuts of structural CLS 60mm x 38mm timber.

Then after cutting a length that would be the width, I drew two dashes where I'd make pocket holes.

Then I made my pocket holes which were two per end. A pocket hole jig may look complicated and in fact, I procrastinated buying one because of this.
But honestly, they're so easy to use! All you need to do is set it up once as did in my DIY coffee table and that's it.
If you don't have one, you could instead predrill holes and screw everything together with a combi drill. It's a little bit longer, but sometimes, you have to use what you've got.

Then I screwed the legs on to the longer piece with pocket hole screws.
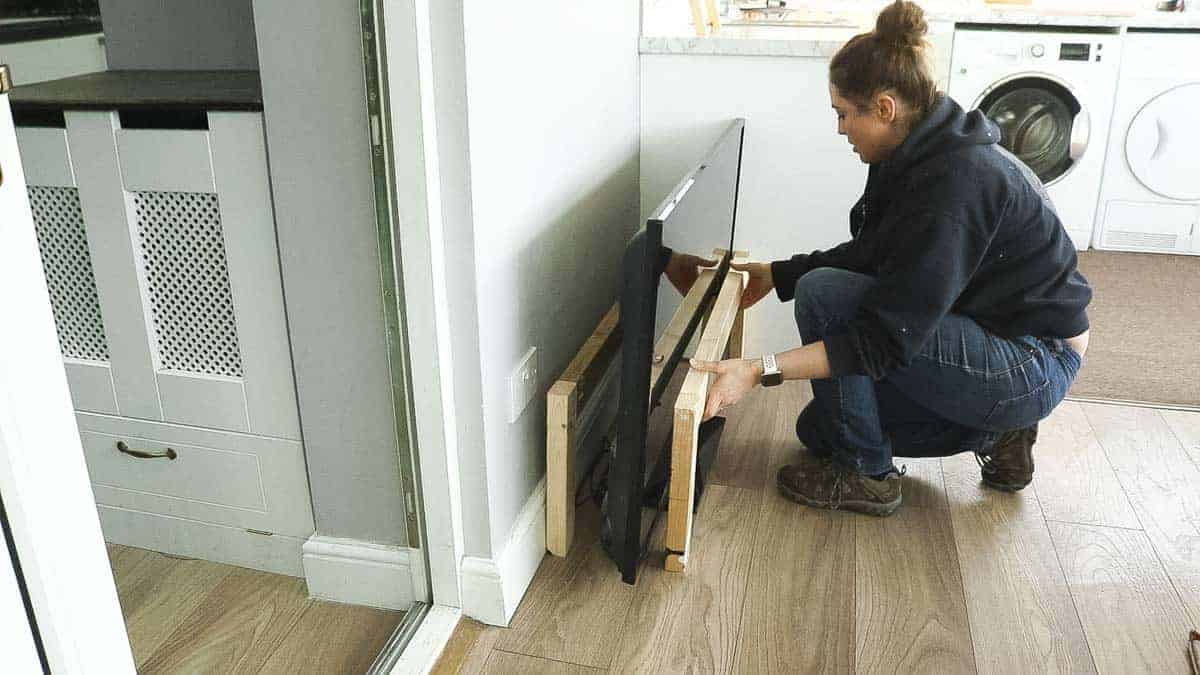
To get an idea for the depth and how I wanted my TV unit furniture piece to look like, I held both legs up.
Then once I got a depth I liked, I measured the gap in between. Note, you could make a fancier design for a bedroom TV unit or living room.
However, I was happy with a rustic TV stand or DIY industrial tv stand if you will.

After more pocket holes drilled, I'm holding a straight offcut against my legs and slat and screwed again with pocket holes.

Above, you can see I'm now screwing the two leg sections together.
I'm only focusing on the outer edges first.
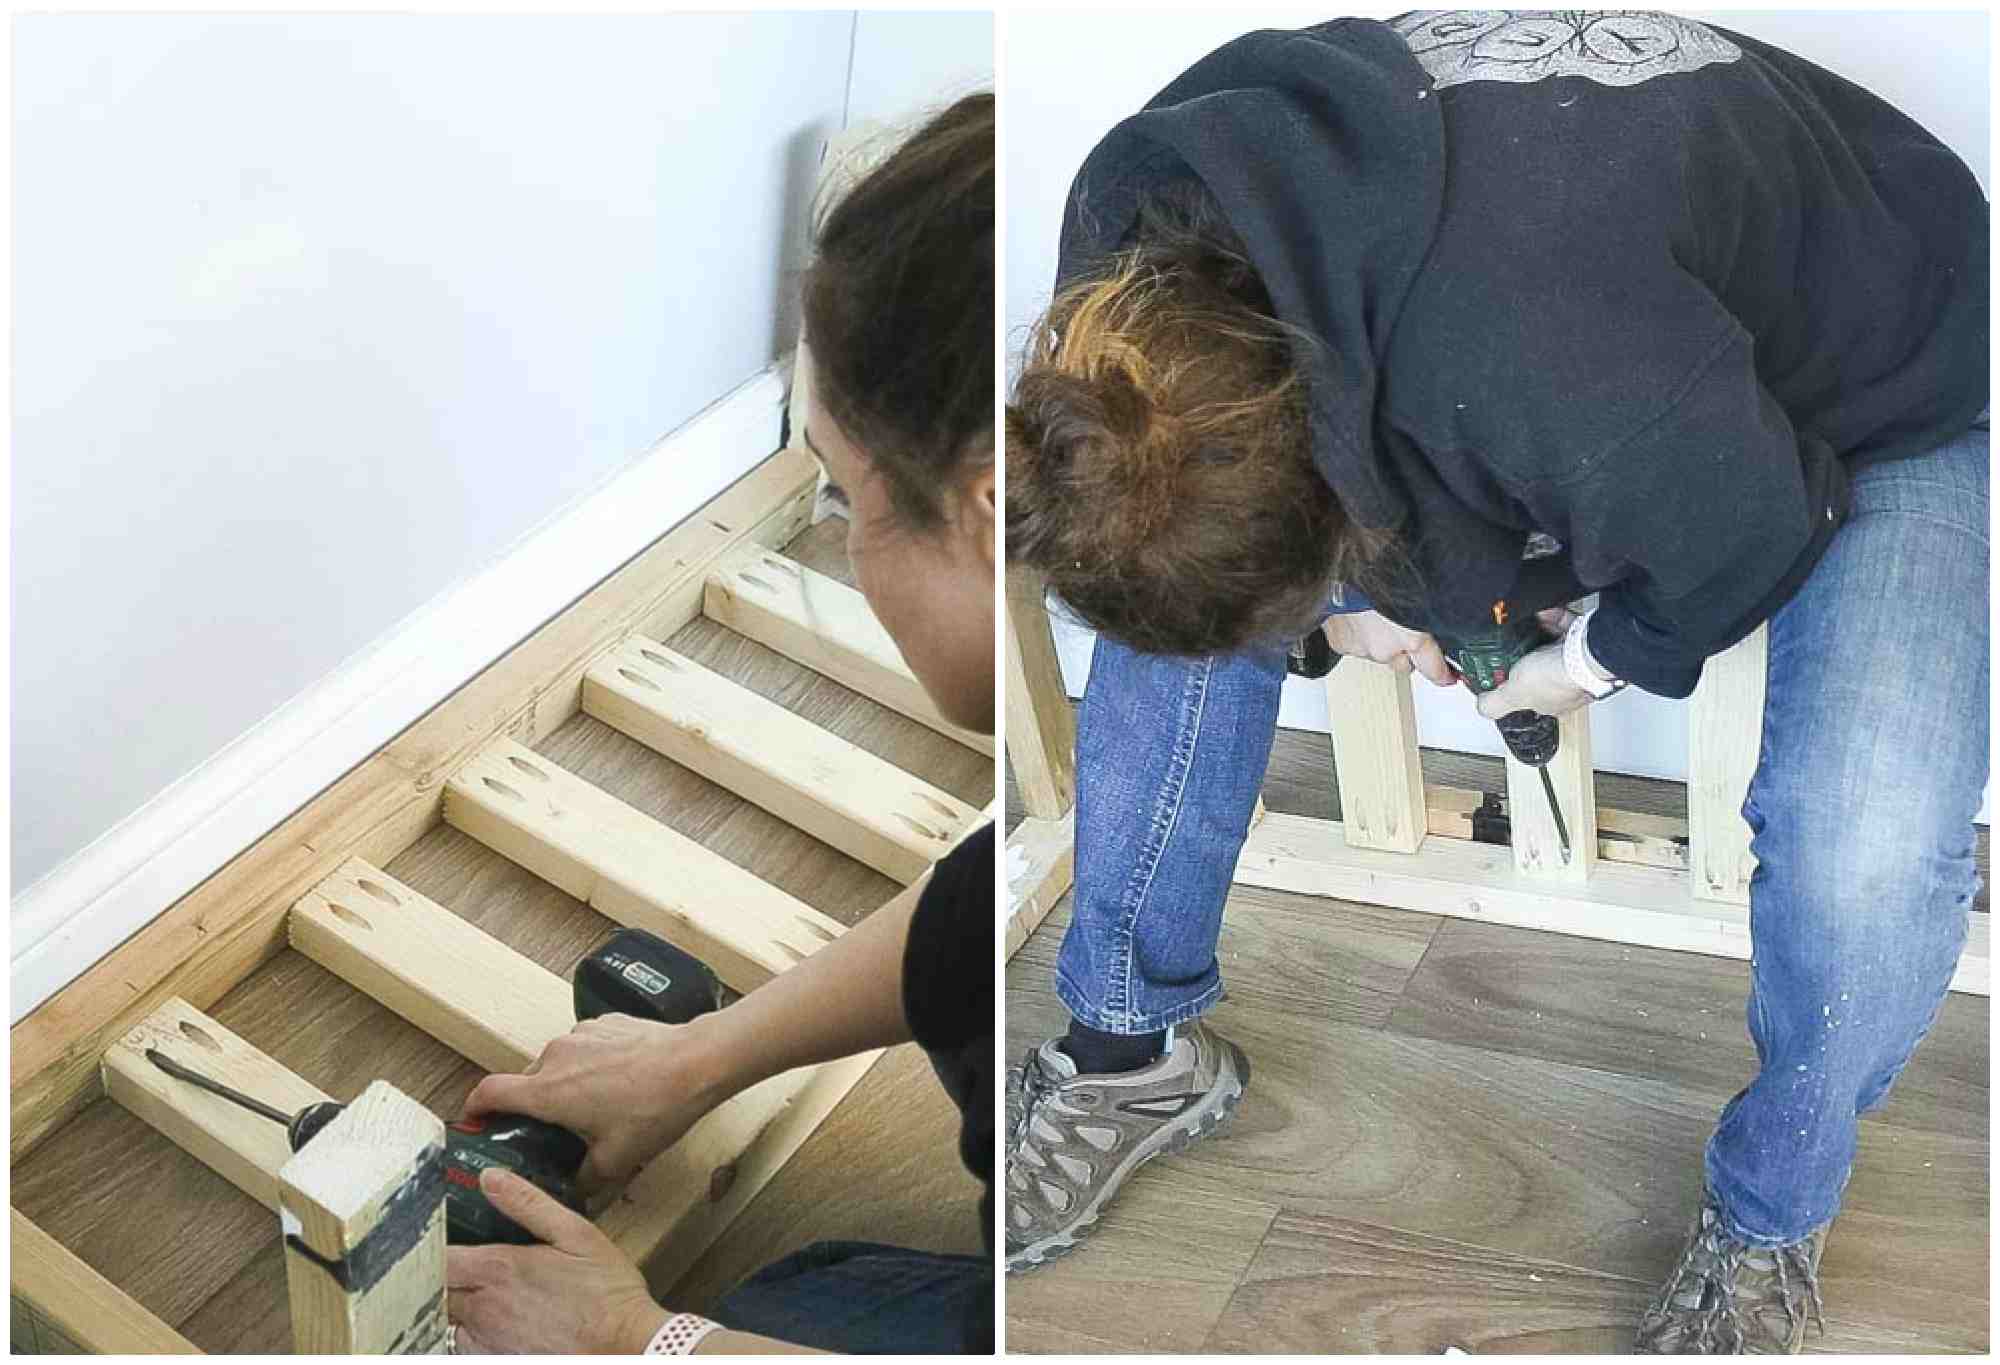
Next, I laid it upside down and evenly screwed some slats in. NOTE: If you have a large enough piece for the top, you won't need as above.
Tips:
If you want a more heavy duty TV stand, then I recommend gluing and clamping with sash clamps before screwing.
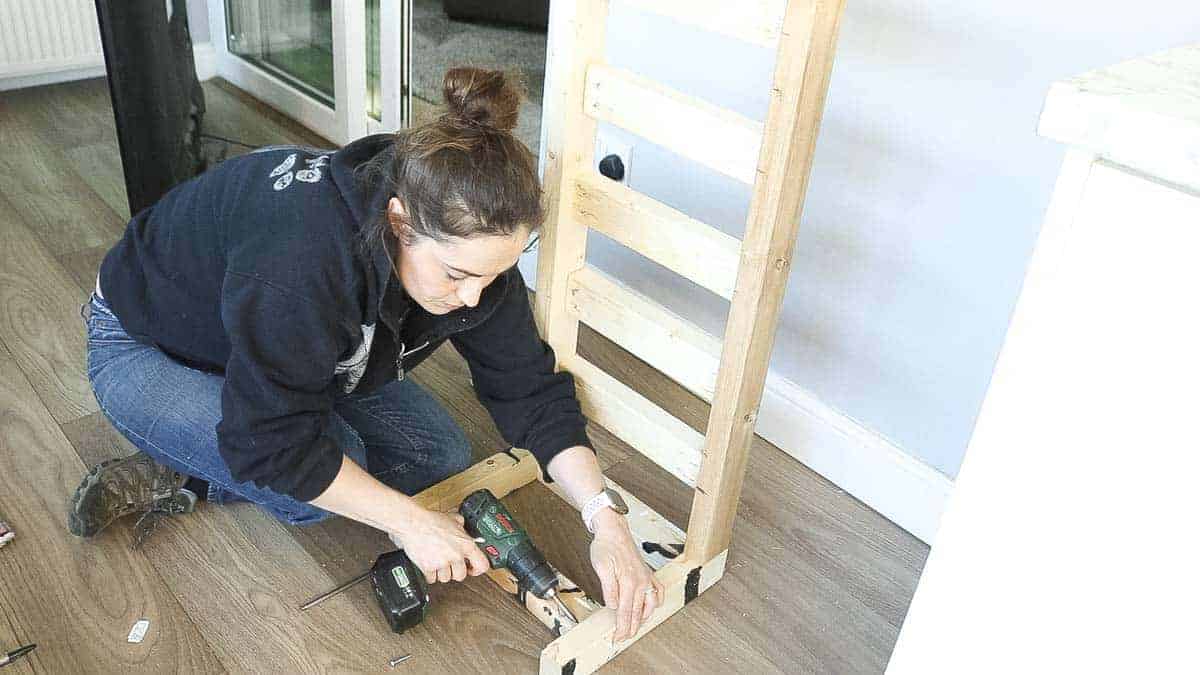
For extra support, I added another slat between the legs to remove any wobble.
You may get away with this is you're making a short DIY TV stand. If you want to make a taller one, then this slat would make a great support for a shelf too.

Black TV Stand Furniture Paint I Used
And finally, I painted my minimalist TV stand with my favourite black furniture satin paint called carbon.
It reminds me of bitumen (black, runny tar). When it's dry, it has a slight sheen and is best to be applied with a foam roller as it can look patchy sometimes.
But the reason I love it so much is that it's so quick to work with. There's no prep, sanding or sealing needed and it doesn't chip. And one coat tends to be enough as you can also see in my DIY desk monitor stand project.
Other TV Stand Ideas
Once I'm able to go and buy more wood, something I may do us add a 15mm plywood top as I did on my treadmill desk.
But this could also add more lengths on the bottom support with another plywood TV shelf design.
And whatever you decide to make, it's the perfect opportunity to experiment and make a unique TV stand of your choice!
More Scrap Wood Projects You Might Like
- Shelf monitor stand with desk
- Kitchen recycling bins cupboard
- DIY coffee table
- Maple leaf trivet
- How to restore oak furniture easily
- Curtain pole batten with grab adhesive
- DIY faux marble desk with hairpin legs
- DSLR Overhead Camera Rig
- Doorway arches for plastering
- Personalised jewellery rings in 10 minutes
DIY TV Stand Scrap Wood Project

Here’s my quick and easy DIY TV stand which was also a scrap wood project. It takes about an hour to make and is a perfect beginner’s woodworking project.
Materials
- CLS structural timber (60mm x 38mm)
- Pocket hole screws
- Paint roller
Tools
- Mitre saw
- Tape measure
- Pencil
- Combi drill
- Pocket hole jig
- Paint
Instructions
- Cut all wood per the cutting list in the notes.
- Create pocket holes in the two longest top pieces and all slats (AKA battens).
- Screw everything together.
- Paint and leave to dry.
Notes
If your TV is particularly heavy, I recommend gluing and screwing everything together.
Wipe all excess glue away before painting.

Comments
No Comments